
Revitalizing Your Concrete Pond: An Introduction
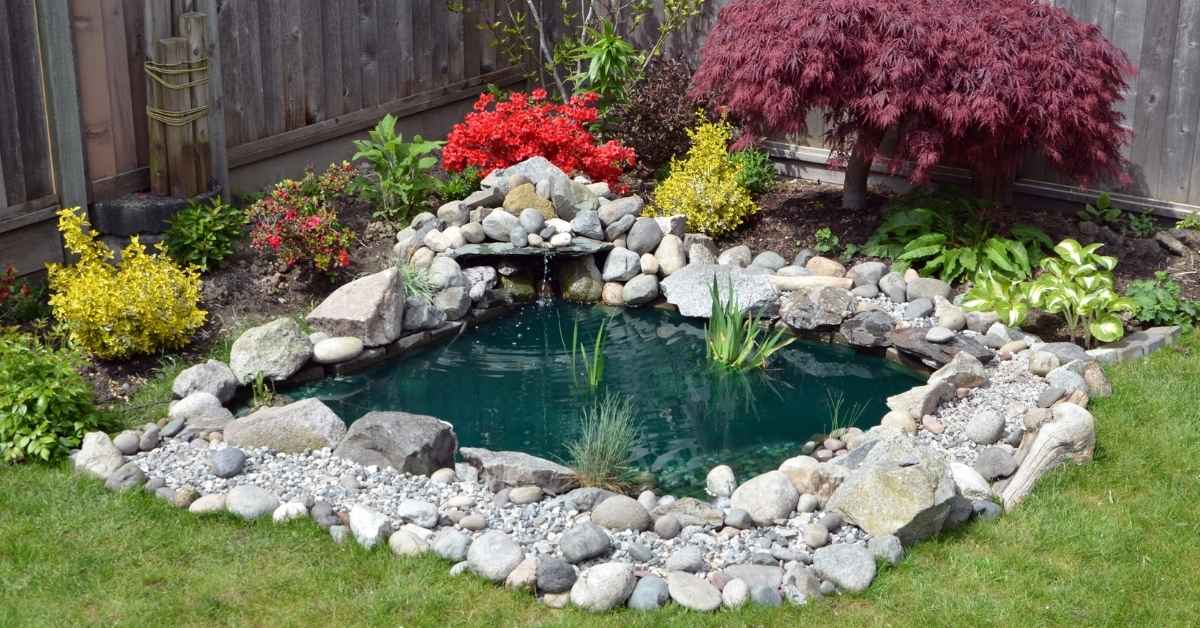
Concrete ponds are a beautiful and durable addition to any outdoor space. Over time, however, they can start to look dull or worn. This guide will walk you through the process of revitalizing your concrete pond using waterproof cement paint.
Before we begin, ensure that your pond is structurally sound and free from cracks. If not, address these issues before proceeding with the refinishing process.
Table of Contents
- Introduction
- Essential Tools and Materials
- Cost Estimation and Preparation
- Detailed Step-by-Step Guide
- Common Mistakes and Solutions
- Understanding the Method
- Additional Tips and Alternatives
- Efficient Project Planning
- Conclusion
- FAQ
Key Takeaways
- Surface Preparation: Start with a pressure washer (min. 2000 PSI) to clean the concrete pond basin thoroughly.
- Paint Selection: Opt for high-quality, waterproof cement paint designed for outdoor use, offering 100-150 sq ft coverage per gallon and enhanced durability.
- Crack Repair: Use epoxy or concrete filler to mend cracks, allowing 4-6 hours for quick curing, ensuring a smooth, long-lasting finish.
Introduction
Revitalizing your concrete pond basin with waterproof cement paint offers dual benefits: it enhances its appearance and extends its lifespan. To achieve a durable, visually pleasing finish, you’ll need the right materials and tools. This guide walks you through the process, suitable for both refreshing old ponds or completing new ones.
By understanding these steps, you’ll be equipped to deliver a professional outcome that not only looks great but also stands up to the elements over time.
Essential Tools and Materials
To successfully refinish a concrete pond basin with waterproof cement paint, you’ll need the right tools and materials. These ensure efficiency, durability, and aesthetic appeal.
Tools You’ll Need:
- Pressure Washer: Essential for cleaning the pond surface (2000 PSI minimum) to remove dirt, algae, and old paint.
- Paintbrushes and Rollers: Use a combination of rollers (9-18 inches) for large areas and brushes for edges. Synthetic bristles are suitable for water-based paints.
- Paint Sprayer: Optional, but useful for large ponds; choose one with adjustable pressure settings and a typical nozzle size of 0.015-0.019 inches.
- Masking Tape and Plastic Sheets: Protect areas not to be painted (2-inch wide tape recommended).
- Masonry Brush: Useful for textured surfaces; opt for a brush with stiff bristles.
- Caulking Gun: Apply waterproof sealant to cracks or gaps, ensuring compatibility with the sealant tube size.
Materials:
- Waterproof Cement Paint: High-quality paint designed for outdoor concrete surfaces (100-150 sq. ft. coverage per gallon).
- Concrete Cleaner: Prepares the surface by removing contaminants; ensure compatibility with chosen paint.
- Epoxy or Concrete Filler: Repair cracks/holes before painting (quick curing time, typically 4-6 hours).
- Sealant: Protects and extends the life of the paint; ensure compatibility with paint and suitability for outdoor use.
- Protective Gear: Gloves, safety goggles, masks to protect from dust/chemicals (meet relevant safety standards).
| Item | Purpose | Key Spec | Alternatives | Notes |
|---|---|---|---|---|
| Pressure Washer | Cleaning pond surface | At least 2000 PSI | Hose and scrub brush | Ensure proper handling to avoid injury |
Key Points
- Pressure Washer: Essential for thorough cleaning (2000 PSI minimum).
- Waterproof Cement Paint: High-quality, designed for outdoor concrete surfaces.
- Epoxy or Concrete Filler: Repairs cracks/holes, withstands submersion (quick curing time).
Quick Facts & Best Practices
- Approx. Time: Working time: 1-2 hours; Curing time: 24-48 hours (paint), 4-6 hours (filler), 24-72 hours (sealant).
- Potential Pitfalls: Poor surface cleaning, incompatible materials.
- Best Practices: Thoroughly clean surfaces; use compatible, high-quality materials.
Problems and Solutions:
- Blistering: Reduce over-troweling; allow material to firm up; maintain temp window.
Special Considerations:
- Pond material other than concrete, potable water use, local regulations, weather conditions, user experience, structural damage.
Cost Estimation and Preparation
Before starting your concrete pond refinishing project, understand the potential costs and prepare accordingly to avoid surprises. This section guides you through estimating expenses and planning your project.
Budgeting for Your Project:
- Materials: Calculate waterproof cement paint needed by measuring the pond’s surface area. Most products cover approximately 100 square feet per gallon. Include additional materials like concrete cleaner, sealants, and fillers.
- Tools: Consider purchasing or renting tools if you lack them. A pressure washer or paint sprayer may be needed; ensure tools are ergonomic for extended use. Trowel sizes typically range from 1/4 inch to 1/2 inch for applying fillers.
- Labor: Decide whether you’ll do the work yourself or hire professionals. Labor costs vary based on location and job complexity.
- Miscellaneous: Include protective gear, masking materials, and unexpected expenses in your budget.
Preparation:
- Inspect and Clean the Pond: Examine the pond for cracks, stains, or algae. Use a pressure washer and concrete cleaner to prepare the surface, ensuring it’s free from debris and contaminants. Maintain a dry substrate with temperatures between 50°F and 85°F for optimal results.
- Repair Damaged Areas: Use concrete filler or epoxy to fix cracks or holes. Allow repairs to cure as per manufacturer instructions, typically 24-48 hours.
- Plan the Application: Organize your painting strategy, starting from the most challenging areas for an efficient process without missing spots.
- Weather Considerations: Check the weather forecast. Avoid rainy or extremely humid days, as they can affect paint adhesion and drying time. Ideal humidity is below 60%.
Detailed Step-by-Step Guide
Step 1: Clean the Pond
- Remove all water and debris.
- Use a pressure washer (2000+ PSI) to clean algae, old paint, and residue.
- Apply concrete cleaner, scrub with stiff brush.
- Allow to dry fully—minimum 24 hours.
Step 2: Repair Cracks and Damage
- Inspect for cracks, holes, spalling.
- Use epoxy filler or hydraulic cement to repair.
- Allow proper curing time (4–6 hrs min, per product instructions).
Step 3: Mask and Protect
- Use plastic sheets and tape to protect edges, plants, decor.
- Mask skimmer boxes, drains, lighting fixtures.
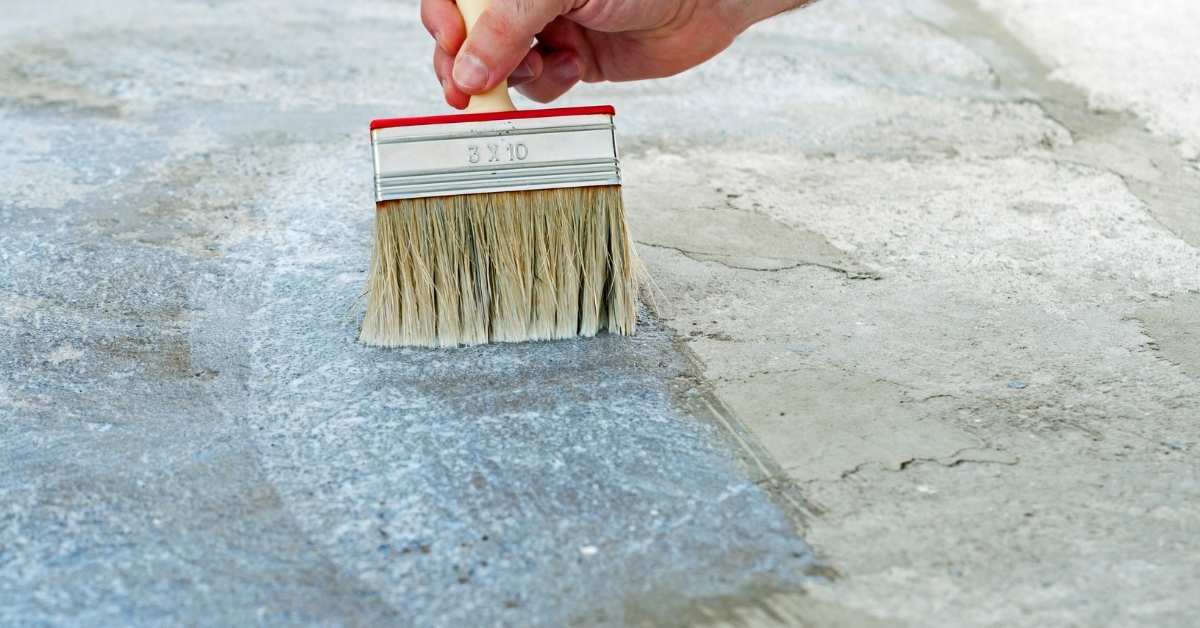
Step 4: Apply Waterproof Cement Paint
- Mix paint thoroughly.
- Use roller/sprayer/brush:
- Sprayer for large areas.
- Roller for flat zones.
- Brush for corners and textures.
- Apply first coat evenly.
- Let dry 6–8 hours (or per product).
Step 5: Second Coat
- Apply second coat at 90° to first for better coverage.
- Inspect for missed spots or uneven areas.
Step 6: Apply Sealant (Optional but Recommended)
- Once paint is dry (24–48 hrs), apply compatible waterproof sealant.
- Allow to cure minimum 48 hours before refilling pond.
Key Points
- Thoroughly clean and repair the surface before painting for optimal results.
- Use masking tape and plastic sheets to protect areas not being painted, and consider applying a primer for better adhesion.
- Apply waterproof cement paint and sealant, adhering to proper drying and curing times for durability.
Quick Facts
- Approx. Time: The entire process takes approximately 8-12 days, including preparation, painting, and curing.
- Potential Pitfalls: Inadequate cleaning and drying before painting can lead to poor adhesion and peeling. Not allowing sufficient curing time may compromise the finish’s durability.
- Reliable Practice: Ensure thorough surface preparation by cleaning and repairing any imperfections before painting. Follow all manufacturer’s instructions for mixing, application, and drying times.
- High humidity or rain during drying/curing periods.
- Temperatures outside the specified range (below 50°F or above 85°F).
- Presence of wildlife or pets that could disturb the drying paint.
- Using incompatible primer or paint products.
- Applying paint or sealant on a wet or damp surface.
- Not wearing appropriate PPE or working in poorly ventilated areas.
Common Mistakes and How to Fix Them
Refinishing a concrete pond basin is a rewarding project, but it’s important to avoid common pitfalls for a durable, professional finish.
1. Inadequate Surface Preparation
The most common mistake is poor surface preparation. A dirty or improperly prepped surface can prevent new paint from adhering properly, leading to peeling or cracking over time.
How to Fix It: Use a pressure washer with at least 2000 PSI to thoroughly clean the surface. Scrape off old paint and apply a concrete cleaner to remove stains. Ensure the surface is completely dry before painting for optimal adhesion.
2. Applying Paint Under Poor Weather Conditions
Painting during high humidity, rain, or extreme temperatures can affect curing and compromise the finish, leading to uneven coverage or blistering.
How to Fix It: Check the weather forecast before starting. Ideal conditions are temperatures between 50°F and 85°F (10°C to 29°C) with humidity below 60%. If conditions aren’t optimal, postpone the project.
3. Skipping the Repair of Cracks and Holes
Neglecting to fill cracks and holes can result in a bumpy, uneven surface that diminishes both aesthetics and durability.
How to Fix It: Inspect the concrete for cracks or holes before painting. Use a high-quality epoxy or concrete filler designed for underwater use. Allow adequate time (typically 4-6 hours) for the filler to cure before painting for a smooth, solid surface.
- Indoor projects where weather conditions are irrelevant.
- Projects involving materials that do not require paint or sealant.
- Situations where the substrate is incompatible with pressure washing.
- Environments with controlled temperature and humidity, making weather conditions irrelevant.
Rationale Behind the Method
Refinishing your concrete pond basin with waterproof cement paint goes beyond aesthetics. It’s a strategic approach to enhance functionality and longevity. Understanding the reasons behind this method helps appreciate its value.
Waterproofing and Durability
The primary goal is to provide a waterproof coating that protects the surface from damage caused by prolonged water exposure. Waterproof cement paint resists moisture, ensuring concrete’s long-term durability. Without proper waterproofing, concrete can absorb water, leading to weakening, cracking, or mold/algae growth.
Aesthetic Appeal
While functional benefits are crucial, the visual transformation is equally important. The new finish brightens the pond, hides stains or imperfections, and restores its original beauty, making it an attractive landscape feature.
Prevention of Algae and Mold Growth
Ponds often face algae and mold growth due to constant water exposure. Waterproof cement paint creates a protective barrier, reducing the likelihood of such growths, keeping your pond cleaner and healthier for both you and any aquatic life it may contain.
Cost-Effectiveness and Longevity
Refinishing with waterproof cement paint is cost-effective, extending your pond’s lifespan. The paint forms a strong protective layer shielding the concrete from harsh weather conditions, UV rays, and physical damage, ensuring your pond remains in top condition for years.
Understanding these points shows that refinishing your concrete pond basin isn’t just about appearances—it’s about protecting your investment long-term.
Extra Advice and Alternatives
While waterproof cement paint is a top choice for refinishing your concrete pond basin, consider these alternative methods and additional tips to enhance your project:
1. Liquid Rubber Coatings
For a flexible, seamless waterproofing solution, liquid rubber coatings are an excellent alternative. They offer superior durability and flexibility, making them ideal for ponds with complex shapes or substrate movement. Known for their resistance to cracking and fading, liquid rubber ensures a long-lasting, low-maintenance finish.
2. Epoxy Paints
Epoxy paints are highly durable alternatives to waterproof cement paint. Renowned for their toughness and chemical resistance, epoxy coatings provide a long-lasting, waterproof finish. However, they require careful application and may involve mixing two components, so be sure to follow the manufacturer’s instructions closely.
3. Pond Liners
For a more drastic solution, synthetic pond liners offer waterproofing with minimal maintenance. Placed over the entire pond surface, liners create a barrier between the water and the concrete. While this option requires precise fitting and installation, it’s a reliable waterproofing choice, especially for those who want to avoid painting upkeep.
4. Eco-Friendly Paints
If you plan to introduce aquatic life into your pond after refinishing, consider using eco-friendly paints designed to be safe for fish and plants. Many brands offer non-toxic, environmentally safe alternatives that do not contain harmful chemicals, ensuring the health of your pond’s ecosystem.
5. Regular Maintenance
Once your pond is refinished, routine maintenance will help keep it looking great. Clean the pond regularly to prevent algae growth and check for any signs of wear and tear. Addressing issues early on will help extend the life of the finish and maintain the pond’s beauty.
Weather Conditions
Just like waterproof cement paint, all alternatives require proper application conditions. Avoid working during extreme weather, as temperature fluctuations and high humidity can compromise the curing process of certain coatings.
By considering these alternatives and extra tips, you can tailor your refinishing project to best suit your needs, whether you’re prioritizing ease of application, flexibility, or the safety of aquatic life.
Additional Tips for Success
- Environmentally Friendly Options: Look for paints that are eco-friendly and safe for aquatic life if you plan to introduce fish or plants into the pond.
- Regular Maintenance: After refinishing, establish a maintenance routine to clean and inspect the pond regularly. This will help catch any issues early and prolong the lifespan of the paint.
- Test the Paint: Before applying the paint to the entire pond, perform a patch test on a small area to ensure compatibility and desired results.
- Application Conditions: Apply the paint when the temperature is between typically 50°F and typically 85°F (typically 10°C to typically 29°C) and humidity is below 70% to ensure proper curing.
- Coverage and Mix Ratios: A typical coverage rate for waterproof cement paint is about 100-150 square feet per gallon, depending on the surface texture. Follow the manufacturer’s recommended mix ratio for optimal performance.
- Working and Cure Times: The working time for cement paint is usually around 1-2 hours, with a set time of 4-6 hours. Full curing can take 7-14 days, during which the pond should remain dry.
Different Options:
- Liquid Rubber Coatings: These provide a seamless waterproofing solution and are known for their flexibility and durability. They’re ideal for ponds with complex shapes. Typical coverage is about 50-100 square feet per gallon.
- Epoxy Paints: Known for their toughness and chemical resistance, epoxy paints can offer a long-lasting finish, though they may be more challenging to apply. They usually require a two-part mix with a working time of 30-60 minutes and a cure time of 5-7 days.
- Pond Liners: For those who prefer a different approach, synthetic liners offer a reliable waterproofing solution. However, they require precise fitting and anchoring. Tolerance for temperature fluctuations is typically between -typically 20°F to typically 120°F (-typically 29°C to typically 49°C).
Conclusion
The process of refinishing a concrete pond basin with waterproof cement paint is a task that demands careful planning, suitable tools, and premium materials. Essential tools include:
- A pressure washer (minimum 2000 PSI) for thorough cleaning.
- Paintbrushes, rollers, and a paint sprayer for efficient application.
Waterproof cement paint is vital, offering a durable finish designed for outdoor concrete surfaces. Choose one with a coverage rate of 100-150 square feet per gallon. Additionally, use epoxy or concrete filler to repair cracks or holes, ensuring a smooth surface ready for painting.
Challenges may arise, such as inadequate cleaning leading to poor adhesion and peeling, or using incompatible materials that compromise durability. Weather conditions and local regulations may also pose challenges requiring adjustments in your approach.
To mitigate these issues, follow reliable practices like thorough cleaning with a pressure washer, using high-quality compatible materials, respecting curing times, and ensuring safety gear meets standards. Effective planning, from accurately estimating costs to deciding whether to DIY or hire professionals, is key to success.
Take the first step today by assessing your pond’s condition and gathering necessary tools and materials. With proper preparation and attention to detail, you can transform your pond into a stunning, durable landscape feature.
Quick Facts
- Total Time Needed: Approximately 2-3 days, including preparation, painting, and curing times.
- Common Pitfalls: Inadequate surface cleaning leading to poor paint adhesion, and not allowing sufficient curing time for fillers and paint.
- Top Best Practice: Ensure thorough surface preparation using a pressure washer with at least 2000 PSI and choose high-quality waterproof cement paint for optimal results.
FAQ
Question 1: What tools are essential for refinishing a concrete pond basin with waterproof cement paint?
- Pressure washer (at least 2000 PSI) for surface cleaning.
- Paintbrushes and rollers for application, and a paint sprayer for larger ponds.
- Masking tape, plastic sheets, and masonry brush for protecting areas and textured surfaces.
- Caulking gun for applying waterproof sealant to cracks or gaps.
Question 2: What materials do I need to refinish a concrete pond basin?
- High-quality, outdoor-rated waterproof cement paint.
- Concrete cleaner for surface preparation.
- Epoxy or concrete filler for crack repair.
- Waterproof sealant to protect and extend the life of the paint.
- Protective gear: gloves, safety goggles, and masks.
Question 3: How should I prepare the concrete pond surface before applying paint?
- Thoroughly clean the surface using a pressure washer to remove dirt, algae, and old paint.
- Repair any cracks or holes with epoxy or concrete filler.
Question 4: What are the potential pitfalls when refinishing a concrete pond basin?
- Inadequate cleaning leading to poor paint adhesion and peeling.
- Using incompatible materials, compromising finish durability.
To avoid these issues, ensure all surfaces are thoroughly cleaned and use materials specifically designed for outdoor concrete surfaces.