

Key Takeaways
- For a small, nonstructural slab, the essential kit covers layout, excavation and compaction, forms, placement, screeding, basic finishing, curing, cleanup, and PPE.
- Buy or borrow hand tools first. Rent or arrange delivery only when slab size, access, and available helpers make bag-by-bag mixing or hand screeding impractical.
- Have every tool, curing material, helper, and cleanup plan ready before concrete is mixed or delivered.
Introduction
This is a tool guide for a small slab-on-ground such as a modest patio pad or equipment pad—not a foundation, garage slab, footing, or other structural work. The right list depends on the slab’s dimensions and thickness, site access, specified finish, concrete source, reinforcement details, and weather. Tools help you place concrete well; they do not determine whether a slab is structurally suitable.
Check permits, utility locations, drainage, and local requirements before buying materials. Stop and get design, code, or professional guidance for structural or code-controlled work, significant loads, poor or expansive soil, drainage problems, retaining conditions, unknown utilities, or required reinforcement. If reinforcement is specified, it must be supported at its specified elevation—not left on the base and pulled up during the pour.
Understanding the Fundamentals
Concrete work has a short, busy placement and finishing period followed by curing and protection. The useful beginner approach is to assign tools by stage: prepare the base, build and check the forms, mix or receive concrete, place and screed it, apply only the finish the project calls for, form or saw the specified joints, then cure and protect the slab.
Do not start until the base is prepared, forms are braced, tools are within reach, and the crew understands its jobs. A screed board cannot correct loose soil or a form that moves; a finishing trowel cannot fix a slab that was short of concrete or placed in delayed batches.
Specific Measurables
Calculate geometric volume before ordering: length × width × thickness, using consistent units. For example, 100 square feet at 4 inches thick is 33.3 cubic feet, or about 1.23 cubic yards, before a project-specific allowance for uneven excavation, variation in thickness, and waste. Confirm bag yield and water requirements on the exact product label rather than using a universal bag-coverage or mixing ratio.
Tool Specifications
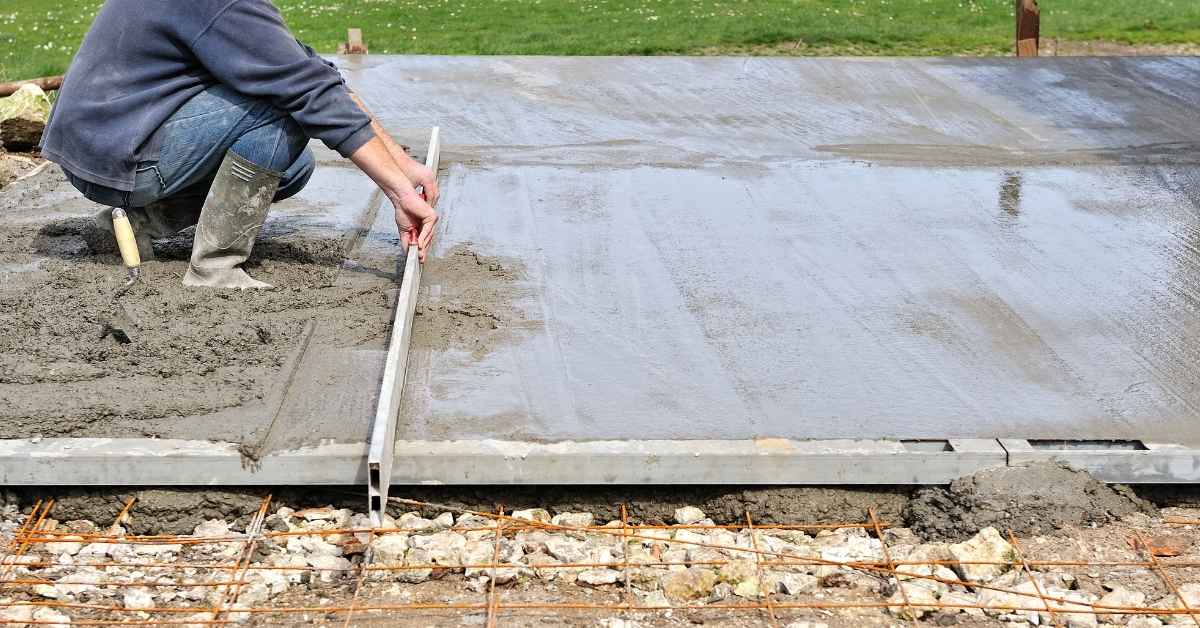
Choose a screed that spans the forms with enough length to rest securely on both sides. A straight, sound 2×4 can work for a small slab; a metal screed is lighter and stays straight. Choose a magnesium hand float for basic finishing, a perimeter edger only if a rounded edge is wanted, and a groover/jointer only when the joint layout calls for a tooled joint. A bull float reaches across a wider fresh surface; it is useful on larger accessible slabs but is not mandatory for every small pour.
Surface Preparation & Conditions
Remove vegetation, organic material, mud, frost, standing water, and soft or unstable material. Grade and compact the subgrade or specified granular base uniformly, then check for soft spots before setting forms. A prepared base need not be bone-dry; the concern is standing water, instability, and conditions outside the project requirements.
Weather affects working time and curing. Wind, sun, air and concrete temperature, and humidity can change how quickly the surface dries. Postpone a beginner pour when rain, freezing conditions, excessive heat, strong drying wind, or an uncertain protection plan would prevent proper placement and curing. Concrete-floor guidance treats preparation, placement, finishing, curing, and joints as connected operations rather than a single temperature or humidity rule.
Failure Modes & Fixes
- Forms move or leak: stop before placement, add stakes and bracing, and recheck line, level, and dimensions.
- Concrete is too stiff or too wet: follow the bag or ready-mix instructions. Measure water; do not add water casually to make finishing easier. The manufacturer’s concrete-mix technical data illustrates why yield and water range are product-specific and warns against overwatering.
- Uneven surface: place enough concrete ahead of the screed, strike off promptly, and refill low areas before moving on.
- Cracks appear: contraction joints are intended to localize shrinkage cracking, not guarantee a crack-free slab. Follow the specified joint layout and timing; do not substitute a generic spacing rule.
- Surface is tearing, blistering, or weak: do not finish through bleed water or add water to the surface. Wait for the appropriate stage, use fewer finishing passes, and follow the product instructions.
Order of Operations
Layout and excavation come first; then base preparation, forms, specified reinforcement, delivery or mixing setup, placement, screeding, floating, edging and jointing as specified, curing, and cleanup. Keep the work moving, but do not rush a finishing operation before the surface is ready.
Necessary Equipment and Devices
A hand tamper is suitable for a small area when it can achieve the specified compaction; rent a plate compactor when the area or base makes hand compaction unrealistic. A small mixer can suit a genuinely small, accessible slab with enough labor to mix, transport, place, and finish continuously. For a larger volume, long travel distance, or tight finishing window, ready-mix delivery, more wheelbarrows, a pump, a power screed, or additional experienced help may be the practical choice. Do not let a single mixer or wheelbarrow create long gaps between batches.
Materials and Tools
Minimum checklist for a small slab
- Layout: tape measure, marking pencil or paint, stakes, string line, and a level or laser level.
- Excavation and base: shovel, rake, wheelbarrow, hand tamper or rented plate compactor, and the specified base material.
- Forms: straight form boards, stakes, screws or nails, drill or hammer, and a level. Have a way to brace corners and long runs.
- Concrete supply: bagged concrete plus a mixer or mixing tub and measured water, or confirmed ready-mix access and a clear truck/pump route. Bring enough shovels and wheelbarrows for the crew.
- Placement and leveling: concrete rake or come-along, square-point shovel, screed board, and hand float. Use a bull float when its reach is useful.
- Finish and joints: edger, groover/jointer or a planned saw-cut method, finishing broom for a broom finish, and steel trowel only when a hard, smooth finish is actually specified.
- Curing and cleanup: selected curing material, protective covering if needed, sprayer if using a compatible curing product, buckets, stiff brush, plastic sheeting, and a controlled washout area.
- PPE: alkali-resistant gloves, waterproof boots, eye protection, long sleeves and full-length clothing as appropriate, plus suitable dust control or respiratory protection when handling dry silica-containing mix.
Wet concrete can burn skin and injure eyes. Wear waterproof boots and protective gloves, prevent wet concrete from staying inside boots or gloves, and wash exposed skin promptly. OSHA’s concrete safety guidance specifically calls for eye protection, gloves, waterproof boots, and avoiding skin contact with wet cement.
Planning and Scheduling
Before mixing or ordering, calculate volume; confirm concrete source, access, and water needs; inspect the tools; and stage them in use order. Assign people to placement, screeding, and finishing. Set out curing supplies and a washout plan in advance. If bagged concrete is being used, do a realistic dry run from mixer to forms—distance and wheelbarrow capacity matter as much as mixer size.
Review the product instructions and weather forecast. Keep delivery, mixing, placement, and finishing continuous enough to avoid uncontrolled delays or cold joints. If the available equipment and crew cannot keep pace, reduce the project scope or change the delivery plan before the pour day.
Practical Guide to Each Stage
1. Layout, excavation, and base
Use tape, stakes, string, and a level or laser to establish the slab perimeter and required elevations. Excavate to the planned depth, install the specified base, rake it even, compact it, and check it again. The base should feel firm and uniform, with no yielding spots or standing water.
2. Forms and specified reinforcement
Set straight form boards to line and grade, fasten them to stakes, brace them against movement, and check diagonal measurements if the slab must be square. Verify depth at several locations. Install only the reinforcement called for by the design or local requirement, on chairs or other supports that hold its required position during placement.
3. Mixing or receiving concrete
For bagged product, use the label’s water range and mixing method; measure water rather than guessing. For ready-mix, clear access, confirm the placement route, and have rakes, shovels, screed, and helpers ready before the truck arrives. Keep dry mix and wash water separate from the finished surface.
4. Placement and screeding
Deposit concrete close to its final location. Use a concrete rake or shovel to distribute it without excessive rehandling, keeping enough material ahead of the screed. Draw the screed across the form tops with a sawing motion; fill low spots and strike off excess until the surface follows the forms.
5. Floating, edging, and finish
Use a bull float or hand float to close small surface irregularities after screeding. Wait until the surface is ready for the next operation; do not work bleed water into it. Run an edger around the perimeter if wanted. For an exterior walking surface, a broom finish may provide the intended traction; use a steel trowel only for a specified smooth finish.
6. Joints, curing, and protection
Install tooled contraction joints or make planned saw cuts at the location and timing specified for the slab. Begin the selected curing method after finishing, when it can be applied without damaging the surface. Keep the curing cover or compound continuous and protect the fresh slab from rapid drying, freezing, rain damage, and traffic. Follow the curing-product and sealer instructions; sealer timing is product-specific.
Steps and Instructions
- Lay out the slab, excavate, prepare the base, and compact it.
- Set, brace, and verify forms; check dimensions, level, and slab depth.
- Install specified reinforcement on supports, if required.
- Stage tools, PPE, concrete supply, helpers, curing materials, and cleanup equipment.
- Mix according to the product instructions or receive ready-mix, then place and distribute concrete promptly.
- Screed to the forms, float only as needed, edge and finish to the planned surface texture.
- Form or saw the specified contraction joints, then cure and protect the slab.
- Clean tools and contain wash water before residue hardens.