
Introduction
Preserving the original character of your home’s plaster picture rails involves careful repair and restoration. Understanding the timeline for this project helps you plan effectively, ensuring a successful outcome that maintains the shadow lines.
From initial assessment to final touches, let’s break down the process into manageable steps, focusing on how long each task takes to give you an accurate estimate of the entire project duration.
For the full guide, see Restoring Plaster Picture Rails: Patch Techniques That Preserve Shadow Lines.
The Restoration Timeline: Step-by-Step
Restoring plaster picture rails typically takes around 3-5 days, depending on the extent of damage and your familiarity with the process. Here’s a detailed timeline to guide you through each step:
- Day 1: Inspection, Preparation, and Cleaning (2-4 hours)
- Inspect rails for cracks and loose spots (30 min)
- Gather tools and materials (30 min)
- Protect surrounding plaster with tape and drop cloths (1 hour)
- Clean old plaster surfaces (1-2 hours)
- Day 2: Patching and Preserving the Shadow Line (4-6 hours)
- Prepare patching compound (30 min)
- Apply initial patches, preserving shadow lines (2-3 hours)
- Allow first layer to cure (1-2 hours)
- Sand and feather edges (1 hour)
- Day 3: Finishing Touches and Testing (3-5 hours)
- Apply additional layers, if needed (2-3 hours)
- Final sanding and blending (1 hour)
- Test paint and finishes on a small area (1 hour)
- Day 4-5: Touch-ups and Final Inspection (1-3 hours)
- Make any necessary touch-ups (1 hour)
- Inspect the entire rail for quality control (1-2 hours)
Key takeaways
The preparation time on Day 1 significantly impacts the overall project schedule, so it’s essential to allocate sufficient time for this crucial step.
- Preserve the shadow line by shaping plaster patch flush with edge profile before sanding.
- Use gauging compound sparingly; build in thin coats to avoid ridge buildup.
- Remove dust and vacuum between coats to maintain adhesion and finish.
- Protect surrounding plaster with tape and drop cloths during repairs.
- Match texture by feathering edges and blending with existing shadow line.
- Safety: wear eye protection and a dust mask when sanding plaster.
Table of Contents
- Introduction
- Key takeaways
- Why Picture Rails and Shadow Lines Matter
- Diagnosing Damage to Plaster Picture Rails
- Tools and Materials Checklist
- Preparing the Repair Area Without Losing the Shadow Line
- Patch Techniques That Preserve the Profile
- Finishing: Feathering, Sanding, and Blending the Shadow Line
- Specialized Repairs: Hairline Cracks, Long Runs, and Corners
- Troubleshooting, Maintenance, and When to Call a Pro
- Conclusion
- FAQ
Why Picture Rails and Shadow Lines Matter
Picture rails are a functional trim that also set a precise visual datum across a room; the narrow shadow line they form reads as a crisp horizontal element that defines proportion and light. Their placement and profile reflect historic practice, construction methods, and the room’s original design intent.
When you repair or replace sections, keeping that shadow line intact is critical because even tiny changes in depth or curvature are obvious to the eye. Confirm any original layout or hidden fasteners by checking physical evidence on-site or consulting old plans when available.
Definition and historical context
Picture rails are narrow ledges built into walls, usually around 2-4 inches wide, that run along the junction of wall and ceiling. They were commonly used in historic homes to display artwork without damaging walls.
Historically, they were made from wood or plaster, with installation methods varying depending on the material. Preserving original profiles is crucial for maintaining a home’s period charm and authenticity.
In older properties, picture rails often feature intricate moldings that add visual interest and architectural detail. Replicating these details during restoration ensures your home retains its unique character.
How shadow lines affect aesthetics and value
Shadow lines, the narrow gaps between picture rails and ceilings or walls, play a significant role in how a room looks. They create a crisp edge that draws the eye upward, making rooms feel taller.
Well-defined shadow lines influence light and shadow patterns within a room, adding depth and dimension to your space. They also emphasize craftsmanship, suggesting careful attention was paid during construction or restoration.
Crisp shadow lines can significantly impact property value. Buyers often appreciate homes with well-preserved architectural features like picture rails and sharp shadow lines, making them more likely to invest in such properties.
Diagnosing Damage to Plaster Picture Rails
Walk the rail slowly and inspect for loose plaster, delamination, dents, or missing profile; tap tests and careful probing reveal whether the defect is surface-only or backed by voids. Look for signs of movement such as hairline cracks radiating from anchorage points and staining that suggests water intrusion.
Create a simple checklist: edge integrity, adhesion to substrate, continuity of the shadow line, and nearby structural issues that could cause recurring failure. If the condition affects backing lath, fasteners, or framing, note that for possible structural repair or specialist consultation.
Types of damage: cracks, delamination, and missing profile
Plaster picture rails can fail in several ways. Let’s look at common issues.
Hairline cracks: These are thin lines where the plaster has split. They’re usually surface-level but can worsen over time.
Plaster pull-away (delamination): This happens when the plaster starts to peel away from the wall or substrate. You’ll see gaps between the rail and the wall, or hear a hollow sound when tapped.
Missing profile: Chunks of the rail may be missing, leaving gaps in the design. This is often due to impact damage or improper repairs.
Assessing structural vs surface issues
Before you start patching, figure out if the issue is on the surface or deeper. Here’s how:
Tap test: Gently tap along the rail with a wooden dowel. A hollow sound indicates a void behind the plaster, suggesting structural damage.
Check for loose sections: Try to wiggle the rail gently with your fingers or use a flathead screwdriver to pry at it slightly. If it moves, there’s likely underlying substrate problems.
If you find structural issues, stop. You’ll need professional help before proceeding.
Visual checkpoints
Before starting repairs, use this visual checklist to assess your picture rail’s condition. Use it after any new damage or before painting.
- Edge crispness: Check if the edges are sharp and well-defined. Blurred edges may indicate delamination.
- Continuity of shadow line: Ensure the line is continuous without gaps or breaks. Discontinuity could mean missing profile.
- Paint adhesion: Gently scratch at the paint with a nail. If it flakes off easily, there might be underlying problems.
- Cracks: Look for hairline cracks or larger ones. Even small cracks can worsen over time.
- Gaps: Check for gaps between the rail and the wall, indicating pull-away.
- Dents or chips: Impact damage can cause missing profile or cracks.
- Discoloration: Uneven color may indicate previous repairs or underlying moisture issues.
- Warping or bowing: These could suggest structural problems behind the plaster.
Quick rule: If you find any of these issues, it’s time for repair. Regular checks help prevent small problems from becoming big ones.
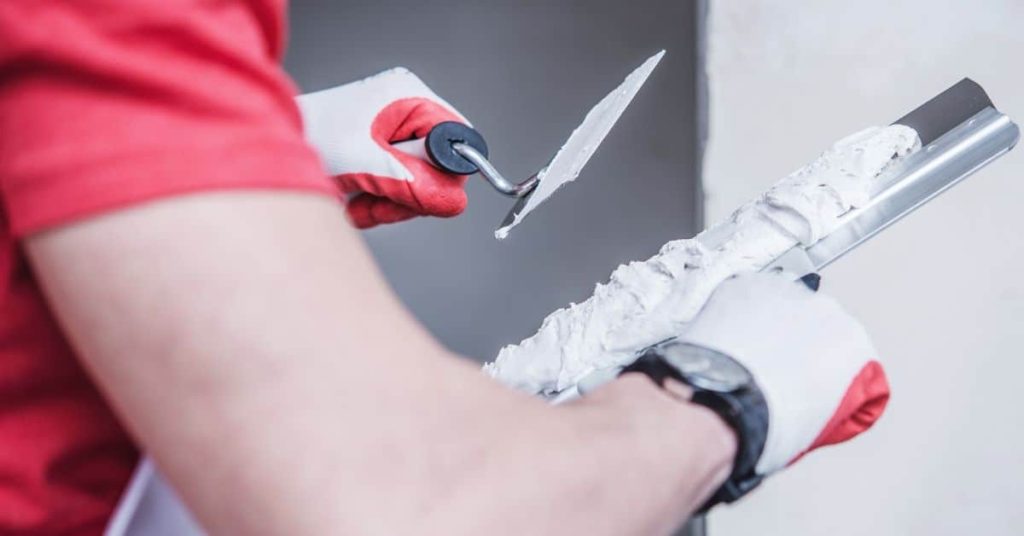
Tools and Materials Checklist
Assemble hand tools like small rasps, feathering knives, a set of flexible spatulas, needle files, and a profiling gauge for matching the original section; include mold-making rubber or silicone for copy work. For materials, gather compatible repair plasters, bonding agents, and consolidation products suitable for historic plaster—check product technical data for compatibility.
Also pack consumables: masking tape, release agent, mixing vessels, small brushes, and appropriate sandpapers or abrasives for fine finish work. When in doubt about compatibility with lime or gypsum plaster, verify with the product label or manufacturer’s data sheet before proceeding.
Essential tools
Before you start, gather these tools to ensure a smooth repair process.
- Putty knives (various sizes): For removing damaged plaster and applying new material.
- Rasps: To shape and refine the patch before finishing.
- Trowels (straight and flexible): For applying and smoothing plaster compounds.
- Temp supports (wood or plastic): To hold up damaged sections while working.
- Sanding tools (sandpaper, sanding block, orbital sander): For final smoothing and prep for painting.
- Scraper: To remove loose material and prepare the surface.
- Tape measure: To ensure accurate patch size and placement.
- Level or straight edge: To maintain a smooth, even surface while working.
Quick rule: Having the right tools makes the job easier. Don’t skip any to avoid frustrating setbacks.
Material options and matching plaster types
Choose the right materials to match your existing plaster for a seamless repair.
- Traditional lime plaster: Suitable for historic homes, matches original texture and hardness. Confirm with a historic preservation expert if unsure.
- Gypsum/plaster of Paris: Modern alternative, easy to apply but may not match historic finishes exactly. Test before applying.
- Modern patching compounds: Quick-setting, flexible options for minor repairs. Not ideal for large areas or historic homes due to shrinkage and texture mismatch.
- Plaster samples: Purchase small amounts of each option to test on a hidden area before committing.
- Matching texture tools (hawk, trowel): To replicate original texture once material is chosen.
Quick rule: Matching materials is crucial. Don’t rush this step; test and confirm before proceeding.
Safety equipment and prep materials
Prioritize safety and protect your surfaces with these essentials.
- Dust mask: Protect your lungs from plaster dust during removal and sanding.
- Goggles or safety glasses: Shield eyes from debris and potential hazards.
- Gloves (latex or rubber): Protect hands from plaster compounds and sharp edges.
- Drop cloths or plastic sheeting: Cover floors and nearby surfaces to prevent damage during repair work.
- Dust control (wet sanding, vacuum): Minimize dust spread for a cleaner workspace and easier cleanup.
- Surface protectant (masking tape, painter’s tape): Seal off areas not being worked on to prevent accidental damage.
Quick rule: Safety first. Don’t compromise your well-being or your home’s finishes by skipping protection measures.
Preparing the Repair Area Without Losing the Shadow Line
Stabilize loose material and clean the area while protecting the adjacent profile using narrow-edge masking or temporary shims that hold the line during work. Remove only the minimal damaged material needed to achieve a sound surface—overcutting ruins the profile and makes reproduction harder.
Support weakened plaster and re-secure lath or fasteners as required, but avoid aggressive sanding or scraping along the existing shadow edge. If adhesive or consolidant choices matter, consult the manufacturer’s instructions for application to historic substrates.
Stabilizing loose plaster and backing techniques
Before you start patching, secure any loose plaster. This prevents further damage and ensures a solid base for your repair.
Use an injectable adhesive to fill hollows behind the loose plaster. Apply it with a syringe, following the manufacturer’s instructions. Let it cure as directed.
For larger areas, consider using wood or mesh backing inserts. Cut them to size and attach them with the adhesive. They provide extra support for your patch.
Temporary keys can also help secure hollows. These are small pieces of wood or plastic that you insert into the hollow before filling. They keep the plaster from moving while it sets.
Protecting surrounding finishes and masking tips
To preserve the shadow line and adjacent paint, mask off the area before you start work. Use painter’s tape and a putty knife to press it down firmly.
Protect cornices or other nearby finishes with drop cloths or cardboard. This prevents damage from debris or your tools.
When removing damaged plaster, be gentle. Use a sharp utility knife to score the area, then carefully lift off the pieces. This helps keep the surrounding paint and shadow line intact.
For larger repairs, you might need to mask off more of the wall. Just make sure your masking is secure but won’t pull off paint when it’s removed.

Patch Techniques That Preserve the Profile
Start with the least-invasive approach: fill small voids and feather in with compatible patching compound using thin builds to maintain the original recess that creates the shadow. For larger loss, build up the profile in controlled layers, using a profile template or form to guide each increment until the rail’s geometry is restored.
When copying an existing profile, make a mold or use a reusable spline/guide so each pass matches the line; check material cure characteristics on the product label to avoid shrinkage that would soften the shadow. If unsure which filler is appropriate for the substrate, verify compatibility in the product data sheet or with a specialist.
Inserting backing and filling voids
Before you start rebuilding your picture rail’s profile, you need a solid base to work on. This is where backing comes in.
Wood keys are thin strips of wood glued into deep cracks or voids to provide support for your filler. Use them when the damage is too deep for just adhesive.
Adhesive nets are mesh-like materials that help distribute pressure evenly across the repair area. They’re great for preventing further cracking and delamination.
For larger voids, use gunned fillers. These are applied with a gun, much like caulk, and harden quickly to provide immediate support.
Building up profile with layers and bonding agents
To rebuild your picture rail’s profile without distortion or shrinkage, use a multi-layer approach with bonding agents.
Start by applying a thin layer of bonding agent to the backing. This helps the new plaster stick to the old. Let it dry slightly until it’s tacky.
Next, apply your first layer of plaster. Use a flexible trowel or putty knife to spread it thinly and evenly. Feather the edges so they blend into the surrounding surface.
Let this layer dry completely before applying the next one. This way, each layer bonds strongly to the last, preventing shrinkage and warping. Repeat until you’ve rebuilt the full depth of the profile.
Using molds and castings to recreate moulding
If your picture rail has intricate moulding that’s beyond repair, you can cast new pieces using a flexible mold.
First, make a flexible mold from an undamaged section of the rail. Use silicone caulk or another flexible molding material to create a negative impression of the profile.
Once your mold is set, mix up some plaster. Pour it into the mold and let it cure until it’s hard but still slightly pliable. This makes it easier to remove from the mold without breaking.
Carefully remove the cast piece from the mold. Apply a thin layer of bonding agent to both the back of the cast piece and the area where you’ll be attaching it. Press it into place, making sure to maintain the original alignment with the surrounding rail. Let it set completely before sanding and painting.
Finishing: Feathering, Sanding, and Blending the Shadow Line
Finish work focuses on preserving the crispness of the shadow while smoothing transitions; use fine feathering blades and minimal abrasion, stopping short of the true edge so the line remains defined. Light, directional sanding and gentle burr removal will blend the patch without rounding the profile.
Match surface texture and paint-surface depth before priming by testing a small area; confirm drying and sanding recommendations on the product instructions to avoid overworking the repair. If texture or sheen mismatches persist, consider additional thin glaze coats rather than aggressive sanding.
Feathering methods to maintain crisp shadow
Feathering is crucial for maintaining a sharp, narrow shadow line. Here are two common methods:
Knife feathering: Use a flexible putty knife to apply thin layers of joint compound at the edge of your patch. Work outwards in small strokes, keeping the blade flat and close to the surface.
Trowel feathering: For wider areas, use a trowel to spread thin coats of compound. Work from the center outwards, using long, smooth strokes. Keep the trowel edge perpendicular to the wall for better control.
Texture and joint finishing for invisible repairs
Matching existing texture is key to a seamless repair. Here’s how:
Use a flexible taping knife to apply thin skim coats of joint compound, working from the center outwards. This helps maintain edge control and prevents rounding.
For textured surfaces, use a stiff brush or comb to mimic the existing texture. Work lightly and evenly for best results.
Priming and painting to match sheen and color
Matching paint is one thing, but matching sheen can be trickier. Here’s how:
Use a primer that matches the existing surface’s sheen. This will help create an even base for your topcoat.
When painting, work in thin coats and use long, smooth strokes. Start at the edge of your repair and blend outwards to avoid any harsh lines.
Specialized Repairs: Hairline Cracks, Long Runs, and Corners
Hairline cracks often need consolidation and flexible repair techniques to accommodate movement; inject or brush in an appropriate consolidant and follow with a hairline-compatible filler applied with minimal thickness. For long runs, work in staged sections using profile jigs so the shadow line stays continuous and consistent across seams.
Corners demand special attention: use matched corner molds or hand-scribe the profile to maintain the shadow around the turn without rounding. When dealing with repeated cracking at corners or long spans, document the pattern and check for underlying movement or moisture issues that require a broader fix.
Crack stitching and flexible fillers
Hairline cracks can ruin your picture rail’s shadow line. To fix them, you’ll need to use the right materials at the right time.
Start with bonding adhesives. These are great for stopping hairline cracks from spreading further. Apply a thin layer into the crack using a small brush or syringe. Let it dry and cure before proceeding.
Next, use micro-mesh to reinforce the area around the crack. This helps distribute stress evenly, preventing new cracks from forming. Apply micro-mesh tape over the adhesive, pressing firmly to remove any air bubbles.
Finally, fill the crack with a flexible filler like spackling compound or lightweight joint compound. These materials can expand and contract with temperature changes, reducing the risk of re-cracking. Feather the filler out from the crack using a flexible putty knife, maintaining the profile of the picture rail.
Repair strategies for continuous rails and corners
Long runs and corners present unique challenges when repairing picture rails. Here are some strategies to tackle these areas without losing the shadow line.
For long runs, use control joints to break up the repair into manageable sections. This helps prevent new cracks from forming due to stress buildup. Mark out your control joints using a straight edge and a scoring tool, then make your repairs incrementally, allowing each section to dry and cure before moving on.
At corners, it’s crucial to blend the repaired section into the existing plaster seamlessly. Start by stabilizing any loose plaster at the corner using backing techniques mentioned earlier. Then, use a flexible filler to build up the profile of the picture rail, feathering out from the corner to maintain the shadow line.
To ensure a smooth transition between the repaired section and the corner, use a flexible putty knife or a corner trowel to work the filler into the corner, following the existing profile. Allow the filler to dry and cure before sanding and finishing.
Troubleshooting, Maintenance, and When to Call a Pro
If repairs repeatedly fail—cracking, detachment, or soft spots—revisit substrate stability, moisture sources, and whether incompatible materials were used; preventive maintenance like gentle cleaning and timely sealing protects the shadow line. Keep a record of repairs and materials used so future work can follow the same approach or avoid past mistakes.
Engage a conservator or plaster specialist when historic fabric, structural problems, or complex replication of ornamental profiles are involved, or when local regulations affect treatment options. If you’re unsure about compatibility, structural concern, or conservation ethics, check with a qualified professional before continuing.
Common repair failures and how to avoid them
Before you start patching, understand these common mistakes to save time and effort.
- Poor material match: Using the wrong type or color of plaster can make repairs stand out. Always test materials on a small area first.
- Inadequate backing: Skimping on support means your patch could fall off. Use proper backing techniques as outlined earlier.
- Over-sanding: Too much sanding can remove the profile and make the shadow line disappear. Be gentle with the sandpaper.
- Ignoring humidity: Fluctuating moisture levels can cause cracks. Maintain consistent humidity in your home.
- Rushing the process: Patience is key. Let each layer dry properly before moving on to the next step.
Take these failures into account and you’ll have a smoother repair job.
Signs a job needs a conservator or plaster specialist
Some repairs are beyond the scope of DIY. Know when to call in the pros.
Structural movement: If your walls are shifting, it’s not just a patching job. You’ve got structural issues that need professional attention.
Large delaminations: Big chunks falling off? That’s too much for a simple DIY repair. A specialist can assess and handle the damage.
If your rails have ornate, historically significant mouldings, it’s best to leave them to professionals who understand their historical context and preservation techniques.
Ongoing maintenance tips to prevent recurrence
Regular care can keep your picture rails in tip-top shape. Here’s how:
Inspect regularly: Keep an eye on your rails. Catching small cracks early prevents them from becoming big problems.
Control humidity: Maintain consistent moisture levels in your home to prevent cracking. Aim for around 45-50% relative humidity.
Avoid sudden temperature changes: Big swings in heat and cold can stress the plaster. Keep temperatures stable if possible.
Conclusion
Restoring plaster picture rails is about getting the line and the finish right while keeping the wall safe and durable. When you protect the shadow line and patch carefully, you preserve the character of the room and avoid costly fixes later.
First, run through a simple check in order: inspect the rail for cracks or loose spots, pull together the exact tools and materials you already lined up, clean and protect the surrounding plaster, test a small patch on a hidden spot, then apply the repair keeping the profile true, feather and lightly sand to blend, finish with a thin, matched coat, and finally cure and clean the area before returning it to normal use. Safety comes first in every step—mask off, wear eye and respirator protection, and work gradually to minimize dust and damage.
Common mistakes to avoid are over-wetting patches, rushing sanding, ignoring the shadow line so the repair looks flat, and using the wrong patch material or filler. Keep the repair area dry, test each step on a noncritical spot, and avoid forcing patch material into tight corners. Use steady, deliberate motions and pause to check your line against the original profile.
If you encounter hairline cracks that won’t behave, long runs, or tricky corners, or if you feel the plaster is loose or the wall shows signs of movement, it’s time to call a pro. Otherwise, stay patient, follow your checklist, and you’ll restore the look without extra damage. Stay focused on the line, work cleanly, and you’ll finish with a solid, lasting result.
FAQ
How do I choose patch material that won’t collapse the shadow line?
Stick to patch materials that bond well with plaster and cure at a compatible rate. Read the product label for bonding and setting guidance. If you’re unsure, test a small patch on a scrap area before proceeding.
Apply thin layers and let each coat grab before the next. Avoid fast-setting mixes that pull away or shrink behind the profile. Check the manufacturer instructions for any required curing time or humidity limits.
What’s the best way to re-establish the shadow line after patching a long run?
Shape the patch to match the original profile as you go. Use light passes with a margin trowel to keep the line crisp. Let borders dry before feathering into the surrounding plaster.
If the line looks soft, you can carefully re-scribe the shadow with the edge of a clean tool once the patch is firm. Always verify any local or product guidance before tool marks harden.
How can I blend the patch without blurring the profile at corners?
Keep feathering on the patch only, not into the raised edge of the moldings. Build the patch a bit proud and blend down with short, controlled strokes. Stop before you dull the corner’s crisp edge.
Match the finish by testing a small area first and comparing to the existing plaster heat and surface. If you’re unsure, consult the patch’s instructions or the molding manufacturer’s guidance.
What steps help prevent damage to surrounding plaster during repair?
Mask off the area and work light, shallow steps so you don’t pry or gouge adjacent plaster. Keep movements parallel to the wall to avoid chipping the edge of the profile. Use minimal pressure near the shadow line.
Clean tools between passes to avoid dragging debris into the repair. If any special instruction exists on the product label, follow it and verify local rules or guidance from the manufacturer.