
Introduction
Repairing stucco behind downspouts means fixing the weather-resistant barrier and ensuring proper edge termination to prevent water intrusion. This is a hands-on DIY task that focuses on reestablishing a continuous moisture barrier and a clean transfer of water away from the wall. You’ll need to work behind the downspout area, where access and flashing details matter for a lasting repair.
Start by inspecting the area, then carefully remove loose stucco around the downspout to expose the WRB. Rebuild or patch the WRB as needed, install appropriate flashing and termination at the edge, and recoat or re-stucco per your project’s finish. Always follow product labels and local rules for materials and flashing details, and check manufacturer instructions for compatible sealants and methods.
Key takeaways
- Inspect the downspout area for water intrusion signs before removing it.
- Shield occupants with PPE, head protection, and fall protection; secure work area.
- Rebuild WRB correctly with manufacturer-backed details and proper flashing at termination.
- Re-lath and re-stucco with compatible materials, ensuring proper bonding and drainage.
- Check visual checkpoints: weatherproofing, flashing integrity, and finish alignment before reattaching.
- If in doubt, hire a pro for scope definition, warranties, and code compliance.
Table of Contents
- Introduction
- Key takeaways
- Quick Assessment: Scope, Signs, and Urgency
- Safety, PPE, and Permits Before You Start
- Tools and Materials Checklist
- Removing the Downspout and Exposing the Problem Area
- Rebuilding the WRB System Correctly
- Rebuilding the Lath and Applying Stucco Finishes
- Visual Checkpoints and Verification Before Reattaching Downspouts
- When to Hire a Pro, Contractor Scope, and Warranty Considerations
- Conclusion
- FAQ
Quick Assessment: Scope, Signs, and Urgency
Start by looking at what is visibly damaged and what might be hidden behind siding or stucco. Look for moisture staining, soft spots, cracking, and delamination around the downspout area. Decide if the repair needs immediate attention or can be staged by checking for active leaks and rain exposure. To confirm specifics, consult the product label, data sheet, or manufacturer instructions about moisture thresholds and repair steps.
Document findings with notes or photos so you can plan a safe sequence of work. Consider weather forecasts and potential water intrusion during rain events when deciding urgency. If you’re unsure, err on the side of treating it as urgent and protect the interior while you plan the repair.
Visual and tactile inspection steps
Before you start any repair work, follow this checklist to assess the damage. It’s best to do this on a dry day.
- Check for stains: Dark spots or streaks can indicate moisture intrusion. They might be hidden behind dirt or algae, so clean the area first.
- Feel for soft sheathing: Press firmly with your fingers. If it feels spongy or gives way, there’s likely rot.
- Look for delamination: Peeling paint or stucco can signal that moisture has gotten behind the surface.
- Inspect caulking and sealants: Cracked or missing caulk around downspouts and at the base of walls lets water in.
- Check for efflorescence: A white, powdery residue on the stucco can indicate moisture migration.
- Examine flashing: Ensure it’s intact and properly installed. Missing or damaged flashing allows water to get behind the stucco.
- Probe with a flathead screwdriver: Gently poke at any suspect areas. If the tool goes in easily, there’s rot.
- Tap on suspect areas: A hollow sound can indicate rotted sheathing or cavities filled with water.
Quick rule: Don’t skip this step. It helps you understand the full extent of the damage and plan your repair accordingly.
Using tools to confirm hidden problems
Sometimes, visible signs aren’t enough. These tools can help you find hidden issues.
- Moisture meter: Measures the moisture content in materials. Ideal for finding wet spots behind stucco. Rental: $20-$50/day.
- Borescope: A flexible camera on a cable lets you see inside walls without opening them up. Purchase: $100-$300, or rent: $30-$60/day.
- Thermal imaging camera: Shows temperature differences, helping to locate hidden moisture and rot. Rental: $50-$200/day.
Safety, PPE, and Permits Before You Start
Put on the basics: sturdy boots, protective gloves, eye protection, and a dust mask or respirator. Use fall protection if you’ll be working near edges or ladders, and keep a clean, stable work area. Control dust by dampening the area and using a containment method as needed.
Before opening walls or removing barriers, check local permitting and code requirements. Verify what permits are needed and whether the job falls under specialty requirements. Always reference official guidance such as local building codes or your jurisdiction’s instructions from the authority having jurisdiction.
Permits, code triggers, and required inspections
Before you start tearing into your stucco, check if you need permits or inspections. Here’s a quick checklist:
- WRB/Flashing Replacement: Check local codes for requirements when replacing water-resistive barriers or flashing.
- Stucco Repair: If your repair is larger than 25 sq ft, you might need a permit.
- Electrical/Plumbing: If work involves these systems, always check for additional permits.
- Inspections: Schedule inspections before hiding any work behind new stucco.
- Historic Districts: Check if your home is in a historic district with extra regulations.
- HOA/Condo Associations: Follow their rules and guidelines for exterior repairs.
- Fire-Resistant Materials: Some areas require fire-resistant materials. Check local codes.
- Accessibility: Ensure your repair doesn’t affect accessibility features like ramps or railings.
Quick rule: Always check with your local building department before starting any major exterior repairs to avoid costly mistakes and delays.
PPE, ladders, and scaffold safety
Safety first, always. Here’s what you need when working on your stucco:
Personal Protective Equipment (PPE): Wear a NIOSH-approved respirator for silica dust protection, safety glasses or goggles to protect your eyes, and work gloves for handling materials.
Ladders & Scaffolds: Use only stable, secure ladders or scaffolds. Extend them at least 3 feet above the gutter to ensure safe access. Always have three points of contact when climbing.
Roof Work: If you’re working near a roof, ensure it’s safe and stable before stepping onto it. Use caution around skylights and vents.
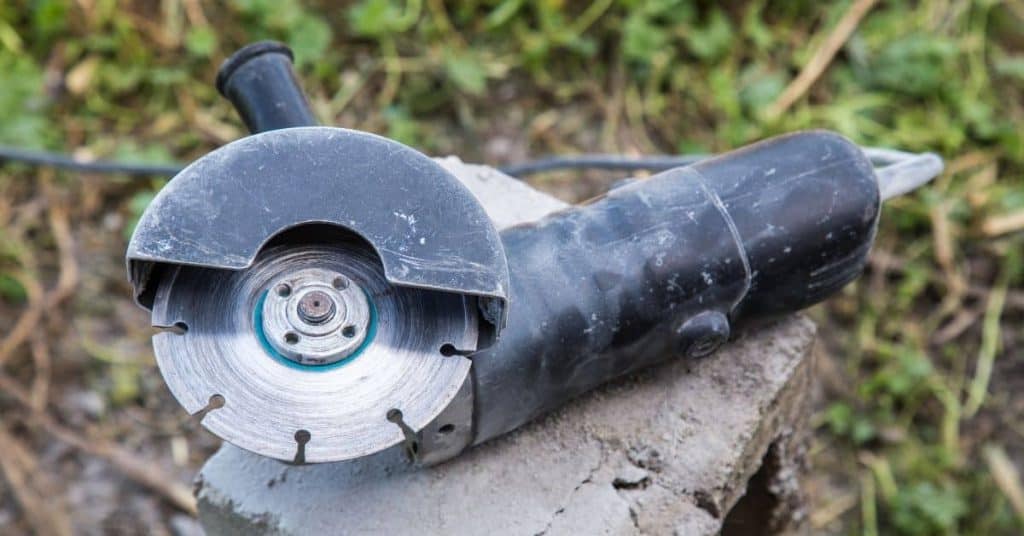
Tools and Materials Checklist
Have a basic set of masonry and hand tools ready: pry bar, hammer, chisel, utility knife, tape measure, straight edge, and a masonry saw or grinder with appropriate discs. A cordless drill and drive bits for fasteners, plus mixing tools for the stucco, will save time. Have a level or lattice to check flatness as you reframe the WRB area.
Stock the necessary materials: weather-resistant barrier, flashing, metal lath, stucco mix or approved base coats, bonding agents, control joints, and appropriate fasteners. Consider acceptable alternatives if you can’t source your first choice, and always verify compatibility with the WRB, flashing details, and stucco system by checking labels or manufacturer instructions.
Essential tools for demolition and installation
Before you start, make sure you have the right tools to get the job done safely and efficiently.
- Stucco saw: To cut through the existing stucco. Safety glasses a must.
- Pry bars: For removing damaged stucco and exposing the wall.
- Utility knife: To score and remove old adhesive and paper.
- Trowels (1/4″ & 3/8″): For applying and smoothing stucco mix.
- Fastener tools (screw gun, nailer): For attaching lath to the wall.
- Moisture meter: To check for hidden moisture behind the stucco. Skip this, risk mold growth.
- Flashing brake or tin snips: To bend and shape metal flashing.
Quick rule: Always double-check your tools before starting to avoid delays.
Material types and specs explained
Knowing the right materials and their specifications is key to a successful repair.
- WRB (Water-Resistive Barrier): Consider housewrap, building paper, or fluid-applied. Check ASTM D6626 for standards.
- Flashing metal: Use corrosion-resistant metals like galvanized steel or aluminum. Thickness should be 24-28 gauge.
- Lath: Opt for corrosion-resistant lath, like stainless steel or plastic. Check ASTM C1365 for specs.
- Stucco mix: Use a pre-mixed, high-quality stucco. Follow manufacturer’s guidelines for mixing and application.
Quick rule: Always check manufacturer or ASTM specs to ensure materials meet building codes and standards.
Removing the Downspout and Exposing the Problem Area
First, safely disconnect or remove the downspout so you can access the wall edge. Create controlled openings in the stucco with minimal damage to surrounding areas, using the tool that keeps cuts clean. Work slowly to avoid tearing the WRB behind the wall.
Protect interior spaces by sealing openings and laying drop cloths or plastic to catch debris. Plan for temporary weather protection if rain is forecast. Keep track of cutouts and debris so you can re-close the area neatly once repairs are complete.
Detaching and supporting gutters/downspouts
Before you start, ensure the downspout is securely attached to the gutter. You don’t want it falling off midway through your work.
Use a ladder that’s tall enough to reach the roof edge safely. Once there, gently lift the downspout away from the wall. If it’s stuck, use a utility knife to cut any caulk or sealant holding it in place.
Temporarily support the gutter with a 2×4 or similar piece of lumber to prevent stress on the roof edge while you’re working.
Cutting stucco and exposing sheathing/WRB
Start by marking out the area you need to expose. Use a straight edge and a pencil to draw a clear line.
Use a utility knife or a score-and-snap tool to cut through the stucco. Go slow and steady, applying even pressure. If you’re using a utility knife, change blades frequently for clean cuts.
Once you’ve scored the entire area, use a flathead screwdriver or a chisel to tap along the scored lines. This should break the stucco into manageable pieces. Remove these carefully, preserving any intact pieces that can be patched back later.

Rebuilding the WRB System Correctly
Install or replace the weather-resistant barrier so it sheds water away from the wall and ties into existing roof and gutter flashings. Overlap where required and ensure the WRB extends under any base flashing at the top edge. Check that penetrations are properly flashed and sealed according to guidelines.
Follow the manufacturer instructions for seams, fastener spacing, and overlaps. If you’re unsure about a detail, verify with the product label or data sheet and match it to local rules or the contractor’s guidance for this wall assembly.
Selecting and installing the WRB
The first step is choosing the right weather-resistant barrier (WRB). You’ve got two main types: fluid-applied and sheet. Both have their pros, but for this job, we’ll focus on sheet WRBs like house wrap or felt paper.
Start by measuring your wall area. Most WRBs come in standard widths, so you’ll need to calculate how many rolls you need. Remember to account for overlaps – aim for at least 4 inches.
Installing is straightforward. Start from the bottom and work your way up. Stagger your seams like shingles to ensure water can’t get behind. Use staples or nails, but avoid overdriving them – you don’t want to puncture the WRB.
Seal all seams with tape or special sealant to keep moisture out. At penetrations like windows and doors, use flashing tape or self-adhesive flashing to create a tight barrier.
Integrating flashing and termination at downspouts
Flashing is key here. You’ll need step flashing – that’s L-shaped metal strips that go behind the WRB and up into the wall, then over the WRB. They create a tight seal around penetrations.
At the downspout, you’ll also need counterflashing. This is an L-shape too, but it goes over the WRB and downspout, creating another barrier against water intrusion. Make sure your counterflashing extends at least 4 inches above the top of the downspout.
For through-wall flashing, use a piece of metal that runs from the outside wall, up behind the WRB, then out again on the other side. This prevents water from getting trapped in the wall cavity.
End dams are crucial too. These are small pieces of flashing that go at the end of each row of step flashing to stop water running back under them. And remember, route your water into the downspout without creating any traps where water can pool and potentially leak back in.
Rebuilding the Lath and Applying Stucco Finishes
Choose the right metal lath and fastening method for the wall type, and install with corrosion-resistant fasteners in recommended patterns. Place control joints where specified to accommodate movement and prevent random cracking. Keep the lath tight and flat as you work.
Outline the multi-coat stucco sequence: base coat, scratch coat, brown coat, then finish coat, with curing periods as directed. Always check the curing guidance on the product data sheet and adapt to ambient conditions, temperature, and humidity for best results.
Lath layout and fastener requirements
First off, you need to use corrosion-resistant lath. Check the label, it should say so. Galvanized or stainless steel are good options.
Now, spacing. You want your fasteners about 6-8 inches apart. That’s center to center. Too close and you’re wasting material, too far and it won’t hold. Use a measuring tape, not your eye.
Tying new lath to existing substrate? Use lath ties or screws. Screws are stronger but can rust if not galvanized. Ties are cheaper but can come loose over time. Check local rules on this one.
Stucco mix, coats, and finishing tips
First off, always follow your product’s datasheet. It’s your Bible for mixing ratios and times.
Here’s the workflow:
Scratch coat: Mix up a batch with a 1:4 or 1:5 cement-to-sand ratio. Add water, but don’t overdo it. You want it thick enough to stick. Apply it over your lath, making sure to cover everything. Let it cure for at least 24 hours.
Brown coat: Once the scratch coat is cured, mix another batch with a 1:3 or 1:4 ratio. This time, add some aggregate (like pebbles) for texture. Apply it over the scratch coat, making sure to embed a mesh or fiberglass reinforcement in there for strength. Let it cure for at least 72 hours.
Finish coat: For your final layer, mix a batch with a 1:3 ratio and add some pigment if you want color. Apply it thinly over the brown coat. You can float it (smooth it out) or texture it, depending on what look you’re going for. Let it cure for at least 28 days before washing or painting.
Visual Checkpoints and Verification Before Reattaching Downspouts
Use a pre-reassembly checklist to confirm WRB, flashing, lath, and stucco are properly installed and that the wall is dry. Look for clean joints, no loose edges, and fully sealed penetrations. Ensure the area is free of standing moisture before closing up.
Confirm the wall feels dry to the touch and use a moisture meter if available to verify dryness. Check that all openings are sealed and that the downspout path will drain away from the wall without pooling water.
What must be visible and verifiable
Before reattaching your downspouts, use this checklist to ensure everything is correctly installed and visible.
- Flashing laps: Check that they overlap properly (at least 4 inches) to prevent water intrusion.
- Sealed penetrations: Ensure all nail holes and other openings are sealed with caulk or sealant.
- Weep/drain-too connections: Verify these are connected correctly to allow moisture to escape.
- Exposed sheathing: Make sure none is visible; if so, it needs to be covered with WRB.
- Stucco finish: Inspect for any cracks or damage that need repair before reapplying.
- Lath layout: Check that laths are properly spaced (usually 6 inches on center) and secured.
- WRB integrity: Ensure the WRB is intact, with no tears or punctures.
- Termination at downspouts: Confirm flashing extends up and around the downspout, lapping properly onto the WRB.
Quick rule: If anything’s amiss, fix it before reattaching downspouts to prevent future issues.
Moisture testing and monitoring after repair
After completing your repairs, use this checklist to ensure the wall is dry before reattaching downspouts.
- Baseline moisture meter readings: Take readings (ideally 15-20% or less) at multiple locations on the repaired area and nearby undamaged sections for comparison.
- Thermal imaging (optional): Use an infrared camera to detect any hidden moisture, if available.
- Recheck schedule: Plan to retest moisture levels after heavy rain or at regular intervals (e.g., monthly) until readings stabilize.
Quick rule: If readings are high or rising, re-evaluate your repair and allow more time for drying before reattaching downspouts.
When to Hire a Pro, Contractor Scope, and Warranty Considerations
Decide which tasks you can safely handle as a DIY project and which should be handled by licensed pros, especially WRB installation and flashing work. Complex details or uncertain conditions are good reasons to bring in a pro. Clarify your scope early to avoid later change orders.
When evaluating bids, ask about insurance, licenses, warranties, and what the bid covers. Verify that the proposed work aligns with local codes and that the warranty terms are clear on what is protected and for how long. Always request documentation that confirms compliance and coverage.
Tasks that typically need a professional
Some jobs are best left to the pros. Here’s why:
Extensive rot repair needs careful assessment and structural understanding. If you’re not sure, hire a pro.
Replacing structural sheathing? That’s a big job. Get an expert to ensure your walls stay strong.
Complex flashing tie-ins, especially at roof/gutter lines, can be tricky. A pro knows how to keep water out.
What to check in contractor bids and warranties
Before you hire, use this checklist to ensure you’re getting a quality job:
- Licensing: Confirm they’re licensed for the work.
- Insurance: Check liability and workers’ comp coverage.
- Detailed scope: Ensure it covers WRB, flashing, stucco, and termination at downspouts.
- Materials specified: Know what they’re using. Cheap materials mean a cheap job.
- Timelines: Make sure they can complete the work in a reasonable timeframe.
- Workmanship warranty: At least one year is standard. Ask for two.
- Materials warranty: Check if materials are covered and for how long.
- Termites and rot: If they find any, ask how they’ll address it. Ignoring this can lead to bigger problems later.
Quick rule: If something seems too good to be true, it probably is. Don’t skimp on quality.
Conclusion
Rebuilding the WRB properly and getting the termination right is essential for long-term durability, appearance, and preventing water damage. Do the work with safety as the top priority, and you’ll avoid costly repairs later.
Before you reattach the downspout, make sure you have cleared hazards, confirmed the WRB is rebuilt and sealed, the lath and stucco finishes meet visual checkpoints, you have a clear weather window, you’re wearing the right PPE, and any required permits are in place. Verify there are no gaps or flashing missteps, test a small area for leaks, and proceed in that cautious, stepwise order.
Common mistakes to avoid are skipping the WRB installation or proper flashing, using undersized fasteners or improper sealants, and rushing the rebuild with poor weatherproofing. Always follow safe work rules: work from a stable ladder, don’t work in high winds, and don’t improvise critical waterproof details. Test as you go and don’t leave weak points that water can find.
If the project drags beyond your comfort zone, or you uncover rot, hidden damage, or unsure details, call a pro rather than pushing on. A professional can seal the system correctly, meet warranty expectations, and save you rework. Stay focused, work methodically, and you’ll finish with confidence and a solid, lasting result.
FAQ
How should I terminate the WRB behind the downspout to prevent leaks?
Make sure the WRB ends with a proper drip edge or flashing that directs water away from the wall. Check the manufacturer instructions on how the WRB should terminate near openings and follow any local guidance. If in doubt, verify with the product label or the installer’s data sheet.
What should I do to protect the stucco once I’ve rebuilt the WRB and reattached the downspout?
Seal all joints with a compatible flashing sealant and ensure the stucco system has a clean, dry surface before finishing. Use the recommended flashing for the WRB and follow the product’s coverage and curing guidelines. If you’re unsure, consult the sealant label or manufacturer instructions for surface prep and cure times.
How can I verify the termination area is draining properly after repairs?
Inspect for a clear run or splash zone where water exits away from the wall. Make sure the downspout and any elbows direct water toward a suitable drainage path. If any pooling or misdirection is visible, revisit the flashing and joint areas and adjust as needed per product instructions.
What signs should I recheck before reattaching the downspout for good?
Double-check that the WRB is continuous behind the area, that flashing is properly integrated, and that the stucco finish has fully cured in the surrounding zone. Look for any gaps, cracks, or loose edges and address them before reinstalling the downspout. If you see uncertainty, review the manufacturer guidance or local rules for finishing details.