
Introduction
DIY stucco patch color matching means creating small test tiles to compare color before applying a patch, then adjust for curing changes. You’ll mix a small batch, apply it to a sample board or patch, and let it cure in the same conditions as the repair. Compare the dried tile to nearby surfaces and note any hue shifts you see.
Cure darkening is real, so plan to compare your finished patch to the cured surface after it fully dries. Use the test tiles as a reference and check the product label and manufacturer guidelines for recommended mixing and curing times, plus weather considerations. If you’re unsure, confirm local rules or guidance from the product instructions and adjust your patch color accordingly.
Key takeaways
- Plan test tiles from the same stucco batch and application conditions.
- Prepare consistent batches by measuring components in the same order each time.
- Create multiple color swatches per texture to match surface finish.
- Cure darkening can shift hue; compare tiles after initial set under same light.
- Use visual and instrument methods, but trust on-site judgment and lighting.
- Wear eye protection and gloves; follow manufacturer’s instructions for safety.
Table of Contents
- Introduction
- Key takeaways
- Overview and Goals
- Tools and Materials Checklist
- How Stucco Components and Texture Affect Color
- Preparing and Mixing Consistent Batches
- Making Test Tiles: Step-by-Step Method
- Accounting for Cure Darkening over Time
- Evaluating Color: Visual and Instrumental Methods
- Troubleshooting Mismatches and Final Application Tips
- Conclusion
- FAQ
Overview and Goals
This section outlines why reliable DIY color matching matters for stucco patches. You’ll learn how to plan for color accuracy from the first tile to the final patch. Expect to walk away with a clear checklist for creating and testing samples before any repair work begins.
We’ll explain the role of test tiles, how cure darkening affects results, and what you can reasonably accomplish with common residential materials. The goal is practical, repeatable steps you can follow on-site without specialized equipment. Verify any specific product claims or local rules as you proceed.
Define cure darkening and its impact
Cure darkening is a natural process that happens to cementitious finishes like stucco. When wet, the material looks lighter in color. As it cures over time, it darkens due to chemical reactions within the mixture.
Why does this matter? If you don’t account for cure darkening, your patch might look great when first applied but won’t match once fully cured.
The difference can be subtle or significant depending on the specific stucco mix and environmental conditions. That’s why it’s crucial to plan for it in your color matching process.
When to use test tiles versus on-wall mockups
Both off-board test tiles and on-wall samples have their pros and cons. The best method depends on your specific situation.
Test Tiles: Pros – Easy to create, no damage to existing wall. Cons – Might not perfectly mimic final conditions due to different surface tension and airflow.
On-Wall Mockups: Pros – Provide a more accurate representation of the final look. Cons – Require more effort, may cause minor wall damage that needs touching up.
For small patches or when accuracy is crucial, on-wall mockups are usually better. For larger areas or when you’re unsure about your color matching skills, test tiles can be a safer bet.
Tools and Materials Checklist
Start with the basics: safety gear, mixing vessels, and a clean work surface. Include pigments, dry colorants, and compatible aggregates for texture. You’ll also want molds or forms and labeling supplies to keep test tiles organized.
Optional but helpful items include a small scale for consistent measurement and a simple moisture meter. Always check manufacturer instructions and label notes for compatibility with your stucco mix. Plan for a few extra tiles to test texture variations and curing conditions.
Essential materials and safety items
Before you start, make sure you have all the necessary supplies to create consistent test tiles. Here’s a checklist to help you.
- Stucco/base mix: Check it matches your existing wall texture. Wrong mix can cause poor adhesion and cracking.
- Pigments: Ensure they’re compatible with your base mix. Incompatible pigments can bleed or fade over time.
- Sand: Use the same type and size as in your existing stucco to maintain consistency.
- Water: Check its pH level to avoid reactions with other materials. Wrong pH can affect curing and color.
- Personal Protective Equipment (PPE): Gloves, goggles, and a respirator are must-haves for safety.
- Safety data sheets: Review them for each product to understand potential hazards and handling instructions.
- Labeling supplies: You’ll need these to mark your test tiles for easy identification.
Quick rule: Always check product labels for compatibility, safety guidance, and proper storage instructions.
Tools and measuring aids
To ensure repeatable batches, you’ll need some practical tools. Here’s a checklist to help you.
- Scales or measuring cups: Accurate measurement of materials is crucial for consistent results. Inaccurate measurements can lead to poor color matching and inconsistent texture.
- Mixing paddles: Use clean, non-corrosive paddles to avoid contaminating your mix.
- Trowels and spatulas: These are essential for applying and smoothing your test tiles. Using the wrong tools can cause uneven surfaces and improper curing.
- Templates: Use these to ensure your test tiles are all the same size, promoting fair comparison.
Quick rule: Invest in good quality tools to ensure accurate measurements and even application.
Optional instruments (colorimeter, spectrophotometer, controlled light source)
While not always necessary, these tools can help you quantify color more accurately. Here’s a checklist to consider.
- Handheld colorimeter or spectrophotometer: These devices can measure and match colors precisely. Skipping this step may result in slight color variations between test tiles and your wall.
- Controlled light source: A consistent light booth helps you compare test tiles under the same conditions, reducing the impact of varying lighting on your perception of color.
Quick rule: Always follow manufacturer calibration and operating instructions for accurate results.
How Stucco Components and Texture Affect Color
Color is influenced by cement type, lime content, and sand color. Each component can shift tone differently as it cures. Texture and aggregate size also alter light reflection and perceived hue.
Be ready to adjust your targets based on the materials you actually use. If you’re unsure about a component, consult the product label, data sheet, or manufacturer guidance. Record your observations as you compare to your wall reference.
Binder, aggregate, and sand contributions
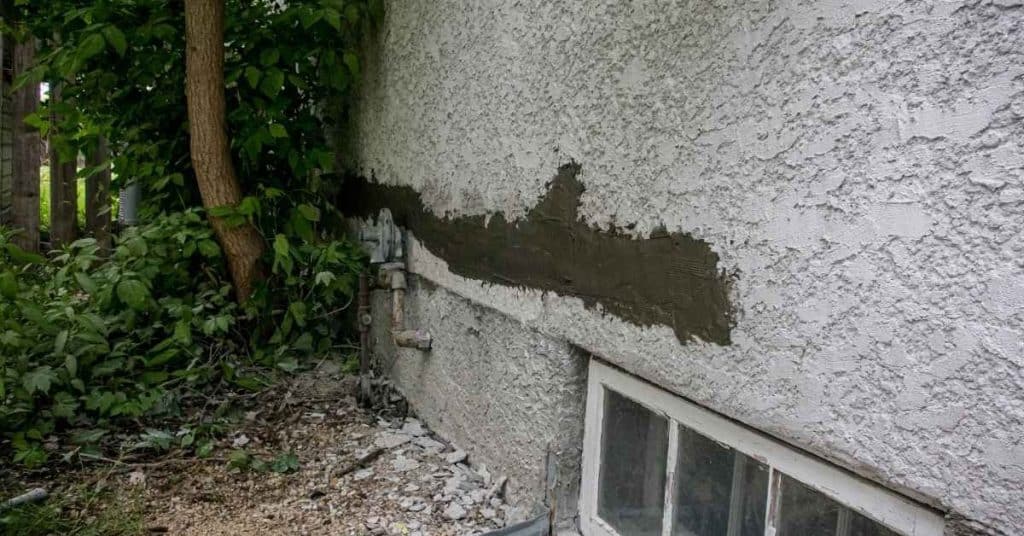
The binder – usually cement – sets the base color. Match it right to avoid a patch that sticks out.
Sand color matters too. It’s the second ingredient by volume. Get it wrong, your patch will look off.
Aggregate is key. Its size and color impact texture and tone. Match it close or your patch will be obvious.
Don’t skimp on aggregate matching. It’s as important as pigment. Use the same grade and color as your existing stucco for a seamless look.
Pigments and admixtures: selection and permanence
Pigments add color. Iron oxides are natural, synthetic ones are vibrant. Choose based on your existing tone.
Check pigment permanence. Sunlight, moisture – they all fade pigments over time. Get data from the supplier if you can.
Admixtures alter properties like workability or curing time. Some add color too. Make sure they’re compatible with your cement type and won’t affect performance.
Remember, even with perfect pigment matching, cure darkening will still happen. Test tiles help account for that.
Preparing and Mixing Consistent Batches
Establish a clean, stable workspace and control surface moisture. Use the same mixing order and duration for each batch. Consistency is your primary tool for repeatable test results.
Label each batch clearly and document the exact materials used. If a specification is unclear, verify with the product instructions or supplier data sheet. Keep notes on any environmental factors that could affect mixing or drying.
Substrate prep and compatibility checks
Before you start mixing, prepare your test surfaces or molds. They should be clean, dry, and free of any contaminants.
Use a wire brush to remove loose material. Then, apply a thin layer of primer designed for stucco. This helps create a consistent surface and improves adhesion.
Compatibility is key. Make sure your new patch materials play nice with the old stucco. Scrape some old material into a small container. Mix it with a bit of water and compare it to your new mix. They should look similar when wet.
Mixing technique and batch control
Consistency is key in matching colors. Keep your water content, mixing time, and batch size the same every time.
First, measure out your dry materials by volume or weight. Then, add water slowly while mixing. Stop when you reach the recommended water limit from the product datasheet.
Mix for a consistent amount of time – usually around 3 to 5 minutes. This helps ensure all materials are well combined and there are no dry spots.
Batch size matters too. Smaller batches are easier to control. Start small, then scale up as you get the hang of it.

Making Test Tiles: Step-by-Step Method
Create a reproducible workflow for your test tiles that matches wall texture. Use molds or forms that yield a similar surface as the repair area. Set up a drying area with steady conditions to avoid rapid or uneven curing.
Label each tile with the mix details and approximate curing time. Follow the steps exactly as you would for a real repair, then compare out in the open or under controlled lighting. If in doubt, check the mold manufacturer instructions and local guidelines for safe use.
Step-by-Step Process
Follow these steps to create test tiles that mimic your wall’s stucco finish.
- Prep your work area: Clear a flat, clean surface for mixing and tiling. Wear gloves, goggles, and a dust mask.
- Gather materials: Have your stucco mix ingredients, molds, tools, and safety gear ready.
- Mix the batch: Follow your earlier notes on consistent batches. Mix slowly to avoid air bubbles.
- Fill the molds: Scoop the mix into molds using a trowel or scoop. Tap gently to remove air pockets.
- Tool and finish: Use the same tools as your wall to apply and texture the mix in the molds. Let it set for 15-30 minutes before removing from molds.
- Clean up: Clean tools and work area thoroughly. Store leftover materials properly.
Choosing Molds, Tile Size, and Labeling Protocol
Select molds that mimic your wall’s texture. Standard sizes like 4×4 or 6×6 inches work well for DIY projects.
Label each tile with batch number, pigment load, and curing conditions. Use waterproof labels or mark directly on the mold before filling.
For larger patches, consider making multiple tiles per mix to account for slight variations in application and curing.
Reproducing Texture and Application Technique
Use the same tools on your test tiles as you did on the wall. This ensures an accurate match in appearance.
Apply the mix with a trowel, then use floats or combs to create the desired texture. Vary pressure and tool type to mimic any variations in your wall’s finish.
Practice on scrap tiles first to get the technique right before making your test tiles.
Controlled Curing Environment and Record-Keeping
Keep tiles in a controlled environment, like an unheated garage or basement, to mimic your wall’s conditions. Maintain consistent temperature and humidity.
Record environmental data (temp, humidity) and curing times for each tile. This helps you account for cure darkening and adjust your final mix accordingly.
Use a notebook or app to record data. Take photos of tiles at different stages if needed.
Accounting for Cure Darkening over Time
Color shifts happen from initial set to full cure and must be anticipated. Plan to compare tiles at multiple cure stages and document the changes. Use this data to select a best-match target that remains close as the patch cures.
Incorporate a margin for darkening when you finalize your mix. If you’re unsure about curing behavior, consult product data sheets or manufacturer guidance for expected ranges. Rely on practical observations and notes for your own setup.
Staging checks through the cure cycle
To account for cure darkening, you need to check your test tiles at multiple stages. Here’s how:
Initial Set (6-12 hours): Check right after application. The color will be lighter and more vibrant.
Intermediate Stage (1-3 days): Check again as the tile starts to harden. You’ll see a slight darkening.
Final Cure (7-28 days): Wait until the full cure time suggested by your product’s technical data. The color will be darker and more muted.
Predicting final color from early samples
It’s tricky to predict the final color from wet, early-stage samples. Here are some rules of thumb:
The initial set stage shows a lighter, more vibrant color. This is not your final color.
The intermediate stage gives you an idea of how much the color will darken. But it’s still not fully cured.
Always rely on the full cure time suggested by your product’s technical data for the most accurate final color prediction.
Evaluating Color: Visual and Instrumental Methods
Develop a repeatable visual comparison process using consistent lighting and a reference wall. Hold multiple tiles side by side and note perceived differences. Document any subtle hue or brightness changes as you compare.
When available, use simple instrumental readings to supplement visuals. Always verify instrument accuracy and calibration requirements with the manufacturer. Combine both methods to strengthen your color decision without over-relying on one approach.
Visual evaluation best practices
When evaluating color visually, consistency is key. Start by ensuring your lighting is consistent and neutral. North-facing light works well as it’s less intense and doesn’t cast harsh shadows. Avoid fluorescent lights; incandescent or LED are better.
Use a neutral background to minimize distractions. A white sheet or foam board works great. Hold your test tiles at the same angle, around 45 degrees, for consistent viewing.
Use reference swatches from your original stucco to compare against. Our eyes can play tricks on us, so having a reliable reference helps reduce perception errors.
Using instruments and comparing readings
Colorimeters or spectrophotometers can give you objective color data. First, calibrate your instrument using a standard white tile that comes with the device.
Place the instrument’s probe flat on the test tile, covering as much area as possible. Take multiple readings in different spots to account for any variations. The more readings you take, the more accurate your average will be.
Don’t rely solely on instrument readings. They’re just one piece of the puzzle. Always compare them with your visual checks. Sometimes what looks right might not read right, and vice versa. Use both to make your final decision.
Troubleshooting Mismatches and Final Application Tips
If a patch reads too dark or light, identify which component or texture caused the shift and adjust the recipe in small, repeatable steps. Test the adjustment with new tiles before applying to the wall. Keep changes organized with clear labels.
Learn to blend test results into the live repair by staging the actual patch in a low-visibility area first. If you’re unsure about a fix, consult product instructions or local building guidelines. Use conservative adjustments to avoid overcorrection.
Common causes of mismatch and corrective actions
The most common culprit for mismatched patches is adding too much water to your mix. Remember, less is more here. Start with a small amount and add gradually.
Wrong pigment type or color can also cause issues. Always use the same type and brand of pigment as your original stucco. If you’re unsure, make another test tile.
Variance in aggregate size and type between your patch and existing wall can lead to mismatches too. Ensure both are consistent before mixing.
Texture mismatch happens when application techniques differ. Practice your technique on test tiles until it matches the original.
Feathering, blending, and protective finishing
To make repairs less visible, feather the edges of your patch. This means gradually reducing the thickness of your mix as you approach the existing wall.
For larger patches, consider using a blend of your original color and a slightly lighter shade to create a gradual transition.
Sealers or stains can be used cautiously to adjust tone, but test them first on a small, hidden area. Some sealers can darken the color over time.
Note: Always follow manufacturer’s instructions when using sealers or stains. Less is more to avoid over-darkening.
Conclusion
Getting color right is about careful testing, consistent batches, and protecting the job from moisture and damage. When you line up test tiles and compare them under the same conditions you’ll actually see how the finish will look on the wall.
First confirm base mix and texture, then mix consistent batches, prepare test tiles, cure under similar conditions, compare color visually and instrumentally if you have a meter, adjust the batch and re-test as needed, and only proceed to the final patch after you’re confident the color will stay true once cured.
Common mistakes to avoid are underestimating cure darkening, skipping small-area tests, and rushing to finish without checking against real-world exposure or using improper protection. Safety rules are simple: wear eye protection and gloves, keep the work area dry and well ventilated, cover adjacent surfaces, and never apply new stucco over damp or unfixed patches. If you’re unsure about the color after testing or the wall texture and substrate are unusual, step back and call a professional rather than risking a costly redo.
FAQ
How should I handle and store mixed stucco before patching to keep color consistency?
Mix only what you can use in a short window. Keep any mixed batch covered and protected from drying out or getting moisture in, and label leftovers with the date and batch notes.
Can I use store-bought pigment powders to tweak color after testing tiles?
Use pigments per the manufacturer’s instructions and mix thoroughly into small test batches first. Avoid guessing by eye and always test on a new tile that matches the substrate you’ll patch.
What lighting should I rely on when judging color matches on the wall?
Check color in the same light that will be present when finished (daylight, shade, or artificial). Compare tiles and patches side-by-side in those conditions, and avoid judging color under mixed or strange lighting.
What steps should I take if the patch still looks off after curing?
Review the test tile results, verify batch uniformity, and consider adjusting in smaller increments with fresh material. If in doubt, consult the product instructions or manufacturer guidance for color matching tips.