
Table of Contents
- Introduction
- Understanding Hairline Crazing in Lime Plaster
- Tools and Materials Needed for Repair
- Step-by-Step Repair Process
- Troubleshooting Common Issues in Lime Plaster Repair
- Safety Precautions During Repair
- Preventing Future Cracks in Lime Plaster
- Cost Breakdown of Repair Materials
- When to Call in the Professionals for Lime Plaster Repairs
- Long-Term Maintenance of Lime Plaster Walls
- Conclusion
- FAQ
Introduction
Repairing hairline crazing in lime plaster can be achieved by applying a fine coat of limewash or a suitable filler to the affected areas. This article will guide you through a simple, step-by-step process to restore your plaster walls, ensuring a smooth and durable finish.
Understanding Hairline Crazing in Lime Plaster
Hairline crazing in lime plaster refers to very fine, superficial cracks that appear on the surface. Unlike larger, more concerning cracks, these are typically narrow and less than a millimeter wide. They often result from environmental factors like temperature fluctuations or the natural properties of lime plaster itself.
Understanding hairline crazing is crucial for maintaining both the aesthetic and structural integrity of lime plaster surfaces. Recognizing these minor cracks can help in diagnosing potential issues early, especially in older homes or regions with specific climate conditions. Addressing hairline crazing promptly can prevent more significant damage and preserve the beauty of your plaster work.
Characteristics of Hairline Crazing
Hairline crazing in lime plaster looks like a network of fine cracks that spread across the plaster surface. These cracks are usually very thin, often resembling a spider web or a series of delicate lines. If you notice these patterns, you’re likely dealing with hairline crazing. These cracks are typically less than a millimeter wide, so you might need to look closely to spot them.
Another sign to watch for is the uniform distribution of these cracks. Unlike structural cracks, which might appear in specific areas due to stress or movement, hairline crazing tends to cover larger areas evenly. This uniformity can help you differentiate between crazing and more serious issues.
When inspecting for hairline crazing, pay attention to the plaster’s finish. A powdery or dusty surface might indicate that the plaster has dried too quickly or improperly. This often leads to crazing, so if you see these signs, it might be time to reassess your plastering technique or environmental conditions during application.
Causes of Hairline Crazing
Hairline crazing in lime plaster often starts with poor base preparation. If the base isn’t compacted properly, it can shift or settle over time, leading to cracks. Always ensure the base is stable before applying plaster.
Environmental factors play a big role too. Rapid drying, especially in hot or windy conditions, can cause the plaster to shrink and crack. To avoid this, keep the plaster moist during the curing process. Covering it with damp cloths or misting it with water can help maintain the right moisture levels.
Structural movement is another culprit. If the building settles or shifts, even slightly, it can lead to crazing. Regularly inspect your building’s structure for signs of movement or instability. Fixing these issues early can prevent further plaster problems.
Lastly, using the wrong mix can cause crazing. Lime plaster needs the right balance of lime, sand, and water. Too much sand or water weakens the mix, making it prone to cracks. Stick to recommended mix ratios to ensure a durable finish.
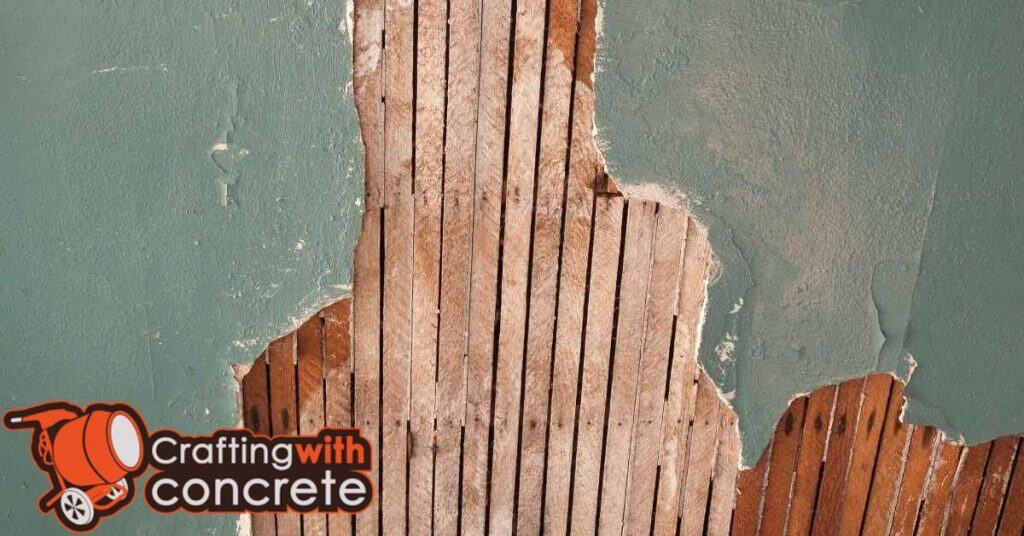
metal plastering trowel pressed against white plaster wall.” decoding=”async” src=”https://craftingwithconcrete.com/wp-content/uploads/2025/10/Seamlessly-Repairing-Interior-Plaster-Walls-Post-Electrical-Rewiring-2.jpg”/>Use a metal plastering trowel to gently smooth lime plaster over hairline cracks, ensuring even coverage and a seamless finish.
Tools and Materials Needed for Repair
Repairing hairline crazing in lime plaster requires a specific set of tools and materials to ensure a smooth and durable finish. Essential tools include trowels, putty knives, and sanding blocks, while materials such as lime plaster mix, bonding agents, and water are crucial for the repair process. Additionally, safety equipment like gloves and masks are recommended to protect yourself during the work.
Understanding the tools and materials needed for lime plaster repair is vital for achieving professional results, whether you’re a DIY enthusiast or working on a jobsite. Using optional tools like sponges for smoothing and color-matching pigments can enhance the final appearance. Sourcing high-quality materials and tools from local hardware stores or reputable online suppliers ensures a successful repair and long-lasting results.
Materials Checklist
Before you start your repair project, make sure you have all the necessary materials on hand. This checklist will help ensure you don’t miss anything crucial.
- Lime plaster mix – Essential for patching and repairing plaster surfaces. Look for a mix that matches your existing plaster for a seamless finish.
- Fillers – Use these to fill small cracks and holes. Choose a filler that is compatible with lime plaster for best results.
- Bonding agent – Helps the new plaster adhere to old surfaces. This is critical for long-lasting repairs.
- Sandpaper – Necessary for smoothing out surfaces after applying fillers. Get a variety of grits for different levels of smoothing.
- Primer – Prepares the surface for painting after repairs. Ensure it’s suitable for use over lime plaster.
- Protective sheets – Keep your workspace clean and protect areas from dust and debris.
Pro tip: Always check the curing time and strength of your lime plaster mix. A good mix will ensure durability and prevent future cracks.
Step-by-Step Repair Process
Preparing the Surface
Before you dive into repairs, make sure the surface is ready. A clean, well-prepared surface is crucial for a strong, lasting repair. Any dirt, grease, or loose material can ruin your hard work. Start by giving the area a good scrub with soap and water. A wire brush can help remove stubborn grime. Rinse thoroughly and let it dry completely.
Next, check base compaction. If the base isn’t solid, your repair won’t hold up. Press down on the surface to see if it feels firm. If it shifts or feels soft, you’ll need to compact it more. Don’t skip this step; a shaky base leads to cracks and more repairs down the line.
Finally, inspect for any cracks or holes. Fill these with a suitable filler and smooth it out. This ensures a flat surface for your repair work. Remember, a little extra effort here saves you headaches later. A well-prepared surface is the foundation of a job well done.
Applying the Repair Material
Once the surface is prepped, it’s time to mix and apply the repair material. This step is crucial for ensuring the longevity of your repair. Gather the right materials and follow these steps to get it done right.
- Ready-mix bag Choose a high-quality product suitable for your repair type. It saves time and ensures consistency.
- Mixing bucket Use a clean, sturdy bucket to prevent contamination and ensure a thorough mix.
- Mixing tool A drill with a mixing paddle attachment works best for even blending.
- Trowel Essential for applying the material smoothly and evenly across the surface.
- Water Follow the manufacturer’s instructions for the correct water-to-mix ratio.
- Protective gear Gloves and goggles keep you safe from dust and splashes.
Pro tip: Always check the curing time on the repair material package. Faster curing times might seem convenient, but they can compromise the strength and durability of the repair if not handled properly.
Finishing Touches
Once the repair material has set, it’s time to blend the repaired area with the existing plaster. Start by gently sanding the surface with fine-grit sandpaper. Your goal is to create a smooth transition between the new and old plaster. Feel the surface with your hand to ensure it’s even. If you notice any ridges or bumps, sand them down carefully.
After sanding, wipe away any dust with a damp cloth. This ensures that the surface is clean and ready for the final layer. Apply a thin coat of primer over the repaired area. This step is crucial as it helps the paint adhere properly and ensures a uniform finish. Use a small brush or roller for precision.
Once the primer is dry, paint the area to match the surrounding wall. Use the same type of paint and finish as the existing wall to avoid any noticeable differences. Apply at least two coats, allowing each to dry thoroughly. Check the color match in different lighting conditions to ensure consistency.
Finally, inspect your work. If the repaired area blends seamlessly with the rest of the wall, you’ve done it right. If not, don’t hesitate to make minor adjustments. Taking the time to perfect these finishing touches is what separates a good repair from a great one.
Troubleshooting Common Issues in Lime Plaster Repair
Even with careful preparation, things can go wrong during lime plaster repairs. Knowing how to troubleshoot common issues can save you time and frustration. Here are some typical problems you might encounter and practical solutions to get your project back on track.
- Cracks Reappearing: If cracks keep coming back, it might be due to an unstable base. Ensure the substrate is solid and well-compacted before applying new plaster. Consider using a bonding agent to improve adhesion.
- Plaster Not Adhering: If the plaster isn’t sticking, the surface might be too smooth or dusty. Roughen the area with sandpaper and clean it thoroughly before reapplying the plaster.
- Uneven Surface: An uneven finish often results from improper application. Use a trowel to apply even pressure and ensure the plaster is spread uniformly. Sand down any high spots once the plaster has dried.
- Discoloration: If the repaired area looks different, it could be due to moisture or incorrect mixing. Ensure the mix is consistent and allow the plaster to dry completely before painting. Use a primer to even out the color.
- Plaster Drying Too Quickly: Rapid drying can lead to crazing. Keep the area moist by misting it with water or covering it with damp cloths during the curing process.
- Plaster Peeling Off: Peeling can occur if the surface wasn’t primed correctly. Always use a suitable primer before applying plaster to ensure proper adhesion.
- Tools Leaving Marks: Marks from tools can ruin the finish. Use a sponge or a fine trowel for the final smoothing to avoid leaving impressions.
Preventing Future Issues
To prevent these problems from occurring, focus on preparation. Ensure your materials are high-quality and your workspace is clean. Follow recommended mixing ratios and application techniques. Regular inspections and maintenance will help catch potential issues early, keeping your lime plaster walls in excellent condition.
Safety Precautions During Repair
When repairing lime plaster, taking proper safety precautions is essential to prevent injuries. Wearing personal protective equipment (PPE) such as gloves, dust masks, and safety goggles is crucial. Ensuring proper ventilation can help reduce inhalation of lime dust and other particulates.
Understanding these safety measures not only protects you from potential hazards but also ensures a smoother repair process. Safe handling and storage of materials prevent skin irritation or chemical burns, while proper tool use minimizes the risk of accidents. Being prepared with first-aid knowledge can make a significant difference in case of exposure or minor injuries.
Personal Protective Equipment
Wearing the right personal protective equipment (PPE) is crucial during repairs. It keeps you safe from injuries and exposure to harmful substances. Here’s what you need to gear up with:
- Safety Gloves Protect your hands from cuts, abrasions, and chemicals. Choose gloves that fit well and are suitable for the materials you’re handling.
- Face Masks Essential for dusty environments or when working with hazardous fumes. Use a mask with a proper filtration rating for the task.
- Safety Goggles Shield your eyes from flying debris and splashes. Make sure they fit snugly and offer clear visibility.
- Hearing Protection Use earplugs or earmuffs when operating loud machinery. Protecting your hearing now prevents issues later.
- Steel-Toed Boots Safeguard your feet from heavy objects and sharp items. Ensure they are comfortable for long wear.
Pro tip: Always inspect your PPE before use to ensure it’s in good condition. Damaged gear won’t provide the protection you need.
Safe Handling of Materials
When you’re fixing things up, the materials you use matter a lot. Some can be dangerous if not handled right. Here’s a list of what you need and why they’re essential.
- Ready-mix bag: Easy to use and saves time. Look for one with clear mixing instructions.
- Sealant tubes: Keeps moisture out. Choose one that’s weather-resistant.
- Adhesives: For strong bonds. Pick a type suitable for the materials you’re joining.
- Paints and primers: Protect surfaces and add finish. Ensure they’re non-toxic and quick-drying.
- Solvents: Needed for cleaning. Use in well-ventilated areas and store safely.
Pro tip: Always check the expiration date on materials. Expired products can compromise your repair’s strength and durability.

Preventing Future Cracks in Lime Plaster
Preventing future cracks in lime plaster is essential for maintaining the integrity and appearance of your walls. By controlling humidity levels and using breathable paints and finishes, you can significantly reduce the risk of hairline crazing. Regular inspection and maintenance also play a crucial role in catching minor issues before they escalate.
Understanding these strategies helps ensure the longevity and durability of lime plaster surfaces. Proper wall insulation and reinforcement techniques, such as using mesh or fiber additives, can further protect against temperature fluctuations and structural stress. These preventive measures not only preserve the aesthetic appeal of your walls but also save time and money on future repairs.
Regular Maintenance Tips
To keep your lime plaster walls in top shape, start with a simple routine: inspect your walls regularly. Look for any signs of wear, like small hairline cracks or discoloration. Catching these early can prevent bigger problems down the line. If you spot any issues, address them quickly to maintain the integrity of the plaster.
Moisture is the enemy of lime plaster. Ensure that your home’s ventilation is up to scratch. Good airflow helps control humidity levels, which is crucial to prevent cracking. If you notice any damp spots, trace them back to their source and fix it. This could be as simple as sealing a window or as involved as repairing a leaky roof.
Another key aspect is to avoid using harsh chemicals when cleaning your lime plaster walls. Stick to mild soap and water. Harsh cleaners can damage the plaster and lead to deterioration over time. A gentle wipe-down with a soft cloth is usually enough to keep the walls looking fresh.
Finally, keep an eye on the structural elements of your home. Shifting foundations or settling can lead to cracks in plaster. If you suspect any movement, it might be time to call in a professional to assess the situation. Regular maintenance of these areas can save you a lot of trouble in the long run.
Cost Breakdown of Repair Materials
Repairing hairline crazing in lime plaster requires specific materials, including lime putty, sand, and water. The cost of these materials can vary, with regional differences affecting prices. It’s important to compare the cost of buying these materials separately versus purchasing a pre-mixed repair kit.
For those undertaking DIY repairs, knowing where to buy materials economically, such as local hardware stores or online suppliers, is crucial. Additionally, considering the cost of any needed tools or protective gear is important for budgeting. Being prepared for unexpected expenses can help ensure the repair process goes smoothly without financial surprises.
Budget-Friendly Options
When you’re looking to save on repair materials, consider using recycled or reclaimed materials. These can often be found at a fraction of the cost of new materials and are just as effective for many projects. Check local salvage yards or online marketplaces for bargains. Just make sure to inspect for quality to avoid any nasty surprises down the line.
Another way to cut costs is by opting for generic or store-brand products instead of name brands. Many times, these are made in the same factories and offer similar performance. Don’t get swayed by fancy packaging; focus on the specifications and reviews to ensure you’re getting good value.
Lastly, think about renting tools and equipment instead of buying them. For one-time or infrequent projects, renting can save you a lot of money. Plus, you won’t have to worry about storage or maintenance. Always compare rental prices and check for any hidden fees before committing.
When to Call in the Professionals for Lime Plaster Repairs
Sometimes, hairline crazing in lime plaster is more than just a surface issue. If you’re seeing more significant damage, it might be time to call in the experts. Professionals can assess whether the problem is cosmetic or a sign of deeper structural issues. Here’s when you should consider getting a pro involved.
- If the cracks are wider than a millimeter or extend across large areas, it could indicate structural movement that needs professional evaluation.
- When you notice cracks reappearing after multiple DIY repairs, it suggests an underlying issue that requires expert attention.
- If you suspect moisture problems, such as persistent damp spots or efflorescence, a professional can identify and address the source effectively.
- Visible bulging or detachment of plaster from the wall is a sign of serious substrate issues that need professional repair.
- For historic or listed buildings, professional guidance ensures repairs comply with preservation standards and maintain the building’s integrity.
- When you’re unsure about the cause of the damage or the best repair approach, a professional can provide a thorough assessment and solution.
Signs of Structural Concerns
Cracks that form in a stair-step pattern or appear around windows and doors can be a sign of structural stress. These patterns often indicate that the building is settling or shifting, which requires a professional’s expertise to stabilize and repair.
Moisture and Environmental Factors
Excessive moisture can weaken lime plaster, leading to more severe damage over time. Professionals can evaluate your home’s ventilation and insulation to prevent moisture-related issues, ensuring your plaster remains in good condition.
Long-Term Maintenance of Lime Plaster Walls
Maintaining lime plaster walls over the long term requires regular care and attention. Key strategies include conducting routine inspections to catch early signs of damage, using gentle cleaning methods to preserve the plaster’s integrity, and ensuring optimal environmental conditions such as appropriate humidity and temperature levels.
For DIY enthusiasts and professionals alike, understanding these maintenance techniques can significantly extend the life of lime plaster walls. By addressing minor cracks and imperfections promptly and using compatible materials for repairs, you can prevent more serious issues. Additionally, applying protective coatings or finishes can further enhance the durability and longevity of your lime plaster surfaces, making them a wise investment for any home or building project.
Routine Inspections
Regular inspections are your first line of defense against potential issues with lime plaster walls. By catching problems early, you can save yourself a lot of time and money down the road. Start by giving your walls a good look-over every few months. Pay attention to any cracks or discoloration that might indicate moisture problems or structural shifts.
Don’t just rely on what you can see. Gently tap the walls to listen for hollow sounds, which could mean the plaster is detaching from the substrate. If you find any areas that sound different, it’s time to investigate further. Ignoring these signs can lead to bigger headaches later.
Also, keep an eye on the areas around windows and doors. These spots are notorious for developing issues due to movement and moisture. If you spot any problems, address them quickly to prevent further damage. Remember, routine inspections are key to maintaining the longevity and beauty of your lime plaster walls.
Repairing Minor Damage
Minor damage in lime plaster walls can escalate quickly if ignored. Start by identifying cracks or chips during your routine inspections. Small cracks can be filled with a lime putty mix. Clean the area first, removing any loose plaster, and then apply the putty with a trowel. Make sure the surface is smooth and level with the rest of the wall.
For chips, use a similar approach. Clean the damaged area thoroughly, then apply a lime-based filler. Press it firmly into the chip and smooth it out. Allow it to dry completely before sanding it down to match the surrounding surface. Don’t rush the drying process; lime plaster needs time to set properly.
Avoid using modern fillers or paints on lime plaster. They can trap moisture, leading to more damage. Stick with traditional materials that allow the wall to breathe. Regular maintenance and prompt repairs will keep your walls in top shape for years.

Conclusion
Repairing hairline crazing in lime plaster isn’t as daunting as it might seem. With the right tools and a bit of patience, you can restore your walls to their former glory. Remember, preparation is key. Make sure you have all your materials ready before you start. Follow the steps carefully, and you’ll avoid common pitfalls.
Safety should never be an afterthought. Always wear protective gear and work in a well-ventilated area. Cutting corners here can lead to accidents or poor results. And don’t forget, prevention is better than cure. Regular maintenance and checking for early signs of cracks can save you time and money in the long run.
Finally, don’t skimp on quality when buying materials. Cheap products might save you a few bucks now, but they can lead to bigger problems down the line. Invest in good materials, and your lime plaster walls will stand the test of time. Keep these tips in mind, and you’ll handle any crazing issue like a pro.
FAQ
What causes hairline crazing in lime plaster?
Hairline crazing happens when the plaster dries too fast or wasn’t mixed properly. It can also occur if the surface wasn’t prepared right. Avoid these mistakes to prevent future issues.
Can I just paint over the crazing?
Painting over crazing is a bad idea. It won’t solve the problem and might make it worse. Fix the crazing first, then consider painting.
Do I need special tools to repair hairline crazing?
No special tools are needed. A basic trowel and a sponge should do the trick. Just make sure you use the right lime plaster mix.
How long does it take for lime plaster to dry?
Lime plaster takes time to dry, usually a few days to a week. Rushing the process can lead to more crazing. Be patient for the best results.
Is it okay to use regular plaster instead of lime plaster?
Don’t use regular plaster on lime surfaces. It won’t bond properly and can cause more damage. Stick with lime plaster for repairs.