
Introduction
Overlaying is applying a new concrete surface on top of an existing landing when the slab is solid and the structure is sound. Start over when there are extensive cracks, hollow spots, or signs of movement that would undermine a new layer. Assessing condition is the first step before choosing overlay or replacement.
Evaluate the slab by looking for cracking patterns, moisture presence, and overall stability, then plan surface preparation like cleaning and removing loose material. Prepare the surface thoroughly and repair or address cracks according to manufacturer instructions or local guidance. Bonded overlays knit to the existing concrete, while unbonded overlays use a separating layer; decide which approach fits the slab condition, expected movement, and load, then follow the relevant guidance from the product or local rules.
Key takeaways
- Assess existing landing for cracks, heave, and moisture before overlay decisions.
- Surface prep: clean thoroughly, repair defects, and create a proper profile for adherence.
- Bonded overlays require full adhesion and can stiffen the slab more than unbonded.
- Unbonded overlays allow movement but need control joints and moisture consideration.
- Tear out and replace when cracking, settlement, or chronic moisture cannot be resolved.
- Weather and curing: avoid overlay in rain or freezing temps; wear PPE and follow instructions.
Table of Contents
- Introduction
- Key takeaways
- Can You Pour New Concrete over Old Concrete?
- How to Evaluate an Existing Concrete Landing
- Bonded Vs. Unbonded Overlays — Pros, Cons and How to Choose
- Surface Preparation Steps Before Overlaying
- When to Tear Out and Start over
- Step-by-Step Workflows: Overlay Workflow Vs Full Replacement
- Risks, Common Mistakes, Weather Effects and Longevity
- Conclusion
- FAQ
Can You Pour New Concrete over Old Concrete?
Overlaying can be practical when the old slab is structurally sound and ready for a new surface. Look for signs of movement, cracks that propagate, and moisture or settlement that would rule out overlay and require restoration or replacement. Proper prep and choosing the right method are essential to a durable result.
Evaluate surface conditions first, test for moisture, remove contaminants, and repair cracks before proceeding. Roughen or scarify the old slab to improve bonding and ensure a clean, dry, and stable substrate. Decide between a bonded overlay and a thin unbonded layer with an isolating sheet based on substrate condition and anticipated movement.
When Overlaying Is Appropriate
An overlay can be a practical solution when your existing concrete landing is structurally sound but has minor surface defects. This method extends the life of the slab and improves its appearance.
To determine if overlaying is suitable, assess the condition of your concrete:
- Stable Slab: Check for signs of structural instability such as excessive deflection or heaving.
- Shallow Surface Defects: Inspect for minor cracks, chips, or spalling that can be repaired and prepared for overlaying.
- Good Drainage: Ensure water drains away from the slab to prevent moisture-related issues.
When You Should Not Overlay
Do not attempt to overlay your concrete landing if it exhibits critical failure modes that compromise its structural integrity. In such cases, removal and replacement are usually necessary.
Inspect your concrete for the following signs:
- Major Structural Cracking: Widespread or deep cracks may indicate severe damage that cannot be addressed by an overlay.
- Unstable Subbase: A weak or unstable subbase can cause movement and settling, making it unsuitable for an overlay.
- Active Movement: Any signs of ongoing movement, such as heaving or settlement, should be addressed before considering an overlay.
How to Evaluate an Existing Concrete Landing
Begin with a surface condition check for delamination, spalling, cracking severity, and laitance to decide if an overlay is feasible or the slab needs removal. Assess the surface’s ability to hold new material and note areas requiring removal.
Next, gauge structural cues such as deflection, movement in cracks, or exposed reinforcement that would push toward reinforcement or replacement. Examine the subbase, drainage, and moisture risks that could undermine an overlay. Conclude with a documented plan and consider involving a structural engineer when indicators exceed simple repairs.
Step-by-Step Process
The following steps guide you through evaluating an existing concrete landing. This process helps ensure a thorough assessment for informed decision-making.
- Preparation and Safety: Wear appropriate safety gear, including hard hat, safety glasses, and gloves. Address or mitigate any safety hazards such as unstable edges or loose debris before proceeding.
- Visual Inspection: Inspect the landing visually for obvious signs of damage like cracks, delamination, or spalling. Document all findings for future reference.
- Surface Condition Assessment: Check for delamination, spalling, cracking severity, scaling, and laitance. Determine if the surface can hold an overlay or needs removal.
- Structural Integrity Checks: Look for limb deflection, visible cracks with movement, rebar exposure, or signs of subgrade settlement. Consider consulting a structural engineer if any serious issues are present.
- Subbase and Drainage Evaluation: Evaluate subbase compaction, voids, standing water, and slope/positive drainage. Identify moisture/freeze-thaw risks that could undermine an overlay.
- Moisture Testing: Perform a simple moisture test using a calcium chloride moisture meter or check relative humidity in the concrete. Prime and bond the surface as needed for overlays.
- Decision Making: Based on your findings, establish thickness limits, bonding method, type of overlay, and expected lifespan. Outline scenarios favoring replacement over overlaying.
- Documentation: Record all findings, decisions, and the process followed for future reference and to maintain a record of the project’s progression.
Concrete Inspection: Visual Signs and Cracking Patterns
Cracks: Examine for various types of cracks to identify potential issues. Hairline cracks (typically less than 0.2mm) often result from minor shrinkage during curing, while wider cracks (>3mm) may indicate more serious problems such as structural settlement or load-related damage.
Delamination: Inspect for delaminating areas where the concrete surface has separated from its base. This could be due to improper bonding, moisture intrusion, or other issues that compromise the slab’s integrity.
Spalling and Scaling: Look for spalled or scaled areas where chunks of concrete have broken off, exposing the aggregate beneath. This can result from freeze-thaw cycles, de-icing salts, or other factors that weaken the concrete surface.
Subbase, drainage, and moisture assessment
Erosion: Inspect for signs of erosion in the subgrade, such as voids or soft spots. Erosion undermines the slab’s support and can lead to settlement or failure.
Ponding Water: Check for standing water on the surface or within the subbase. Ponding water can cause frost heave in cold climates, leading to slab damage, and may also contribute to subgrade erosion.
Rising Damp: Look for signs of rising damp, such as efflorescence (white powdery deposits) on the surface. Rising damp indicates moisture migration from the subgrade into the slab, which can compromise its integrity over time.
Load, settlement and deflection checks
Limb Deflection: Check for limb deflection by placing a straight edge across the slab’s surface. If there is visible daylight between the edge and the surface, this indicates deflection, which could suggest ongoing settlement or load-related damage.
Visible Cracks with Movement: Inspect cracks for signs of movement, such as changes in width or appearance over time. Moving cracks indicate ongoing structural issues that may require professional assessment.
Load Testing: Perform a simple load test by placing weights on the slab and observing any movement. This can help determine if the landing is experiencing ongoing damage from excessive loads.
Bonded Vs. Unbonded Overlays — Pros, Cons and How to Choose
Clarify what bonded and unbonded overlays mean in relation to the existing slab, and how each approach interacts with the substrate. Bonded overlays rely on adhesion to the concrete, while unbonded systems use an isolating layer to accommodate movement.
Weigh the advantages and limitations in terms of crack bridging, preparation requirements, and long-term performance. Consider slab stability, potential movement, the desired overlay thickness, and the intended lifespan when choosing a path. Always confirm guidance with manufacturer instructions or an engineer for complex slabs.
Bonded Overlays: Definition and Application
Bonded overlays form a robust bond with the existing slab, directly transferring loads. They are typically employed for thin overlays (1-3 inches) on interior floors where minimal movement is anticipated.
The effectiveness of bonding agents and surface profiling is crucial for proper adhesion. Ensure the surface is clean, dry, and free from contaminants for optimal results.
Bonded overlays enhance load-bearing capacity and durability, making them suitable when a thin overlay is required.
Unbonded Overlays: Definition and Application
Unbonded overlays permit independent movement between the new layer and existing slab, safeguarding both from stress. This is accomplished through the use of a separation layer or expansion joints.
This method is suitable for thicker overlays (greater than 3 inches) and areas prone to expansion/contraction, minimizing the risk of cracking due to movement.
Proper installation of the separation layer or expansion joints is vital to prevent stress accumulation and ensure the longevity of the new surface. Always follow manufacturer instructions and local building codes for optimal results.
Choosing between Bonded and Unbonded Overlays
The choice depends on overlay thickness, movement risk, and expected loads. Assess slab stability (cracks, deflection), risk of movement, desired overlay thickness, and intended lifespan for an informed decision.
For thin overlays (up to 3 inches) with minimal movement expected, choose a bonded overlay. For thick overlays (over 3 inches) or areas with significant movement, select an unbonded overlay.
Always check manufacturer recommendations and consult an engineer for complex slabs or unusual loads to ensure safety and longevity.
Surface Preparation Steps Before Overlaying
Identify essential prep tasks such as cleaning, roughening, repairing defects, and priming. Clarify how surface quality affects bonding and the expected performance of the overlay.
Include safety and contamination control, moisture testing, and proper sequencing from cleaning to priming. Outline a plan for dealing with common contaminants and ensure cure conditions are understood before applying the overlay.
Cleaning and contaminant removal
Before applying a new overlay, it’s crucial to remove all contaminants from the existing concrete surface. Contaminants like oil, paint, sealers, and salts can hinder adhesion and compromise the durability of your overlay.
Use appropriate cleaners such as detergent, degreaser, or solvent based on the type of contaminant. Mechanical scrubbing or pressure washing may be necessary to ensure thorough cleaning. Always follow the cleaner’s instructions for safe handling and disposal.
Dry-time is also important; allow sufficient time between cleaning and overlay application to prevent moisture-related issues.
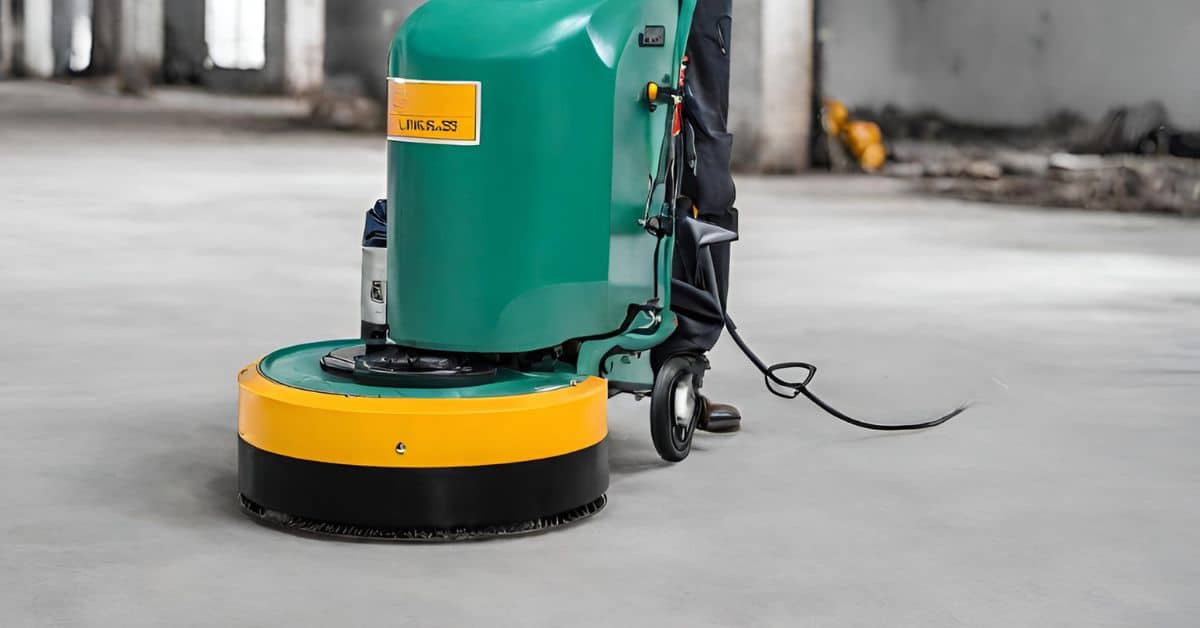
Mechanical Profiling and Roughening
The existing concrete surface must be profiled to enhance bond strength with the new overlay. This can be achieved through methods such as grinding, shot blasting, or scarifying.
Select a method based on your overlay type:
- For thin overlays (less than 1/4 inch), grinding is typically sufficient.
- Shot blasting is suitable for medium-thickness overlays (1/4 to 3 inches).
- Scarifying may be necessary for thick overlays (over 3 inches) or when dealing with heavy concrete.
Repairing cracks, spalls, and level issues
Inspect the existing concrete for cracks, spalls, or level issues. These should be repaired before overlaying to prevent them from reappearing in the new surface.
For hairline cracks, routing and sealing may suffice. For larger cracks or spalls, use a suitable patch product and follow the manufacturer’s instructions for mixing and application. Always allow the repair material to cure completely before proceeding with the overlay.
If repairs are extensive or if underlying issues (like inadequate subbase or moisture problems) are present, consider whether localized repairs will solve the problem. In some cases, a complete replacement of the landing may be necessary.
When to Tear Out and Start over
Full removal is safer when deep cracking, spalling, corrosion-damaged rebar, significant differential settlement, or ongoing moisture problems indicate substrate failure beyond repair. These conditions show that overlay cannot restore long-term performance. In borderline cases, seek a concrete contractor or structural engineer evaluation.
Overlays can restore function when the surface is flat enough, rough enough for bonding, and the substrate has sufficient strength. Removal generally costs more and takes longer but can prevent recurring issues, while overlays offer quicker results with potential sooner maintenance. For edge cases, use a practical workflow to assess moisture, bonding readiness, and reinforcement exposure, and plan remediation, permits, and disposal with professional guidance.
Red flags that necessitate full replacement
When assessing old concrete landings for repair or replacement, it’s crucial to identify signs of severe structural distress. These indicators suggest that a full removal and replacement may be necessary for long-term performance and safety.
Severe spalling, where large chunks of concrete are missing or falling off, is a clear sign that the landing needs to be replaced. This indicates significant deterioration of the concrete’s structure.
Widespread cracking with movement is another red flag. If cracks are extensive and show signs of shifting or separation, it suggests that the underlying slab has lost its integrity and may require replacement.
Eroded or missing subbase can also necessitate full replacement. The subbase provides support and stability for the concrete landing. If it’s significantly damaged or missing, it compromises the entire structure’s stability and longevity.
Cost and time trade-offs: overlay vs replacement
When deciding between an overlay and full removal for your concrete landing, consider the cost and time implications of each approach.
Overlays typically offer lower short-term costs and faster turnaround times. They can restore function and improve the surface’s condition, making them a viable option when the underlying slab’s integrity is still sound.
However, full removal and replacement often provide longer-term reliability. While they come with higher initial investments and longer project timelines, they address any underlying issues and ensure a solid foundation for future use.
To make an informed decision, it’s essential to get multiple estimates from contractors. They can help you understand the costs and timeframes involved in each option and provide expert advice based on your specific situation.
Safety, permits and regulatory considerations
Before starting any work on your concrete landing, it’s essential to consider safety, permits, and local regulations to ensure compliance and protect both you and your property.
If your project involves building modifications or structural changes, permits may be required. Check with your local authorities to understand what permits are needed for your specific situation.
Safety should always be a top priority on the jobsite. If your work involves heavy machinery or hazardous materials, implement appropriate safety measures and ensure that all equipment is in good working order.
Additionally, it’s crucial to review local building codes and regulations. These can vary by location, so consulting with local authorities can help you understand what checks and inspections may be necessary for your project.
Step-by-Step Workflows: Overlay Workflow Vs Full Replacement
Define two concise workflows: (1) Overlay Workflow — surface prep, bonding or primers, mix design, placement, screeding, finishing, curing, joints, and protective measures; (2) Demolition/Full Replacement Workflow — site prep, removal, substrate checks, formwork, reinforcement, pour, leveling, joints, and curing. Note what triggers each path.
Highlight essential prep and bonding checkpoints for overlays and for full replacements, and point out material and tooling differences. Include risk flags and clear quality checkpoints to compare outcomes between workflows.
Step-by-Step Process
The following step-by-step workflows outline the processes for both overlaying existing concrete landings and full replacement. They guide you through preparation, main work, and cleanup or final checks.
- Preparation: Inspect the landing for structural issues, damage, and moisture. Ensure safety by wearing appropriate gear (hard hat, safety glasses, gloves).
- Decision Point: If minor surface damage and no structural concerns, proceed with Overlay Workflow. If excessive damage or structural issues, proceed with Full Replacement Workflow.
- Main Work – Overlay: Prepare the surface, apply bonding agent/primer, mix concrete, place it, screed, finish, cure, and seal joints.
- Main Work – Full Replacement: Prepare the site, remove/dispose of existing concrete, verify substrate, formwork, reinforce, pour mix, level, joint, and cure.
- Cleanup/Final Checks: Inspect the finished surface for any imperfections. Ensure all tools are cleaned and stored properly.
Overlay Workflow Checklist
Use this checklist when preparing to overlay existing concrete landings.
- Surface Inspection: Check for cracks, spalls, and level issues. Repair as needed.
- Cleaning: Remove all contaminants, laitance, and loose material.
- Mechanical Profiling: Roughen the surface to enhance bonding.
- Bonding Agent/Primer Application: Apply an appropriate bonding agent according to manufacturer’s instructions.
- Mix Design: Prepare concrete mix designed for overlay applications.
- Placement: Place the concrete mix, ensuring even coverage and depth.
- Screeding and Finishing: Screed the surface to achieve desired level and finish it properly.
- Curing: Cure the overlay according to manufacturer’s instructions, monitoring for delamination or soft spots.
- Jointing: Cut control joints at specified intervals to prevent random cracking.
- Protective Measures: Apply sealers and other protective measures as required.
Quick rule: Thorough surface preparation and proper bonding techniques are crucial for a successful overlay.
Full Replacement Workflow Checklist
Use this checklist when preparing to fully replace existing concrete landings.
- Site Preparation: Ensure the site is safe and clear of debris. Wear appropriate safety gear.
- Removal/Disposal: Remove and dispose of existing concrete responsibly.
- Substrate Verification: Inspect and prepare the subgrade, ensuring it’s dry, compacted, and stable.
- Formwork Installation: Install forms according to design specifications.
- Reinforcement Placement: Place reinforcement (rebar/mesh) as per design requirements.
- Pour Mix Design: Prepare concrete mix designed for new pours, ensuring proper slump and air content.
- Leveling: Level the concrete surface to achieve desired finish.
- Jointing: Cut control joints at specified intervals to prevent random cracking.
- Curing: Cure the new pour according to manufacturer’s instructions, monitoring for edge/perimeter support.
Quick rule: Proper subgrade preparation and reinforcement installation are key to a successful full replacement.
Tools, Materials, and Inspection Checkpoints
Use this checklist for common tools, materials, and inspection points in overlay and full replacement workflows.
- Surface Preparation Tools: Wire brushes, grinders (rent/borrow) – Remove contaminants and roughen the surface.
- Overlay Materials: Bonding agents, anti-evaporation membranes – Enhance bonding and prevent moisture loss.
- Full Replacement Materials: Rebar/mesh, forms, concrete mix design – Strengthen and shape new pours.
- Safety Gear: Hard hats, safety glasses, gloves – Protect yourself from hazards.
- Inspection Points: Cleanliness, laitance removal, moisture testing, bonding agent application, surface texture check, final cure monitoring – Ensure quality at each stage.
Risks, Common Mistakes, Weather Effects and Longevity
Identify frequent installation errors such as inadequate surface prep, improper bonding, and incorrect thickness. Understand how these issues affect both overlays and replacements.
Explain how weather and curing conditions influence bond strength, timing, and long-term durability for each path. Offer mitigation strategies tied to profiling, bonding agents, mixes, cure regimes, and documented prevention steps.
Common mistakes to avoid
To ensure the longevity and success of your concrete landing project, it’s crucial to steer clear of common installation errors. These mistakes can lead to premature failures and costly repairs.
- Insufficient profiling: Inadequate surface preparation leads to poor bonding between the old and new concrete. Ensure the surface profile meets required roughness (e.g., 3-5 mils) and remove all contaminants.
- Ignoring subbase issues: Neglecting underlying problems can cause long-term instability. Thoroughly inspect the existing slab for subbase issues, cracks, and spalls before proceeding with overlay or replacement.
- Wrong overlay type choice: Selecting an inappropriate overlay based on the existing slab’s condition can result in poor performance. Consider the slab’s condition, load, and moisture when choosing between bonded and unbonded overlays.
- Inadequate curing: Improper curing allows moisture to escape too quickly, weakening the concrete. Follow manufacturer instructions for proper cure/download schedules.
Addressing these common mistakes involves thorough surface preparation, subbase inspection, appropriate overlay type selection, and adherence to recommended curing procedures.
Weather Considerations for Concrete Work
Weather conditions significantly impact concrete landing projects. Understanding temperature and moisture effects on preparation, placement, and curing ensures a durable result.
Cold Temperatures: Working below freezing weakens bond strength and slows curing. Use heating measures to protect fresh concrete in cold weather.
Hot Temperatures: High heat accelerates curing but can cause rapid moisture loss, leading to cracks. Avoid extreme heat without precautions like misting or using retarding admixtures.
Moisture and Humidity: High humidity or rain within 24 hours of placement weakens the bond. Delay work until conditions improve or use protection measures such as tarps or heat blankets.
Long-term durability and maintenance expectations
The lifespan of your concrete landing depends on various factors. Proper preparation, drainage, load management, and regular maintenance can extend its service life.
Quality of prep: Thorough surface profiling, proper bonding, and addressing subbase issues ensure a strong foundation for the overlay or replacement.
Drainage and moisture management: Proper joint placement and sealing control cracking and prevent moisture intrusion. In regions with frequent freeze-thaw cycles, consider using integral waterproofing admixtures.
Maintenance: Regularly inspect for signs of distress, clean joints, seal cracks, and perform periodic resurfacing or repairs to extend the service life of your concrete landing.
Conclusion
Choosing between overlaying and starting over hinges on safety, long-term durability, and how the existing landing performs under load. A careful evaluation now prevents costly mistakes later and helps you finish with a surface that looks and acts right for years to come.
Assess what to do by confirming the condition of the old concrete, deciding between a bonded or unbonded approach, and confirming you have a workable surface plan and weather window before you begin. In practice, proceed by confirming the old slab is stable, checking for extensive cracks or moisture, selecting the appropriate overlay method, preparing the surface properly, and following the chosen workflow step by step. Always test a small area first and follow the manufacturer instructions and local rules for materials and curing.
Avoid these common missteps: rushing the surface preparation or trying to overlay a damaged, loose, or damp slab; skipping a test patch or moisture check; and ignoring temperature, wind, or curing requirements. Safety rules are simple: wear eye and respiratory protection as needed, keep children and pets away during work, and never mix or pour materials in unsafe conditions. If you encounter significant movement, extensive cracking, or uncertain moisture behavior, call a professional rather than pushing ahead, and remember that a well-planned repair is usually cheaper than a call back for a failed overlay.
When the situation calls for professional help, do not delay. A contractor can confirm structural stability, provide the right surface preparation and curing plan, and ensure compliance with local codes. With a clear plan, careful preparation, and sensible timing, you can move forward confidently and achieve a durable, safe landing that stands up to use and weather.
FAQ
How do I assess whether the existing slab should be overlaid or replaced?
Check for wide cracks, mapping, and settlement signs. If structural cracks are extensive or the slab is uneven beyond repair, replacement may be required. Refer to manufacturer guidance and local rules for acceptable repair limits.
What surface preparations are essential before applying a new overlay?
Clean the surface thoroughly and remove loose material. Etch or profile the surface as required by the overlay system you choose. Always follow the product label and manufacturer instructions for priming, bonding, and curing steps.
What are the main advantages of bonded versus unbonded overlays?
Bonded overlays create a continuous bond to the existing slab, helping transfer loads. Unbonded overlays can allow for movement without transferring stresses. Choose based on slab condition, movement risk, and manufacturer recommendations.
How should I consider thickness and seasonal timing for a new layer?
Follow the overlay product guidelines for recommended thickness. Seasonal factors like temperature and moisture can affect curing; check the product label and local guidance for suitable pouring windows and curing practices.