
Introduction
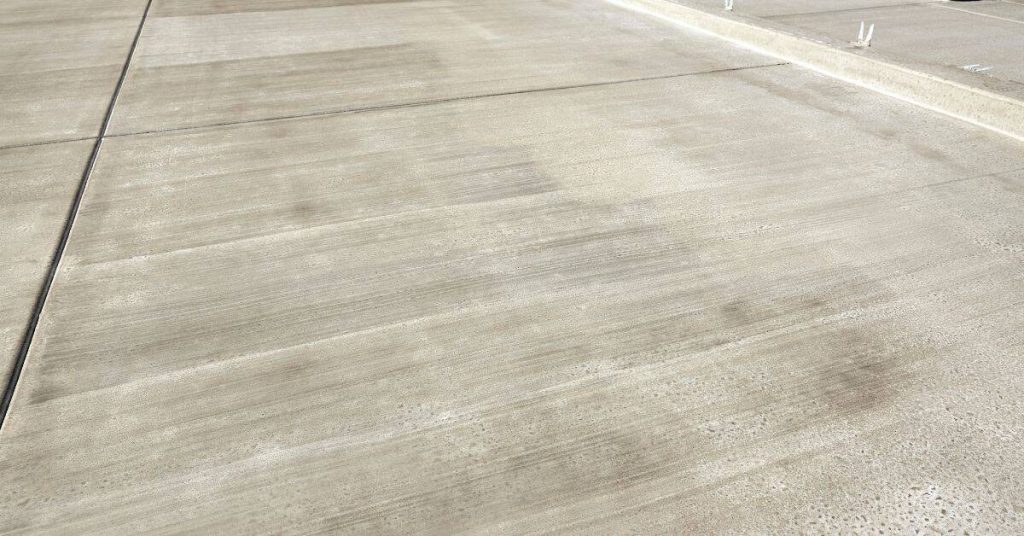
Concrete driveway thickness is the minimum concrete depth chosen to support expected loads safely. In practice, you balance what you plan to drive over it, the soil under it, and your budget. This approach keeps the project practical and within what your site can handle and your wallet can cover.
Standard thickness recommendations vary with driveway type and vehicle use, so check local guidance and reputable sources for your area. Factors like load bearing, soil type, drainage, and subgrade preparation affect the final choice, and a DIY approach should plan for proper compaction and edge support. Budget considerations often drive trade offs between concrete depth, reinforcement, and paving alternatives, so weigh long-term performance against upfront cost.
Key takeaways
- Assess expected vehicle traffic and load when selecting driveway thickness.
- Consider soil subgrade and drainage to guide practical thickness and reinforcement needs.
- Balance budget with long-term lifecycle costs to justify thickness choices.
- Evaluate different driveway types for trade-offs between durability and cost.
- Follow local codes, obtain permits, and schedule inspections before pouring.
- Plan joints, reinforcement, and curing carefully to prevent cracking and failures.
Table of Contents
- Introduction
- Key takeaways
- Choosing the Right Thickness: an Overview
- Loads and Use-Cases: Matching Thickness to Traffic
- Soil, Subgrade, and Drainage Impacts
- Materials, Mix Design, and Specifications
- Reinforcement, Joints, and Construction Techniques
- Permits, Codes, and Inspection Checklist
- Budgeting, Cost Trade-Offs, and Lifecycle Analysis
- Common Mistakes, Inspection Checkpoints, and Maintenance
- Conclusion
- FAQ
Choosing the Right Thickness: an Overview
Concrete driveway thickness must balance vehicle loads, soil support, and budget. Start by identifying expected traffic patterns and loading categories. Consider how these factors limit or extend viable thickness ranges.
Assess subgrade conditions such as bearing capacity, moisture, and drainage, and how they cap thickness options. Outline standard ranges and how reinforcement or dowels influence decisions. Conclude with a practical workflow: assess load and soil, check local codes, pick a thickness, and plan for future needs.
Key decision factors
When choosing the thickness of your concrete driveway, several project variables play a crucial role. Understanding these factors helps ensure longevity, safety, and cost-effectiveness.
Vehicle types and expected load frequency significantly impact the minimum thickness required. Typical passenger cars need less thick concrete than heavy-duty trucks or frequent traffic.
Soil condition and drainage also cap or extend viable thickness ranges. Poor soil conditions or inadequate drainage may necessitate improved subbase or increased thickness to prevent settling, cracking, or excessive maintenance.
Budget implications are another key factor. Cost per inch varies, and a thicker driveway might require additional subbase preparation. Consider both upfront costs and long-term maintenance expenses.
Assess Driveway Thickness Trade-offs
When selecting driveway thickness, balance upfront cost with long-term maintenance. Understanding the trade-off framework helps in decision-making.
Thinner concrete has a lower initial cost but may require more frequent repairs and maintenance over time. Conversely, thicker, higher-quality concrete or reinforcement options have a higher upfront cost but offer better durability and reduced long-term costs.
Evaluate lifecycle implications, including potential expansion needs, to determine the best thickness for your specific situation. Revisit initial decisions if they result in unexpected costs or excessive repairs.
Consider both immediate expenses and potential future costs to ensure a driveway that meets your needs and budget over time.
When to call a pro
While many driveway projects can be tackled as DIY, there are scenarios where professional involvement is crucial. Calling a contractor or geotechnical engineer can prevent costly mistakes and ensure project success.
If you’re unfamiliar with local soil conditions or building codes, consult a professional for guidance. Heavy-duty vehicles, frequent traffic, or poor soil conditions may also necessitate engaging a contractor to ensure proper design and installation.
Even if you plan to DIY, consulting a professional early on can save time and money by providing expert advice tailored to your specific project. If DIY efforts lead to issues, don’t hesitate to consult a professional for assessment and repair recommendations.
Loads and Use-Cases: Matching Thickness to Traffic
Driveway Thickness: Factors to Consider
Driveway thickness is primarily determined by its intended use and the loads it will bear. Consider the following:
- Use-cases: From light residential car traffic with occasional bikes, to heavy trucks and commercial access.
- Subgrade factors: Soil bearing capacity, compaction, drainage, frost risk, and slope stability. Check local soil conditions and consult a professional if needed.
Reinforcement, joints, and ground conditions influence slab thickness. Here are general guidelines:
- Light residential use: Around 4-5 inches thick.
- Standard residential use: Around 5-6 inches with reinforcement.
- Heavy-duty use: Around 7-9+ inches thick, depending on local codes and climate.
- RV/commercial use: Around 8-12+ inches thick. Always consult local codes for specific requirements.
To gauge thickness needs, look for signs of heavy truck or RV traffic in your neighborhood. A professional installer will assess the heaviest vehicle and consult local codes to provide a precise recommendation.
Passenger Cars and Light Use
For driveways subject to typical passenger vehicles and light use, ensure your design accommodates everyday vehicle loading characteristics. Most sedans and small SUVs have a gross vehicle weight rating (GVWR) ranging from 4,000 to 6,000 pounds.
To confirm your driveway can support these loads without damage or failure:
- Verify the specific weights of the vehicles using your driveway. While most passenger cars and small SUVs fall within this range, checking ensures alignment with your driveway design.
- Maintain proper tire inflation for even load distribution. Regularly check tire pressure to maintain optimal conditions.
If vehicle weights and tire pressures are within design limits, a thickness of 4–5 inches is likely sufficient for light use. However, if you observe signs of stress or cracking under typical loads, consider increasing the thickness or reinforcing the driveway.
Heavy Vehicles, RVs and Occasional Commercial Loads
When designing a driveway to accommodate heavy vehicles, RVs, or occasional commercial loads, factor in the additional stress from concentrated axle loads and turning movements.
To protect your driveway from damage under these conditions:
- Assess vehicle weights: Heavy-duty trucks, RVs, and delivery vans can weigh significantly more than passenger vehicles. Check their Gross Vehicle Weight Rating (GVWR) to ensure your driveway’s capacity.
- Maintain proper tire pressure: Regularly verify tire inflation, especially for heavy loads, to maintain optimal conditions.
- Evaluate turning radii: The turning movements of large vehicles can stress the edges of your driveway. Ensure your design accommodates their turning radii.
If vehicle weights, tire pressures, and turning radii are within design limits, consider a thicker slab, typically 6 to 8 inches with appropriate reinforcement. If you observe signs of stress or cracking under heavy loads or turning movements, upgrade the thickness or reinforce your driveway as necessary.
Driveway Design Considerations for Longevity
When planning your driveway, factor in repeated traffic, turning movements, and parked loads on edges. These aspects significantly impact your driveway’s lifespan and performance.
To optimize your driveway design:
- Analyze traffic patterns: High-frequency traffic may require additional reinforcement or adjusted joint spacing to minimize wear and tear.
- Evaluate turning radii: Ensure your driveway design accommodates vehicle turning movements without causing stress on edges.
- Consider parking habits: Account for vehicles parked on edges to prevent localized stress points.
If you observe signs of stress or cracking due to high traffic, frequent turns, or parked loads on edges, consider increasing the thickness to 7-9 inches and exploring additional reinforcement or adjusting joint spacing.
Soil, Subgrade, and Drainage Impacts
Describe how soil types like clay, silt, sand, and gravel affect subgrade strength and moisture behavior. Provide simple indicators readers can observe to gauge thickness needs. Emphasize reading soil signs without relying on guesswork.
Explain bearing capacity and climate movement such as frost heave. Discuss how these factors alter base design and edge support for heavier loads. Highlight drainage choices and how they influence settlement and cracking risks.
Soil types and what they mean for thickness
Understanding soil type is crucial in determining the required slab thickness for your concrete driveway. Soil can be broadly categorized into two main behaviors: granular (sand, gravel/rock) and cohesive (clay, silt).
Granular soils have good drainage properties. They allow water to pass through easily, reducing the risk of moisture-related issues. For these soils, you can consider a thinner slab with proper base design.
Cohesive soils, on the other hand, retain moisture and may swell or shrink depending on moisture content. These soils require a thicker slab and better drainage to prevent settlement, cracking, or heaving.
To estimate soil type, observe the stiffness of the soil, check for moisture sheen, and see if your boots sink into the ground. If unsure, consult a geotechnical engineer. Common mistakes include overlooking soil type and inadequate drainage, which can lead to slab failures over time.
Soil testing and compaction requirements
Proper soil testing ensures that your subgrade is suitable for the chosen slab thickness. It’s recommended to perform a soil test before construction, especially if you’re unsure about your soil type or behavior.
The California Bearing Ratio (CBR) test and moisture content tests are common methods used to assess soil strength and compaction. A CBR value of 80% or higher indicates that the subgrade is suitable for most driveway slabs. However, always check local codes for specific requirements.
During compaction, monitor the moisture content of the soil to ensure optimal density. If compaction fails, retest and adjust the moisture content or consider soil stabilization methods. Failing to meet compaction requirements can lead to slab settlement and cracking over time.
Surface and subsurface drainage
Effective drainage is crucial in preventing thickness-related failures of your concrete driveway. Poor drainage can cause water to pond near the slab, leading to heaving, cracking, or other issues over time.
Assess your site’s grading and observe water flow during rain. If there are any areas where water ponds near the slab area, consider installing a drainage layer such as gravel or geosynthetic materials to protect your slab from excessive moisture.
If you have a deep groundwater table (>10 feet), the risk of heaving is low. However, it’s still important to focus on surface runoff and proper base design to prevent other thickness-related failures. Common mistakes include overlooking site grading and inadequate drainage measures, which can lead to slab failures over time.
Materials, Mix Design, and Specifications
Concrete Slab Thickness for Driveways
Durable driveway slab thickness is influenced by several factors: concrete strength, aggregate choice, admixtures, and mix quality. To set a minimum thickness, consider target strength for typical residential loads. For heavier traffic or equipment, higher psi mixes (3,000–4,000) may be suitable. Aggregate size and gradation affect workability and finish at different thicknesses; larger aggregate can impact required thickness.
Admixtures and placement practices, such as slump control, proper consolidation, air content, and curing methods, influence slab performance. Consider subgrade strength, frost and drainage factors, heavy loads, or poor soils when determining thickness. Use a concrete specification checklist to guide tests, joints, reinforcement, vapor barriers, and finish requirements. Always confirm the mix design against the product label or datasheet.
Concrete Strength and Admixtures
The compressive strength of concrete significantly influences the minimum slab thickness needed for your driveway. For typical residential use, a common range is 2500 to 3000 psi (pounds per square inch). If you anticipate heavy traffic or equipment, consider higher psi mixes up to 4000 psi.
Admixtures such as air-entraining agents and water reducers can alter concrete performance. Air-entraining agents enhance durability by improving freeze-thaw resistance, making them beneficial in colder regions. Water reducers improve workability without compromising strength. Always verify that admixtures align with your project’s requirements.
Confirm local specifications for required compressive strength to comply with building codes and standards. If you expect frequent freeze-thaw cycles, consider using air-entraining agents to enhance durability.
Aggregate, Base Materials, and Subbase Selection
Choosing the right aggregates, base, and subbase materials is vital for supporting your desired slab thickness and reducing settlement risk.
- Aggregate: Choose aggregates suitable for your desired finish and workability. Larger aggregate sizes can influence required thickness, providing better support under heavy loads or poor soil conditions.
- Base Material (e.g., crushed stone): Select materials with a high crushing strength to minimize settlement. Avoid materials that may cause staining or weak bond.
- Subbase Material (e.g., sand, gravel): Opt for materials that provide good compaction and drainage. Poor subbase material can lead to cracking and other issues over time.
Material Specs and Standards Explained
Understanding which standards or product specs to reference is crucial for ensuring consistent quality and compliance with local codes.
- Concrete: Refer to ASTM C150/C150M for standard concrete specifications. Check for the appropriate mix design based on your required strength and exposure conditions.
- Aggregates: Follow ASTM D624 for aggregate material standards. Ensure aggregates meet required gradation, size, and shape criteria.
- Admixtures: Refer to ASTM C494 for chemical admixtures and ASTM C260 for air-entraining agents. Always confirm compatibility with your chosen concrete mix.
Reinforcement, Joints, and Construction Techniques
Reinforcement choices for a driveway depend on thickness and expected loads, with options such as rebar for heavier use and welded wire mesh or fiber blends for lighter slabs, while spacing and bar size change as the slab depth increases. Plan joint layouts, edge detailing, and formwork to control cracking and ensure clean transitions across thicknesses, and sequence pouring and finishing steps to suit the chosen thickness and site conditions.
Proper subgrade prep, base material, and drainage alignment support the reinforcement pattern and joint spacing, reducing curling and settlement. For thicker slabs or heavier use, opt for reinforcement that helps control crack widths and improves load transfer, and verify spacing with a qualified installer. Check the label for guidance on spacing and installation, and ensure reinforcement is properly spaced and aligned before pouring, since skipping reinforcement can lead to cracking and long-term performance issues.
Concrete Reinforcement Options
Reinforcing concrete enhances slab durability under load. Select the appropriate reinforcement type based on your slab’s thickness and expected loads.
Rebar is suitable for thick slabs (6 inches or more) and heavy loads due to its high tensile strength. Space rebar at least 18 inches apart, center-to-center, and embed it at least 2 inches from the top and bottom of the slab.
Welded wire mesh is appropriate for thinner slabs (4-6 inches) with moderate loads. It offers better distribution of reinforcement but has lower tensile strength than rebar. Follow manufacturer guidelines for spacing and embedment depth.
Fiber blends are an option for thin slabs (less than 4 inches) with light to moderate loads. They distribute micro-cracks, preventing them from growing into larger ones. Always check local building codes and ASTM standards before proceeding.
Control Joints, Expansion Joints, and Edge Details
Effective jointing minimizes cracking from slab contraction and load transfer.
Control joints should be spaced 24-36 inches apart for thick slabs (6 inches or more) with heavy loads, and 36-48 inches apart for thin slabs (less than 4 inches) with light loads. Cut them to a depth of at least one-third the slab thickness.
Expansion joints are required where there’s a change in slab direction or adjacent structures. Space them based on temperature changes and expected movements, typically every 10-20 feet.
Proper edge detailing maintains structural integrity. Use chamfers or beveled edges to reduce stress concentrations. Ensure edge restraints are secure and follow manufacturer recommendations for curing.
Concrete Pouring, Curing, and Quality Control
Proper pouring, curing, and quality control ensure slab strength and longevity.
For thick slabs or hot weather: Use staged pouring to prevent excessive curling and cracking. Allow each layer to set before proceeding (usually 24-72 hours). Extend curing times, keeping the slab moist for at least 3 days, preferably 7.
For thin slabs or cool weather: Consider accelerated curing methods like steam or heat blankets. These can reduce curing time but may require professional assistance.
Conduct regular quality checks throughout the process to ensure concrete meets specified strength and slump requirements (check local standards, e.g., ASTM C143). Inspect for proper placement, compaction, finishing, and curing before leaving the site. Address any issues promptly.
Permits, Codes, and Inspection Checklist
Clarify when a driveway permit is typically required in residential zones and how it relates to other permits. Explain the role of local authorities and what approvals are usually needed. Suggest confirming requirements early to avoid delays.
Summarize common code requirements tied to thickness, subbase, reinforcement, and joints. Advise readers to gather documentation such as site plans and strength specs. Include an inspections-oriented checklist to anticipate reviewer expectations.
Typical Permit Triggers and Documentation
Before starting your driveway project, it’s crucial to understand when a permit is required. This checklist helps you determine if you need one.
- New construction: Always requires a permit.
- Significant modification or expansion: May require a permit; check local codes.
- Changes in use: Could trigger a permit, especially if increasing vehicle traffic.
- Structural alterations: Usually need a permit, as they affect the driveway’s integrity and safety.
- Grading or utility work: May require separate grading or utility permits.
- Driveway width exceeds local limits: Could necessitate a permit; check zoning regulations.
- Driveway is part of new construction: A building permit may be required.
- Driveway involves grading or utility work: Separate grading or utility permits may be needed.
Quick rule: Always review local building codes and zoning regulations to confirm if a permit is necessary. If denied, consult with the local permitting office to address issues before reapplying.
Inspection and Acceptance Criteria
Preparing for inspections ensures a smooth process and helps avoid costly revisions. Use this checklist to ready your driveway project for inspection.
- Formwork integrity: Ensure it’s secure and properly braced.
- Base/subbase compaction: Verify proper compaction methods were used; check with local standards.
- Concrete mix specifications: Confirm the mix design meets required strength and slump levels.
- Joint placement: Ensure control joints are correctly spaced and expansion joints are properly placed.
- Reinforcement placement: Verify rebar or wire mesh is properly positioned and secured.
- Curing methods: Follow best practices to prevent cracking or delamination; check manufacturer recommendations.
- Slope for drainage: Ensure the driveway slopes away from structures to promote proper drainage.
- Load-bearing capacity: Confirm the driveway can support anticipated loads; check soil bearing capacity reports.
Quick rule: Familiarize yourself with local inspectors’ expectations and common pitfalls. Address any noted issues promptly to avoid re-inspection fees or project delays.
Budgeting, Cost Trade-Offs, and Lifecycle Analysis
Describe how thickness choices influence upfront costs and potential long-term maintenance. Compare light, standard, and heavy-duty thicknesses with reinforcement scenarios. Encourage evaluating overall durability alongside initial expense.
Explain how soil and subgrade conditions affect the cost-benefit balance. Include considerations for future maintenance such as joints, sealants, and resurfacing. Suggest a simple decision framework that factors load type, climate, budget, and expected lifespan.
Upfront Cost vs Long-Term Savings
A thicker, higher-quality concrete driveway can reduce maintenance costs over time. However, it requires a larger upfront investment.
Key factors to consider:
- – Repair frequency: Thicker slabs crack less often and have better load-bearing capacity.
- – Lifespan: A thicker slab can last 2-3 times longer than a thinner one.
- – Resale value: A well-maintained, durable driveway adds to your home’s curb appeal.
To evaluate the payback on extra investment, compare the upfront cost with the estimated maintenance and repair costs over the slab’s lifespan. For instance, if a thicker slab costs more but reduces annual maintenance by an amount, calculate how many years it would take to break even.
Cost-saving strategies and risks
Reducing costs without compromising quality involves strategic choices. Here are some practical ways:
– Value-engineering: Optimize design, materials, and construction methods.
– Selective reinforcement: Use rebar or wire mesh where needed most, rather than throughout the entire slab.
– Proper subgrade work: Compact soil well to minimize future settling.
However, be aware of associated risks:
– Inadequate reinforcement: Can lead to cracking and structural failure under heavy loads or poor soils.
– Poor subgrade preparation: May result in slab settlement, cracking, and increased maintenance costs.
Always consult with a professional if you’re unsure about these trade-offs. They can help you make informed decisions that balance cost savings with long-term durability.
Common Mistakes, Inspection Checkpoints, and Maintenance
Intro
Thickness errors in concrete slabs often result from underestimating loads, neglecting soft or expansive subgrades, and skipping necessary inspections to prevent early cracking. Key inspection points include:
- Ensuring form alignment
- Maintaining consistent edge thickness
- Achieving proper subgrade compaction
- Cleaning and sealing joints before and after pouring
DIY practice enhances value by focusing on visible cues and ongoing maintenance, such as:
- Maintaining uniform slab height
- Providing appropriate joint spacing
- Directing drainage away from structures
To ensure consistency, measure slab height at multiple points. When planning thickness, consider vehicle load, soil conditions, and local climate. For light vehicles and occasional use, a range of 4 to 6 inches may be sufficient; for heavy traffic or commercial loads, 8 to 10 inches is often required. To address common mistakes:
- Re-evaluate load and soil conditions
- Adjust thickness as needed
- Focus on early crack control
- Seal joints promptly
- Avoid salt damage during curing
Common construction and design errors
To ensure a durable concrete driveway, avoid these common mistakes:
- Inadequate base: A weak base leads to pavement failure. Check: Base material label/datasheet.
- Poor drainage: Water buildup can cause cracks and deterioration. Quick check: Observe water flow after rain.
- Undersized thickness: Insufficient thickness cannot support expected loads. Pro check: Measure slab thickness per load type and soil conditions.
- Improper curing: Inadequate curing leads to weak, brittle concrete. Check: Cure/water protection plans.
Heavy loads or soft subgrade may require increased thickness and reinforcement. Poor drainage needs proper slope and additional measures.
Visual checkpoints before and after pour
Use this checklist to confirm work quality during and after pouring:
- Form alignment: Misaligned forms cause uneven surfaces. Check: Visually inspect formwork.
- Edge thickness consistency: Irregular edges lead to cracking. Pro check: Measure edge thickness.
- Subgrade compaction: Poor compaction causes settlement and cracks. Check: Subgrade before pouring.
- Reinforcement/joints: Missing or improperly placed reinforcement causes cracking. Check: Observe reinforcement or control joints.
- Clean slab base: Debris on the base weakens concrete. Quick check: Inspect slab base for debris.
- Fill-stator issues: Problems with fill-stators cause voids in the concrete. Check: Fill-stators before pouring.
- Levelness and proper joint formation: Irregularities indicate problems with the pour. Quick check: Walk slab after pour.
Quick rule: Address any identified problems immediately or postpone the pour until resolved.
Routine maintenance and repair triggers
Regularly inspect your driveway to maintain its longevity:
- Timely crack control: Cracks allow water penetration, leading to deterioration. Quick check: Spot-check for new cracks.
- Sealing schedules: Sealer protects the surface from damage and wear. Pro check: Check sealant condition regularly.
- Joint maintenance: Properly functioning joints prevent cracking. Check: Monitor joint performance.
- Salt damage: De-icing salts can cause scaling and spalling. Quick check: Observe surface for signs of damage or wear.
- Heavy loads/curb impact during early cure: Early damage weakens the concrete. Pro check: Avoid heavy loads and impacts during curing.
Quick rule: Promptly repair minor cracks to prevent further deterioration. Consider full replacement if repairs are insufficient for significant damage or multiple cracks.
Conclusion
The core idea is to choose a concrete driveway thickness that meets load, soil, and climate realities while keeping safety, durability, and curb appeal in balance. Making a clear plan now helps prevent costly follow-up work and protects your property for years to come.
Validate your plan with a simple, practical flow: confirm expected loads and traffic, assess soil drainage and subgrade conditions, choose an appropriate thickness, verify any permits or codes, plan reinforcement and joints, and set a realistic schedule for form work, pouring, and curing. Confirm material quality, mix design, and installation steps with manufacturer instructions and local rules before you begin, then document the checks in the order you will execute them.
Common mistakes to avoid include underestimating the impact of soil drainage on thickness choices, skipping or poorly detailing joints and reinforcement, and rushing the cure or weather-sensitive steps. Always protect the work area from moisture and temperature extremes during curing, and follow clear safety rules for form removal, edge support, and equipment use.
If you encounter unusual soil conditions, complex loads, or strict permitting requirements, or if you’re unsure about the right thickness for your site, it makes sense to consult a qualified contractor or engineer. With careful planning, steady progress, and attention to safety, you can achieve a durable, smooth driveway that performs well and remains visually solid.
FAQ
What is a standard thickness recommendation, and what factors influence it?
There is no single universal standard. Thickness depends on expected loads, soil conditions, and the type of vehicles that will use the driveway. Check manufacturer instructions, local guidance, or a qualified contractor for guidance tailored to your site.
How do budget considerations affect driveway thickness and type?
Budget constraints influence the level of reinforcement, subgrade preparation, and the overall design. Heavier traffic or poorer soils may require more robust construction, which increases cost, while lighter use and better soils can reduce material and labor needs.
What are the benefits and drawbacks of different driveway types in relation to thickness and drainage?
Solid, monolithic concrete typically offers durability with standard thickness choices but may require drainage planning to prevent erosion. Pavers or reinforced slabs can allow for jointed drainage and repair options but may demand more precise installation. Choose based on load expectations, drainage needs, and long-term maintenance considerations.
What are some proper reinforcement techniques and drainage considerations?
Reinforcement should align with load and joint design, and follow manufacturer instructions or local guidelines. Ensure adequate slope and drainage features to prevent standing water, and consult the installation guidelines for any required detailing or accessories.