
Introduction
Protecting PEX in concrete means keeping the tubing safe from damage and movement while it sits in the slab. Sleeving, proper routing, and careful bending help prevent kinks and cracks as the concrete cures. Work carefully on site, verify that sleeves or guards are used where required and follow local guidelines.
Use protective sleeves or conduit where the PEX passes through slabs or near edges, and choose materials that won’t snag during pouring. Maintain a generous bend radius and avoid sharp turns in concrete-embedded runs; if you must change direction, do it with gradual curves and support. Plan for expansion and contraction by leaving modest slack or using expansion loops where the layout allows, and always check the tubing manufacturer and local code requirements before pouring.
Key takeaways
- Sleeve PEX through rigid or rated protective sleeves before concrete pour to prevent abrasion.
- Maintain proper bend radius by minimizing tight turns near joints and avoiding kinks during pours.
- Select sleeves extending above slab surface and secure to form to stay aligned.
- Plan for thermal expansion by routing PEX with slack and avoiding interference with structures.
- Inspect sleeves and bends during pour and verify no damage after it sets.
- Safety: depressurize, cap ends, and keep debris out of sleeves to prevent embedding hazards.
Table of Contents
- Introduction
- Key takeaways
- Types of PEX and How They Behave in Concrete
- Why Sleeving PEX in Concrete Is Essential
- Choosing the Right Sleeve Material and Dimensions
- Proper Sleeve Installation Techniques for Concrete Pours
- Bend Radius, Layout, and Supporting PEX in Slabs
- Managing Thermal Expansion and Contraction in Slabs
- Common Installation Pitfalls, Safety, and Inspection Checkpoints
- Codes, Material Specs, Cost Implications, and Tools Checklist
- Conclusion
- FAQ
Types of PEX and How They Behave in Concrete
PEX comes in several crosslinking types, each with its own behavior in concrete. The differences matter for slab work, especially around flexibility, long term stability, and how heat from embedded systems affects the tube. Expect variations in how easily you bend, recover from movement, and resist deformation during pour and cure.
Practically, the type you choose influences bend radius, sleeving navigation, and how prone the tube is to kinking. Temperature changes in a concrete slab affect each type differently, which in turn shapes where you place joints and expansion sleeves. When maintenance is needed, consider how easy leaks will be to detect and access if the line is embedded.
PEX types and characteristics
PEX comes in three main types: A, B, and C. Each has unique properties that affect their performance in concrete slabs.
PEX-A is made by Engel method, offering high flexibility and thermal memory. It’s excellent for embedded applications but can be more expensive.
PEX-B, produced via Sioplas process, has medium flexibility and good thermal memory. It’s cheaper than PEX-A but may not perform as well long-term in concrete.
PEX-C, made by Percor method, is the least flexible with low thermal memory. It’s the cheapest option but should be avoided for slab work due to its brittleness risk and poor performance under heat.
Which PEX to choose for slab installations
When choosing PEX for concrete slabs, consider these factors:
Durability: PEX-A offers the best long-term stability in concrete. PEX-B is a good balance between cost and performance, while PEX-C should be avoided.
Freeze resistance: All PEX types can freeze without bursting, but PEX-A’s superior flexibility helps it withstand more cycles.
Compatibility with fittings: Check manufacturer guidance to ensure your chosen PEX type is compatible with required fittings. Local codes may also dictate approved types.
Why Sleeving PEX in Concrete Is Essential
Sleeves provide a physical shield between PEX and concrete, reducing abrasion and protecting bends from concrete pressure. They also isolate the pipe at expansion joints to accommodate movement and limit leak risk. Sleeves lay the groundwork for easier future repairs or replacement options.
Material choice, sizing, and installation practices matter. Verify sleeve wall thickness and inner diameter clearances and ensure chemical compatibility with PEX and curing compounds. During pre-pour planning and the pour itself, check alignment, embedment depth, and seal any ends to prevent concrete intrusion before cure.
Primary functions of sleeves
PEX sleeves in concrete serve multiple protective and functional roles. First, they act as a physical shield, preventing direct contact with the concrete. This is crucial as concrete can abrade PEX over time, leading to leaks.
Sleeves also allow for movement at control joints. Concrete shrinks and expands due to temperature changes. Without sleeves, this movement could cause the PEX to kink or break. Sleeves accommodate these movements, reducing stress on the pipe.
Lastly, sleeves provide a clear path for service access. If repairs are needed in the future, sleeves make it easier to locate and extract the damaged section of PEX.
Risks when sleeving is omitted or improper
Omitting sleeves or installing them incorrectly can lead to several problems. Without sleeves, PEX is directly exposed to concrete’s abrasive nature, leading to premature pipe failure.
Improperly installed sleeves can constrain the PEX’s expansion and contraction, causing stress on the pipe that can lead to leaks or breaks. Additionally, without proper isolation at control joints, concrete intrusion into the PEX is possible, further increasing leak risk.
Proper sleeving also provides thermal isolation for the PEX. Without it, extreme temperatures in the concrete could damage the PEX over time. Moreover, improper sleeving can make future repairs or replacement difficult and costly.
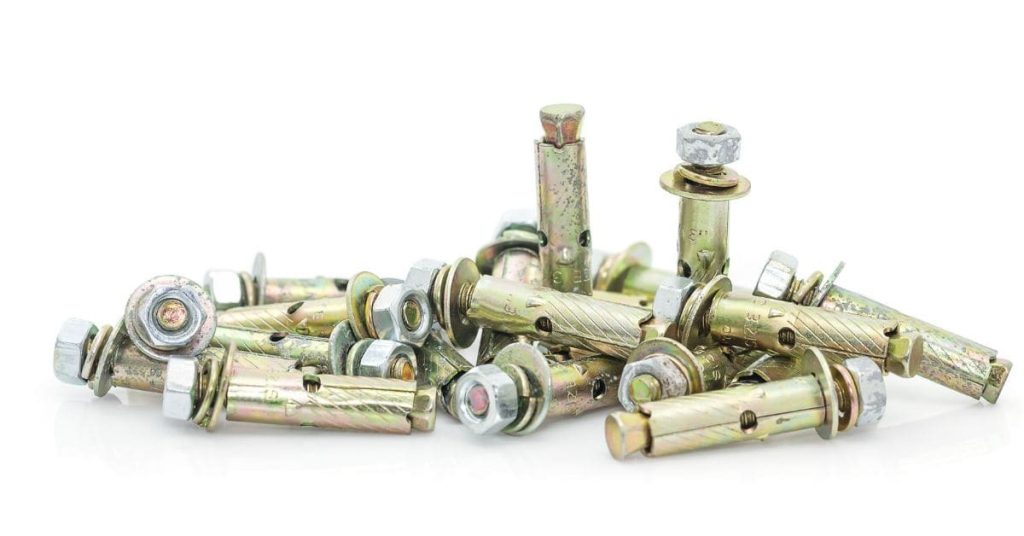
Choosing the Right Sleeve Material and Dimensions
Common sleeve materials include PVC, CPVC, HDPE, and polypropylene. Compare how each material interacts with PEX, concrete, and any additives you use. Consider how chemical exposure and heat from the slab might affect the sleeve over time.
Key dimensions matter: inner diameter should fit the PEX with generous clearance, wall thickness supports during pour, and enough room for bends. Plan bend radii with the sleeve in mind to prevent kinking, and note how sealing or bonding at joints will be executed. Look at code references and fire/expansion considerations when choosing a sleeve and size.
Sleeve material options and pros/cons
The sleeve material you choose affects your conduit’s durability, flexibility, and appearance. Here are your options:
- Smooth HDPE (High-Density Polyethylene): Used for underground or direct burial installations. Key spec: Thickness between 1/8″ to 3/8″. Tip: Avoid thin sleeves; they’re prone to punctures.
- Corrugated Conduit: Ideal for above-ground, exposed runs. Key spec: Wall thickness typically 0.060″ – 0.125″. Tip: Thicker walls offer more protection but are stiffer.
- Foam Sleeves: Used for protecting conduit from sharp edges or vibration. Key spec: Density around 1-3 lb/ft³. Tip: Not a standalone solution; use with other sleeves for added protection.
- Pre-slit Sections: Easier to install around obstacles. Key spec: Slit width varies, but 1″ – 2″ is common. Tip: Wider slits make installation faster but offer less protection.
- Cheap PVC or Plastic Tubing: Avoid! They’re too flexible, kink easily, and won’t protect your conduit. Safety tip: They can crack under pressure, exposing wires.
Pro tip: Buy sleeves in bulk for better prices. Store them off the ground to prevent moisture absorption. Always follow manufacturer’s mixing instructions for best results.
Sizing, wall thickness, and what to verify
The sleeve’s internal diameter (ID) must be larger than the pipe’s outer diameter (OD). This allows for movement. Here’s what you need to check:
Internal Diameter (ID): Ensure it’s at least 1/4″ to 3/8″ bigger than your pipe’s OD. This range gives enough room for expansion and contraction.
Wall Thickness: Verify with the manufacturer or local codes. It should be thick enough to provide strength, but not so much that it restricts movement. A good starting point is 1/8″ to 3/16″.
Also, check the slit type. Some sleeves have one slit, others have two. One-slit sleeves are easier to install but may leak if not installed correctly. Two-slit sleeves are more secure but harder to install.
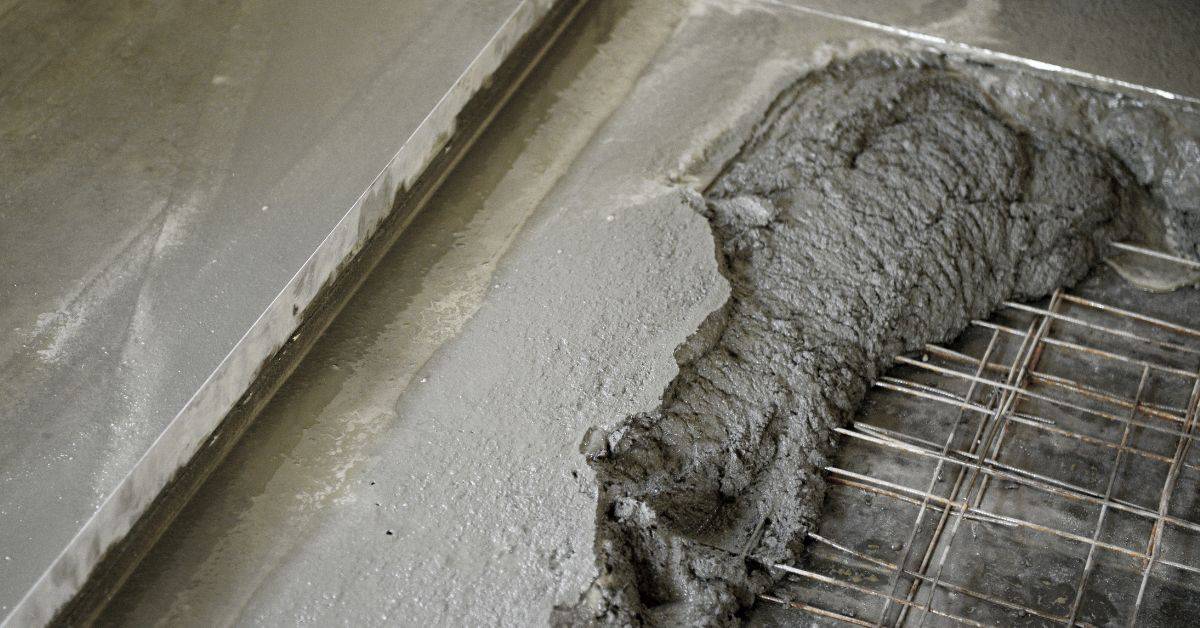
Proper Sleeve Installation Techniques for Concrete Pours
Locate sleeves before you set rebar and embeds, marking exact positions to avoid clashes and ensure continuous protection. Choose sleeves with appropriate diameter and wall thickness for your PEX and the concrete exposure. Use rigid supports to hold sleeves in place during the pour.
Allow for movement and expansion by leaving proper clearances and using end caps or membrane plugs at ends. Protect endpoints from concrete spray and maintain alignment through the pour. Document sleeve positions in as-built drawings for future reference.
Placement at joints, penetrations, and transitions
Mark sleeve positions carefully. They should line up with control/expansion joints to allow for movement.
At wall and floor penetrations: Place sleeves so they’re flush with the surface. This keeps PEX protected and allows for easy routing.
Where slab meets other elements, like walls or columns, sleeve placement is crucial. Ensure sleeves are centered and aligned to maintain structural integrity and allow for PEX movement.
Securing and protecting sleeves during the pour
Use sleeve clips or ties to secure sleeves to rebar. This keeps them from moving during the pour.
Avoid using stakes alone. They can cause sleeve misalignment or damage. Instead, use temporary forms that support sleeves and keep them in place.
To prevent concrete intrusion, seal both ends of sleeves with end caps or membrane plugs before pouring. This keeps concrete out and maintains PEX protection.
Bend Radius, Layout, and Supporting PEX in Slabs
Define bend radii per PEX type and sleeve size, avoiding sharp turns that can kink or restrict flow. Plan the slab layout with spacing between runs and decide between continuous loops or staged runs to minimize tension. Keep bends away from joints or fixtures where possible.
Use sleeves and protection at critical points, align with rebar chairs, and shield PEX from concrete slurry. Secure PEX with appropriate supports to prevent movement while allowing for expansion, and leave slack to absorb temperature-driven motion. After installation, review the layout to confirm there are no tight spots near sleeves or ends.
Why bend radius matters and common effects of tight bends
Listen up, DIYer. Bending PEX too tight is like kinking a garden hose – it’ll mess with your water flow and stress the pipe.
Tight bends can cause:
- Kinking: The pipe twists on itself, blocking water flow. Check your pipe manufacturer’s instructions for minimum bend radii to avoid this.
- Restricted flow: Even if it doesn’t kink, a tight bend can squeeze the pipe, reducing water pressure and flow. Not good when you’re trying to fill that hot tub!
- Stress: Tight bends put extra strain on the pipe, weakening it over time. This can shorten your PEX’s service life, leaving you with leaks or worse – a burst pipe.
So, check those bend radius recommendations before you start bending. It’s worth the extra time to get it right and avoid headaches later on.
Supporting bends and transitions during installation
When installing PEX in slabs, maintaining consistent bend radii is crucial. Here’s how to support those bends and keep ’em steady:
Bend supports, like foam or plastic blocks, are your best friends here. They maintain the radius and prevent movement during the pour. Place them every 12-18 inches along the pipe.
Preformed bend aids, clips, and holders can also help. These keep the bends in place and ensure consistent radii. Just make sure they’re compatible with your PEX and support size. Check the manufacturer’s instructions to be safe.
Managing Thermal Expansion and Contraction in Slabs
PEX in slabs expands and contracts with temperature, which can stress fittings and bends if restrained. Understanding this movement helps prevent leaks and reduces wear on sleeves. Plan for how concrete interacts with the tubing over the life of the slab.
Use passive design moves like longer sleeves and loops, and locate PEX away from fixed points. Consider active design options such as expansion joints and planned gaps, plus accessibility for serviceable sections. Verify bend radii and ensure sleeving protects against kink and that no rigid items restrain movement.
Design solutions: expansion joints, slip sleeves, and loops
PEX in slabs expands and contracts with heat and cold. To manage this movement, consider these design solutions:
Expansion Joints: Incorporate planned gaps or joints in the slab to allow for thermal expansion. Align these with radiant heating/cooling zones.
Slip Sleeves: Use slip sleeves at critical points where PEX passes through concrete. This allows the pipe to slide within the sleeve as it expands and contracts.
Loops and Slack: Design mid-run flexibility with loops or zig-zag paths. Keep these away from fixed points to absorb movement without compromising performance.
Practical installation tactics to allow movement
During installation, ensure PEX has room to move:
Sleeve Clearances: Maintain generous sleeve lengths and oversized bends. This gives PEX space to expand and contract without stressing fittings or sleeves.
Avoid Embedding Fittings: Do not embed fittings in concrete. Keep them clear of the pour to avoid locking PEX in place during temperature changes.
Sliding at Terminations: Allow for sliding at terminations using slip couplings or other approved methods. This lets PEX move freely where it exits the slab.
Common Installation Pitfalls, Safety, and Inspection Checkpoints
Avoid common mistakes like overbending PEX, skipping sleeves, or allowing concrete to contact the PEX directly. Keep runs clear of rebar and avoid near cold joints. Plan together with other trades to reduce conflicts during the pour.
Follow sleeve and protection protocols, double-check sleeve sizing and placement, and seal penetrations to prevent intrusion. Map bend radii on drawings and document them for future work. Prior to pouring, perform safety checks and a go/no-go sign-off, then inspect for kinks or crushed sections after cure.
Typical DIY and installer mistakes to avoid
Use this checklist before, during, and after your concrete work to prevent common errors that can lead to costly rework.
- Burying fittings too deep: Check that all fittings are at least 2 inches below the final slab surface. If buried deeper, they may not be accessible for future repairs or modifications.
- Undersized or missing sleeves: Verify that all necessary sleeves are installed and sized appropriately (as per your plans) to accommodate rebar, post-tension cables, or other penetrations.
- Inadequate supports for forms: Ensure that formwork is properly braced and supported. Check that braces are tight and plumb, and that the forms are level and square.
- Improper concrete mix design: Double-check that you’re using the correct mix design (as per your plans or local requirements) to ensure proper strength and durability.
- Insufficient curing time: Confirm that concrete has been cured for at least 7 days before removing forms. Inadequate curing can lead to weak, cracked, or discolored surfaces.
- Not compacting concrete properly: Make sure that the concrete is properly consolidated using a vibrator or other approved method to remove air pockets and ensure even distribution of materials.
- Improper pressure testing: Before backfilling, perform a hydrostatic pressure test on waterproofing membranes or systems. Check manufacturer instructions for proper testing procedures.
- Ignoring expansion joints: Install expansion joints as per your plans to allow for natural movement of the concrete and prevent cracking due to temperature changes or settling.
Quick rule: Always follow manufacturer instructions, local building codes, and best practices to ensure a durable, long-lasting concrete installation.
Safety, testing, and visual checkpoints before pouring
Before you start mixing concrete, use this checklist to ensure everything is ready. This will help prevent costly mistakes and delays.
- Verify pressure test: Check that the water supply has passed a pressure test of at least 50 psi. Low pressure can cause issues with mixing and pumping concrete.
- Check sleeve continuity: Ensure all sleeves are properly aligned and continuous from top to bottom. Misaligned or broken sleeves can lead to damaged reinforcement and weak spots in the slab.
- Secure tubing layout: Make sure all tubing for vibrators, air lines, etc., is securely laid out and won’t get disturbed during the pour. Displaced tubing can cause voids and honeycombing in the concrete.
- Protect exposed ends: Cover any exposed reinforcement ends with cardboard or plastic to prevent them from rusting before the concrete is poured. Rust can weaken the reinforcement and compromise the structure’s integrity.
- Check formwork alignment: Ensure forms are properly aligned, level, and plumb. Misaligned forms can result in an uneven slab surface that may require costly reworking.
- Inspect drainage: Verify that all drains and weep holes are clear and unobstructed. Blockages can cause water to pond on the surface, leading to scaling and other defects.
- Check concrete mix design: Ensure you have the correct mix design for your project’s requirements. Using the wrong mix can result in a slab that doesn’t meet strength or durability needs.
- Test concrete slump: Before pouring, test the slump of your concrete to ensure it meets the required workability. Incorrect slump can lead to placement issues and poor consolidation.
Quick rule: Always double-check that all safety measures are in place before starting any concrete pour. Safety first, then quality.
Codes, Material Specs, Cost Implications, and Tools Checklist
Identify where to find applicable codes and standards that govern PEX in concrete, sleeving requirements, bend radii, and inspections. Review official documents and updates from the relevant authorities. Look up local amendments that can affect installation.
Outline material specs for sleeves and protection, including materials, wall thickness, and coatings that resist corrosion and are compatible with PEX. Compare upfront costs to long-term maintenance and risk mitigation, and document choices for code compliance and future remodels. Use a practical tools and materials checklist and conduct a pre-pour verification workflow to keep the project on track.
Material specs and standards to verify
Before you start any concrete work, use this checklist to ensure your materials meet the required standards. This will save you time, money, and potential rework.
- Concrete Mix Design: Check the mix design on the ready-mix ticket or bag label. It should match what’s specified in your plans (e.g., 3000 psi, 4000 psi).
- Cement Type: Ensure you’re using the correct type of cement (Type I, II, III, etc.) as per your project’s requirements.
- Water-Cement Ratio: Verify that the water-cement ratio is within acceptable limits (typically 0.45 to 0.60).
- Admixtures: Check if admixtures are required and ensure they’re added as per manufacturer’s instructions.
- Aggregate Size: Confirm the aggregate size (coarse and fine) matches what’s specified in your mix design.
- Concrete Cover: Measure and verify that concrete cover over reinforcement meets code requirements (usually 2″ to 4″).
- Reinforcement Bars: Check bar sizes, spacing, and embedment lengths against your plans. Ensure they’re properly tied and supported.
- Formwork: Inspect formwork for proper alignment, plumb, level, and support. Check that it’s strong enough to withstand concrete pressure.
Quick rule: Always check your materials against your plans and local codes before pouring. This ensures you’re using the right stuff in the right way, saving you from costly mistakes.
Cost vs long-term risk and maintenance considerations
Use this checklist before you start pouring concrete to ensure you’re making smart decisions that will save you money in the long run.
- Check reinforcement spacing: Ensure rebar is spaced no more than 12″ on center for slabs and 6″ for footings. Too much space can lead to cracking under load.
- Verify proper embedment: Check that all reinforcing bars are properly embedded in the concrete, at least 3″ from the surface, to prevent corrosion and maintain structural integrity.
- Inspect formwork: Ensure forms are level, plumb, and braced properly. Warped or poorly braced forms can cause uneven settling and cracking.
- Check joint spacing: Ensure control joints are cut at least 1/4″ deep every 5′ to 7′ to control where cracks will form due to shrinkage.
- Verify water-cement ratio: Check that the mix design has a water-cement ratio between 0.4 and 0.6 for proper strength development and durability.
- Inspect drainage: Ensure there’s adequate drainage around the concrete to prevent water from ponding, which can lead to deterioration over time.
- Check curing method: Plan for proper curing, either with a curing compound or wet burlap, to maintain moisture and promote strength development.
- Verify aggregate size: Ensure the maximum aggregate size is no more than 3/4″ for slabs on grade and 1.5″ for footings to prevent segregation and ensure proper compaction.
Quick rule: Always consider the total lifecycle cost, not just the upfront investment. Proper sleeving, supports, and maintenance can save you big bucks in repairs down the road.
Tools and materials checklist
Before you start your concrete project, use this checklist to ensure you have everything needed and that each item is compatible with your specific job. This will help prevent costly mistakes and rework.
- Concrete Mix: Verify it meets local standards (check product label or manufacturer).
- Reinforcement Sleeves: Ensure they match the size of your rebar (measure before purchasing).
- Formwork Supports: Check they are suitable for your form’s height and weight (consult manufacturer guidelines).
- Concrete Clips: Confirm they fit your form ties or anchors (check product compatibility).
- Concrete Cutters: Make sure they’re the right size for your job (measure cuts needed).
- Pressure Test Equipment: Check it’s calibrated and suitable for your pipe or structure (follow manufacturer instructions).
- Marking Tools: Ensure you have a reliable way to mark levels, forms, and cuts (test before use).
- Concrete Vibrator: Confirm it’s the right size for your pour (check vibrator head size).
Quick rule: Always double-check product compatibility and local standards to avoid expensive rework.
Conclusion
Protecting PEX in concrete matters for safety, durability, and a clean look. When you do it right, you reduce the chance of leaks, cracks, and costly repairs later on.
First, confirm you’re using the correct PEX and sleeve for concrete work and then check bend radii and layout before any pour. Do a dry run, mark all sleeves and exits, verify sleeve material and dimensions match the spec, and confirm there’s proper clearance around each line. Secure and support PEX in the slab area, ensure sleeves stop water paths where needed, and re-check alignment after any adjustments. Then pour only when you’ve double-checked the reinforcement, ties, and pour sequence, and perform a final inspection against the applicable codes and material specs. If anything looks uncertain, pause and verify with the plan or a professional before proceeding.
Common mistakes to avoid include skipping the sleeve or using the wrong material, ignoring bend radius and layout, and rushing the pour without testing movement or expansion provisions. Safety rules are simple: keep hot work away from drilling and sleeving until sleeves are secure, confirm clean interior sleeve surfaces, and test for movement or misalignment after concrete sets. Don’t skip inspections or skip codes checks; these save you time and money in the long run.
If you’re unsure about sleeve integrity, code compliance, or expansion management, call a pro before proceeding. Otherwise, follow the checks you’ve set, stay deliberate, and push forward with confidence—your concrete install should stay reliable for years to come.
FAQ
What’s the best way to protect PEX in a concrete slab?
Use a protective sleeve or wrap around the PEX before the pour. Check the sleeve material’s compatibility with concrete and whether it has a smooth inside surface to minimize friction and damage.
How should I handle bends in PEX inside a slab so it doesn’t kink or fail?
Bend PEX within the allowable bend radius set by the manufacturer. Use gentle, gradual curves and avoid sharp bends. If you’re unsure, consult the tubing label or instructions for the exact bend radius requirements.
How do I manage expansion and contraction of PEX embedded in concrete?
Pex will move with temperature, so provide slack or bridging where possible and avoid over-constraining runs. Use sleeves or trajectory planning to give the tube room to expand and contract without rubbing against concrete or sleeves. Always verify expansion guidance on the product label or datasheet.
What materials are typically used to protect PEX in concrete, and how do I choose?
common options include protective sleeves and tape or wrap systems. Choose materials that are rated for concrete contact and compatible with PEX. If in doubt, read the manufacturer instructions and local rules to ensure proper protection and clearance.