
Introduction
Plaster and joint compound are traditional wall repair options that serve different purposes.
Plaster gives a hard, durable finish when applied over lath or backing, while joint compound is a softer patch material for seams and small repairs. Your choice depends on the location, the surface, and the level of patch you need.
In many repairs, you’ll mix both to get a smooth, sturdy result. Start with the joint compound for seams and shallow repairs, then skim with plaster or a plaster substitute if you want a tougher finish. Always check the product label, manufacturer instructions, and local rules for mixing ratios, application methods, and drying times.
Key takeaways
- Inspect substrate for moisture before repairs to prevent future plaster or joint failure.
- Match repair materials to existing walls: plaster with plaster, joint compound with drywall.
- Crack patterns guide technique: wide, irregular cracks require different repair than hairline fractures.
- Prevent cracks by addressing moisture, movement, and proper substrate bonding surfaces.
- Safety: wear eye protection and a dust mask when cutting or sanding repairs.
- Drying or curing times depend on product and environment; follow label directions.
Table of Contents
- Introduction
- Key takeaways
- Quick Comparison: What Plaster and Joint Compound Are
- Why Walls Crack: Underlying Causes and Crack Patterns
- How Plaster Cracks: Typical Failure Modes and Indicators
- How Joint Compound Cracks: Typical Failure Modes and Indicators
- Substrate Compatibility and Bonding Differences
- Step-by-Step Repair Guides for Common Crack Types
- Tools and Materials Checklist Plus Visual Checkpoints
- Finishing, Paint Compatibility, and Preventing Future Cracks
- Conclusion
- FAQ
Quick Comparison: What Plaster and Joint Compound Are
Plaster and joint compound are both used to finish and repair walls, but they come from different families. Plaster is a traditional lime or gypsum-based mix, while joint compound is designed for drywall joints and repairs. You’ll typically find plaster in older homes and joint compound in modern constructions or renovations.
In practice, plaster creates a harder, denser surface and may require more curing time, while joint compound goes on lighter and sands easier. Read product labels or manufacturer instructions to confirm what you’re buying and how to install it safely.
Definitions and common names
Plaster is a mix of gypsum, water, and sometimes additives like clay. It’s often called ‘gypsum plaster’ or just ‘plaster’. In the UK, it might be referred to as ‘plaster of Paris’.
Joint compound, on the other hand, is primarily made from gypsum and water with added fillers and binders. You’ll usually see it labeled as ‘joint compound’, ‘mud’ (in the US), or ‘spackling compound’.
Plaster of Paris is a specific type of plaster that sets quickly, often used for minor repairs.
Typical use cases
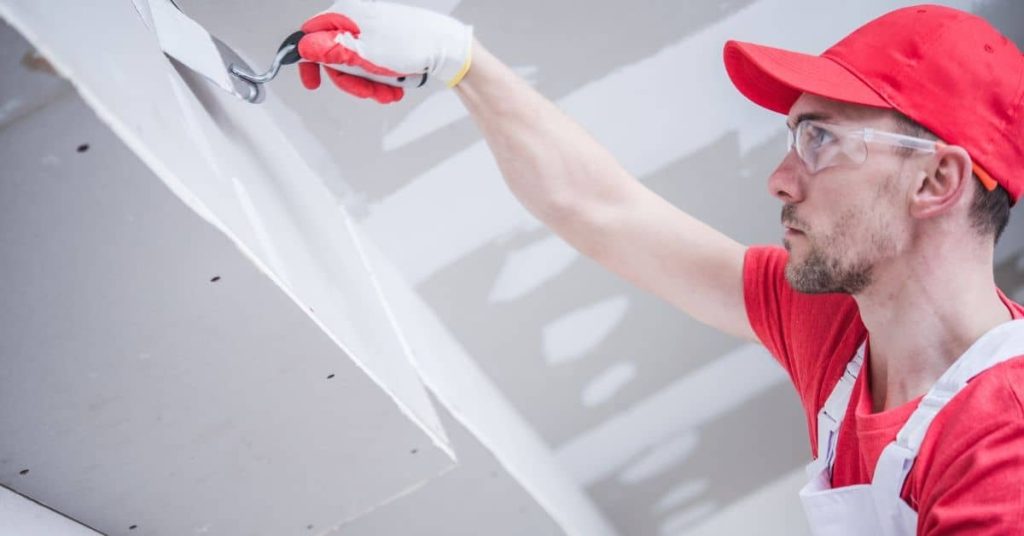
Plaster is typically used for applying a smooth, even finish on walls and ceilings. It’s great for creating a seamless look because it can be applied thickly without cracking.
Joint compound, however, is designed to fill joints between drywall or plasterboard sheets. It’s not meant to be applied as a finish coat but rather to create a smooth surface for painting.
Plaster is often used in older homes and historic restorations due to its traditional aesthetic. Joint compound is standard in modern construction.
Why Walls Crack: Underlying Causes and Crack Patterns
Cracks form for several reasons: movement, moisture, thermal changes, or installation mistakes. Each cause leaves a telltale crack pattern you can recognize with a careful look. Identifying the root cause helps you choose the right repair method.
Movement cracks often run in irregular lines, while moisture-related cracks may appear with staining or spalling. Thermal cracks can be wide at joints, and poor installation might show through-edge hairlines or pop-outs.
Structural Movement vs Surface Defects
Cracks can be caused by either structural issues or just problems with the plaster or skim coat. Let’s learn to tell them apart.
Structural cracks are usually wide and run diagonally, often from corners. They’re signs of framing or settling issues. If you see these, it’s time to call a pro.
Surface defects, on the other hand, are narrow and random. They’re limited to the plaster or skim coat. You can usually fix these yourself.
Moisture, Temperature, and Installation Factors
Cracks can also be caused by moisture, rapid drying, or poor application. Here’s how to spot each:
Moisture intrusion causes cracks that widen at the bottom. They often start at the baseboard or where walls meet floors.
Rapid drying can cause small, hairline cracks. These are usually random and not too serious.
Poor application, like applying plaster too thickly, can lead to large, wide cracks. If you see these, you might need to strip the old stuff off before trying again.
How Plaster Cracks: Typical Failure Modes and Indicators
Traditional plaster failures usually start with delamination or loss of bond to the lath. You’ll see hollow sounds or peeling where the plaster pulls away. Hairline crazing can spread across large surfaces as the substrate moves.
Other signs include sagging patches, visible lath ties, or cracking along old joints. These indicators point to substrate issues beneath the plaster rather than just surface flaws.
Delamination and large-area failure
The first sign of trouble with plaster is often delamination. This happens when the plaster starts to separate from its substrate – usually the wall or lath.
You’ll notice this as areas that sound hollow when tapped, or even bulging sections where the plaster has started to pull away. It’s like a blister on your wall.
Why it happens: Moisture is the usual culprit here. It can soften the plaster and cause it to lose its grip on the surface beneath. Temperature changes and vibration can also play a part.
If you find these signs, act fast. Delamination can quickly turn into large-area failure, leading to chunks of plaster falling off – a real mess and safety hazard.
Surface crazing and hairline cracks
Another common issue is surface crazing. This looks like a fine network of hairline cracks on the plaster’s surface.
Most times, these are just superficial – the result of shrinkage as the plaster dries. But they can also be a sign of deeper problems.
When to worry: If the cracks are wide (more than 1/8 inch), or if they’re growing over time, there might be an underlying issue like movement in the structure or moisture intrusion.
For now, these fine cracks can often be filled with joint compound. But keep an eye on them. If they widen or multiply, you may need to address the root cause.
Lath-specific problems
If your walls are lath-and-plaster, you’ve got some unique issues to watch for. Lath is the wooden framework that supports the plaster.
One problem is corrosion of the nails or wires holding the lath in place. This can cause the lath to move, leading to cracks and other problems.
Another issue is loose nails or seams. Over time, these can work their way loose, causing the plaster to crack or fall off.
What to do: Inspect your lath regularly. Tighten any loose nails or wires. If you find significant movement or corrosion, it might be time to replace some of the lath before it causes more damage.
How Joint Compound Cracks: Typical Failure Modes and Indicators
Joint compound often fails due to shrinkage, tape failure, or cracking over fasteners. Expect small internal cracks that widen as the compound dries. Tape bubbles or lifted edges signal stuck or weak joints.
Cracks that recur after repairs suggest the underlying substrate or framing is moving. If cracks cross studs or appear after a wind load, repairs with compound alone may not hold long-term.
Shrinkage and Tape Separation
Joint compound shrinks as it dries. If not applied properly, the tape can separate from the wall or itself. You’ll see this as small cracks or gaps at the edges of your patches.
Improper drying can also cause tape to bubble up. This looks like a blister on your finished surface. It’s usually caused by applying too much compound in one go, or not letting each layer dry enough before adding more.
Prevent this: Apply thin layers of joint compound and let them dry completely between coats. Keep the room well-ventilated to speed up drying.
Fastener and Seam Cracking
Cracks that run parallel to screws, nails, or taped seams are usually due to movement at these points. This can happen if the fasteners weren’t driven in deep enough, or if the seam wasn’t reinforced properly.
Moisture can also cause these cracks. It can swell the drywall around the fasteners or seam, then shrink as it dries, causing a crack.
Check for: Cracks that start at screws or nails, or run along taped seams. If you see these, check if the fasteners are secure and if the seam is reinforced with tape and compound.
Recurrent Cracks After Patching
If a crack keeps reappearing in the same spot, even after you’ve patched it, there’s likely an underlying issue causing the movement. This could be structural movement, moisture, or temperature changes.
Incomplete repair can also cause recurrent cracks. If the patch doesn’t cover the full length of the crack, or if the compound wasn’t applied thick enough, the crack will reappear as the wall moves.
Look for: Cracks that keep reappearing in the same spot. If you see this, check for underlying issues and make sure your patches are complete and thick enough to handle any movement.
Substrate Compatibility and Bonding Differences
Adhesion varies between plaster and joint compound with different substrates like plaster, drywall, or concrete. Plaster can bond strongly to solid masonry but may debond on painted or weakened lath. Joint compound relies more on paper or mesh tape for strength on drywall.
Assess the substrate condition before choosing a repair method. Check for moisture, old coatings, and structural movement that could undermine long-term bond.
Bonding to Masonry, Lath, and Drywall
Plaster and joint compound bond differently to various substrates. Understanding this helps you choose the right one for your repair.
Masonry: Plaster sticks well to masonry like brick or block due to its porous nature. It soaks into the substrate, creating a strong bond. Joint compound doesn’t penetrate as well and may require a primer.
Wood Lath: Both plaster and joint compound can bond to wood lath. Plaster needs a scratch coat for better adhesion. Joint compound requires a primer or bonding agent due to its smooth surface.
Drywall: For drywall, use joint compound. It’s designed for paper-faced gypsum boards and creates a strong bond. Plaster doesn’t stick well to drywall without extensive prep work.
When to Use Primers or Bonding Agents
Sometimes, you’ll need a primer or bonding agent for better adhesion. Here’s when:
Poor Substrate Condition: If your substrate is smooth, non-porous, or damaged, use a primer or bonding agent to improve adhesion.
Combining Materials: When using both plaster and joint compound in the same repair (like skim coating over joint compound), use a compatible primer or adhesive to ensure they bond well together.
Always check product labels and follow manufacturer guidance for best results. Some products come with their own primer or bonding agent, so read instructions carefully.
Step-by-Step Repair Guides for Common Crack Types
Break repairs into small, repeatable steps for reliability. Start with clean, dry surfaces and appropriate primers or bonding agents as directed by the product label. Follow the instruction sheet for mixing, application, and curing times.
For large delaminations, separate the repair into removal, reattachment, and refinishing steps. If you’re unsure about adhesive compatibility, verify with the manufacturer instructions before proceeding.
Step-by-Step Repair Process
Follow these clear, practical steps to repair common crack types in your plaster or joint compound walls.
- Inspect the area: Check for moisture, temperature issues, and other causes. Refer back to our earlier guide if needed.
- Safety first: Put on gloves, goggles, and a dust mask. Cover nearby surfaces with drop cloths.
- Main repair work: Use a utility knife to score around the crack. Apply joint compound or plaster as per product instructions, filling cracks and embedding tape where necessary.
- Let it set: Follow drying times on product labels. Sand lightly once dry for a smooth finish.
- Final checks: Inspect your repair work. If satisfied, clean up. If not, re-sand and touch up as needed.
Small and hairline crack repair
Tiny cracks need careful attention to avoid visible repairs. Here’s how to fix them right:
Clean first: Use a wire brush or vacuum to remove dust and debris from the crack.
Fill carefully: Apply joint compound or plaster with a putty knife, working it into the crack. Let it set as per product instructions.
Smooth finish: Lightly sand the area once dry. Wipe off any dust and inspect your work.
Tape and seam failure repair
When tape or seams fail, follow these steps to fix them properly:
Remove compromised tape: Use a utility knife to score and peel off the failed tape. Clean the area with a wire brush or vacuum.
Prepare seams: Apply joint compound or plaster along the seam, embedding new tape as you go. Let it set according to product instructions.
Finish smooth: Lightly sand the area once dry. Wipe off any dust and inspect your work.
Large-area plaster repair or replacement
For extensive damage, follow these steps to assess, consolidate, or replace:
Assess the area: Check for delamination. Tap gently; a hollow sound indicates loose plaster.
Consolidate or remove: If minor, use screws and plaster washers to secure loose areas. For major damage, carefully remove loose plaster with a utility knife and pry bar.
Prepare surfaces: Clean the area thoroughly. Apply primer or bonding agent if needed (refer back to our earlier guide).
Tools and Materials Checklist Plus Visual Checkpoints
Prepare a practical toolkit: putty knives, trowel, sanding blocks, mixing cups, and appropriate repairs for plaster or drywall. Choose products based on the repair type and substrate, then verify labels for use on that surface. Keep a damp cloth handy for clean edges as you work.
Use visual checkpoints: surface should be smooth and uniform, edges flush with surrounding material, and no obvious ridges after finishing. Compare your work to product labels or a reference guide as you progress.
Tools and materials checklist
Before starting any repair or construction work, use this checklist to ensure you have the right tools and materials. This will save you time, money, and prevent costly mistakes.
- Tape measure: Confirm it’s in good working order and calibrated correctly. A faulty tape can lead to inaccurate measurements, resulting in improperly fitting materials.
- Level: Check that the bubble is centered when placed on a flat surface. An off-level structure can cause aesthetic issues and functional problems down the line.
- Hammer or mallet: Ensure it’s not cracked or damaged. A broken tool can cause injury or damage to materials.
- Safety glasses: Inspect for any cracks or scratches. Worn-out safety gear provides inadequate protection.
- Work gloves: Check for tears or worn spots. Damaged gloves offer less protection and can cause injury.
- Cement, sand, and aggregates: Verify that materials are within their expiration dates and stored properly to maintain quality. Using expired or improperly stored materials can result in weak concrete.
- Concrete mix design: Consult manufacturer instructions to ensure the right proportions of cement, sand, and aggregates for your project’s requirements. Incorrect ratios can lead to weak or poorly performing concrete.
- Formwork materials: Inspect lumber, plywood, or other formwork materials for cracks, warping, or other defects that could compromise the final product’s quality.
Quick rule: Always double-check your tools and materials before starting any task. A few minutes of verification can prevent hours of rework and costly mistakes.
Visual checkpoints during the repair process
Use this checklist at each stage of your concrete repair to ensure you’re on track and avoid costly mistakes. Check these points before moving on to the next step.
- Preparation: Surface Cleanliness – Ensure the surface is clean and free of dirt, grease, or loose material. Use a wire brush or pressure washer if needed. What goes wrong if you skip this: Poor adhesion of the repair material.
- Preparation: Surface Moisture – Check for excessive moisture using a moisture meter (available at hardware stores). The surface should read below 4% for proper bonding. What goes wrong if you skip this: Delamination of the repair material.
- Preparation: Surface Profile – Verify that the surface has been properly profiled using a chipping hammer or scarifier to create a rough, textured surface. This promotes better bonding. What goes wrong if you skip this: Insufficient mechanical bond between old and new concrete.
- Fill: Mix Consistency – Check the consistency of your repair mix by performing a “slump test.” The mix should hold its shape but flow slightly when placed on the surface. What goes wrong if you skip this: Incorrectly mixed material can lead to weak repairs or excessive shrinkage.
- Fill: Placement – Ensure the repair material is properly placed and fully fills any voids or cracks. Use a trowel or screed to level the surface as needed. What goes wrong if you skip this: Incomplete filling can result in weak spots or further cracking.
- Dry: Surface Level – After initial setting, check that the repair is level with the surrounding concrete. Use a straight edge and level to verify. What goes wrong if you skip this: Uneven surfaces can lead to tripping hazards or further damage.
- Dry: Curing – Verify that the repair is being properly cured, typically with a plastic sheet or curing compound. This helps prevent excessive water loss and cracking. What goes wrong if you skip this: Inadequate curing can result in weak, cracked repairs.
- Finish: Surface Texture – Once fully dried, check that the repair has a consistent texture with the surrounding concrete. Use a broom or texturing tool as needed to match the existing surface. What goes wrong if you skip this: A smooth or inconsistent texture can make the repair obvious and unsightly.
Quick rule: Always follow manufacturer’s instructions for specific products used in your repair, as they may have unique checkpoints or requirements.
Finishing, Paint Compatibility, and Preventing Future Cracks
Finishing steps like sanding, priming, and top-coat choice influence crack visibility and texture match. Use a compatible primer for plaster or drywall repairs and select sheen levels appropriate for the room. Proper curing and coverage help prevent new cracks.
Match textures and paint finish to the surrounding wall to reduce noticeable repairs. For prevention, address underlying movement, moisture, or improper installation and follow maintenance guidance for long-term stability.
Sanding, priming, and paint tips
After patching, sanding is crucial for a smooth finish. Use fine-grit sandpaper (120-220) to avoid deep scratches.
Primers seal the patched area and improve paint adhesion. Choose one that matches your existing surface – latex for plaster, oil-based for joint compound.
For paint, match the sheen of surrounding walls to maintain visual cohesion. Use a high-quality paint designed for repaired areas to ensure long-lasting results.
Preventive maintenance and environmental controls
Regularly inspect your walls for signs of stress or moisture. Address any issues promptly to prevent cracks.
Maintain consistent indoor humidity levels (between 30-50%) to minimize expansion and contraction of walls. Use a hygrometer to monitor this.
Ensure proper ventilation in bathrooms and kitchens to control moisture buildup. Consider using exhaust fans or opening windows during showers or cooking.
Conclusion
Know what you’re dealing with, pick the right material, and test first. Safe, proper repairs keep walls looking good and prevent bigger damage down the line.
If you’re repairing a crack, check the crack type and the substrate, then clear debris, prime if needed, apply the appropriate repair material in the correct order, let it cure, then sand smooth and finish with the right paint. Start small, follow the step-by-step guides for the crack you see, and keep edges clean. Don’t rush drying times, and protect yourself with a mask and eye protection. If you’re unsure about the substrate or bonding, test a small area first and err on the side of a conservative repair.
Common mistakes to avoid are using the wrong material for the surface, skipping surface prep, and overworking or under-sanding the patch. Don’t skip safety steps, don’t force a patch where it won’t bond, and don’t paint until the patch is fully cured and the surface is dust-free. If a crack keeps reappearing after a few rounds, or you’re dealing with structural movement, call a professional rather than chasing a fix that won’t last. Stay methodical, stay patient, and you’ll finish with a clean, durable patch that stays put. You’ve got this.
FAQ
When should I choose plaster versus joint compound for a repair?
Choose plaster for solid, older walls where a hard, durable patch is needed. Use joint compound for quick repairs on modern drywall or plaster with light damage and where you’ll skim and paint over it.
How can I tell if a repair needs plaster or can be done with joint compound?
Look at the wall type and the crack. If the surface is hard, dense, or has historical plaster details, go plaster. If the surface is drywall or gypsum board with paper, joint compound usually works well.
Can I mix plaster and joint compound in the same repair?
Stick to one path per patch. Mixing can create a weak bond and uneven surfaces. If you start with joint compound, finish with joint compound; if you start with plaster, finish with plaster.
What should I check before finishing and painting after a patch?
Make sure the patch is fully dry and sanded smooth. Check that the substrate is stable and bonded. Apply primer as required by the patch material and follow paint manufacturer recommendations for compatibility.