
Introduction
Plaster dust containment means keeping dust from plastering work from escaping the work area. It helps protect your home and makes cleanup easier. Start by setting a clear boundary and using basic barriers and cleanup habits.
For a simple setup, close off the work zone, lay down plastic sheeting, and seal doorways. Use a damp sponge or cloth to wipe surfaces as you go and clean as you finish. Check the material labels and local rules to choose the right barriers and disposal methods.
Key takeaways
- Define job scope and access points before starting to minimize dust spread.
- Use a single doorway containment with plastic sheeting and zip panels for easy access.
- Seal gaps around doors, windows, and fixtures to minimise airborne exposure.
- Wear respirators and eye protection; plaster dust irritates eyes and lungs.
- Ventilate with temporary filtration and monitor negative pressure to control plume.
- Contain waste promptly and label bags for safe transfer and cleaning.
Table of Contents
- Introduction
- Key takeaways
- Why Plaster Dust Control Matters on Small Jobs
- Plan the Job: Scope, Access, and Containment Strategy
- Tools and Materials Checklist
- Simple Single-Doorway Containment Techniques
- Partial-Room and Wall Demo Containment
- DIY Negative Pressure and Air Filtration for Small Jobs
- Sealing, Transfer, and Waste Handling Workflow
- Cleanup Best Practices to Keep Cleanup Sane
- Conclusion
- FAQ
Why Plaster Dust Control Matters on Small Jobs
Small plaster jobs still create dust that can drift beyond the work zone. You’ll want to protect your lungs, eyes, and skin from airborne particles that linger after the work is done. Don’t overlook the potential irritation for anyone nearby, including kids and pets in the same house.
Dust can also settle on finished surfaces and migrate into ducts, ceilings, and HVAC returns. When that happens, you may spend extra time cleaning or dealing with streaks and stubborn spots. The consequences extend to the rest of the space, not just the area you’re actively working in.
Health and safety risks
Plaster dust might seem harmless, but it’s not. It can cause serious health issues.
Breathing in fine particles can lead to respiratory problems. Allergies are common too. You don’t want your family or yourself getting sick because of a DIY project.
Protect yourself. Wear a proper mask, gloves, and goggles. Check the safety data sheet for specific hazards.
Protecting adjacent finishes and systems
Plaster dust travels far and wide. It gets into everything – your furniture, floors, even your HVAC system.
Once it’s in there, it’s hard to get out. You’ll spend hours cleaning, and you might still miss some spots. Worse yet, it can damage these systems over time.
Contain the dust. Seal off the work area. Use plastic sheets, tape, and drop cloths. Keep your HVAC system off during work.
Plan the Job: Scope, Access, and Containment Strategy
Start with a quick walk‑through to gauge how big the area is and how long you’ll be at it. Identify entry points, any openings to other rooms, and where debris will accumulate. Note where you can place barriers without blocking essential access.
Match the containment setup to the task size and duration. Avoid overbuilding if it’s a quick patch, but don’t skimp on basic barriers for longer projects. For any specifications, refer to the product label, data sheet, or manufacturer instructions and follow local rules as needed.
Assessing the work area and dust sources
Before you start, walk through your work area. Identify where dust will be generated – sanding, mixing, or cutting plasterboard.
Look for openings – doors, windows, vents – that could let dust escape. Mark these on a quick sketch.
Consider traffic patterns too. Where do people, pets, or equipment pass through? You’ll want to contain dust away from these paths.
Choosing an appropriate containment level
Not every job needs a full-blown clean room. Here’s how to pick the right containment level:
Minimal Containment: Small jobs, short duration (less than a day), no sensitive surroundings. Use drop cloths and damp rags.
Moderate Containment: Medium-sized jobs, few days’ work, some sensitive areas nearby. Consider using zip walls and HEPA vacuums.
Full Containment: Large jobs, long duration (weeks), highly sensitive surroundings. Go for full encapsulation with airlocks and negative pressure systems.
Tools and Materials Checklist
Must‑have items include plastic sheeting or drop cloths, painter’s tape, and a sturdy barrier like a doorway cover. Keep a few trash bags and a sharp utility knife handy for quick cuts. A shop vac with a HEPA filter helps capture fine dust during cleanup.
Nice‑to‑have gear includes a lightweight frame to mount doors or flaps, dust containment sleeves, and disposable coveralls. Always read product labels and instructions to confirm use, and upgrade components if the label suggests it for better containment or cleanup efficiency.
Essential Containment and Cleanup Tools
Before you start, make sure you have these basics on hand. They’ll help keep dust in check and cleanups manageable.
- Plastic Sheeting: 6mil or thicker for best containment. Check packaging for thickness and opacity.
- Contractor Tape: Choose a strong, wide tape to seal seams and edges. Look for ‘removable’ if you want to avoid paint stripping.
- Utility Knife: A sharp blade is key. Check packaging for blade type and size.
- Hand Tools (trowels, hawks, etc.): Ensure they’re in good condition before starting.
- HEPA-rated Vacuum or Air Purifier: Look for ‘HEPA’ on the packaging. This ensures 99.97% of particles are filtered out.
Quick rule: Don’t skimp on these essentials. Cheap tools mean more work and less control over dust.
Recommended Consumables and Filter Guidance
Disposable items and filters are crucial for maintaining containment. Here’s what to look for:
- Plastic Sheeting Replacement: Have extras on hand, especially if your job spans multiple days.
- Tape Replacement: Restock as needed. Don’t let seams open up.
- Vacuum Bags/Filter Replacement: Check manufacturer guidelines for replacement frequency. Clogged filters mean reduced suction.
- Air Purifier Filter Replacement: Follow manufacturer instructions. Dirty filters reduce air quality and machine lifespan.
Quick rule: Regularly replace consumables to maintain containment effectiveness.
Optional Upgrades and Rental Equipment
These tools can make your job easier, especially on larger or longer projects. Consider renting instead of buying for cost savings:
- Negative-Air Machines: Purpose-built for dust control. Check rental terms and ensure it’s suitable for your job size.
- Portable Barriers: Ideal for isolating work areas. Ensure they’re tall enough to contain dust.
- Industrial Vacuums/HEPA Vacs: Rent these for tough cleanup jobs. Check rental terms and ensure they’re HEPA-rated.
Quick rule: Rentals can save you money, but ensure the equipment suits your needs before signing any contracts.
Simple Single-Doorway Containment Techniques
Measure the doorway opening and secure a plastic curtain or framed barrier across it. Add a flap or zippered entry so you can move in and out without tearing the barrier. Seal the edges with tape to minimize gaps.
Maintain controlled access by using a clear doorway path and a minimal gap at the bottom for air flow control. If instructions specify a particular setup, follow them, and verify that the barrier stays taut and intact during work.
Plastic Sheeting Doorway Setup
To create a temporary dust barrier, you’ll need heavy-duty plastic sheeting. It’s cheap, easy to install, and leaves no permanent marks.
First, measure the doorway height and width. Cut the plastic sheet accordingly, adding an extra 6-12 inches on each side for overlap.
Secure the top of the sheet using duct tape or gaffer’s tape. Make sure it’s tight against the door frame to prevent dust from escaping. Then, tuck the excess plastic into the gap between the door and the frame on both sides.
For extra stability, you can use zip ties or bungee cords to anchor the bottom of the sheet to the door handle or nearby furniture. This keeps it from flapping around when people walk through.
Making a Basic Airlock for Frequent Access
An airlock is like a small entryway that helps keep dust contained. It’s especially useful when you’re making frequent trips in and out of the work area.
The simplest way to create an airlock is by using two layers of plastic sheeting. Cut them slightly smaller than the doorway, so they can overlap each other.
Tape one sheet to the top of the door frame, leaving it loose at the bottom. This creates a makeshift curtain that you’ll walk through first. Then, tape the second sheet over the first, creating an overlap. When you enter or exit, pull back both sheets and pass through quickly.
Alternatively, you can use zippered doorway panels, which are designed for this purpose. They’re easy to install and provide a tight seal. Just make sure to close them behind you each time you pass through.

Partial-Room and Wall Demo Containment
When opening a wall or working mid‑room, seal edges with plastic to block dust escape. Lay down floor protection that covers the full pathway from the work zone to the disposal area. Use local collection tools like a small neighborhood of dust collectors if available.
Keep edges sealed along the opening and run containment plastic past the floor to prevent dust tracking. Ensure the barrier is continuous and not easily disturbed as you remove debris and proceed with the demo.
Building floor-to-ceiling barriers and sealing joints
Start by measuring your room’s dimensions. You’ll need plastic sheeting that’s at least 6 mil thick, wide enough to cover walls and tall enough to reach from the floor to the ceiling.
Secure the sheeting to the floor using duct tape or a heavy-duty adhesive. Work your way up, attaching it to the baseboards, then the walls, and finally the ceiling. Use screws or nails with washers for extra security at the top.
Inspect all seams carefully. Even small gaps can let dust escape. Seal any openings with duct tape or caulking. Remember, the goal is to create a tight seal that contains the dust within the work area.
Protecting adjacent finishes and HVAC registers
Before you start, cover nearby furniture with drop cloths or plastic sheeting. This protects them from dust and potential damage.
For hard floors like wood or tile, use painter’s tape to secure a layer of plastic sheeting. This creates a barrier that prevents dust from settling into the grooves and causing long-term damage.
HVAC registers can be a major source of dust spread. Tape plastic bags over them, securing them tightly with duct tape. Make sure they’re large enough not to restrict airflow too much. If you have a central vacuum system, consider disconnecting it temporarily to avoid sucking up dust.
DIY Negative Pressure and Air Filtration for Small Jobs
Set up a simple airflow plan with portable fans and a filtration path that draws air away from living spaces. Keep doors to adjacent rooms closed to preserve any created negative pressure. Do not block necessary exits or create any safety hazards with power cords or equipment.
Verify the airflow by verifying a small indicator, like a light breeze at the barrier or a simple smoke test as allowed. Follow safety checks and the equipment instructions to avoid backflow or pressure issues that could spread dust.
Box fan plus filter and portable purifier setups
A simple, DIY negative pressure setup involves a box fan, a suitable filter, and optionally, a HEPA-type air purifier. Here’s how:
Fan orientation: Place the fan in an open window or doorway with the intake facing into the room. This pulls dust-laden air out of the work area.
For added filtration, place a filter (like a MERV 13) in front of the fan’s intake. You can DIY a frame using cardboard or foam board. If you’re using an air purifier, place it near the work area with its exhaust facing outwards.
When to rent a negative-air machine or call professionals
While DIY containment is great for small jobs, there are times when you need specialist equipment or trained contractors. Here’s when:
Complex ventilation systems: If your work area has complex ductwork or multiple HVAC registers, consider renting a negative-air machine with proper duct connectors to ensure thorough dust capture.
Large volumes of dust: For jobs generating vast amounts of dust (like large-scale demolition), renting or hiring professionals ensures adequate containment and safety.
Sensitive occupants: If there are young children, elderly, or those with respiratory issues nearby, it’s wise to err on the side of caution. Hire trained contractors to ensure a thorough job.
Sealing, Transfer, and Waste Handling Workflow
Bag debris in tightly sealed bags or cans as you work, never loose accumulate into open piles. Move waste along a clean path that stays inside the containment zone whenever possible. Keep the work area organized to minimize cross‑contamination.
Store bags and containers briefly in a designated spot before disposal, and label them if needed per local rules. Check guidelines for short‑term storage and transport to disposal sites to avoid spills or mix‑ups.
Minimizing dust transfer during removal
Start by wetting down the work area and debris with a fine mist. This helps to control dust when you start removing materials.
Use tools that dampen dust: For example, use a wet saw instead of a dry one for cutting plaster or concrete. If using power tools like grinders or sanders, attach a vacuum hose to collect dust at the source.
Remove debris in small sections, working from one side of the room to the other. This is called progressive containment and helps prevent dust from building up and escaping into other areas.
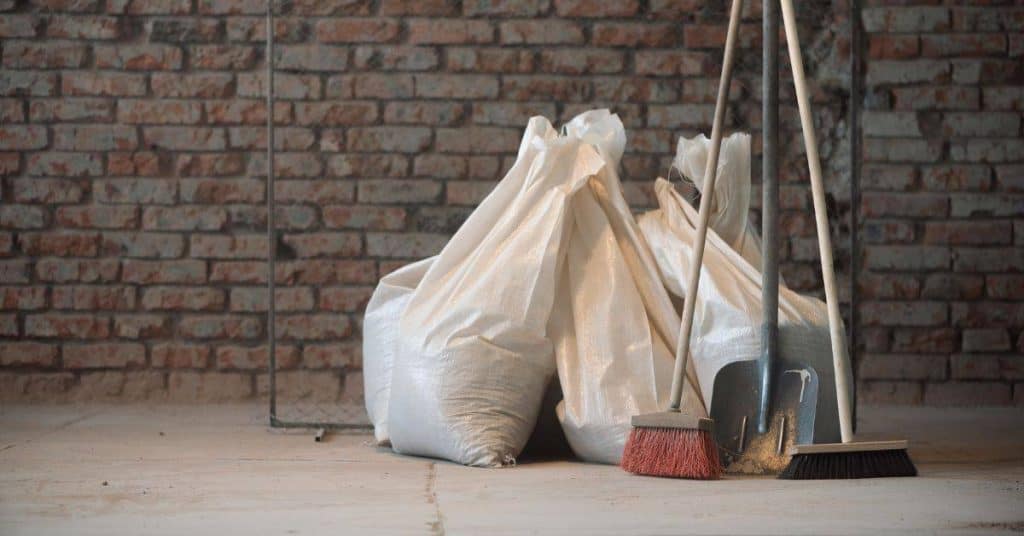
Bagging, labeling, and transporting debris safely
Use double-bagging for plaster waste. Place the first bag inside a second one to prevent any leaks or tears from contaminating your workspace or vehicle.
Seal each bag tightly with tape to keep dust contained. Label bags clearly, noting the type of debris and date collected. This helps you follow local disposal rules and keeps track of waste for future reference.
Temporarily stage waste in a designated area outside the containment zone. Keep it away from wind or rain to prevent contamination. When transporting, place bags in your vehicle’s cargo area, not inside the cabin, to avoid cross-contamination.
Cleanup Best Practices to Keep Cleanup Sane
Follow a logical cleanup sequence: vacuum first, then damp wipe surfaces, and finish with a final vacuum pass. Use tools that are appropriate for dust control and avoid re‑floating settled particles. Inspect the area to confirm you didn’t miss any spots.
Choose tools with proper filtration and check labels for recommended use. If any step or product spec is unclear, check the manufacturer instructions or local rules to ensure you’re meeting safety and cleanup requirements.
Effective vacuuming sequence and attachments
Start your cleanup by vacuuming from top to bottom, perimeter to center. This helps prevent dust from resettling. Use a vacuum with HEPA filtration to trap fine particles.
For walls and ceilings, use a crevice tool attachment to reach into corners and along edges. For floors, switch to a floor brush or upholstery attachment to capture settled dust efficiently.
Remember, it’s not just about one pass. Go over each area multiple times to ensure you’ve captured as much dust as possible.
Wet-cleaning and final wipe-down approach
After vacuuming, it’s time for a wet-wipe down. This helps remove any residual dust that the vacuum might have missed.
Use a damp (not wet) cloth or sponge with clean water. For walls, work from top to bottom in small sections. For trim and fixtures, use a soft brush or toothbrush for hard-to-reach areas.
After the first pass, let it dry slightly, then go over it again. This helps ensure you’re not just spreading dust around. Repeat this process until no more dust is coming off.
Conclusion
Safety first. When you control the dust, you protect your lungs, your floors, and your finish work from sticking dust or damage, and you keep cleanup sane and doable.
Make your plan and execute it in plain order: confirm the job scope and access points, pick a containment approach, gather the tools and materials, set up a doorway or partial-room barrier, seal all joins and vents, establish a simple negative-pressure or filtration flow, protect floors and nearby surfaces, set up proper waste handling and disposal, test the setup with a quick trial run, then start with the smallest tasks before expanding, and clean as you work so nothing piles up.
Common mistakes to avoid include underestimating dust spread and skipping seals, failing to test containment and airflow before you cut, using the wrong tools or not guarding transfer paths, and ignoring waste handling steps or overloading filters. A few safety rules to keep the job honest: wear a proper dust mask or respirator, keep doors closed and use a clearly marked containment path, slow down during demos, and verify all seals and barriers are intact after any tool change.
If you’re dealing with large areas, persistent dust, or moisture/DPC issues, or you’re unsure about air movement or waste handling, it makes sense to bring in a professional. Stay deliberate, stay safe, and finish with solid results you can be proud of. You’ve got this—keep the work tight and the cleanup sane.
FAQ
1. What should I check before starting a homemade plaster dust containment setup?
Read the product labels and manufacturer instructions for any containment gear, plastic sheeting, and filtration you plan to use. Check local rules or site guidelines if you’re unsure about airflow or waste handling. If in doubt, choose safer options and plan to adjust as you go.
2. How do I make sure doors and openings stay sealed without trapping dust everywhere?
Use overlapping plastic or a dedicated doorway dust barrier with a snug seal. Keep the barrier limited to the area you’re working in and close it when you step out. Tape seams well and don’t leave gaps that dust can track through.
3. Can I reuse equipment or materials from a previous job for this project?
Inspect all gear for wear, damage, or contamination before reuse. Some items may not be rated for plaster dust and should be replaced. When in doubt, follow the manufacturer’s guidance or retire the item.
4. What is the best way to handle waste and cleanup without stirring up dust?
Contain waste in closed bags or bins and transfer through a doorway barrier when possible. Wet cleanup methods or a damp cloths approach can help reduce dust but check what works with your surface material. Always seal and label waste properly for disposal per local guidelines.