
Introduction
Planning concrete pours around weather means scheduling and preparing to pour concrete when conditions are favorable and safe. This article helps weekend builders anticipate rain, wind, and cold, and plan work days accordingly. It keeps the job simple and avoids costly delays.
Cold weather can slow setting and affect strength, so plan around forecasts and shade or shelter as needed. Look for a practical temperature range and use protective measures, like coverings or heated storage, and check local guidance. Rely on experienced suppliers who understand winter construction and can advise on mix choices and delivery timing.
Key takeaways
- Weather planning crucial; align pours with forecasts and provide protective measures.
- Cold weather slows set; avoid placing when ambient or slab temps are too low.
- For winter pours, choose days with forecasted moderate temps and extended curing windows.
- Protect with insulating coverings and heater if permitted; check local rules and supplier advice.
- Coordinate with experienced suppliers for cold-weather mix design and delivery windows.
- Inspect formwork, perimeter protection, and curing conditions before and after pour.
Table of Contents
- Introduction
- Key takeaways
- Why Weather Matters for Weekend Concrete Pours
- Temperature Thresholds and Safe Ranges for Pours
- Planning Your Pour: Timing, Days, and Delivery Windows
- Protecting Concrete During and After the Pour
- Mix Design, Additives, and Material Temperature Control
- Tools, Materials Checklist, and Visual Checkpoints
- Common Mistakes, Costs, and Long-Term Durability Impacts
- Safety, Inspections, and Local Rules
- Conclusion
- FAQ
Why Weather Matters for Weekend Concrete Pours
Concrete performance hinges on more than mix design. Air temperature, ground temperature, wind, humidity, and precipitation all influence workability, set time, curing, and final strength. Weekend pours benefit from forecasting these factors to avoid surprises.
Understanding concrete temperature helps predict hydration rate and shrinkage risks. Check the forecast for guidance on mixing, placing, and curing while avoiding cold joints or heat-related cracking. Use practical weather checks and lead times for formwork and reinforcement, and know when to postpone due to rain or extreme conditions. Finishing and curing are tied to weather, including when forms can be removed and how to protect surfaces. Have a simple decision framework and buffer time, with quick substitutions such as insulating blankets if needed. Safety and site readiness matter too, as wind can affect form stability and wet conditions raise erosion or runoff risks.
How setting and curing work
The process of concrete hardening begins with hydration, a chemical reaction that generates heat and causes the mixture to solidify. This rate is highly dependent on temperature.
Understanding hydration is crucial for weekend builders as it ensures concrete’s long-term performance. Monitor temperature during mixing, placing, and initial curing stages to maintain optimal hydration conditions.
Verify the concrete mix design and its intended use, as these factors influence the required hydration time. If temperature drops below the ideal range, consider using heating blankets or accelerators.
Common mistake: Insufficient curing can lead to surface cracking. Apply additional moisture and consider re-curing if signs of insufficient curing appear.
Hot vs. cold impacts on performance
Temperature plays a significant role in concrete’s setting time, strength gain, and durability. Cold temperatures slow or stop the hydration process, while heat speeds up setting but increases cracking and evaporation risks.
Understanding these effects helps weekend builders plan pours for optimal strength gain and durability. Monitor daily high and low temperatures, as well as overnight lows, to anticipate setting times and curing needs.
Review concrete specifications to understand its designed temperature range and potential additives for extreme conditions. If temperature exceeds the ideal range, consider using retarding admixtures or cooling the concrete. If it drops below freezing, postpone the pour until temperatures rise.
Common mistakes: Cold joints can occur if proper curing is not ensured, leading to reduced strength and durability. Heat-related cracking should be repaired as soon as possible to prevent further damage.
Temperature Thresholds and Safe Ranges for Pours
Common guidance points to minimum and maximum temperatures for critical curing phases, noted for air and substrate conditions. Use these ranges to inform initial set, early curing days, and finishing windows, while verifying exact thresholds with your supplier and local codes. Ranges are tied to hydration rate and control over cracking potential.
Contractors typically maintain safe temperature corridors using insulation, windbreaks, blankets, or heated enclosures. Avoid large swings, freezes, or overheating during pour and curing. Ambient conditions interact with concrete temperature and may require adjustments for different mixes or slumps, with extra care for lightweight or fast-setting blends. Before pouring, perform checks with the supplier, confirm delivery timing, and verify surface temps and weather forecasts; after pouring, monitor temperatures and curing duration, keeping proper protection in place. Document thresholds and approvals for weather changes per local codes and supplier data sheets.
Minimum Temperatures and Freeze Risk
Concrete sets optimally between 50°F (10°C) and 70°F (21°C). Below these temperatures, setting slows significantly. Freezing temperatures can cause severe damage during initial set and early curing.
Maintain air and substrate temperatures above freezing point (32°F/0°C) before pouring. Check short-term weather forecasts and ground conditions to avoid freeze risk.
If temperatures may drop below freezing, postpone the pour until warmer conditions. If freeze risk is imminent after pouring, apply temporary heating or insulation for protection.
Hot-Weather Concrete Care
High temperatures speed up concrete setting and increase water loss, which can result in rapid set, reduced strength, and surface cracking.
Check air temperature during pouring and early curing. Consult your ready-mix supplier for suitable temperature ranges (usually 70°F-90°F/21°C-32°C) and consider using evaporation retarders in hot conditions.
If temperatures exceed safe limits, implement cooling measures such as temporary shading or windbreaks, or use evaporation retarders. If necessary, postpone the pour until temperatures drop.
Planning Your Pour: Timing, Days, and Delivery Windows
Choose days and times with stable forecasts and avoid sequences that bring heat waves, rain risk, or strong winds. Use a forecast checklist for several days out and have a plan B ready. This helps maintain control over the pour window and curing conditions.
Set precise delivery and crew arrival windows, including site access, equipment staging, and batching timing to maximize efficiency. Consider temperature and humidity effects on early cure and specify target ambient and surface temperatures, curing duration, and shade or windbreaks as needed. Have backup suppliers or alternative hauls in case forecasts shift and communicate promptly with all parties about changes.
Best day/time for the pour
Timing your concrete pour effectively can significantly improve cure quality and efficiency. Here are some practical tips:
Favor mornings in hot weather, as temperatures peak later in the day, which can accelerate evaporation and slow curing.
Avoid pouring late in the week if follow-up work or inspections are needed over the weekend. This allows for sufficient undisturbed curing time before any further activity on your site.
Review multi-day forecasts for stability to plan your pour. If forecasts worsen, reschedule prioritizing cure quality over convenience.
Scheduling and communicating with the supplier
Timely delivery of concrete is crucial for optimal performance. Here’s how to schedule and communicate effectively with your supplier:
Confirm lead times and delivery windows when placing your order. This ensures that the concrete arrives at the right time, maintaining its freshness and workability.
Specify a temperature-appropriate mix in your order, considering both ambient and surface temperatures on the day of pouring.
If weather delays are likely, plan contingencies with your supplier for rescheduling or alternative hauls. Prompt communication helps minimize delays and maintains concrete quality.
Protecting Concrete During and After the Pour
Protection methods vary by season. For cold weather, use insulation and controlled curing to prevent premature freezing; for hot weather, provide shading and misting to limit surface temperature and evaporation; and for rain, deploy covers and barriers as forecast dictates. Deploy methods in relation to pour timing and forecast for best results.
Specify materials and setup, including thermal blankets, windbreaks, plastic sheeting, shade cloth, and misting systems. Note weight, permeability, and removal ease, with secure attachment methods to withstand wind. Timing is key, with clear windows for covering before finishing and post-pour curing durations; have rapid-deploy options if weather shifts. Safety and quality checks should track surface temperature, ambient temperature, humidity, wind, and dew point to avoid thermal shock or rapid moisture loss; document curing temperatures and cover performance in project logs.
Cold-weather Concrete Protection
Protect concrete in cold weather using insulated blankets or temporary enclosures to maintain consistent temperature and prevent premature freezing.
Before pouring, ensure the ground is frost-free. If not, apply ground insulation to prevent frost from rising under the slab.
For temperatures below safe pouring range, consider using heated water or heated aggregates in your mix. Monitor surface and ambient temperatures during setting and curing.
Hot- and Rain-Protection Techniques
In hot weather, employ sunshades to minimize direct sunlight exposure. Combine this with misting or fogging systems to lower surface temperatures and reduce evaporation.
If rain is expected during the pour or early curing, use temporary covers. Ensure these are wind- and moisture-resistant to protect concrete from sudden storms.
Consider incorporating evaporation retarders in your mix design. Monitor surface temperature, humidity, and wind speed during setting to prevent water loss.

Mix Design, Additives, and Material Temperature Control
Admixtures such as accelerators, retarders, and air entraining agents influence set time, strength development, and workability under varying temperatures. They help tailor performance for weekend pours when conditions shift. Follow supplier guidance and project specifications for compatibility.
Aggregate selection and grading affect temperature performance, shrinkage, and durability under extreme weather, with attention to frost-thaw resistance and thermal mass. Control practical temperature factors for concrete, aggregates, and mixing water, and manage on-site handling to minimize heat gain or loss during a pour. Adhere to mix designs and project specs, and verify compatibility of additives with cement type and aggregates. Have quick checks for temperature, slump, and time windows to prevent cold joints or premature setting in harsh conditions.
What to ask your ready-mix supplier
When planning a concrete pour around weather conditions, it’s crucial to communicate effectively with your ready-mix supplier. Asking the right questions ensures you receive a mix that performs optimally in varying temperatures.
Key questions to ask:
– What is the expected set time and slump of the concrete?
– What is the recommended air content for our specific application and weather conditions?
– Which admixtures do you recommend, considering our pour schedule and local weather?
– Do you offer temperature-controlled mixes to minimize heat gain or loss during transport? If so, request it.
Additionally, inquire about their experience with weekend pours in your area’s specific weather conditions. This can provide valuable insights into any necessary adjustments for optimal performance.
Safe DIY Concrete Mix Adjustments
While adhering to supplier guidelines is crucial, there are some safe, minor adjustments you can make to optimize your concrete mix for varying temperatures. Major changes should always be handled by the supplier.
Permitted adjustments:
- Alter water temperature: If significantly different from the design, adjust it by up to 5°C to maintain set time. Ensure this change falls within the supplier’s recommended ranges and understand its impact on workability and strength development.
- Stage aggregates: If aggregates are too hot or cold, stage them properly to allow for gradual temperature equalization before mixing. This helps maintain consistent concrete quality throughout the pour.
Always confirm that any changes you make fall within the supplier’s recommended ranges. If aggregates are significantly out of range, consult the supplier to avoid compromising concrete quality.
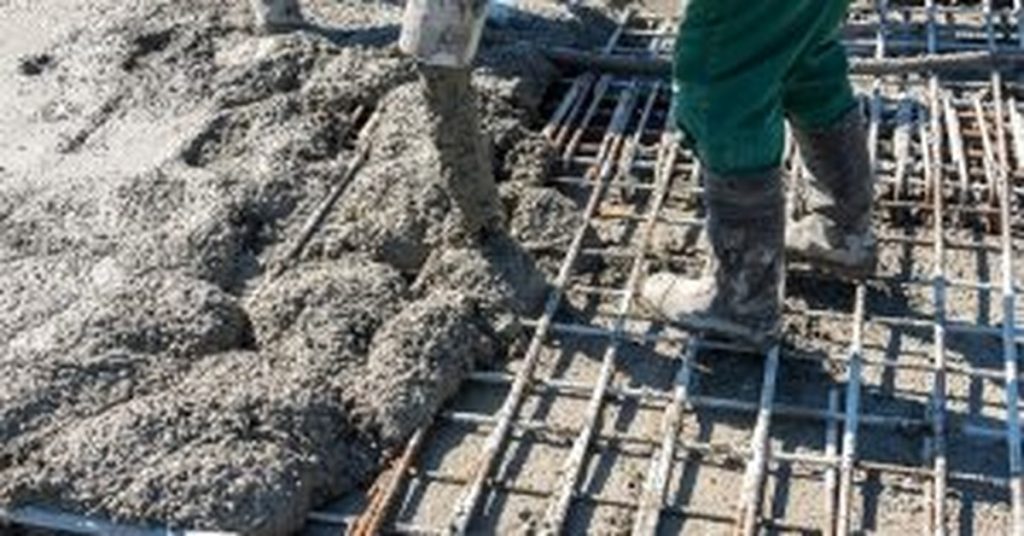
Tools, Materials Checklist, and Visual Checkpoints
Prepare weather-specific tools and materials: windbreaks or shade, curing blankets, plastic sheeting, plastic bins for consistent mix-ins, a sturdy wheelbarrow, screed board, bull float, hand tamper, trowels, level, and a reliable thermometer or hygrometer for real-time readings. Include a portable water source and a way to keep the mix at target slump in sun or wind.
For pre-pour setup, verify formwork rigidity, spacing, alignment, edge supports, and reinforcement; ensure a clean, damp subbase. Have weatherproof lids ready for quick shelter if rain appears. Plan water access and additional mixes if weather delays occur, and keep a simple plan for safety and containment during the pour.
Tools and materials for weatherized pours
Equip yourself with the right tools and materials to ensure your concrete pour performs optimally despite varying weather conditions.
- Insulated blankets: Retain heat in cold conditions, promoting proper curing. Check their R-value for optimal insulation.
- Curing blankets: Maintain surface moisture during early curing stages. Ensure they fit your formwork size.
- Tarps: Protect the pour area from rain. Choose durable, waterproof tarps and secure them properly.
- Heaters or fans: Regulate temperature in extreme conditions. Rent or borrow portable heaters/fans for cost-effective use.
- Thermometers/hygrometers: Monitor real-time temperature and humidity. Calibrate them before use to ensure accurate readings.
- Finishing tools (trowels, screed board, bull float): Achieve a smooth surface finish. Inspect tools for damage before use.
- Personal Protective Equipment (PPE): Ensure safety with gloves, goggles, and hard hats. Check PPE’s condition before starting work.
Concrete Pour Inspection: First 48-72 Hours
Regularly inspect your freshly poured concrete within the first three days to ensure proper setting and identify potential distress signals early.
- Surface Finish: Check for uniform compaction, absence of air pockets, and minimal bleeding. Address any issues promptly.
- Edge Treatment: Inspect edges for honeycombing or chipping. Re-evaluate techniques if necessary.
- Cracking: Look for early signs of cracking, particularly around formwork and rebar. Address immediately to prevent propagation.
- Surface Crusting: Monitor the formation of a solid surface layer. Adjust curing methods if crusting occurs too rapidly.
- Rebar/Welded Wire Mesh Visibility: Ensure they are well-embedded and not visible on the surface. Adjust finishing techniques if necessary.
- Color Variation: Check for inconsistent color, indicating improper curing or moisture loss. Adjust curing methods accordingly.
Key Principle: Address any issues promptly to minimize potential repairs and maintain your concrete pour’s integrity.
Common Mistakes, Costs, and Long-Term Durability Impacts
Identify frequent errors such as pouring in freezing ambient conditions, inadequate curing, incorrect mix design or water content, and poor scheduling. Weather amplifies each risk by affecting hydration and drying patterns. Avoid these with mindful planning for weekend projects.
Link mistakes to repair costs and durability outcomes like cold joints, micro-cracking, early surface wear, or compromised bonds to reinforcement. Use practical planning checks on forecasts, temperature thresholds, and contingencies for rain or swings, plus curing methods such as blankets or sealing. Choose mix and curing strategies that support durability under changing weather, and carry a concise on-site decision checklist for delays, mix adjustments, curing steps, and long-term maintenance implications to prevent costly repairs.
Financial and durability consequences
Improper timing or protection during concrete pouring can lead to various issues that impact both the financial aspect and the durability of your project. Surface damage, lower strength, increased maintenance, and higher lifetime costs are all potential outcomes.
Surface damage, such as cold joints, micro-cracking, and early surface scaling, can occur due to improper curing or exposure to freezing temperatures during the setting process. These issues not only affect the appearance of your concrete but also compromise its protective layer, making it more susceptible to further deterioration.
Lower strength can result from incorrect mix design or water content, leading to a weaker final product that may not withstand expected loads or environmental conditions. This can lead to costly repairs and even structural issues over time.
How to avoid these mistakes
To prevent the financial and durability consequences outlined above, it’s crucial to take proactive measures when planning your concrete pour. Here are some steps you can take:
- Check forecasts: Regularly monitor weather forecasts before and during the pour to anticipate any potential issues.
- Use appropriate protection: Implement cold, hot, or rain-protection techniques as needed to safeguard your concrete from adverse conditions.
- Document conditions: Keep records of weather conditions, protection measures taken, and any adjustments made to the mix design. This will help you track potential issues and make informed decisions for future projects.
- Work with an experienced supplier: Collaborate with a knowledgeable ready-mix supplier who can provide guidance on appropriate mix designs, additives, and material temperature control based on weather conditions.
By following these proactive measures, you can minimize the risk of costly repairs and ensure long-term durability for your concrete project.
Safety, Inspections, and Local Rules
Safety planning covers seasonal extremes, including appropriate PPE, hydration, cold-weather precautions, and emergency procedures. Prepare the site to reduce trips, slips, and hazards, and plan to pause work during rain, freezing temperatures, or lightning. Maintain clear communication and safe spacing around staff and equipment.
Documentation involves permits, inspections, weather logs, test results if applicable, and photos at key stages. Know who to contact for scheduling and how to access approval stamps. Local rules and permitting require understanding setback, zoning, building codes, and HOA restrictions, with awareness of inspection windows and potential re-inspection fees. Align the pour timeline with local forecasts and ensure curing time and inspections are completed before proceeding with finish work.
Jobsite Safety for Seasonal Extremes
Before starting any work, ensure you’re prepared for the weather conditions to keep your team safe.
- Cold Stress and Hypothermia: Provide warm clothing, gloves, and insulated boots. Monitor workers for signs of cold stress.
- Heat Illnesses: Schedule regular breaks in shaded areas. Provide cooling gear like hats, bandanas, or vests.
- Slip/Ice Hazards: Use sand, salt, or other traction aids on slippery surfaces. Consider using ice cleats for workers’ boots.
- PPE and Warming/Cooling Breaks: Ensure all workers have appropriate PPE. Schedule regular breaks to warm up or cool down.
- Hydration: Provide plenty of water and encourage regular drinking, especially in hot conditions.
- Emergency Procedures: Train workers on emergency procedures for heat stress, hypothermia, and other weather-related issues.
- Site Setup: Ensure the site is clear of trip hazards. Use non-slip mats or tape where needed.
- Halting Work: Stop work during heavy rain, freezing temperatures, or lightning for safety.
Quick rule: Always prioritize worker health and well-being by addressing seasonal hazards promptly.
Permits, Inspections, and Record-Keeping
Before starting your concrete pour, ensure you’re familiar with local permit requirements and understand the inspection process.
- Local Permit Rules: Confirm if permits are required. Understand setback, zoning, and building-code restrictions.
- Permit Submission: Submit plans as required by your local authority. Ensure they meet all necessary standards.
- Inspection Windows: Know when inspections are required (footings, forms, reinforcement, final).
- Temperature and Curing Logs: Keep a log of concrete temperature during placement and curing.
- Photos from Key Stages: Take photos at key stages for reference during inspections or warranty claims.
- Contact Local Authorities: If unsure about any requirements, contact your local building department for guidance.
- Re-inspection Fees: Be aware of potential re-inspection fees if work does not pass initial inspections.
- Access Approval Stamps: Know how to access approval stamps or sign-offs once inspections are complete.
Quick rule: Maintain clear records and stay in communication with local authorities to ensure a smooth project progress.
Conclusion
Plan the pour around weather with emphasis on safety, durability, and a clean appearance. When done right, you reduce cracking, uneven surfaces, and costly mistakes, while keeping the work safe for you and others on site.
First, check the forecast and determine a safe weather window that fits your project, then verify your site conditions, forms, and drainage; confirm the concrete supply timing and temperature requirements; prepare protection, curing measures, and tools, and have a clear sequence for delivery, placement, and finishing. Then review the plan with everyone involved, confirm PPE and safety barriers, and proceed only if all checks align with the planned window and local rules.
Common mistakes to avoid include pouring in adverse weather or during rising or falling temperatures without a plan, skipping joint placement or proper curing, and rushing finishing tasks. Follow simple safety rules: keep the area clear of trip hazards, wear appropriate PPE, verify temperature thresholds, and stop if the forecast changes or if the pour cannot be completed within a safe window.
If you’re uncertain about the temperature, mix design details, or local requirements, or if conditions are marginal, consider pausing the project or bringing in a professional. When you proceed, work deliberately, document what you did, and finish with a solid curing plan and a final inspection to ensure a durable, safe result. You can do this, one careful step at a time.
FAQ
How does cold weather affect concrete setting and the curing process?
Cold weather slows hydration and can lead to weak spots if temperatures drop too quickly. Protect the mix with proper insulation and keep the pour within the temperature range specified by the manufacturer and local guidelines.
What is a practical target temperature range for winter pours?
Refer to the concrete supplier’s guidelines for the recommended range. In general, maintain the mix and surrounding environment within the ranges they specify, and avoid extreme cold or rapid cooling that can hinder strength development.
What protective measures help concrete survive low temperatures?
Use temporary enclosures, insulating blankets, or windbreaks as appropriate. Keep the surface protected during early curing, and follow manufacturer instructions for curing compounds or moisture retention methods.
How should I approach scheduling deliveries and coordinating a cold-weather pour?
Coordinate delivery windows to align with your site readiness and weather gaps. Communicate any temperature-related requirements with the supplier and crews, and plan for contingencies if a cold snap or rain is expected.