
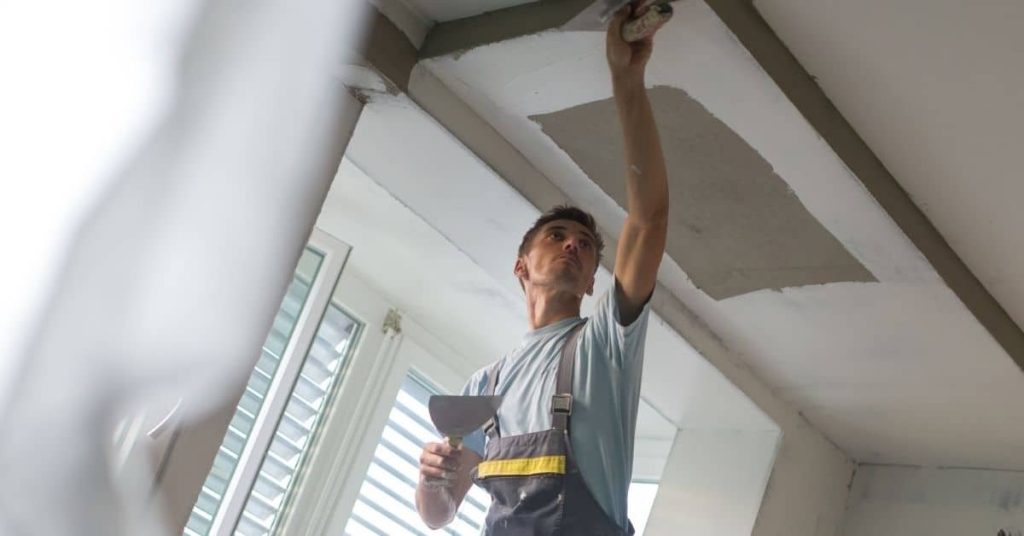
Introduction
Patching plaster around vents is fixing gaps where the vent touches the wall so edges stay crisp. You’ll clean and feather the plaster, then seal the joint so it blends with the surrounding wall. Work carefully where the vent meets the plaster to avoid cracks.
Start by removing loose material, dampening the area, and applying patching compound to fill the gap. Push and smooth with a putty knife, then feather the edge so it blends with the wall. Let it dry fully and inspect for any uneven spots that need another light pass.
Key takeaways
- Assess substrate for vibrations, loose edges, or crumbling plaster before patching.
- Mask and protect vents, floors, and adjacent surfaces to prevent debris.
- Use proper backing and feathered build-up to create crisp edges.
- Dampen patch area as needed to minimize dust and control suction.
- Sanding should be light; avoid rounding edges that break transitions.
- Wear eye protection and a dust mask to guard against plaster dust.
- Check final edges under raking light and verify clean, sharp transitions.
Table of Contents
- Introduction
- Key takeaways
- Overview: Scope, Goals, and Common Outcomes
- Tools and Materials Checklist
- Surface Preparation and Assessment
- Creating Crisp Edges and Clean Transitions — Core Techniques
- Backing, Filling, and Build-up Strategies
- Sanding, Texture Matching, and Finishing
- Troubleshooting Common Problems
- Visual Checkpoints, Workflow Timing, and Final Inspection
- Conclusion
- FAQ
Overview: Scope, Goals, and Common Outcomes
The objective of patching plaster around vents is to restore a clean visual transition while keeping airflow and safety in mind. It also helps prevent future cracking where the vent flange meets the surrounding wall or ceiling. A DIY repair will set expectations for a solid patch without guaranteeing professional-grade finish.
Understand that patches vary by condition, and checking the area for movement or moisture can save trouble later. Different situations may call for different approaches, so review the surrounding materials and any guidelines from the manufacturer or local rules. This section helps you plan what you can achieve and what might require a pro.
Why edges and transitions matter
Sharp, crisp edges around vents make your walls look neat and well-maintained. They’re the first thing people notice when they walk into a room.
Poor transitions, on the other hand, can trap dirt and dust. Over time, this can lead to discoloration or even paint failure. Plus, poor transitions can cause stress points where cracks start.
Proper patching ensures smooth surfaces that are easy to clean and less likely to crack.
Typical causes of damage around vents
Vibrations from HVAC systems can cause tiny cracks over time. This is more common with older systems or improperly secured vents.
Thermal movement – walls expanding and contracting with temperature changes – can also lead to cracking, especially in areas like vents where there’s less support.
Poor original installation or cutting into plaster for retrofit vents can leave weak spots that crack under stress. Even minor impacts can cause damage in these areas.
Tools and Materials Checklist
Gather the basics: a putty knife, a sturdy utility knife, and a sanding block with fine grit paper. Have plaster or patch material suited for your surface, plus mesh or backer if needed. Include protective gear like a dust mask and safety glasses, and consider optional tools for tougher jobs.
Stock up on finishing items such as primer and compatible paint, plus painter’s tape and a foam brush or small roller. Avoid mixing materials that aren’t designed for plaster or drywall joints. If in doubt, check the product label, manufacturer instructions, or local building guidance for compatibility and limitations.
Patch compounds and adhesives explained
Choose the right patch compound for your job. This checklist helps you decide.
- Spackling: For small touch-ups, like nail holes or minor cracks. Dries quickly but shrinks over time.
- Plaster of Paris: Good for larger repairs, sets fast. Can crack if not mixed properly.
- All-purpose joint compound: Versatile, can be used for both small and large repairs. Takes longer to dry.
- Quick-setting compounds: For when you need a fast cure time. More expensive but worth it for quick fixes.
- Avoid: Using drywall mud or cement-based products. They’re not suitable for plaster work.
Quick rule: For small touch-ups, spackling is your friend. For larger repairs, all-purpose joint compound works best.
Essential tools and optional upgrades
Gather these tools before you start patching. They’ll make the job easier.
- Putty knife: 2-4 inch widths for various tasks. Essential for applying compound.
- Hawk (trowel): Holds and transfers compound to putty knife.
- Sanding block or pole sander: Smooths out patched areas. Grit 120-150 works best.
- Edge bead pliers (optional): For creating crisp, clean edges around vents. A professional touch.
- Mini sander (optional): For hard-to-reach spots and fine sanding. Makes the job quicker and easier.
- Dust mask: Protects you from plaster dust. Essential for safety.
- Goggles or safety glasses: Keeps dust out of your eyes. Safety first!
- Drop cloth or plastic sheeting: Covers the floor and protects it from compound drips.
Quick rule: The putty knife, hawk, and sanding block are must-haves. Edge bead pliers and a mini sander make the job easier but aren’t essential.
Surface Preparation and Assessment
Start by removing loose material around the edge of the vent and any peeling finish. Wipe away dust and inspect for corrosion or moisture issues behind the patch. Protect the ductwork and any electronics or insulation from debris.
Good prep determines how long the patch lasts, so take the time to dry-fit and clean the area. If you find moisture or rot, address it before patching, and verify the recommended remediation steps in the product instructions or applicable codes. This step sets the stage for a durable repair.
Identifying substrate: plaster, drywall, or lath
Before you start patching, figure out what’s under that damaged plaster. It could be:
- Plaster: A mix of cement, sand, and water. It’s strong but can crumble over time.
- Drywall: Made from gypsum pressed between thick paper faces. It’s lighter and easier to cut than plaster.
- Lath: Thin strips of wood or metal used as a base for plaster. You’ll see it if the plaster is badly damaged.
Each has its own repair technique, so knowing what you’re dealing with makes all the difference.
Protecting vents and duct interiors
Vents and ducts are sensitive areas. Here’s how to protect them:
- Remove vent covers: Unscrew and take off the vent cover. Be gentle, you’ll need it later.
- Seal duct openings: Use painter’s tape and a piece of cardboard or plastic sheeting to seal the duct opening. This keeps dust out and makes your job easier.
- Cover nearby surfaces: Lay down drop cloths or old sheets to protect floors and furniture from dust and debris.
By taking these steps, you’ll keep your ducts clean and make your patching job neater.
Creating Crisp Edges and Clean Transitions — Core Techniques
Use edge beads, trim forms, or cutting guides to establish crisp boundaries around the vent flange. Don’t rely on feathering alone for a straight line; plan with a defined edge and back it with proper backing as needed. Work methodically to maintain square corners throughout the patch.
Apply patches or forms first, then build out with stiff material against the edge, checking for straightness as you go. Keep the patch edges consistent from all angles by using small, controlled motions and repeating the same technique across the seal. This approach yields repeatable, clean transitions.
Using edge beads, stop beads, and trim
Edge beads are your first line of defense in creating crisp edges around vent flanges. They provide a defined boundary for your patch compound and protect the edge from wear once it’s dry.
Plastic or metal? Both work well, but metal is more durable. Use plastic for smaller vents or where you want a lighter touch.
Installation: Apply a bead of construction adhesive around the vent flange before installing the edge bead. Press it firmly in place and let the adhesive set. This creates a solid base for your patch compound.
Cutting and tooling clean lines
Before the patch compound sets, you can score and tool it to create precise edges. This step ensures crisp transitions around your vents.
- Scoring: Use a utility knife with a sharp blade to score the compound at a 45-degree angle. This creates a clean line that’s easy to follow when tooling.
- Tooling: A straight edge trowel is your best friend here. Run it along your scored lines, applying even pressure to create a smooth, sharp edge.
- Angle matters: Hold your trowel at a 45-degree angle to the surface for best results. Too flat, and you’ll feather; too steep, and you won’t get a clean line.
- Optional tool: Multi-tool with a scraping attachment: For larger vents or tougher compounds, consider renting a multi-tool. It can handle bigger jobs and makes quick work of tooling.
- Price cue: A good quality utility knife is around $10, while a straight edge trowel runs about $5. Multi-tools start at around $30 per day to rent.

Backing, Filling, and Build-up Strategies
For small voids, start with a thin layer that adheres well to the surface, then build up gradually. Deep gaps may require mesh or backer material to support the fill and prevent sagging or cracking. Use the minimum necessary backing to achieve a solid, stable patch.
Apply staged fills to minimize settlement and cracking, letting each layer firm up before the next. Prioritize structural support and edge stability over rushing to finish. If you’re unsure about the backing choice, review the product guidance or consult a pro for the best option for your situation.
Choosing and installing backer materials
Picking the right backer material is crucial for a durable, long-lasting concrete surface. It affects how your concrete looks and performs over time.
- Mesh Tape: Used to reinforce joints and prevent cracking. Look for tape with high adhesive strength and good flexibility. Avoid cheap tape that tears easily or doesn’t stick well. Expect to pay around $20-$30 per roll.
- Woven Scrim: Provides reinforcement over larger areas. Choose scrim with a tight weave for better durability. It’s cheaper than mesh tape, around $15-$25 per roll. Avoid loose-weave scrim that can’t handle tension.
- Foam/Rod Backer: Used to create control joints and prevent random cracking. Look for foam with good compressive strength and a tight cell structure. Expect to pay around $30-$50 per pack of rods or rolls of foam.
- Expansion Joint Fillers: Used in areas where movement is expected. Choose fillers that can handle the expected movement without cracking or crumbling. They’re usually around $20-$40 per tube.
- Concrete Bonding Agents: Applied before backer materials to improve adhesion between old and new concrete. Look for agents with good bond strength and compatibility with your concrete surface. Expect to pay around $15-$30 per quart.
Pro tip: Always check the product label or manufacturer’s instructions to ensure you’re using the right material for your specific job. Store materials properly to maintain their effectiveness, and follow mixing instructions carefully to avoid waste and ensure durability.
Layering and curing approach
Listen up, DIYer. You wanna avoid a cracked mess on your hands? Then you gotta apply your concrete in thin layers. Thick coats might seem quicker, but they’ll shrink and crack like crazy.
Here’s how you do it:
Check your product label for recommended layer thickness. It’s usually around 1/4 to 3/8 inch. Spread that thin layer evenly, then let it cure. Don’t rush this.
Curing time depends on weather and humidity. But generally, you’re looking at at least a day or two between coats. This gives the concrete time to dry properly and reduces shrinkage. Trust me, your backer materials will thank you.