
Introduction
Patching clay plaster means repairing damaged plaster by blending fresh material with the surrounding texture so the patch isn’t obvious. This guide treats texture and color matching as a hands-on, jobsite task you can do with basic tools. You’ll work in small steps, testing on a scrap area first.
Start by cleaning the area, selecting a clay mix that matches the old plaster, and dampening the surface. Apply thin layers, feathering the edges to blend, and adjust color with subtle tweaks if the mix allows. If in doubt, test on a hidden patch and compare dry to the surrounding wall, and follow the manufacturer instructions and local codes.
Key takeaways
- Assess wall texture and color before patching to guide matching techniques.
- Avoid patch rings; instead feather edges into surrounding plaster for seamless blend.
- Keep color matches in small batches; mix gradually to match shade.
- Use appropriate hand tools to texture patch; practice on scrap plaster first.
- Allow proper curing and avoid moisture exposure; wear eye protection and masks.
Table of Contents
- Introduction
- Key takeaways
- Why Patch Without a Patch Ring?
- Assessing the Damage and Surface
- Tools and Materials Checklist
- Preparing the Patch Area Without a Ring
- Mixing and Matching Color
- Matching Texture: Tools and Techniques
- Application and Feathering Technique
- Curing, Finishing, and Painting
- Conclusion
- FAQ
Why Patch Without a Patch Ring?
Patching without a patch ring can work well for small to medium repairs and helps protect historic surfaces. It avoids cutting into sound plaster and keeps the look intact when done carefully.
This approach means less cutting and less disruption, which is good for DIY folks. It isn’t a cure-all—larger gaps or shifting plaster may need a ring or a different method, and follow the product label or datasheet for backing and patch materials.
Advantages for historic and delicate walls
Ringless patches are ideal for preserving the original character of historic homes. Here’s why:
Minimal disturbance to lath and finishes: Without a patch ring, you’re not cutting into sound plaster or damaging underlying lath. This keeps your wall structure intact.
Retains more original material: By working with what’s already there, you maintain the patina and texture of the existing clay plaster. This is crucial for historic homes where every bit of original material counts.
Think of it like a gentle touch-up rather than a major overhaul. It’s the best way to keep your walls looking authentic.
Limitations and risks to consider
While ringless patches have their benefits, they’re not always the best solution. Here are some things to keep in mind:
Poor keying: Without a patch ring, it can be harder for new plaster to bond properly with the old. This could lead to delamination over time.
Larger delamination risk: If your existing plaster is already damaged or unstable, trying to patch without a ring could cause further damage.
Moisture issues: Clay plaster is porous and can absorb moisture. Without a barrier like a patch ring, there’s a risk of water getting behind the new patch and causing problems.
Before you start, assess your walls carefully. If you’re unsure, it might be best to consult with a professional or use a patch ring for added security.
Assessing the Damage and Surface
Before you even think about ringless repair, do a quick but thorough check of hole size, depth, substrate condition, and moisture. Use a simple checklist and don’t skip the obvious signs of trouble that mean deeper problems. If the hole is large, the base is crumbly, or moisture wicks from the surface, pause.
Deeper issues like wide cracks, soft spots, dampness, or surface staining tell you to stop and fix the root cause first. Address the substrate and moisture before filling; if you’re unsure, check the label or datasheet for guidance.
Determining if a ringless patch is suitable
The first step in assessing your plaster damage is to determine if a ringless patch is even possible. Here’s what you need to look for:
Edge Soundness: Check the edges of the damaged area. If they’re crumbling or soft, a ring might be needed to provide support.
Isolation of Damage: The damage should be isolated and not part of a larger pattern of deterioration. If it’s widespread, you may need professional help.
Absence of Structural Movement: Gently push on the surrounding plaster. If there’s movement or cracking, the problem might be structural and beyond DIY repair.
Identifying substrate and adhesion issues
Before you start patching, you need to ensure your substrate is sound. Here’s how to check:
Detached Plaster: Gently tap the plaster with a screwdriver handle. If it sounds hollow or crumbles, the plaster might be detached from the lath.
Rotten Lath: Inspect the lath (usually wood strips) behind the plaster. If it’s soft, crumbly, or has visible rot, it needs to be replaced before patching.
Wet Spots: Look for any signs of moisture. Wet spots can cause new patches to fail and may indicate a deeper problem like a leaky pipe.
Visual checkpoints and photographic documentation
Before you start mixing your patching compound, take some time to document the area. This will help you match the texture and color perfectly.
- Edges: Photograph and mark the edges of the damaged area with a pencil or chalk. This will help you keep your patch neat and even.
- Texture: Take close-up photos of the surrounding plaster’s texture. This will serve as a reference when applying your patch.
- Color: Photograph the color of the surrounding plaster in different lights. This will help you match the color exactly.
- Surrounding Area: Take a step back and photograph the entire area. This can help you see how the patch will fit into the overall look of the room.
- Lighting: Note the lighting in the room. Different lights cast different shadows, which can affect the perceived color and texture.
- Temperature: Make note of the room temperature. This can affect how materials dry and set.
- Moisture: Check for any signs of moisture or dampness in the area. If present, address these issues before patching.
- Structural Issues: Look for any signs of structural damage or movement. If present, do not proceed with a ringless patch.
Quick rule: Always document your work area before starting. It’s much easier to match what you’ve got than try to recreate it later.
Tools and Materials Checklist
This section lists the essential tools and material types you can source easily for ringless clay plaster patches. Stick to DIY friendly items and verify product attributes on the label or datasheet rather than guessing exact specs.
Knowing what to have on hand saves trips back to the store and helps you patch right the first time. The right tools make cleanup faster and keep the patch durable, but using the wrong product or tool can ruin the finish; always check label for clay compatibility and application notes.
Clay plasters and compatible additives
Before you start, ensure your clay plaster matches the existing one. Here’s a checklist to help.
- Base or premix: Choose a clay plaster base or premix that matches your wall’s current finish. Check the label for ‘clay plaster’ as the main ingredient.
- Color: Ensure the new plaster has the same color or tint. Look for matching pigments on the label.
- Texture: Select a texture that matches your wall. Fine, medium, or coarse – confirm it on the label.
- Additives: Check if any additives are needed to match the existing plaster’s properties (e.g., lime for breathability).
- Aging agent: If your wall has an aged patina, consider using an aging agent to achieve a similar look.
- pH level: Ensure the new plaster has a pH level close to that of the existing one (around 7-8).
- Manufacturer’s recommendations: Follow any specific application guidelines provided by the manufacturer.
- Test patch: Always do a test patch in an inconspicuous area to ensure color and texture match.
Quick rule: If in doubt, contact the plaster manufacturer or consult with a professional for advice tailored to your specific wall.
Hand tools and texture-making tools
To match textures without a patch ring, you’ll need the right tools. Here’s what to gather:
- Trowels: Small trowels (6-12 inches) for applying plaster and creating smooth or textured surfaces.
- Spatulas: Various sizes for spreading, scraping, and creating fine details.
- Brushes: Soft-bristled brushes for applying washes or creating a stippled effect.
- Sponges: For creating a ‘wash’ effect or softening hard edges.
- Combs: Tooth combs or plastic combs for creating linear textures.
- Improvised tools: Items like credit cards, plastic bags, or crumpled aluminum foil can create unique textures.
Quick rule: Experiment with different tools and techniques on a test patch to achieve the desired texture.
Safety and surface preparation supplies
Before you start patching, ensure you have the right safety gear and prep materials. Here’s what to gather:
- Dust control: Wet down the area with a fine mist of water to minimize dust.
- Masking tape: Protect adjacent areas from plaster splatter or overspray.
- Goggles: Protect your eyes from debris and plaster dust.
- Dust mask: Wear a respirator or dust mask to protect your lungs.
- Gloves: Use gloves to protect your hands from plaster and any harsh cleaning agents.
- Drop cloths: Cover the floor and nearby furniture to keep them clean.
- Cleaning supplies: Have a bucket, water, and mild detergent ready for cleaning tools and surfaces.
- Bonding agent: Use a bonding primer or adhesive to ensure the new plaster adheres well to the existing surface.
Quick rule: Always prioritize safety first. Ensure you have the right gear before starting any patching work.
Preparing the Patch Area Without a Ring
Prepare the patch area without a ring by removing loose material from the crack or hole, then clean the cavity until it shows a dry, dust-free surface. Wipe back the edges to expose sound material and make a light keyed perimeter around the hole without making the opening bigger.
This matters because a clean, keyed edge helps the patch grip and last. If you rush or widen the hole, the repair will fail sooner; take the time to prep and always check the product label or datasheet for the right method.
Removing loose plaster and cleaning the cavity
Start by gently scraping off any crumbly, loose material with a flexible scraper or putty knife. Be careful not to damage the surrounding sound plaster.
Work slowly and use short, light strokes. If you hit hard spots, switch to a soft brush to dust them off.
Once you’ve removed all loose material, use a soft brush or vacuum to clean the cavity thoroughly. You want a smooth, dust-free surface for your new plaster to adhere to.
Creating a mechanical key without a ring
To give your new plaster something to grip onto, you’ll need to create a ‘key’. Without a patch ring, this means small-scale scoring or undercutting.
Use a sharp tool, like a utility knife or a small chisel, to score the surface lightly. Make shallow, closely spaced lines in a cross-hatch pattern.
For deeper keying, use a small chisel to carefully undercut the edges of the patch area. This gives your new plaster more ‘tooth’ to grab onto. Alternatively, you can use adhesive backers like thin paper or fabric scrims for added grip.
When to use temporary backing or meshes
Temporary backing or meshes can help distribute stress and prevent new plaster from cracking. They’re especially useful for large patches, weak substrates, or when you’re using a different type of plaster.
Use thin paper, fabric scrims, or small patch meshes sparingly and only where needed. Too much backing can weaken the bond between your new and old plaster.
To integrate them unobtrusively, cut the backing material to fit just inside the perimeter of your patch area. Apply it with a light coat of adhesive before applying your new plaster. Make sure it’s well-aligned and smooth to avoid any visible bumps or lines in your finished patch.
Mixing and Matching Color
Mixing and matching color without guessing means sampling first, tinting in small batches, and making incremental adjustments. Use real samples on a scrap board and compare under the same light you’ll work in. Always check the manufacturer instructions for pigment guidance instead of guessing ratios.
This approach helps you get a close match without wasting material or damaging the finish. It’s worth the extra steps because color can look different once it dries or ages. If you’re unsure about any step, check the label or datasheet for guidance and follow local rules and product directions.
Visual and sample-based color-matching workflow
Start by creating test mixes on a scrap board. This way, you can see the true color in different lights throughout the day.
Mix small batches using your chosen clay plaster and pigments. Document each mix’s components for repeatability. Take photos of the samples in various lighting conditions to ensure consistency with the existing wall.
Once you’ve matched the color, make a note of the exact pigment ratios used. This will help you replicate the color when mixing larger batches for your patch.
Tinting and using natural pigments safely
Add pigments gradually to your clay plaster mix. Start with a small amount, then increase as needed. Remember, it’s easier to add more than it is to remove excess.
Monitor the hue shifts as the plaster dries. Natural pigments can change color slightly once dry. Make sure to test this on your scrap board samples before applying to the wall.
Safety note: Always wear a respirator and gloves when handling pigments. Some natural pigments can be harmful if inhaled or ingested.
Material specs and finish compatibility
Choosing the right paint, limewash, or sealer is crucial for a successful patch. The wrong material can cause cracking, staining, or weak bond.
- Paints: Look for breathable paints with good adhesion ratings. Avoid oil-based paints as they can trap moisture and cause issues with clay plaster.
- Limewashes: These work well with clay plasters but ensure they’re compatible with your specific plaster type. Check the pH level to avoid any chemical reactions.
- Sealers: Use natural, breathable sealers that won’t trap moisture. Avoid solvent-based sealers as they can damage the plaster.
- Primer: A breathable primer can help with adhesion and even out the surface. Ensure it’s compatible with your chosen paint or sealer.
- Avoid: Never use non-breathable materials like vinyl paints or acrylic sealers on clay plaster. They can trap moisture, leading to cracks and other issues.
Matching Texture: Tools and Techniques
Matching texture means recreating clay-plaster textures with simple hand tools and improvised items. Practice and timing are king; start with a clean base and test your texture on scrap before you commit. Vary pressure, angle, and strokes until the look matches what you’re aiming for.
This matters because the right technique hides flaws and helps your repair blend in. You don’t need fancy gear—just patience and a feel for how the plaster behaves as it sets. If you’re unsure, check the label or datasheet for guidance on working times and finish options.
Catalog of common textures and reproduction strategies
Clay plasters come in various textures. Understanding these helps you match them perfectly.
Smooth: Use a steel trowel to create this. Apply plaster, then smooth it out with firm, even strokes.
Skip-trowel: This texture is created by lifting the trowel off the wall before it’s completely smooth. Practice makes perfect here.
Stipple: Use a stippling comb to create this textured look. Press and release repeatedly for consistent results.
Combed: A wide-tooth comb dragged through wet plaster creates this linear texture. Work from top to bottom for best results.
Tool-by-tool application methods
Different tools create different textures. Here’s how:
- Steel Trowel (Smooth): Apply plaster, then smooth it out with firm, even strokes.
- Skip Trowel (Skip-trowel): Lift the trowel off the wall before it’s completely smooth. Timing is key here.
- Stippling Comb (Stipple): Press and release repeatedly to create a consistent stippled effect.
- Wide-tooth Comb (Combed): Drag through wet plaster from top to bottom for linear texture.
- Plastic Float (Orange Peel): Apply plaster, then drag the float across the surface to create tiny peaks and valleys.
Practice, timing, and workability cues
Plaster consistency affects texturing. Too thick, it’s hard to smooth; too thin, it’s hard to texture.
Workability: Plaster should be like peanut butter – spreadable but not runny. Adjust water content as needed.
Drying rate also matters. Practice on test patches first to get timing right. Too slow, plaster dries before you can texture; too fast, it’s hard to work with.
Remember, patience and practice are key to mastering clay plaster textures.
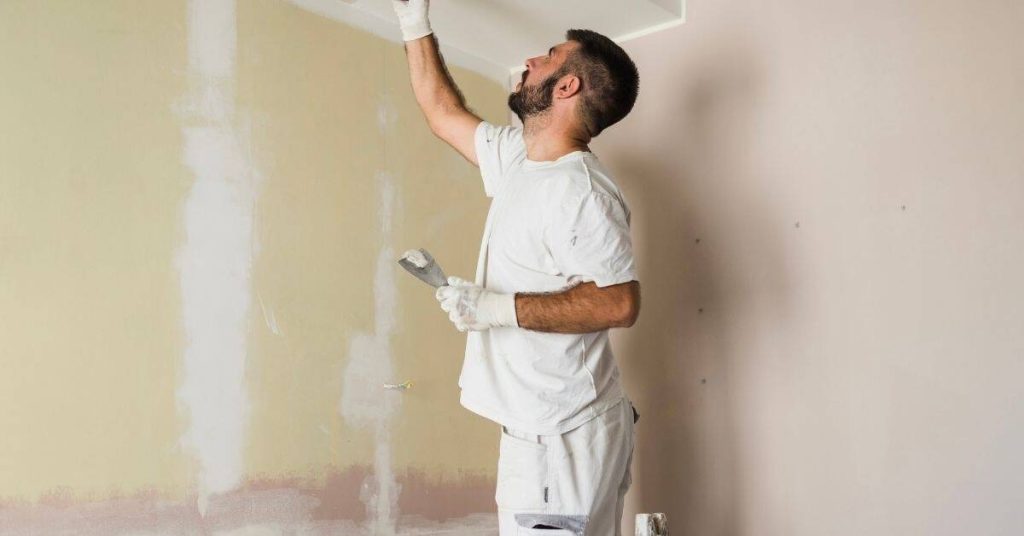
Application and Feathering Technique
Apply in thin passes with a ringless technique to keep the joint small and controllable. Feather the edge as you move, so you don’t see a hard line. Blend into the existing plaster so the transition disappears.
This approach hides repairs and keeps the surface even, so the room looks finished. Take your time with the edge work and check for ridges as you go. If you’re unsure about how to feather, check the product label or manufacturer instructions for guidance.
Layering approach and pass sequencing
Listen up, DIYer. You’re not painting a wall here; you’re building a concrete structure that’ll last. That means no slapping on a thick layer and calling it a day.
Here’s the deal: thin layers are your friend. They set better, bond stronger, and reduce the risk of cracking. Aim for layers around 1-2 inches thick, depending on what you’re pouring. Check your mix design or manufacturer’s instructions if you’re unsure.
Now, sequencing those passes. You want to pour and finish before the concrete starts losing its workability. That’s when it’s still easy to place, spread, and finish. Not too hard, not too soft – just right for a smooth, strong slab or wall.
Feathering and blending edges seamlessly
After applying your patch using the layering approach and pass sequencing, it’s time to blend those edges. You don’t want no harsh lines or shadows, right? Here’s how:
First off, check your mix design. Too much cement makes a hard edge, too little makes it crumble. Aim for a sand-to-cement ratio of 3:1 to 4:1, depending on what you’re patching.
Now, grab a trowel or a float. Start from the outer edges of your patch and work your way inwards. Use smooth, steady strokes, fanning out towards the surrounding surface. This is called feathering. It spreads the mix thinly, blending it with the existing concrete.
Be careful not to overwork the patch. That can cause it to dry too fast and crack. And for Pete’s sake, don’t splash water on it while you’re working. That’ll mess up your blend real quick.
Tool handling and stroke patterns for invisible seams
When it comes to blending your patch seamlessly, tool control is key. You’re aiming for a continuous look, so here’s how you handle your trowel and apply your strokes.
Trowel pressure: Keep it consistent. Too much and you’ll overwork the plaster, too little and you won’t get a smooth finish. Start with medium pressure, adjust as needed.
Stroke directions:
- For horizontal seams, use vertical strokes. This helps to feather the edges and blend the patch into the surrounding plaster.
- For vertical seams, use horizontal strokes. This helps to hide any slight variations in thickness.
Finishing strokes: Once your patch is set, use light, smooth strokes to even out any minor imperfections. Remember, you’re not trying to add texture, just remove it.
Curing, Finishing, and Painting
Curing, finishing, and painting require you to control the environment and follow product instructions. Keep the curing area clean and stable in temperature and humidity as advised on the label, and protect the surface from dust and rapid changes. For finishing, use light sanding or burnishing as a gentle touch, and don’t overwork the surface before it fully cures; always follow what the product label says about surface preparation and timing.
When you prime and paint, prep the surface well and apply coats as the label instructs. The right approach saves you from peeling, cracking, or a chalky finish, and it helps the topcoat look even. Disposal rules vary by location, so check local household hazardous waste rules and never pour or dump paint or solvents on the ground.
Monitoring cure and avoiding rapid drying
The last thing you want is your patch drying too fast. Here’s what to watch out for:
- High humidity: Too much moisture in the air can cause your patch to dry slowly, leading to mold or mildew growth.
- Drafts: Airflow can speed up drying and create cracks. Keep fans off and windows closed.
- Direct sunlight: Prolonged exposure to sun can make the surface dry too quickly, causing it to crack.
- Low humidity: If the air is too dry, your patch may dry out too fast, leading to cracks. Use a humidifier if needed.
Keep an eye on your patch. If it’s drying too fast, cover it with plastic or damp cloths at night to slow down the process.
Final texture touch-ups and smoothing
After your patch has cured, you might need to make some final adjustments to the texture. Use a damp sponge or light sandpaper to gently smooth out any rough spots.
Be gentle: You don’t want to remove too much material. A light touch is all you need.
For deeper imperfections, use a damp tool like a trowel or putty knife to carefully press the clay back into place. Let it dry slightly, then smooth it out with a damp sponge.
Choosing primers/paints and application order
Before you start painting, you need to prime your patch. This seals the surface and gives your paint something to adhere to.
Test first: Always test your primer and paint on a small, hidden area of your patch before applying it to the whole thing. This way, you can make sure they’re compatible.
The order of operations is simple: Prime first, then paint. Let each layer dry according to the manufacturer’s instructions before moving on to the next one.
Conclusion
Patching clay plaster without a patch ring is about doing clean, durable work that you can trust to stay put and look right. Focus on safety, test patches first, and keep edges feathered so the repair blends with the surrounding texture and color.
Start by confirming the area is clean and dry, assess damage, choose a matching mix, test color on a hidden spot, mix patch material consistently with the base, apply in thin feathered layers, keep edges feathered and smooth, let each layer cure before the next, and finish after full cure with the same texture and paint steps you practiced. Document what you did and how it looks so you can repeat or adjust if needed.
Two common mistakes to avoid are over-wetting the surface or applying too thick a patch, which can cause shrinkage and cracking; never guess on color—test and adjust in a small area before committing to the entire patch; keep work area clean, ventilated, and protected, and use proper gloves and eye protection when mixing and applying. Remember the safety rules: test patches first, work in dry conditions, and stop if you see signs of moisture or structural movement.
If you notice large cracks, bulging, moisture behind the plaster, or a backing surface that feels soft, it makes sense to call a professional rather than push on. You’ve got this as long as you stay methodical, test as you go, and follow the feathering and curing rules. Stay patient, stay safe, and you’ll restore both look and durability with confidence.
FAQ
Can I patch clay plaster without a patch ring if the damage is small?
Yes, for small defects you can feather the edges and blend the patch into the surrounding texture. Work in thin layers so you don’t create a ridge behind the wall.
What should I look for when matching color and texture by eye?
Compare color in natural light and texture up close. Scrape a little off the patch edge to see the underlying plaster, then mix to match the batch you’re using. If it looks off, let the patch dry and reassess in daylight.
How do I blend the patch with the surrounding plaster without a ring?
Use a wide, soft-edged tool to feather the edges, pulling product outward in gradual passes. Keep the surface damp as you work to avoid chalky edges and to help matching wet-on-dry texture.
What signs tell me the patch is ready for finishing or painting?
Wait for the patch to firm up per manufacturer guidance, then lightly sand or texture once it’s dry. Check the color in the room’s lighting and before painting; if it looks different, adjust with a light skim to even out the tone.