
Introduction
Microtopping problems are defects like bubbles, pinholes, and delamination that happen when a thin decorative concrete layer can’t bond or level properly. This article covers straightforward, hands-on steps to prevent them during mixing, prep, and application. You’ll also see how surface preparation and choosing self-leveling options can help you get a smoother, longer-lasting finish.
Self-leveling concrete offers a forgiving base when prepared and applied correctly, but success still depends on clean, dust-free edges and a solid primer or bonding agent as required by the product you choose. I’ll walk through practical surface prep techniques, mixing and application tips, and clear troubleshooting steps for common issues, with safe checks like reading labels, manufacturer instructions, and local rules to stay compliant. If a problem pops up, you’ll know where to look first and what adjustments to try on your next pass.
Key takeaways
- Prioritize thorough surface prep to prevent bubbles, pinholes, and delamination.
- Self-leveling options smooth out irregular floors when mixed and poured correctly.
- Monitor mixing consistency; entrained air is easier to manage with proper technique.
- Apply in staged coats per manufacturer guidance to reduce air voids.
- Ventilate work area, wear respirators when handling coatings and solvents.
- Inspect, repair defects promptly; pinholes and bubbles worsen with traffic and moisture.
Table of Contents
- Introduction
- Key takeaways
- What Is Microtopping and Common Failure Modes
- Surface Preparation: the Foundation for Success
- Tools, Materials, and Specs Checklist
- Mixing Techniques to Minimize Entrained Air and Consistency Problems
- Application Best Practices to Prevent Bubbles and Pinholes
- Troubleshooting: Diagnosing and Repairing Defects
- Safety, Ventilation and Handling Hazardous Materials
- Costs, Maintenance, Longevity, and Common DIY Mistakes
- Conclusion
- FAQ
What Is Microtopping and Common Failure Modes
Microtopping is a thin cement/polymer coating applied over existing concrete to create a smooth, durable finish. It commonly goes down in thin layers and relies on good bonding to the substrate. Thickness and product data sheets matter because they influence performance and defect risk.
Link failure modes to prep and application: improper substrate prep, moisture content, bonding surface preparation, and surface contamination can lead to bubbles, pinholes, and delamination. Understand what bubbles, pinholes, and delamination look like and what typically causes each defect. Prevention comes from surface prep, proper mixing, and controlled application conditions, plus appropriate curing timelines.
Microtopping vs other floor toppings
Microtopping is a thin cement-polymer system, unlike thicker self-leveling overlays or epoxy systems. It’s flexible and bonds well to various substrates, but it needs proper prep and application to avoid defects.
Thickness: Microtopping is typically 1-3mm thick, while self-levelers can be up to 25mm and epoxies vary. This thinness makes microtopping more susceptible to substrate issues if not prepared correctly.
Flexibility & Bonding: Microtopping’s flexibility allows it to move with the substrate, reducing cracking risks. However, it needs a clean, dry, and primed surface to bond properly. Unlike epoxies, it doesn’t rely on mechanical bonding alone.
Typical failure mechanisms (bubbles, pinholes, delamination)
Bubbles, pinholes, and delamination are common microtopping defects. Understanding their sources helps prevent them.
Bubbles: Entrained air or outgassing from the substrate can cause bubbles. Over-rolling, surface moisture, or improper troweling technique can also trap air. Bubbles appear as small, raised blisters on the surface.
Pinholes: These tiny holes form due to dust particles, curing compounds, or insufficiently cured thinner layers. Pinholes look like small, crater-like indentations.
Delamination: Poor adhesion, substrate movement, or insufficient primer can cause delamination. It manifests as flaking or peeling of the microtopping layer from the substrate.
Why prevention saves time and cost
Preventing defects in microtopping installation saves time, money, and reduces long-term maintenance. Reworking or replacing failed microtopping is costly and time-consuming.
Rework Costs: Fixing bubbles, pinholes, or delamination involves stripping the affected area, re-prepping the substrate, and reapplying microtopping. This process can double or triple initial installation costs.
Lifecycle Costs: Defects left untreated can worsen over time, leading to further damage and higher repair bills. Regular inspections and preventive maintenance reduce these lifecycle costs significantly.
Surface Preparation: the Foundation for Success
Start with a clean, profiled substrate. Remove oils, sealers, dust, curing compounds, and concrete inhibitors that can interfere with adhesion. Verify that the surface is ready for the topping material you will use.
Profile the surface to the correct texture, address cracks or hollow spots, and control moisture. Perform moisture testing and plan mitigation if moisture is detected. Select primers and bonding agents compatible with the substrate and topping, and follow dwell times and methods exactly.
Cleaning, repair, and mechanical profiling
Start by degreasing your substrate. Oils, sealants, and curing compounds can stop microtopping from sticking.
Remove all contaminants: dust, concrete inhibitors too. A clean surface is key for adhesion.
Fill spalls and cracks with appropriate patching products. Use bond coats to ensure repairs stick.
Create an anchor profile by grinding or shot-blasting. This gives microtopping something to grip onto.
Moisture, vapor, and pH testing
Test your substrate’s relative humidity (RH). Most microtoppings need RH below 75%. Check product datasheets for specific limits.
Use calcium chloride tests to measure moisture vapor emission rate. High values may require a vapor barrier.
Check pH too. Concrete should be between 6-10. Too high or low can cause issues with microtopping.
Always check product datasheets: Some systems have unique moisture and pH requirements.
Primers, bond coats and curing substrates
Select a primer that seals pores, improves bond, and reduces pinholing. It should be compatible with your microtopping and substrate.
Apply primers according to manufacturer’s instructions. This includes dwell times before applying microtopping.
Check cure times: Primers need time to set before you apply microtopping. Don’t rush this step.
Cure your substrate properly before applying microtopping. Follow the manufacturer’s guidelines for temperature and humidity ranges.
Tools, Materials, and Specs Checklist
Assemble core tools, PPE, and mixing equipment tailored for microtopping prep. Include gauges, levelers, and protective gear suitable for concrete substrates and coatings. Plan for clean, safe handling between steps.
Check materials and supplier questions: primers, skim coats, polymer-modified mixtures, additives, and batch traceability. Verify pot life, curing times, and compatibility with the topping product. Document tests and standard signatures for project records.
Tools and PPE
Before you start, ensure you have the right tools and protective gear. This checklist helps prevent mistakes that lead to bubbles, pinholes, or delamination.
- Mixers: Electric mixers with paddle attachments for consistent microtopping mixing.
- Gauges: Level gauges to ensure even application and proper thickness.
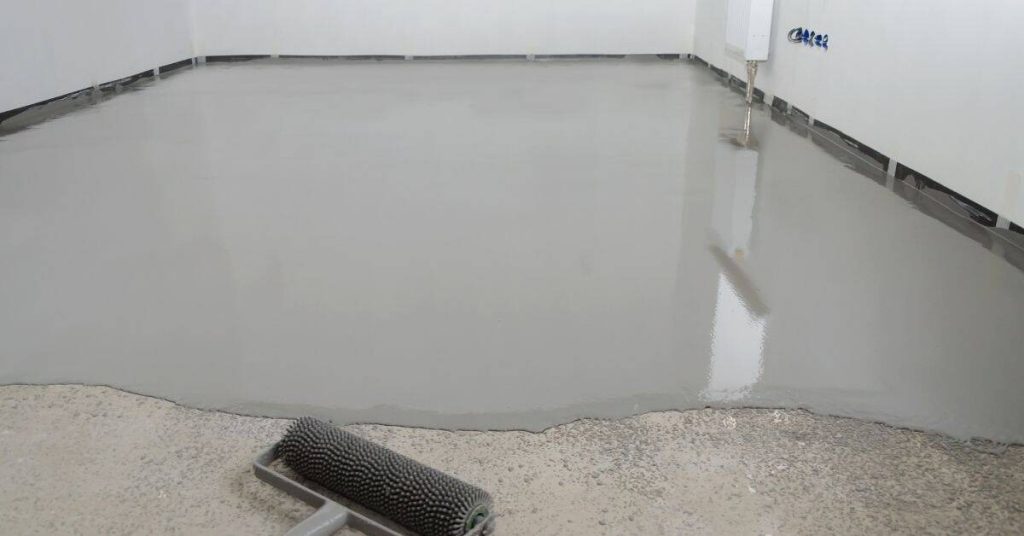
- Spiked rollers: For evening out the microtopping and removing air bubbles.
- Trowels: Sponge float trowels for final smoothing and finishing.
- Vacuums: Wet/dry vacuums to clean up spills and prevent contamination.
- Gloves: Disposable gloves to protect hands from chemicals.
- Eye protection: Safety glasses or goggles to shield eyes from debris and splashes.
- Respirators: Dust masks or respirators for protection against harmful particles.
Quick rule: Always use the right tool for the job. Wrong tools can lead to improper mixing, application, and finish.
Material selection and product specs to verify
Confirm these material specs with your supplier to avoid surprises that could cause defects.
- Primer: Verify compatibility with chosen microtopping. Incompatibility can lead to poor adhesion or delamination.
- Tixotropic agents: Check if they’re included in the mix, as they prevent sagging and improve application.
- Skim coats: Ensure they match your desired finish thickness and profile (R value).
- Pot life: Confirm to plan your work schedule accordingly. A short pot life can lead to waste or rushed application.
- Cure time: Verify to schedule follow-up activities, like applying sealers or foot traffic.
- Compatibility with primers: Ensure the microtopping adheres well to your chosen primer.
- Aggregate sizes: Check they’re suitable for your desired finish and substrate.
- Additives: Verify their purpose and effects on the final product.
Quick rule: Always verify material specs with your supplier. Assumptions can lead to costly mistakes.
Visual checkpoints and test patches
Before full installation, do a small test area and visual checkpoints to ensure the microtopping behaves as expected.
- Test patch: Apply a small test area to check for any unexpected reactions with your substrate or primers.
- Adhesion tape: Perform an adhesion test using tape. Poor adhesion can lead to delamination.
- Cross-hatch: Use a utility knife to score the surface and apply tape. Pulling off the tape should leave no residue if adhesion is good.
- Surface profile (R value): Check if it matches your desired finish. Incorrect R values can lead to slippery or rough surfaces.
- Cure conditions: Monitor temperature and humidity during curing to prevent defects.
Quick rule: Always do test patches before full installation. It’s cheaper to fix issues on a small scale than on the entire project.
Mixing Techniques to Minimize Entrained Air and Consistency Problems
Define the correct mixing sequence: powders first, then liquids or additives, to minimize air entrapment. Follow a step-by-step example and avoid shortcuts. Keep the mix movement steady to limit foam and bubbles.
Monitor equipment speed and mixing time, using the recommended RPM and blade type. Avoid over-mixing, which can trap air. Plan batch sizing to maintain pot life and uniform flow, and control temperature to prevent premature drying.
Correct mixing order and speeds
Start by adding your dry powders to the mix. This helps prevent air entrapment.
Gradually add liquids or additives while mixing at a low speed, around 200-300 RPM. This gives the powder time to absorb the liquid evenly.
Avoid high-speed mixing, which can incorporate too much air into your mix.
Use a paddle blade designed for low-viscosity materials and maintain consistent speed throughout the mixing process.
Batch size, pot life, and temperature effects
Keep batch sizes small to match the product’s pot life. This ensures your mix remains workable and consistent.
Check the product label for pot life limits. Warmer ambient or substrate temperatures can shorten working time, while cooler temps lengthen it.
Monitor temperature rise during mixing. Excessive heat can cause air bubbles to form as the material expands.
Adjust your batching workflow accordingly, ensuring you’re using each batch within its pot life window.
Use of additives, defoamers, and polymers
Air-reducing admixtures or antifoams can help minimize bubbles. Add these after your main powders and liquids.
Test a small batch first to ensure compatibility and the desired effect on air reduction. Overdosing can weaken the mix, so follow manufacturer guidelines.
Be cautious with incompatible additives or polymers. These can cause delamination or other failures if not used correctly.
Always clean your mixing equipment thoroughly between batches to avoid contamination from previous mixes.