
Introduction
Sealing new concrete can trap moisture and cause peeling later.
That moisture gets trapped under the sealer if the surface is still damp or the slab is still curing.
Let the concrete cure fully and follow the manufacturer’s guidance before applying any sealer.
Before sealing, clean the surface and remove dust, oil, and any loose particles.
Choose a sealer based on where the concrete is and read the label for compatibility, curing guidance, and local rules.
Apply in thin, even coats and avoid sealing over damp patches or in conditions that are too hot or humid, which can create problems.
Key takeaways
- Test moisture with simple no-shrink test and ensure surface is dry before sealing.
- Choose a sealer compatible with new concrete and moisture-rich environments.
- Wear gloves and eye protection during surface prep and sealing.
- Avoid sealing too soon; wait for cures to complete and test results.
- Surface prep includes cleaning, leveling, and repairing cracks before application.
- Apply evenly with proper technique; avoid puddling or over-application at edges.
- Store leftovers safely, ventilate area, and follow local code for sealers.
Table of Contents
- Introduction
- Key takeaways
- Why Proper Sealing of New Concrete Matters
- Types of Concrete Sealers and Their Moisture Sensitivity
- Optimal Timing and Tests Before Sealing New Concrete
- Common Moisture Traps and How to Prevent Them
- Step-by-Step Process to Seal New Concrete Correctly
- Diagnosing and Correcting Peeling or Failure
- Safety, Environmental, Maintenance, and Cost Considerations
- Conclusion
- FAQ
Why Proper Sealing of New Concrete Matters
A sealer is meant to shield fresh concrete from water intrusion, stains, and wear while helping it resist weathering without dramatically changing its look. It forms a barrier that supports long-term surface performance when applied correctly. A good seal helps concrete stand up to daily use and exposure over time.
Moisture under a seal can vaporize or become trapped, which undermines adhesion and may cause blisters or peeling. When moisture is locked in, deterioration can accelerate and the surface may fail sooner than expected. Understanding moisture pathways helps you choose the right product and timing.
How moisture interacts with sealers
Moisture plays a big role in how concrete sealers work, or don’t. Here’s what happens:
Concrete is porous. Moisture inside can move up through tiny capillaries. This is called capillary action.
When it hits the surface, moisture wants to escape. If there’s a sealer on top, it might get trapped. This is vapor drive – pressure building up from below.
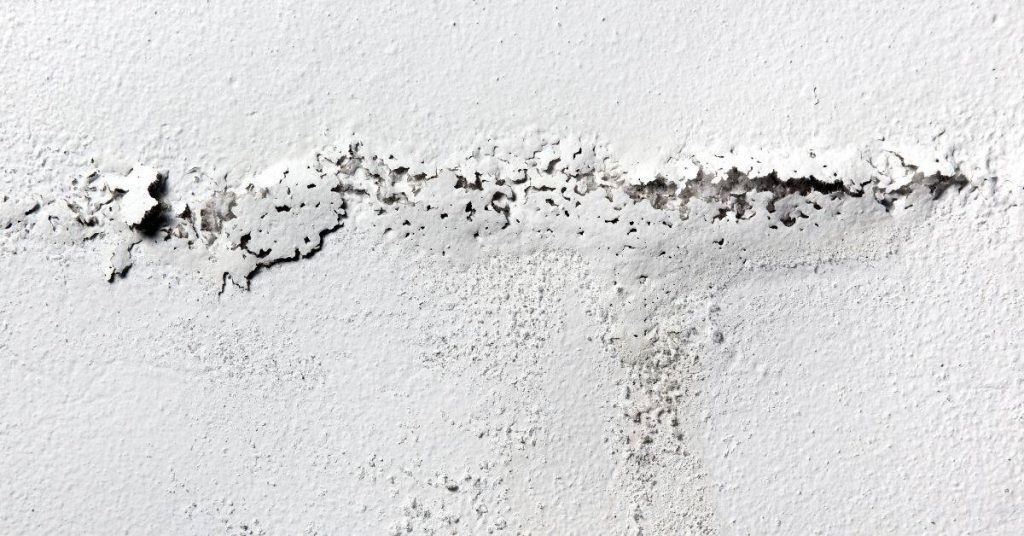
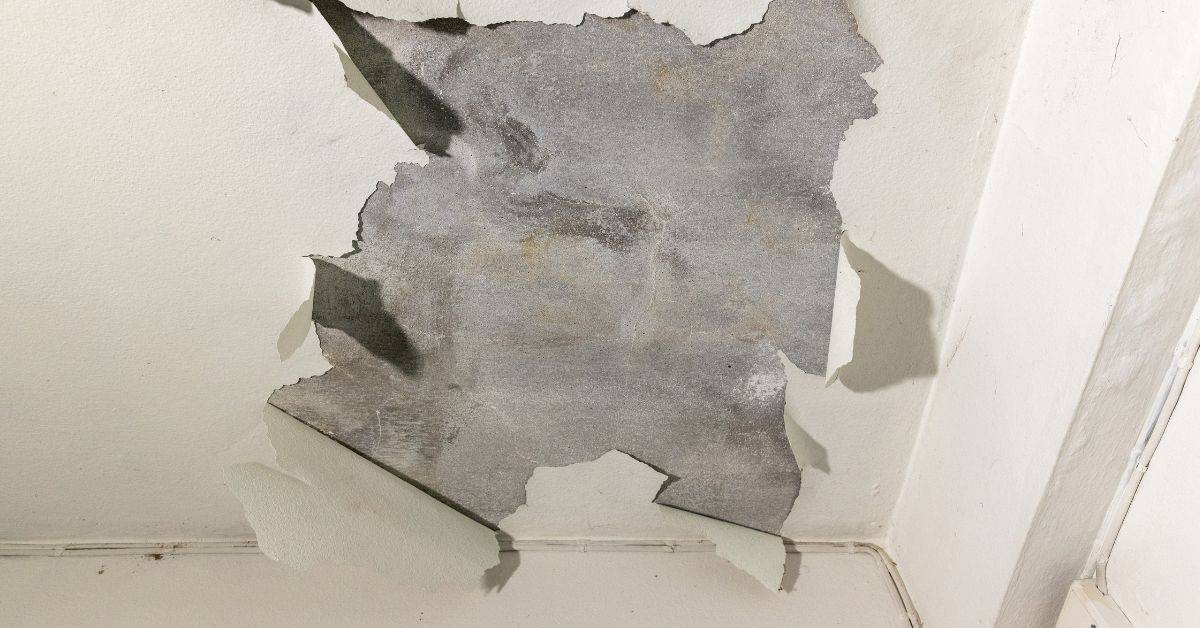
Too much pressure, and the sealer can’t hold. It lifts, blisters, or peels off.
Long-term consequences of sealing too early or incorrectly
Sealing new concrete before it’s ready? You’re asking for trouble. Here’s why:
Moisture trapped under a sealer can’t escape. It turns into a steam bath, cooking your concrete from below.
First sign of trouble is peeling or blistering. Then comes efflorescence – that ugly white powder on the surface. Freeze-thaw cycles make things worse, cracking and damaging your concrete.
Repairs? They’ll cost you. Better to wait and do it right first time.
Types of Concrete Sealers and Their Moisture Sensitivity
Penetrating sealers (like silane/siloxane) work by soaking into the substrate, while film-forming sealers (such as acrylics, epoxies, or top-coats) create a surface layer. Each type interacts with moisture differently at the interface and has distinct cure behavior. Knowing these differences helps prevent premature failure.
Water-based and solvent-based chemistries behave differently on damp concrete, affecting film formation and moisture entrapment. Residual moisture can hinder penetration or cure, leading to a whitish haze or blisters. Surface prep and testing guide your choice for the conditions at hand.
Penetrating sealers (silane/siloxane/silicate)
Penetrating sealers like silane, siloxane, or silicate work by soaking into the concrete’s pores. They react chemically with the cement and form a protective barrier deep within the substrate.
Why they’re moisture-resistant: Since these sealers penetrate deeply, they don’t create a surface film that can peel off when moisture is present. Instead, they lock out water at its source, preventing it from causing damage.
However, proper surface preparation and ensuring the concrete is dry enough are still crucial. Too much moisture can prevent proper penetration or cause white haze on the surface.
Film-forming sealers (acrylics, epoxies, polyurethanes)
Film-forming sealers like acrylics, epoxies, or polyurethanes create a protective layer on top of the concrete. This film protects against water and other contaminants.
Why they’re moisture-sensitive: If applied over damp concrete or trapped contaminants, these sealers can blister and peel. Moisture beneath the film can cause it to lift off, leading to failure.
To prevent this, ensure your slab is dry before application. Use a moisture meter and relative humidity tests to confirm. Even then, some residual moisture may still be present in the concrete, which could potentially affect cure and longevity.
Optimal Timing and Tests Before Sealing New Concrete
Plan sealing around typical cure times and climate conditions. Weather, slab thickness, and mix design all influence when moisture is low enough for a lasting seal. If you’re considering early sealing, refer to the manufacturer guidelines for the specific product.
Simple field checks like color and tackiness can indicate readiness, but instrumental tests provide more reliable results. Use concrete moisture meters or RH probes per product instructions to interpret outcomes. Document results for warranty or future reference.
Cure-time guidance and what to verify
Before you seal that new concrete, let’s make sure it’s ready. Here’s what you need to do:
Check the manufacturer’s recommendations. Most mixes need around a month to cure properly, but it varies. Always check the label or instructions.
Now, verify your concrete is ready for sealing with these tests:
Moisture test: Use a simple moisture meter (around $20) to ensure your slab isn’t too wet. Aim for readings below 4%. Too high, and you risk trapping moisture under the sealant.
Surface check: Inspect the surface for any signs of incompletely cured concrete, like a sticky or tacky feel. If present, wait until it’s completely dry and hard.
Practical moisture and adhesion tests (visual checkpoints)
Before sealing new concrete, it’s crucial to ensure it’s dry and ready for the sealant. Use this checklist once your concrete has cured for the recommended time (refer to manufacturer guidelines or local building codes).
- Check surface moisture: Place a piece of plastic sheeting on the concrete, secure the edges with tape, and leave it for 24 hours. If condensation forms under the plastic, the concrete is still too moist to seal.
- Use a moisture meter: Measure the relative humidity (RH) at the surface using a concrete moisture meter. Aim for RH below 75% before sealing. Always follow manufacturer instructions for accurate readings.
- Calcium chloride test: If required by your sealant’s manufacturer, perform a calcium chloride test. Apply the test kit according to instructions and check the results after the specified time. A pass means the concrete is dry enough to seal.
- Inspect for efflorescence: Look for white powdery deposits on the surface, which indicate excess moisture. Sealant won’t adhere properly over efflorescence, so remove it with a suitable cleaner before sealing.
- Check for cracks or damage: Inspect the concrete surface for any cracks, chips, or other defects. Repair these issues before sealing to ensure proper adhesion and prevent water intrusion.
- Ensure concrete is clean: Remove all dirt, debris, and contaminants from the surface using a suitable cleaner. A dirty surface can compromise sealant adhesion.
- Verify cure time: Confirm that at least 28 days have passed since the concrete was poured (or as recommended by the manufacturer). This ensures the concrete has reached its intended strength before sealing.
- Test sealant adhesion: Perform a small-scale adhesion test using your chosen sealant. Apply a small amount to an inconspicuous area and let it cure according to the manufacturer’s instructions. Scratch the surface with a coin or utility knife to check for proper adhesion.
Quick rule: Always follow manufacturer guidelines for your specific concrete mix, sealant product, and local climate conditions. Skipping these tests can lead to premature sealant failure, water damage, and costly rework.
Common Moisture Traps and How to Prevent Them
Common traps include ground vapor, inadequate drainage, and curing compounds left on the surface. Contaminants such as oils or cleaners can also hinder adhesion. Each trap creates a path for moisture to linger under the coating and later cause peeling.
Before sealing, perform site checks and verify dryness with appropriate tests. Improve drainage and remove residues, then clean and prepare the surface so moisture can dry evenly. Use compatible cleaners and sealers as a readiness checklist.
Construction- and site-related traps (drainage, slope, subgrade)
Moisture from the ground can wreak havoc on your concrete slab. Here’s how it happens:
Improper grading lets water pool around your slab. This moisture seeps in through capillary action, getting trapped and causing peeling sealers later.
Insufficient vapor barriers beneath your slab allow ground moisture to migrate upwards, leading to the same issues.
Prevent this: Ensure proper grading – slope away from the slab. Install a good vapor barrier under your slab during construction. If water’s pooling, regrade or install drainage like French drains.
Surface traps (curing compounds, form oils, contamination)
Stuff left on your concrete’s surface can stop sealers from bonding. Here’s what to watch out for:
Leftover curing compounds and release agents create a barrier that sealers can’t stick to.
Oils and other contaminants do the same, plus they can react with some sealers, causing cloudiness or discoloration.
Remove these: Clean your slab thoroughly. Use a suitable cleaner for any curing compounds (follow manufacturer’s instructions). Remove all visible oils and contaminants. If in doubt, etch or profile the surface to ensure cleanliness.
Step-by-Step Process to Seal New Concrete Correctly
Select the right sealer type for new concrete and gather tools such as a roller, sprayer, and edge applicator. Have PPE ready and moisture meters on hand to verify conditions. Prepare the surface by cleaning and ensuring it is fully cured.
Follow a practical application sequence with consistent technique and watch for edge and contour areas. Maintain proper temperature and humidity ranges as you apply, then observe cure guidelines before exposure to moisture. Use quick tests like bead-up water to gauge sealing success and plan maintenance timing.
Step-by-Step Process
This sequence will guide you through sealing new concrete correctly, ensuring durability and longevity.
-
Check weather: Ensure temperature is between 50°F-90°F (10°C-32°C) and no rain is expected for at least 24 hours.
Reason: Extreme temperatures or moisture can affect sealant performance.
Check: Consult weather forecast. -
Inspect surface: Check concrete is clean, dry, and free of any defects.
Reason: A well-prepared surface ensures better sealant adhesion.
Check: Run your hand over the surface; it should feel smooth. -
Apply sealant: Using a paintbrush or roller, apply sealant evenly across the concrete.
Reason: Sealant protects concrete from moisture and abrasion.
Check: Surface should have a consistent sheen. -
Inspect edges: Ensure sealant is applied to all edges and corners.
Reason: Edges are most susceptible to damage.
Check: Inspect edges visually. -
Allow curing: Let the sealant cure for the time specified on the product label, usually 24-72 hours.
Reason: Curing allows the sealant to fully bond with the concrete.
Check: Surface should feel dry and non-tacky. -
Inspect for defects: Check for any missed spots, bubbles, or imperfections.
Reason: Defects can compromise the sealant’s protective properties.
Check: Inspect surface visually and by touch.
Pro tip: Always follow manufacturer’s instructions for specific product application, curing times, and safety precautions.
Tools and materials checklist
Before you start sealing your new concrete, make sure you have all the necessary tools and materials. This list will help you ensure nothing is missed.
- Appropriate sealer: Check product label to confirm it’s suitable for your concrete type (e.g., plain, stamped, colored).
- Sealer application tool: Choose a sprayer or roller based on the sealer’s recommended method. A 3/8″ nap roller is common.
- Pressure washer: Ensure it has a suitable PSI (1200-2800) and GPM (1.6-2.5) for cleaning concrete.
- Concrete cleaner/degreaser: Check that it’s designed for concrete, not just general-purpose.
- Personal Protective Equipment (PPE): Include gloves, safety glasses, and a respirator if the sealer has strong fumes.
- Adhesive/moisture test tools: Use a moisture meter to ensure concrete is dry (<18% MC) before sealing. Check for adhesion by applying tape and pulling it off.
- Tape measure: Measure your concrete area to calculate how much sealer you’ll need per square foot (typically 20-35 sq ft/gal).
- Timer: Keep track of application and drying times to avoid over-applying or rushing the process.
Quick rule: Always follow manufacturer’s instructions for specific product usage, safety guidelines, and clean-up procedures.
Surface preparation and application best practices
Before you start sealing, you gotta get your concrete surface ready. Here’s how:
Clean it up: Remove any dirt, stains, or debris. A power washer can help. Let it dry completely.
Repair cracks and holes: Fill ’em with a concrete patching compound. Follow the mix ratio on the bag.
Now, check if your concrete needs etching or neutralizing: If it’s new, you might need to neutralize any leftover alkalis. If it’s old and has efflorescence (white powdery stuff), etch it off. Check product labels for the right stuff.
Apply sealer: Use a thin, uniform coat. Don’t glob it on. Follow the cure window on the label to avoid trapping moisture. And don’t seal if rain’s in the forecast.
Curing, testing and visual quality checkpoints
Use this checklist after you’ve applied the sealant to ensure your new concrete is curing correctly and maintaining its integrity.
- Check moisture content: After application, wait for 24-72 hours (check product label) before testing. Use a moisture meter to confirm surface is between 15-20% relative humidity. Too high may cause delamination.
- Perform adhesion test: Apply small patch tests in hidden areas using the same sealant. Scratch with a coin or blade after curing time (check manufacturer’s instructions). If sealant lifts off, adhesion is poor.
- Water-bead test: Sprinkle water on sealed surface. If it beads up and doesn’t soak in, the sealant is working correctly. If it soaks in, reapply or check for proper curing time.
- Inspect for blisters: Look for any raised, bubble-like areas that may indicate trapped moisture underneath. If found, puncture and allow to dry before reapplying sealant.
- Check for cracks: Inspect the surface for any hairline cracks that could compromise the seal. Fill with appropriate crack filler if necessary.
- Verify even drying: Ensure there are no wet or dry spots remaining after the recommended curing time (check manufacturer’s instructions). Uneven drying can lead to inconsistent protection.
- Test for delamination: Gently tap the surface with a hammer. A dull thud indicates good adhesion. A hollow sound may suggest delamination, requiring reapplication or further investigation.
- Check local rules: Ensure your concrete has met all local building codes and regulations regarding curing times and sealant application before proceeding with final inspections.
Quick rule: Always follow manufacturer’s instructions for specific product guidelines. Regular visual checks can help prevent expensive rework due to improper curing or sealant application.
Diagnosing and Correcting Peeling or Failure
Identify root cause by examining moisture presence, gloss or dullness, and blistering patterns. Determine if failure stems from trapped moisture, surface contamination, or a mismatched product. Clear signs point you toward the appropriate corrective path.
Use moisture tests and review compatibility charts to confirm moisture entrapment or contamination. Remove failed sealer if needed, dry the surface, and choose a compatible product or primer suited for damp or contaminated surfaces. Plan resealing with proper curing and preparation steps to prevent recurrence.
How to diagnose the root cause
The first step is to figure out why your sealer’s peeling. Here’s how:
Check for moisture: Use a moisture meter or relative humidity test on the slab. If it’s above 75%, you’ve got trapped moisture.
Look at the sheen and blisters: A cloudy film or whitening means your sealer’s reacting to something – likely contamination. Blistering patterns can also hint at moisture entrapment.
Remember, peeling due to wrong product choice won’t show these signs. It’ll just look like it doesn’t stick. Check curing conditions and sealant compatibility charts to be sure.
Repair and removal options
Once you’ve found the root cause, here’s how to fix it:
Remove failed sealer: You can use mechanical methods like scraping or sanding, or chemical strippers. Always follow safety guidelines.
For surface repairs, use a concrete patching compound for small cracks or holes. For bigger issues, you might need to replace the damaged section entirely.
Before reapplying sealer, make sure to re-prep the surface. This means cleaning thoroughly and letting it dry completely. If moisture’s still an issue, consider using a primer designed for damp surfaces.
Safety, Environmental, Maintenance, and Cost Considerations
Follow a PPE plan with gloves, eye protection, and appropriate respiratory protection when fumes are present. Ensure good ventilation and stable footing during application. Work practices should minimize exposure and risk on elevated areas if used.
Contain runoff and protect surroundings, dispose of containers properly, and respect local rules on VOCs. Maintain the sealed surface with periodic cleaning and inspections, and consider low-VOC options for ongoing projects. Weigh preventive sealing against repair costs to determine long-term value.
Safety and environmental precautions
Safety first: Wear gloves, eye protection, and a respirator if you’re sanding or dealing with solvent fumes. Ensure there’s adequate airflow, and keep exposure to fumes minimal.
Protect the environment: Contain runoff using drop cloths or barriers. Keep sealers away from landscaping and storm drains. Follow local VOC regulations and have a spill response plan ready.
Dispose responsibly: Store and dispose of sealers properly, following manufacturer guidelines. Empty containers should be recycled if possible, or disposed of according to local waste management rules.
Maintenance schedule and cost-benefit ideas
Regular inspections: Check your concrete every few months for signs of peeling or moisture. A quick visual check can save you big bucks in the long run.
Light maintenance: Keep your concrete clean, repair minor cracks promptly, and ensure water drains away from the surface. This extends sealer life and prevents costly repairs.
Preventive care vs. repair: Regular preventive sealing is cheaper than fixing moisture-related failures. It’s like changing your oil; it costs less than a new engine.
Conclusion
You’ve got to get moisture right on new concrete, or the finish will peel and look bad long before it should. Take control now so your seal protects what you built and keeps the surface solid and clean.
First, test and verify before you seal and follow the curing window, then clean and repair any cracks, pick the right sealer for the moisture you’ve measured, apply in the correct temperature and humidity range, and recheck adhesion in a small area before committing to the whole slab. Seal only after curing and after you’ve confirmed there are no active leaks or damp spots, and document the steps you took so you have a concrete maintenance plan to follow.
Avoid these mistakes: sealing when the concrete is still damp or testing shows sensory moisture; skipping a small-area test to confirm adhesion and coverage; using the wrong sealer for the moisture conditions or ignoring safety gear and ventilation. Use basic safety rules: wear eye and skin protection, work in a dry, ventilated area, and keep pets and kids away from the work zone; if you see ongoing moisture or peeling after sealing, don’t push on without rechecking the timing and the moisture traps.
If moisture issues persist or the area is large, consider calling a professional to diagnose the moisture source and select the correct sealer system. Stay steady, follow the checks, and you’ll protect the surface and avoid costly fixes down the line.
FAQ
How should I prep the surface before sealing new concrete?
Make sure the concrete is fully cured and dry to the touch. Remove dirt, oil, and curing compounds, then rinse and let it dry completely before applying any sealer. Check the product label for surface prep steps and acceptable moisture levels.
How do I choose the right sealer for new concrete?
Look for a sealer labeled for exterior use and compatible with new concrete. Read the label for moisture tolerance, UV resistance, and whether it’s breathable or has a water-repellent film. If in doubt, compare options and follow the manufacturer’s instructions and local guidance.
What are the correct application techniques for sealing fresh concrete?
Apply as directed—usually in suitable weather with no rain forecast. Use the recommended tool (roller, brush, or sprayer) and keep a consistent thickness. Do not apply thick coats or multiple coats unless the label allows it.
What are common mistakes that lead to peeling, and how can I avoid them?
Avoid sealing over damp or not fully cured concrete, and don’t seal too early or too soon after rain. Don’t skip surface prep or apply to dirty surfaces. If peeling starts later, verify moisture and cure status, then reseal following the product instructions. Always check labels for compatibility with new concrete and moisture limits.