
Introduction
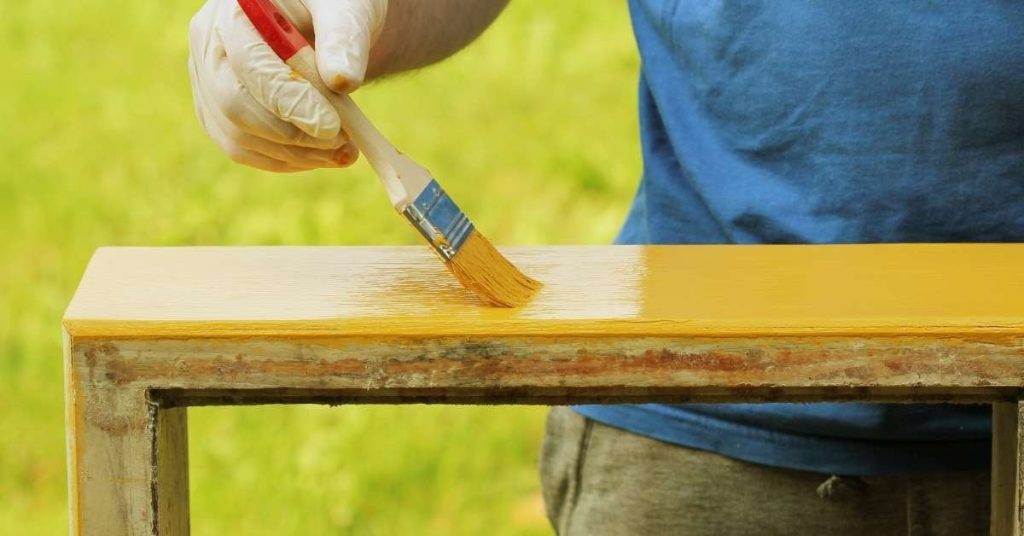
Tackling a painting project over stained wood can seem daunting, especially when you’re worried about bleed-through. But with the right approach and understanding of the timeline, you can achieve a flawless finish.
The key to success lies in proper preparation and timing. This guide walks you through each step, from assessing your wood to applying the final coat, ensuring you stay on track and within a reasonable timeframe.
For the full guide, see Painting Over Stained Wood Without Bleed-Through: Sealing and Scuff-Sand Workflow.
Understanding the Timeline: How Long Does It Take?
The entire process of painting over stained wood without bleed-through can take anywhere from two to five days, depending on factors like the size of your project, the type and condition of the wood, and environmental conditions. Here’s a breakdown of each step and its estimated time commitment:
- Assessing the Stained Wood (Day 1): 30 minutes to 2 hours
- Surface Preparation: Cleaning, Deglossing, and Scuff-Sanding (Day 1-2): 2 to 4 hours
- Choosing and Applying the Right Sealer/Primer (Day 2): 1 to 3 hours
- Application Workflow: Coats, Dry Times, and Scuff Between Coats (Day 3-5): 4 to 8 hours spread over multiple days
While some steps can be completed in a single day, others require waiting for proper drying or curing times. It’s essential to plan your project accordingly and allocate sufficient time for each stage.
Key takeaways
Proper surface preparation is crucial and can significantly impact the overall timeline. Taking the time to clean, degloss, and scuff-sand the wood ensures better adhesion and reduces the likelihood of bleed-through, ultimately saving you time in the long run.
- Assess wood type and finish before choosing sealer or primer alternatives.
- Clean, degrease, and scuff-sand to create a bite for sealer.
- Use a compatible sealer or primer designed for stained woods.
- Apply sealers in thin coats with light sanding between coats.
- Test bleed-through on a hidden sample area before full painting.
- Protect surrounding surfaces and wear PPE to avoid fumes and dust.
- Dry times vary; follow label directions and environmental limits.
Table of Contents
- Introduction
- Key takeaways
- Why Stained Wood Bleeds Through Paint
- Identify Your Wood and Existing Finish
- Tools and Materials Checklist
- Surface Prep: Cleaning, Deglossing, and Scuff-Sanding
- Choosing and Applying the Right Sealer/Primer
- Application Workflow: Coats, Dry Times, and Scuff Between Coats
- Troubleshooting Common Problems and Fixes
- Visual Checkpoints, Testing, and Final Maintenance
- Conclusion
- FAQ
Why Stained Wood Bleeds Through Paint
Bleed-through happens when colorants and oily materials in the wood or finish move into paint layers and show through the topcoat. Tannins from some species, resins and rosin in softwoods, residual oil finishes, and surface contaminants are the primary movers that can migrate through primer and paint.
Certain conditions make migration worse, such as older finishes breaking down, elevated moisture in the wood, or heat that softens resins and speeds movement. Check product labels and manufacturer instructions for any notes about tannin or oil blocking when selecting a sealer or primer.
Tannins, resins and oils explained
Some woods, like cedar, redwood, and mahogany, are high in tannins. Knots in any wood species can also contain these compounds.
Tannins react with iron in paint, turning it brown over time. Resins and oils in wood can also bleed through, causing discoloration.
These chemicals migrate through primer and paint, ruining your finish.
Previous finishes and contaminants
Waxes, oils, old shellac, grease, and silicones can interfere with adhesion. They prevent stain-blocking primers from working properly.
These contaminants create a barrier that stops paint from bonding to the wood. It’s like painting on wax paper – your paint won’t stick.
Before you start, test for these contaminants. Use rubbing alcohol or denatured alcohol on a cloth. If it becomes cloudy, you’ve got contamination.
Environmental and moisture factors
High humidity speeds up bleed-through. It allows tannins and resins to move more easily through the wood.
Wet wood also encourages bleeding. Make sure your surface is dry before you start painting.
Age matters too. Older woods have had time for tannins and resins to migrate. Be prepared for more bleed-through in older homes.
Identify Your Wood and Existing Finish
Start by looking at grain, color, and end-grain to narrow species groups, and inspect edges, hardware backsides, and cut ends for factory finish clues. To spot a factory or field finish, use a solvent test (per the finish label) on an inconspicuous area and note whether the surface softens, dissolves, or resists.
Assess absorbency with a small water droplet or a light sanding test to see if the wood drinks in liquid or beads up; that helps determine primer choice. If uncertain about the existing product or substrate behavior, consult the product data sheet or manufacturer instructions before proceeding.
Simple tests: solvent, scratch, and water
Before you start sealing, do some quick tests to figure out what’s on your wood. Grab some denatured alcohol or mineral spirits for a solvent rub, a sharp object for scratching, and a cup of water.
Solvent Rub: Apply the solvent with a cloth. If it dissolves the finish, you’ve got lacquer or shellac. If nothing happens, move on to the next tests.
Scratch Test: Gently scratch the surface. If it’s bare wood, you’ll see it. If not, you’re dealing with an oil-based finish.
Water Droplet: Place a drop of water on the wood. If it darkens or gets absorbed quickly, your wood is porous and needs sealing. If it beads up, you’ve got a factory finish that might not need sealing.
Visual and tactile clues for species and knots
Now let’s identify your wood species and spot any trouble spots like resinous knots or pitch pockets. Grab a flashlight and feel the grain.
Pine: Soft, light in color, and has visible grain patterns. Knots may be present but usually not resinous.
Oak: Hard, tight grain, and often has distinctive swirls or ‘medallions’. Knots can be present but are typically clean.
Cedar: Reddish-brown, straight grain, and a distinct smell. Knots may ooze resin, so check for pitch pockets that need special treatment.
Tools and Materials Checklist
Gather essential hand tools (sanders, scrapers, brushes, rollers), abrasives in graded grits, cleaning solvents or degreasers, and appropriate sealers/primers and topcoats for your situation. List alternatives: basic tools for DIY (hand sander, foam rollers) and pro-tier options (random-orbit sander, quality synthetic-bristle brushes) so you can match investment to project scope.
Include PPE like respirators, gloves, and eye protection and purpose notes for each item—abrasives for tooth, primers for blocking, and topcoats for durability. Verify specific product compatibility and safe-use instructions on labels or technical sheets before use.
Abrasives, sanding blocks and grit progression
Before you start painting, prep your wood surface properly to ensure a smooth finish. Here’s what you need:
- Wet/dry sandpaper: Start with 120-grit for heavy-duty work, then progress to 150 and 220-grit for fine sanding.
- Abrasive pads or scuffing screens: Use these for hard-to-reach areas or when you need extra aggression. They’re great for removing old finishes.
- Sanding blocks: For flat surfaces, use a sanding block to apply even pressure and avoid uneven sanding.
- Random orbital sander (optional): This power tool speeds up the process but requires some skill to use effectively.
Quick rule: Always start with coarse grits, then progress finer. Skipping this can lead to a rough surface and poor paint adhesion.
Sealers and primers to consider
Choosing the right sealer or primer is crucial for preventing bleed-through and ensuring good paint adhesion. Here are your options:
- Shellac-based sealers: These are ideal for blocking tannins and resins. They dry fast, but have a strong odor.
- Oil-based primers: High-hide oil primers can cover dark stains well. They take longer to dry and clean up with mineral spirits.
- High-hide waterborne primers: These offer good stain-blocking and are low-odor, water-cleanup options. However, they may not be as effective on severe stains.
Quick rule: For severe stains, use a shellac-based sealer first, then follow up with an oil or waterborne primer for better paint adhesion.
Safety gear and ventilation
Protect yourself and your workspace from harmful solvents and dust. Here’s what you need:
- Respirator: Use a NIOSH-rated respirator for solvent-based products to protect against fumes.
- Gloves: Wear gloves to protect your hands from chemicals and splinters.
- Eye protection: Safety glasses or goggles are essential to shield your eyes from debris and splashes.
- Ventilation: Ensure proper ventilation, using fans or open windows. For enclosed spaces, consider a HEPA vacuum for dust control.
Quick rule: Always use safety gear when working with solvents and sanding. Inadequate protection can lead to health issues and accidents.
Surface Prep: Cleaning, Deglossing, and Scuff-Sanding
Begin with cleaning to remove grease, wax, and dust so sealers can bond; use the cleaner recommended for the type of finish or contaminant you found. Follow with deglossing or chemical stripping if the existing finish is hard, glossy, or incompatible with your chosen primer.
Finish prep with scuff-sanding to create a mechanical tooth for adhesion, working through appropriate grit progressions and keeping the surface clean between steps. If residue remains after sanding, clean again and confirm the surface is dry and dust-free before priming.
Cleaning and degreasing effectively
Start by removing any loose dirt with a soft brush. Then, tackle grease and residue with a cleaner like TSP substitute or trisodium phosphate.
Mix according to instructions, usually 1/2 cup per gallon of warm water. Apply with a sponge or sprayer, let it sit for 5-10 minutes, then scrub gently. Rinse thoroughly with clean water to remove all residue.
Be careful not to over-wet the wood. Excess water can raise the grain and cause issues later.
Scuff-sanding technique and grit choices
Choose your sanding method: hand or orbital. Hand sanding gives more control, while orbital is faster but can be less precise.
For final surface prep, aim for 180-220 grit. This range provides enough ‘tooth’ for primer adhesion without leaving deep scratches. Be gentle with thin veneers – you don’t want to sand through.
Start with a lower grit (60-80) if the surface is rough or has old paint. Progressively finer grits will help smooth it out. Always sand with the grain, never against.
Repairing holes, cracks and knots
Treat knots first to prevent tannin bleed. You can use a back-priming technique, shellac, epoxy, or knot filler. Apply according to the product’s instructions.
For cracks and holes, use a stain-blocking filler like putty or spackling compound. Apply with a putty knife, let it dry, then sand smooth with 120-grit paper.
If you find bad veneer that can’t be repaired, replace it. Remove the old piece carefully, apply wood glue to the new one, and clamp it in place until dry. Sand flush with the surrounding surface.
Choosing and Applying the Right Sealer/Primer
Select a sealer or primer based on its stain-blocking claims, compatibility with your intended topcoat, and the severity of bleed potential—mild cases may need a standard primer, while severe tannin or oil cases often require a dedicated block primer. Compare cure and recoat information from product data sheets and pick one that fits your timing and cleanup preferences.
When unsure about compatibility with your topcoat, do a small test patch and recheck manufacturer instructions for adhesion and overcoating limits. For critical situations, follow the sealer label for surface preparation and application rates rather than assuming a universal approach.
Shellac-based sealers: pros and cons
Dewaxed shellac is a quick and reliable short-term blocker for tannins and resins, making it an excellent choice when you need to paint over stained wood. It’s fast-drying and easy to apply.
Pros
- Fast drying time
- Excellent stain-blocking properties
- Easy application
- Non-toxic once dry
- Can be used as a finish coat in some cases
Cons
- Sensitive to alcohol-based solvents
- Strong odor during application
- Limited durability as a topcoat
- May darken over time if not sealed properly
- Not suitable for outdoor use or high-moisture areas
Shellac-based sealers are ideal when you need to stop mild to moderate bleed-through quickly. However, they’re not the best long-term solution due to their limited durability.
Oil-based and solvent primers
Oil-based or alkyd primers are great for adhesion and stain control, especially when dealing with severe bleed-through. They penetrate deep into the wood fibers to provide excellent coverage.
Note: These primers have high VOC content and strong odors, so proper ventilation is crucial.
They’re ideal for use on bare wood or when you need to seal in heavy tannins or resins. However, they do take longer to dry compared to other options.
Cleanup requires mineral spirits or paint thinner, which can be harsh on the environment and your skin.
High-hide waterborne primers and adhesion promoters
Latex or acrylic primers with adhesion promoters are a good choice when you want to reduce odor and cleanup issues. They provide excellent coverage, especially on light-colored woods.
These primers are typically low in VOCs, making them more environmentally friendly than oil-based options. However, they may not perform as well on severe bleed-through cases compared to oil-based or shellac sealers.
Tip: For best results, use these primers in combination with a good quality paint and primer conditioner to enhance adhesion and coverage.
They’re easy to clean up with just soap and water, making them a user-friendly option for DIY homeowners.
Application Workflow: Coats, Dry Times, and Scuff Between Coats
Apply the sealer first in a thin, even coat and watch for the touch and handle-dry indicators listed by the product before proceeding to additional coats or sanding. After the sealer cures to the state recommended by the manufacturer, lightly scuff-sand to knock down any nap and promote mechanical bond for the primer or topcoat.
Build subsequent coats in the order the products specify, allowing the recommended recoat window and using a light scuff between coats when instructed. If timings are unclear, check the technical data sheet for minimum and maximum recoat guidance and use touch and visual checks to confirm readiness.
Wet-on-wet vs full cure workflows
The wet-on-wet approach lets you recoat sooner, speeding up the job. But remember, faster isn’t always better. Here’s what to consider:
Wet-on-wet means applying the next coat before the previous one fully cures. It saves time but might not give you the best results. You’re relying on the sealer’s initial stain-blocking power, which might not last long-term.
Full cure, on the other hand, means waiting for each coat to dry completely before applying the next. This ensures better adhesion and more reliable stain blocking. But it takes longer.
Choose based on your project’s needs. If you’re in a hurry, wet-on-wet might work. But if you want long-lasting results, full cure is the way to go.
Scuff-sanding between coats: when and how
Scuff-sanding helps smooth out any imperfections before the next coat. Here’s how to do it right:
Wait for the previous coat to just start tacking off. This usually takes 1-2 hours, depending on humidity.
Use a fine grit (220–320) sandpaper or sponge with light pressure. You want to remove dust nibs, not break through the sealer. Wipe off any dust with a damp cloth and let it dry before moving on.
Scuff-sanding helps improve adhesion and gives you a smoother finish. But don’t overdo it – too much sanding can wear down your sealer.
Spray vs brush vs roller: technique decisions
Each application method has its pros and cons. Here’s how to choose:
Spraying gives you a smooth, even finish. It’s great for large areas but requires more equipment and skill. Avoid lap marks by overlapping each pass slightly.
Brushing is slower but gives you more control. It’s good for detailed work and tight spaces. Work in small sections to avoid runs and orange peel.
Rolling is fast and easy, perfect for large, flat surfaces. Use a high-quality roller cover to avoid leaving marks. Keep a wet edge to prevent lap marks.
Troubleshooting Common Problems and Fixes
If late-appearing bleed-through shows after topcoating, isolate the affected area and test-block with a stronger stain-blocking primer following removal of the topcoat if necessary. For adhesion failures or peeling, trace back to prep steps—clean again, remove loose coating, and ensure the right primer-to-topcoat compatibility before reapplying.
Address blotchy coverage or texture defects by feather-sanding and applying thin, even coats or by using a different application tool to match the surface. When in doubt about a corrective product or method, consult the manufacturer instructions or test in a small area before committing to the whole piece.
Bleed-through appearing after topcoat
If you’re seeing stains or discoloration bleeding through your topcoat, it’s likely tannin bleed. Tannins are natural compounds in woods like cedar and redwood that can leach out over time. Here’s how to deal with it:
First, check if it’s tannin bleed or surface contamination. Tannin bleed will usually show up as a consistent brownish stain, while contamination is more random and often lighter in color.
If it’s tannin bleed, you’ve got two options:
Option one, sand back the affected area. Lightly sand with 120-grit paper, being careful not to damage the wood. Wipe off any dust and re-seal with a shellac-based primer or an oil primer designed for tannin bleed.
Option two, spot-treat the affected area. Apply a tannin-blocking primer specifically designed for this issue. Follow the manufacturer’s instructions to ensure you’re using it correctly.
Adhesion loss and peeling
If your concrete surface starts to peel or lose adhesion, you’ve got a problem that needs fixing. Here’s how to figure out what went wrong and how to fix it.
First things first: Check if the base was properly prepared. Inadequate scuffing or contamination can cause adhesion issues. If you’re not sure, check the product label or contact the manufacturer for advice.
Now, let’s troubleshoot:
- Contamination: Check if there was any oil, grease, or other contaminants on the surface before application. If so, you’ll need to clean it thoroughly and let it dry completely.
- Incompatible products: Ensure you’re using compatible products. Some sealers don’t play nice with certain primers or topcoats. Double-check your product labels or contact the manufacturer if you’re unsure.
Once you’ve identified and fixed the cause, it’s time to remediate:
- Re-sand: Lightly sand the affected area with fine-grit sandpaper (around 220-320 grit) to create a better surface for the new primer.
- Choose your primer: Select a primer that’s compatible with both your existing concrete and the topcoat you’ll be using. If you’re unsure, consult the manufacturer. Some popular choices include acrylic, epoxy, or polyurethane primers.
Remember: Prevention is better than cure. Always prep your surface properly and use compatible products to avoid adhesion loss in the first place.
Surface texture and finish defects
Got some unwanted marks or bumps on your concrete? Here’s how to fix ’em:
Brush Marks: Too much water in your mix or sloppy finishing can leave those. Check your mix design, make sure you’re not overwatering. Use a magnesium float to smooth it out.
Dust Nibs & Orange Peel: These happen when the surface dries too fast. Keep your concrete cool and moist, use a sprinkler or cover with plastic. For light nibs, you can de-nib before final coats. Heavy ones? You might need to grind and re-apply.
Uneven Sheen & Scuffing: This is usually due to poor compaction or not letting the base cure enough. Check your base compaction, make sure it’s solid. Let your base cure for at least 7 days before applying a new coat. If you scuffed it up, lightly de-nib and re-apply.
Visual Checkpoints, Testing, and Final Maintenance
Use visual checkpoints: after cleaning the surface should be uniformly free of contaminants, after sealing there should be no migrating color visible through the sealer, and after the topcoat expect uniform film and consistent sheen. Perform a small test patch that goes all the way through your intended prep, sealer, and topcoat to confirm bleed-block success before covering the entire surface.
Record what products and methods worked and follow maintenance practices recommended by the finish manufacturer to extend finish life, such as cleaning methods and acceptable cleaners. If you find uncertainty about longevity or product care, check the product label or technical guidance for recommended maintenance intervals and procedures.
Test Patch Protocol and Documentation
Before committing to full coverage, test your sealer and topcoat on a small area. This helps ensure no bleed-through occurs.
- Choose the test location: Select an inconspicuous spot, similar to the main surface in terms of wood type and exposure.
- Test size: A 2′ x 2′ patch is usually sufficient. Skipping this may lead to costly mistakes if bleed-through occurs.
- Apply sealer: Follow the application workflow mentioned earlier, applying the chosen sealer.
- Cure time: Allow the sealer to cure for the recommended time. This could be 24 hours or more.
- Observe for bleed-through: Check if any stain is bleeding through the sealer. If yes, you may need a different sealer or additional coats.
- Apply topcoat: Once cured, apply your chosen topcoat following the workflow mentioned earlier.
- Cure and check again: After curing, recheck for bleed-through. If none, proceed with full coverage.
- Documentation: Record products used, temperatures, times, and any observations. This helps reproduce results or troubleshoot issues later.
Quick rule: Always test before committing to full coverage to avoid costly mistakes.
Long-Term Maintenance and Touch-Up Guidance
Maintaining your painted wood surface ensures its longevity and appearance. Regular check-ups and timely touch-ups are key.
- Regular cleaning: Use a mild soap solution and soft brush to clean dirt off the surface. Neglecting this can lead to buildup and eventual damage.
- Inspect for failures: Regularly check for peeling, cracking, or other signs of failure. Early detection helps prevent bigger issues.
- Touch-up when needed: If small areas show signs of wear, touch up with the original topcoat. Delaying this can lead to larger repairs.
- Repair small failures: For small failures, lightly sand, clean, and recoat using the original products. No need to strip the entire surface.
- Re-coating intervals: Every 5-7 years, depending on exposure, consider a full re-coat for best protection.
Quick rule: Regular maintenance and timely touch-ups extend your finish’s life significantly.
Conclusion
Sealing and scuff-sand steps matter because they stop bleed-through, protect the wood, and keep your paint looking solid for years. Do the work right and you’ll avoid costly touch-ups and a front-row seat to peeling and staining creep.
First identify the wood and finish, then gather the approved tools, primers, and sealers, and confirm ventilation and PPE. Next, clean and deglose, scuff-sand the surface, choose and apply the right sealer or primer, and follow the coating plan with proper dry times and a light scuff between coats. Test in a hidden area for bleed-through and finish with final checks and maintenance to lock in the result.
Common mistakes to avoid: skipping the deglossing step, skipping or mis-timing the scuff between coats, and rushing the drying times. Safety first means using proper ventilation, protection for eyes and skin, and never forcing a coat with heat or fan exposure. Also, remember to test in a small area before committing to the whole piece, and keep a simple rule of thumb: if you see bleed-through, stop, reassess your sealer choice, and fix before moving on.
If the wood is heavily stained, the stain is old, or you’re unsure about the finish compatibility, don’t push beyond your comfort level. Consider a pro for complex mixes or large surfaces. Stay patient, follow the steps, and you’ll end with a durable, smooth finish that lasts.
FAQ
How do I pick a sealer or primer to stop stain bleed-through?
Look for products labeled as stain blockers or shellac-based primers. Check the label for bleed-through resistance and follow the manufacturer’s instructions. Do a small test on an inconspicuous spot before committing the whole project.
Should I scuff-sand between coats?
Yes if the previous coat feels glossy or smooth. Lightly scuff the surface to give the next coat something to grab, then wipe off dust before applying the next layer. Don’t over-sand; you’re just roughening for adhesion.
What if the stain still bleeds through after priming?
You may need a second coat of primer or a different stain-blocking product. Re-clean the surface, re-prime, and re-test on a small area before continuing. If it persists, check product instructions or try a manufacturer-recommended alternative.
How do I know when the topcoat is ready to apply?
Follow the topcoat label for dry-to-touch or cure indicators. Ensure the surface is free of tack and feels dry to touch in the tested area. Ventilate well and avoid applying in extreme temperatures or humidity as advised by the product instructions.