
Introduction
Painting basement walls without trapping moisture means choosing a coating and prep method that manages moisture rather than sealing it in. Start by diagnosing the wall condition and cleaning, repairing leaks, and planning ventilation before any paint goes on. Then determine if the wall needs moisture barriers, steps for drying, and whether to apply primer before paint.
For basement walls, mineral paints, acrylics, and epoxies each behave differently when moisture is present, so pick based on wall condition and humidity. Prepare the surface thoroughly, use appropriate primers or sealers per product instructions, and follow proper brushing, rolling, or spraying techniques with the right tools. Always check the product label and local rules to confirm suitability and curing requirements.
Key takeaways
- Inspect walls for efflorescence, cracks, and moisture sources before selecting paint.
- Repair leaks and moisture causes; fix drainage and sump issues prior to coating.
- Use breathable mineral paints on damp masonry to allow vapor release.
- Prime with appropriate sealer if recommended by manufacturer; follow cure times exactly.
- Prepare walls by removing loose paint, efflorescence, and brushing away dust.
- Epoxy or high-build coats resist breathability; choose for durability where moisture is controlled.
- Wear respirator, eye protection, and gloves when sanding or applying coatings.
Table of Contents
- Introduction
- Key takeaways
- Diagnose Your Basement Walls Before Choosing a Paint
- Manage Moisture and Fix Root Causes Before Painting
- Prepare Walls Properly for Breathable Coatings
- Mineral (Silicate) Paints — Breathable Masonry Option
- Acrylic Masonry Paints — Flexible, Easy-to-Use Choice
- Epoxy and High-Build Coatings — Durability Vs. Breathability Trade-Offs
- Application Best Practices and Tools to Avoid Trapping Moisture
- Aftercare, Costs, Safety, Longevity, and Common Mistakes
- Conclusion
- FAQ
Diagnose Your Basement Walls Before Choosing a Paint
Start by identifying what your walls are made of and what coatings already exist. Look for bare concrete, painted concrete, block, or plaster and note any sealants that could affect adhesion and primer choice. Inspect visible damage and surface texture to gauge prep needs before selecting a product.
Check for moisture indicators like efflorescence, damp patches, salt deposits, condensation patterns, and odors. Differentiate exterior moisture ingress from interior humidity and plan accordingly. Observe cracks, scaling, and any mold growth to determine the right approach for prep and coating compatibility.
Identify wall material and condition
The material of your basement walls affects how paint adheres, performs, and looks. Here’s what to look for:
- Concrete: Smooth, grey surface. Look for spalling (flaking) or efflorescence (white deposits). Avoid if not properly cured.
- Cinder Block: Hollow cores, rough texture. Check for cracking or staining. Paint may need primer to bond well.
- Brick: Uniform size, clay-like feel. Watch out for salt deposits and efflorescence. May require special paint.
- Plaster: Smooth, white surface. Look for cracks or delamination. May need primer to prevent peeling.
- Previous coatings: Check if existing paint is peeling or flaking. Remove before painting.
Recognize moisture clues and sources
Moisture can ruin your paint job. Here’s how to spot it:
Visible signs: Look for stains, salt deposits, or mold/mildew. Efflorescence is a sign of excess moisture.
Sources: Exterior leaks, hydrostatic pressure (water pushing in from outside), and condensation can cause moisture. Internal humidity may also be the culprit if there’s no exterior source.
Moisture can come from many places. Identify yours to fix it at the source.
Use basic diagnostics and when to call a pro
Before painting, do some quick checks:
Visual inspection: Look for damp patches, cracks, or other signs of moisture. A tib tape test can help.
Simple tests: Check humidity levels and observe condensation patterns. If unsure, try a 24-48 hour moisture revert test.
If results are unclear or problems persist, consider using a moisture meter or consulting a professional. Better safe than sorry!
Manage Moisture and Fix Root Causes Before Painting
Identify and prioritize moisture sources such as rising damp, interior condensation, plumbing leaks, or exteriorwater intrusion. Perform diagnostic actions like meter readings, visual checks, or infrared if available to locate the problem areas. Create a plan to address these causes before coating.
Establish a fix-before-paint protocol that stops leaks, improves drainage, and controls interior humidity. Note any wall conditions such as efflorescence or loose plaster that signal readiness for coating prep. Document repairs and set up a monitoring plan to verify stability before proceeding with paint.
Exterior fixes and drainage improvements
Before you grab your paintbrush, tackle the exterior to keep water out. Here’s what to do:
Gutters and downspouts: Ensure they’re clear and directing water away from your home’s foundation.
Grading: The ground around your home should slope away from the walls, preventing water from pooling against them. If it doesn’t, regrade or consult a contractor.
Exterior waterproofing: If you find cracks in exterior brick or masonry, seal them with an appropriate waterproofing compound. For serious issues, consider hiring a professional for exterior waterproofing systems.
Interior moisture control strategies
Keep your basement walls dry from the inside out with these tactics:
Ventilation: Ensure there’s adequate airflow. Open windows when possible, and consider installing fans to circulate air.
Dehumidification: Use a dehumidifier to control moisture levels. Monitor humidity levels and empty the unit regularly to maintain effectiveness.
Condensation reduction: Insulate cold water pipes and keep them warm with heat tape or pipe sleeves to reduce condensation on walls.
When waterproofing or repairs are required first
Sometimes, painting won’t cut it. Here’s when you need to address underlying issues:
Masonry repair: If walls show signs of significant damage like crumbling mortar or large cracks, they’ll need repair before painting.
Crack injection: For active leaks coming through cracks, consider crack injection with a suitable resin to seal the source.
New drainage systems: If your basement floods regularly, you may need new interior or exterior drainage systems installed by a professional before painting.
Prepare Walls Properly for Breathable Coatings
Assess the moisture baseline and masonry health to decide if moisture management must come first. Identify leaks, efflorescence, staining, and capillary action that could affect adhesion. Decide on the sequence of prep steps based on these findings.
Clean and dry the walls thoroughly, removing dirt, oils, and loose paint. Repair with breathable fillers and avoid products that seal pores unless specifically advised. Prepare the surface without sealing its pores and verify dryness before coating.
Cleaning and efflorescence removal
Start by brushing off loose dirt and debris with a stiff-bristle brush. Then, use a masonry cleaner specifically designed for your wall type to remove any oils or stains. Apply the cleaner using a sprayer or paintbrush, let it sit as directed, then scrub gently with a soft-bristled brush.
To remove white salt deposits (efflorescence), use a wire brush or a solution of muriatic acid diluted 1:4 with water. Be sure to wear protective gear and follow safety guidelines. Apply the solution sparingly, scrub lightly, then rinse thoroughly with clean water. Allow the wall to dry completely before proceeding.
Do not use high-pressure washing or harsh chemicals that could damage the surface or seal its pores.
Repairing cracks, spalls, and deteriorated mortar
For small cracks (less than 1/4 inch), use a breathable masonry filler or hydraulic cement. Apply with a putty knife or trowel, ensuring the material is well-packed into the crack. Allow it to cure according to the manufacturer’s instructions.
For larger cracks or spalls, you may need to chisel out damaged material first. Use a compatible, breathable repair mortar to fill these areas. Apply in thin layers, allowing each to dry before applying the next. Ensure repairs are flush with the surrounding surface and won’t trap moisture.
Do not use non-breathable materials or sealers that could trap moisture behind them.
Etching, profiling, and surface compatibility
For mineral paints, you’ll want a micro-rough surface to enhance adhesion. Use a mild acid etchant or gentle abrasion with sandpaper (120-grit) to achieve this. Rinse thoroughly after etching and allow the wall to dry completely.
For epoxy systems, a smooth profile is best. Lightly abrade the surface with fine-grit sandpaper (220-grit or higher), then clean off any dust. Ensure your chosen paint system is compatible with your wall material and condition.
Do not over-etch or over-abrade, as this can damage the surface and reduce its ability to breathe.
Mineral (Silicate) Paints — Breathable Masonry Option
Define mineral (silicate) paints and explain their breathable nature for masonry. Understand how silicate binders bond to mineral substrates and how this influences adhesion and durability on basement walls. Consider breathability as a key factor in moisture management.
Address surface prep and substrate compatibility, including cleaning, efflorescence removal, and porosity considerations. Outline application approach, curing considerations, and the role of primers in preparing the substrate. Discuss long-term performance traits and maintenance without overreaching on specifics.
Advantages for basements
Mineral paints, also known as silicate paints, offer unique benefits when painting basement walls. They’re especially designed to work with mineral substrates like concrete and masonry.
Vapor Permeability: These paints allow moisture vapor to pass through them, preventing trapped moisture that could lead to mold or mildew growth. This is crucial in basements where moisture can be a common issue.
Chemical Bonding: Silicate paints bond chemically with the silica and aluminum oxides in concrete and masonry. This creates a strong, durable bond that resists peeling even when walls experience minor moisture fluctuations.
Mildew Resistance: Due to their breathability and lack of organic materials, mineral paints are resistant to mildew growth, making them an excellent choice for damp basement environments.
Limitations and practical considerations
While mineral paints offer many benefits, they also have some limitations to consider before applying them in your basement.
Substrate Type: Mineral paints work best on sound, clean, and dry concrete or masonry surfaces. They’re not suitable for gypsum-based walls or highly damp surfaces without proper preparation.
Flexibility and Color Options: These paints have limited flexibility compared to acrylic or epoxy counterparts. They also offer a more natural, earthy color palette as they rely on mineral pigments rather than synthetic ones.
Preparation and Application: Proper surface preparation is crucial for successful application. This includes ensuring the substrate is clean, free of efflorescence, and any cracks or spalls are repaired. The application process may also require specific techniques to avoid radiant or hydrothermal stresses that could cause cracking.
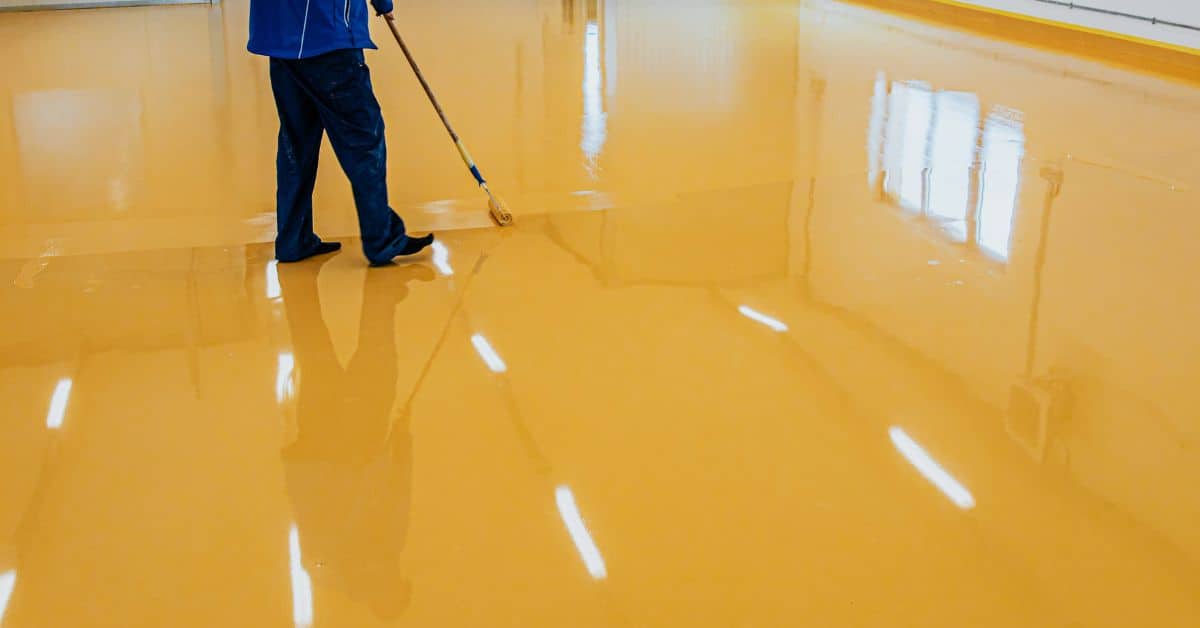
Acrylic Masonry Paints — Flexible, Easy-to-Use Choice
Clarify what makes acrylic masonry paints different from standard interior latex, focusing on binder flexibility and moisture handling on damp walls. Explain why breathable, flexible masonry paints are favored for basements and how they reduce cracking risk when paired with proper primers. Emphasize the importance of selecting products designed for masonry surfaces.
Cover surface prep and priming needs specific to basement walls, including cleaning and efflorescence management. Discuss primer-paint pairing, coverage expectations, and how to choose finishes that balance maintenance with moisture management. Outline a practical application approach and common pitfalls to avoid.
Benefits and best-use scenarios
Acrylic masonry paints are a popular choice for basement walls due to their ease of application and wide color range. Formulated specifically for masonry surfaces, they offer moderate breathability, allowing your basement walls to breathe while protecting them from moisture damage.
Ease of Application: Acrylic paints are water-based, making them easy to clean up and apply using a brush, roller, or even a low-pressure sprayer. They dry quickly, typically within 30 minutes to an hour, allowing for quick recoats.
Color Range: Acrylics come in a wide variety of colors, making it easy to find the perfect shade for your basement. They can also be tinted to match existing colors or create a custom look.
Risks of reduced breathability and mitigation
While acrylic masonry paints offer good breathability, some formulations can still trap moisture if not applied correctly. This is because acrylics form a partial vapor barrier, which can prevent water vapor from escaping through the walls.
Choosing Breathable Formulations: To mitigate this risk, look for acrylic masonry paints that are specifically designed to be breathable. These paints will have higher permeability ratings, allowing more water vapor to pass through them.
Proper Priming and Application: Using a breathable primer designed for damp substrates can also help reduce the risk of moisture trapping. Apply primers and paints in thin, even coats to ensure proper adhesion and breathability. Avoid applying too many coats at once as this can seal in moisture.
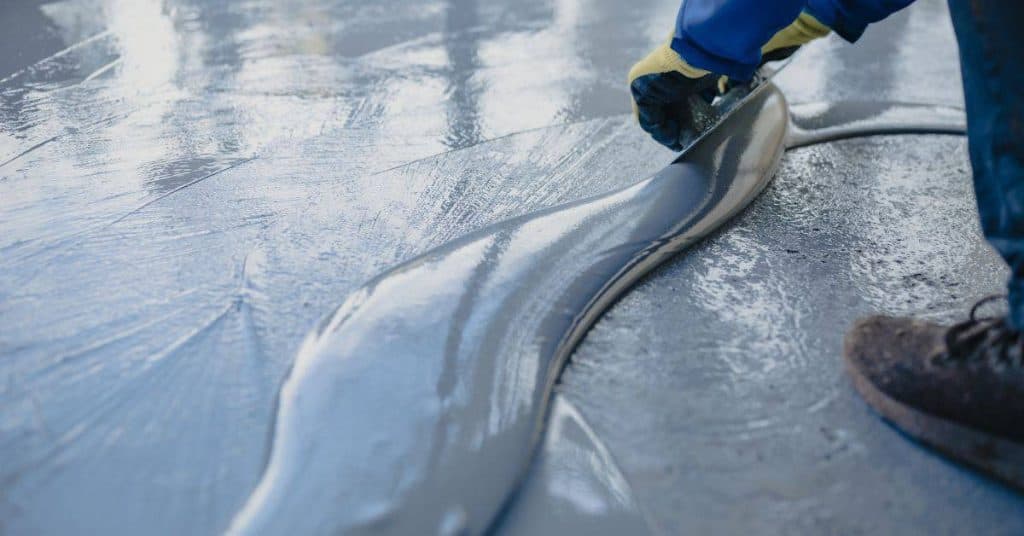
Epoxy and High-Build Coatings — Durability Vs. Breathability Trade-Offs
Explain core differences between epoxy and other high-build coatings in terms of water vapor permeability and film thickness. Clarify how impermeability can protect against moisture behind the coating but may trap humidity if the wall is not dry. Provide a framework for choosing coatings based on moisture risk and substrate condition.
Map out pre-application checks like wall dryness, moisture sources, and substrate porosity. Discuss surface prep and primer options that balance adhesion with breathability when needed. Offer a decision framework for selecting epoxy versus mineral or acrylic coatings with long-term considerations in mind.
Appropriate uses and cautions
Epoxies are tough cookies. They’re great where you need heavy-duty protection against chemicals, water, or abrasion. Think garage floors, workshop walls, or exterior basement surfaces with a proper drainage system.
But here’s the catch: Epoxy’s impermeability is a double-edged sword. It keeps moisture out from the front, but if there’s dampness behind it, you’re in trouble. Basements are tricky; they can hide moisture sources like rising damp or hydrostatic pressure.
Epoxies aren’t breathable. So, if you slap them on a wall with hidden moisture, that water has nowhere to go. It’ll get trapped and could cause efflorescence, blistering, or even structural damage over time.
Prep and warranty implications
Epoxies demand a clean slate. You gotta prep your walls right: clean ’em, deglaze any existing paint or sealers, and make sure they’re dry – we’re talking 14-21 days after any repairs or moisture mitigation.
Here’s where it gets serious: If you skip these steps, or if there’s hidden moisture, your epoxy job could fail. And guess what? Most manufacturers won’t cover that under warranty if prep wasn’t done right.
So, take your time with surface prep. Check and double-check for moisture. And always follow the manufacturer’s guidelines to keep your warranty intact.
Application Best Practices and Tools to Avoid Trapping Moisture
Start with moisture checks and surface conditioning to ensure stable conditions before painting. Verify RH levels and porosity and assess any remaining coatings that could affect adhesion. Use this information to plan primer and topcoat choices.
Detail a layering strategy that preserves vapor movement, including proper sequencing and dry times. Recommend tools and techniques that promote even coats and minimize moisture entrapment. Include basic troubleshooting steps for adhesion or moisture-related issues during application.
Tools and materials checklist
Before you start painting, make sure you have the right tools and materials. This list will help ensure a lasting, breathable finish.
- Respirator: Essential for protecting against paint fumes and dust.
- Masonry primer: Crucial for adhesion and preventing moisture issues.
- Paint brushes (1.5″ – 2″): For cutting in edges and corners.
- Roller covers (9″ – 18″): Choose 3/8″ or 1/2″ nap for textured surfaces, 1/4″ for smooth ones. Synthetic or lambswool work best.
- Paint trays: For holding paint and minimizing spills.
- Scrapers or sandpaper (80-120 grit): To remove loose material and prep surface.
- Plastic drop cloths: To protect floors from paint drips.
- Tape measure: For measuring wall heights and determining how much paint you’ll need.
Quick rule: Don’t skip any items. Each plays a role in a successful, breathable finish.
Primer, layering, and drying practices
A good primer is key to a lasting paint job. Use a masonry or silicate primer for best results.
Apply the primer evenly with a roller or brush, following the manufacturer’s instructions. Let it dry according to their guidelines as well.
Once the primer is dry, apply your topcoat. Again, follow the manufacturer’s instructions for application and drying times. Remember, too many layers can trap moisture, so keep it minimal.
Quick tip: Always respect curing windows to prevent trapping moisture during application and cure.
Visual checkpoints during application
During and after application, keep an eye out for these signs of success or failure.
- Uniform coverage: Check for even paint distribution. Uneven patches can indicate missed spots or overapplication.
- No blisters: Blistering paint indicates trapped moisture underneath. If you see any, stop painting and address the issue immediately.
- Adhesion test: After applying primer, perform a simple adhesion test by sticking painter’s tape on the wall, letting it sit for 30 minutes, then pulling it off. If paint comes off with it, you need to re-sand or re-prime.
- No peeling or flaking: These are signs of poor adhesion and should be addressed promptly.
Quick rule: Regular visual checks help catch issues early, saving you time and money in the long run.
Aftercare, Costs, Safety, Longevity, and Common Mistakes
Outline a maintenance plan that addresses cleaning, mold control, and touch-ups without compromising the coating. Include guidelines for re‑sealing or re‑coating that align with the chosen system. Without giving prices, discuss general cost considerations and durability expectations over time.
Share safety precautions like ventilation, PPE, dust control, and proper disposal of paint and wash water. Highlight longevity determinants such as substrate condition and moisture control, and warn about common mistakes to avoid. End with a quick reference checklist for homeowners to review before, during, and after the project.
Maintenance, troubleshooting, and when to repaint
Keep your basement walls looking good and performing well with these simple maintenance tips. Regularly inspect your painted walls for any signs of trouble.
Bubbling or blistering paint could indicate moisture trapped beneath the surface. If it’s minor, you might be able to scrape off the affected area and repaint. But if it’s widespread, it’s time for deeper remediation – patching, priming, and repainting.
Efflorescence – those white salt deposits – can recur over time. Clean them off with a solution of water and muriatic acid (follow safety guidelines), then touch up the paint if needed. Always address these issues promptly to prevent further damage.
Cost considerations and lifecycle trade-offs
The cost of painting your basement walls isn’t just about the price of paint. Prep work, labor, and touch-ups over time all factor in.
Mineral paints, while pricier upfront, often last longer due to their breathability and durability. Acrylics are cheaper but may need repainting every 5-7 years. Epoxies are mid-range but offer excellent longevity with proper care.
Don’t forget to factor in prep costs – moisture testing, patching, priming. These can vary greatly depending on your basement’s condition. Always get quotes from reputable sources and review product data sheets for expected lifespan and warranty information.
Safety precautions and common mistakes to avoid
Painting your basement walls can be a rewarding DIY project, but it’s important to do it safely and correctly. Here are some safety precautions and common mistakes to avoid.
- Ventilation: Ensure proper ventilation during application and drying to prevent fumes from building up.
- Respirator/eye protection gloves: Wear appropriate PPE, including a respirator for epoxy paints, to protect yourself from harmful chemicals.
- Dust control: During prep, use damp rags or a vacuum to minimize dust and reduce the risk of respiratory issues.
- Proper handling of pigments/additives: Follow manufacturer guidelines for mixing and applying any additives or pigments to avoid waste and ensure even coverage.
- Disposal guidelines: Dispose of paint and rinse water responsibly, following local regulations. Never pour paint or chemicals down drains.
Some common mistakes include painting over active leaks, skipping proper surface preparation, using non-masonry paints that increase moisture risk, applying paints in unsuitable humidity/temperature conditions, and over- or under-coating. Always test for moisture, prep surfaces properly, and follow manufacturer guidelines to avoid these pitfalls.
Conclusion
One clear rule: fix the moisture problem first, then choose a breathable coating and apply it with clean, dry walls to protect the investment and keep the basement looking good for years. Safety and proper curing matter as much as color choices.
Start by checking for signs of active moisture and leaks, repair the root causes, dry the space, clean and damp-proof only as needed, test a small area with your chosen coating, follow its directions to the letter, use the right PPE, work in good ventilation, and keep humidity and temperature in the recommended range during and after application.
Common mistakes to avoid are overloading the wall with dense coatings that trap moisture, skipping the moisture fix before painting, and skipping small-area tests that can reveal issues before a full coat. Safety rules to follow: always vent the space, wear eye and skin protection, never apply coatings when the wall is wet or when temperatures are out of the coating’s recommended range, and document any changes in moisture or odors after the project to catch problems early.
If the moisture path isn’t clear, or if you’re unsure about the wall’s condition, call a professional before moving forward. When in doubt, prioritize safety and durability over speed, and you’ll finish with a basement that stays dry, breathable, and looking solid for the long haul.
FAQ
How do I diagnose the condition of basement walls before choosing a paint?
Look for damp spots, efflorescence, salt deposits, or mold. Inspect for cracks, spalling, or soft, crumbly concrete. Note if leaks or high humidity run through the wall and check the wall with a simple moisture test on the surface.
What wall prep steps are essential for basements before painting?
Clean the wall to remove dirt, dust, and efflorescence. Repair cracks with a patch or filler that matches the coating you’ll use. Remove loose material and let the surface dry before applying any breathable coating.
How should I choose between mineral, acrylic, and epoxy paints for basement walls?
Mineral (silicate) paints offer breathability and compatibility with masonry. Acrylics are flexible and easier to apply but may trap moisture if conditions aren’t right. Epoxies are durable but less breathable and require careful surface prep; check substrate compatibility and moisture status on the label.
What are the key steps and tools for applying paint correctly on basement walls?
Use clean brushes and a roller suited for masonry; mask off adjoining surfaces. Apply thin, even coats and follow the manufacturer’s cure times. Never paint over wet or damp surfaces and ventilate as you work to keep humidity in check.