

Introduction
Making stucco sample boards means applying small, finished panels that show how a specific mix, color, and texture will look on the real wall. These test panels let you see drying color shifts, surface texture, and how the base and finish layers interact before you commit to the whole job.
Keep the process hands-on: build boards with the same substrate, mesh, and application technique you plan to use on the house so the samples match real conditions. Check product labels and manufacturer instructions for mix ratios, curing, and compatible coatings, and tweak technique on the boards until the texture consistency and color outcome match what you want.
Key takeaways
- Prepare a flat, clean substrate and labeled boards for repeatable samples.
- Match textures with observed wall finishes using controlled trowel pressure.
- Mix consistency lightly, test small panels before committing full-size samples.
- Document color outcomes under natural light and test over time.
- Label each panel with texture, color, substrate, and date for future reference.
- Follow safety guidelines, wear eye protection, and keep ladders stable.
Table of Contents
- Introduction
- Key takeaways
- Why Make Stucco Sample Boards
- Planning and Choosing Representative Textures
- Tools and Materials Checklist
- Preparing the Substrate and Workspace
- Techniques for Applying Stucco Test Panels
- Predicting Color Accuracy and Color Testing Methods
- Evaluating Durability and Long-Term Performance of Samples
- Common Mistakes, Troubleshooting, and Cost Considerations
- Conclusion
- FAQ
Why Make Stucco Sample Boards
Sample boards are your low-risk test wall: they let you see final color and texture under real conditions before committing to the building. Use them to confirm how application technique, base coats, and surface prep alter the look you expect on the actual elevation.
Plan tests that cover color match under different light, texture replication, and edge/joint treatments so you avoid costly fixes later. Record each trial carefully—note product brands and mixes, take calibrated color swatches and before/after photos, and log environmental conditions so results are repeatable and defensible.
Benefits of using test panels
The main benefit of making stucco sample boards is to predict how your final wall will look and perform. Before you start slapping on the real stuff, you can check:
Color match: How it looks under different lighting conditions – morning sun, evening glow, or cloudy days.
Texture replication: If the sample board’s texture matches what you want for your wall. You can tweak application techniques until it’s just right.
Finish durability: How well the finish holds up during curing and over time. A quick test can save you from costly repairs later on.
When to create sample boards in your project timeline
Timing is key when it comes to making stucco sample boards. The best time to start is during the design and pre-construction phases.
Here’s why: Early decision-making. You’ll have plenty of time to decide on colors, textures, and materials without holding up your project schedule.
Informed ordering: Once you’re happy with your samples, you can order the exact products and quantities needed. No surprises at delivery time.
Smooth scheduling: Knowing what you need ahead of time lets you plan your application schedule more accurately. You won’t be waiting for materials or rushing to meet deadlines.
Planning and Choosing Representative Textures
Choose textures that reflect the surfaces and architectural details on your project, prioritizing those most visible or that influence perceived color and shadow. Match typical wall types—painted plaster, masonry, drywall with render, and brick—to appropriate finishes so each sample board represents a real installation scenario.
Create a compact sampling plan that maps which textures to test, how many variations to run, and where on the board to place each finish for side‑by‑side comparison. Note visual priorities like granularity, sheen, and shadow lines, document light conditions with photos and notes, and pick textures that scale appropriately for small panels versus larger mockups.
Assessing the existing wall texture
Before you start, take a good look at your walls. You’re checking for two things: what kind of texture they have and any special details that make them unique.
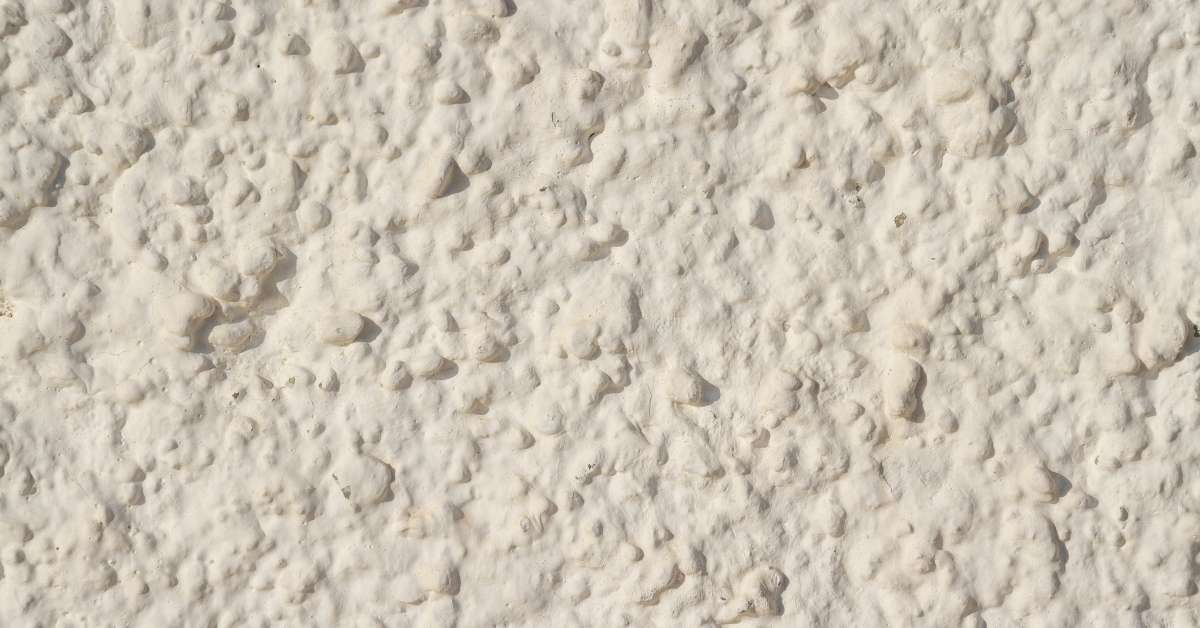
Texture comes in three main types:
- Smooth: Like a freshly painted wall, no bumps or grooves.
- Light texture: A bit of character but not too much. Think ‘orange peel’ or ‘sand finish’.
- Heavy texture: Big bumps and deep grooves. This is your classic ‘stucco’ look.
Now, note down any special details like shadow lines, sheen levels, or the scale of granularity. These will help you recreate the exact look on your sample boards.
Selecting locations and variety for samples
You want your sample boards to show off what your finished walls will really look like. So, choose spots that mimic the conditions on your actual walls.
Think about exposure. Where does the sun hit your walls? North sides are cool and shady, south sides get baked in the sun all day.
Consider the substrate too. What’s under your stucco? Is it drywall, masonry, or something else? Each one might need a different base coat.
And don’t forget about desired finishes. If you want some parts of your wall to look different, make sure that shows up on your samples. That way, you can see how they’ll all work together before you commit to the whole wall.
Tools and Materials Checklist
Gather the essentials: mixing equipment, a range of trowels and floats, texture tools, gauges, brushes, and basic PPE—confirm tool suitability for the product you use by checking the product data sheet. For safety and timing control, include a mixer with the right capacity and a dust control solution; keep spare blades and clean water at hand to avoid contamination between batches.
Select substrates such as cement board, exterior plywood, rigid foam, or mesh-reinforced panels based on how closely they mimic the wall you’re matching, and review manufacturer instructions for adhesion and compatibility. List the material types to test—cementitious mixes, acrylics, lime plasters, colorants, and sealers—label each panel with batch details, and follow a simple checklist for prep, priming, application, curing environment, and documentation to ensure consistent comparisons.
Stucco mixes, additives, and primers
Use this checklist before starting your stucco project to ensure you have the right materials for a durable and attractive finish.
- Base Stucco Mix: Check product label for appropriate use (interior/exterior, new/renovated surfaces).
- Finish Coat Mix: Ensure it’s compatible with your base mix and provides desired texture/sheen.
- Color Tint: Verify color matches your project needs. Check if tint is pre-mixed or add-on.
- Bonding Agent: Confirm it’s suitable for your substrate (concrete, plywood, etc.).
- Acrylic Additive: Check if it improves adhesion, flexibility, or water resistance. Skip at your own risk.
- Stucco Primer: Ensure it’s compatible with your mix and provides proper surface preparation.
- Sand (for base mix): Verify sand is clean, dry, and within 0.5-2mm size range for smooth finish.
- Water: Check water quality (no impurities) and temperature (ideally between 68°F – 77°F).
Quick rule: Always follow manufacturer instructions to avoid costly mistakes. Different brands may have specific mixing ratios or application techniques.
Substrates and application tools
Use this checklist before starting your concrete project to ensure you have the right materials and tools for a successful outcome.
- Backer Board: Check size (usually 1/2″ or 5/8″) and type (cement board, plywood, or OSB). Ensure it’s rated for exterior use and compatible with your primer.
- Plywood: Inspect for warping, cracks, or delamination. Use ACX or CDX plywood, 1/2″ to 3/4″ thick, depending on your project’s requirements.
- Trowels (Square and Margin): Check sizes (6″, 8″, 10″, 12″) for suitability. Ensure they’re in good condition with no bends or cracks.
- Float: Inspect for straight edges and proper size (4′ to 5′) to match your project’s scale. Check if it’s made of magnesium, aluminum, or wood.
- Sprayer: Ensure it’s suitable for your mix type (pump sprayers for small jobs, airless sprayers for larger ones). Check for proper maintenance and functionality.
- Mesh (Fiber Reinforcement): Verify size (usually 1/2″ or 3/4″) and type (plastic, fiberglass, or steel). Ensure it’s compatible with your mix and application method.
- Tape: Check if it’s suitable for concrete (e.g., fiberglass mesh tape) and if it’s wide enough to cover joints properly. Ensure it’s rated for exterior use.
- Mud Pan: Inspect for proper size (usually 1/6″ or 1/8″) and condition. Ensure it’s clean and free of debris before use.
Quick rule: Always check your tools and materials against the manufacturer’s recommendations to avoid costly mistakes and rework.
Preparing the Substrate and Workspace
Pick a substrate that behaves like the real wall—cement board for masonry-like absorbency, plaster panels for smooth finishes, or properly primed drywall for interior matches—and verify primer and bonding recommendations with the manufacturer. Clean, de-dust, degrease, and abrade as needed to create a uniform profile; patch high spots and ensure edges are consistent to avoid feathering that skews texture tests.
Control moisture by testing porosity and using compatible primers or bonding agents so absorption is consistent across samples; follow product label or technical data sheet guidance for priming steps. Set up a dedicated, clean workspace with ventilation, dust control, drop cloths, and a clear labeling system for batch, substrate, and test conditions; include PPE and a simple cleanup/disposal plan to keep samples and personnel safe.
Surface prep and priming steps
The first step to creating consistent stucco samples is preparing the substrate. Start by choosing a suitable base material like cement board, plaster panels, or properly prepared drywall.
Cleaning: Remove any dust, dirt, or debris using a damp cloth or vacuum. Ensure edges are clean and free of obstructions.
Repairing: Patch or abrade high spots to create a uniform surface profile. Use joint compound for drywall or plaster for cement board, feathering the edges to avoid raised areas.
Priming/Bonding: Moisture test porous substrates and apply a compatible primer or bonding agent. This ensures consistent tannish-to-gray color absorption and proper adhesion.
Safety, ventilation, and waste handling
PPE: Wear appropriate personal protective equipment (gloves, eye protection, mask/respirator) to safeguard against chemicals and dust.
Ventilation: Ensure adequate ventilation in your workspace. Open windows, use fans, or set up a temporary ventilation system to control dust and fumes.
Waste Handling: Consult product Safety Data Sheets (SDS) for proper handling and disposal of waste materials. Segregate waste into designated containers for recycling, hazardous, and non-hazardous materials.
Proper safety measures maintain a clean and safe work environment, ensuring the longevity and accuracy of your stucco samples.
Techniques for Applying Stucco Test Panels
Maintain consistent substrate prep, priming, and cure conditions across all panels so differences come from technique, not surface variation. Follow a repeatable mixing and batching protocol—label batches and keep mixing times and water additions consistent; check the product data sheet for recommended practices rather than guessing measurements.
Apply layers in the same sequence and target thickness on each board to reproduce scratch, brown, and finish coats; use the same trowel angles and tool speeds to ensure uniform texture. For each texture method (slick, coarse, skip-trowel, combed), document tooling, timing between coats, and environmental conditions, then photograph and log results for reliable comparison.
Application methods for different textures
Alright, listen up. You’ve mixed your stucco and you’re ready to apply. But hold on a sec, let’s talk about how to get those fancy textures you see on real walls.
Trowel or Float Method: This is old-school but still effective. Use a trowel or float to spread the stucco. For texture, work it in one direction, then switch up and do another layer at a 90-degree angle. Keep your strokes even and consistent.
Spray Method: This is for those who want a smooth, even finish. You’ll need a spray machine. Check the manufacturer’s instructions to set the right pressure. Spray in even passes, overlapping each one slightly. Remember, safety first – wear protective gear.
Stamp Method: Want that stone or brick look? Use stamps. Apply your base coat, then press the stamp into it. Lift straight up, don’t twist. Check base compaction before stamping to ensure a solid surface. And don’t forget to clean your stamps regularly.
Layering, curing, and consistency
Consistency is key when applying stucco test panels. You want each layer to be even, so the finish looks professional.
First, check your base compaction. It should be solid as a rock. Then, mix your stucco like you’re making pancake batter – smooth and consistent. Follow the manufacturer’s mixing instructions for the right water-to-stucco ratio.
Now, apply the first layer, called the scratch coat. Keep it around 3/8″ to 1/2″ thick. Let it cure as per the manufacturer’s guidelines – don’t rush this, or you’ll end up with cracks. Once cured, apply a second layer, the brown coat, about 1/4″ to 3/8″ thick.
The final layer, the finish coat, should be around 1/16″ to 1/8″ thick. Again, let it cure as instructed. Patience is a virtue here, folks. Don’t skimp on curing times or you’ll regret it later.
Predicting Color Accuracy and Color Testing Methods
Texture, substrate color, and application thickness all change perceived color—rough textures and thicker coats often shift tone, and substrate tint can show through thin finishes. To isolate variables, run controlled batches with consistent substrate prep and application, and document pigment loads and curing conditions instead of relying on memory.
Use objective tools like a colorimeter or spectrophotometer where possible and verify readings under a standardized light source—check equipment guidance for setup and reference standards. Complement instrument readings with photos under multiple lighting scenarios and a simple testing matrix (different finishes, sealers, and moisture states) so you can iterate mixes and reach an acceptable match with documented rationale.
Mixing, batching, and tint control
Consistency is key when it comes to color. Here’s how to keep your batches uniform:
Mix thoroughly: Stir each batch well to ensure pigments are evenly distributed.
Batch size matters: Smaller batches mean less chance of variation. Aim for no more than 5 gallons at a time.
Label and record: Keep track of pigment loads, mix times, and any additives used. This way, you can replicate successful batches later.
Viewing conditions and color evaluation
Lighting plays a big role in how we perceive color. Here’s how to evaluate your samples accurately:
Vary the light: Check your samples under different lights – natural, incandescent, and fluorescent. This helps you see how the color changes.
Time of day matters: Colors can look different at sunrise than they do at sunset. Evaluate your samples at various times to account for this.
Standardize viewing: Keep your distance and background consistent when comparing samples. This helps you focus on the color, not other factors.
Evaluating Durability and Long-Term Performance of Samples
Decide which durability metrics matter for your project—color stability, cracking, delamination, moisture resistance, and edge integrity—and set realistic expectations for DIY testing. Conduct simple exposure checks like short outdoor placement in varied exposure (sun/shade, protected/unprotected) and log changes at fixed intervals rather than guessing performance from a single viewing.
Keep a photo log and notes on texture changes, color shifts, and any cracking or adhesion loss; if you have access to basic accelerated methods (UV lamp or humidity chamber), run them as supplementary tests but follow manufacturer guidance if using equipment. Use the logged data to correlate sample behavior with likely field performance and establish pass/fail criteria for acceptable variance and when to adjust mix or application methods.
Outdoor exposure and accelerated checks
Set your sample boards in different outdoor conditions to mimic real-world scenarios. This helps you predict how the stucco will perform over time.
Sun: Place a panel in direct sunlight to test color stability and UV resistance. Check for fading, efflorescence, or cracking every few weeks.
Shade: Position another panel in a shaded area to observe moisture handling and texture fidelity. Look out for mold growth or delamination.
Wet: Expose a third panel to regular water contact (e.g., near a sprinkler or under an eave) to test edge integrity and adhesion. Monitor for any signs of deterioration.
Maintenance implications and finish lifecycle
Your sample boards can reveal a lot about the long-term care your stucco will need. Here’s what to look for:
Cleaning ease: Simulate cleaning methods (e.g., pressure washing, scrubbing) on samples to see how well they hold up. This helps you understand future maintenance requirements.
Touch-up compatibility: Apply touch-ups to samples and observe how well they blend with the existing finish. This shows you how easy or difficult repairs might be in the future.
Maintenance needs: Based on your observations, estimate how often you’ll need to clean, touch up, or perform other maintenance tasks to keep your stucco looking its best over time.
Common Mistakes, Troubleshooting, and Cost Considerations
Frequent errors include inconsistent water content, incorrect aggregate size, uneven layer thickness, and inadequate substrate prep—each can be identified by comparing labeled panels and batch notes. Troubleshoot by isolating one variable at a time: re-mix a small sample with adjusted water, test a different aggregate grade, or re-prepare substrate and document the effect before changing multiple factors.
Keep testing efficient by reusing substrates when practical, buying materials in sensible quantities, and prioritizing spend on items that affect outcome most (quality colorants, reliable primers); verify prices and availability locally rather than assuming specifics. Create a compact protocol and budget checklist to track cost per panel, where to economize, and which steps to invest in to get useful, repeatable samples without overspending.
Troubleshooting common issues
Stucco test panels can sometimes show unexpected results. Here’s how to diagnose and correct the most common problems:
Inconsistent texture: Check for variations in aggregate size or inconsistent mixing. Re-test with uniform aggregates and proper mixing.
Color variation: Ensure pigments are evenly distributed. Use a pigment disperser or re-mix your batch. If color still varies, adjust tint amounts slightly.
Adhesion failures: Inspect substrate for compatibility issues. Prime if necessary and ensure the surface is clean and dry. Re-test if adhesion problems persist.
Cost, waste reduction, and planning tips
Keeping sample costs sensible involves smart batching and substrate reuse:
Batch efficiently: Mix enough stucco for all panels at once to ensure consistency. This reduces waste and saves time.
Reuse substrates: If possible, clean and reuse test panel substrates to cut down on material costs. Just make sure they’re properly prepared each time.
Choose wisely: Make the minimum number of panels needed to represent your project’s variables. Too many can lead to waste, too few might not give you a clear picture.
Conclusion
Seeing how your sample boards respond before you plaster a full wall saves time, money, and headaches, and it keeps safety at the front line as you work toward a durable, true-to-finish result. Treat these tests as your heads-up, not a guess, so you can predict color and texture with confidence and avoid costly rework.
Proceed with a simple, no-nonsense checklist: verify the substrate and workspace are prepared and clean, mix and apply the texture in a controlled order, compare your boards to the target color and finish under the same lighting you’ll use in the final job, document the results with notes and photos, allow proper curing, test for adhesion and durability on small samples, and clean and store materials afterward. Work in small, repeatable steps and stop if something seems off; safety gear should stay on, and never work on a live wall if you’re unsure about the surface conditions.
Common mistakes to avoid are rushing the texture, skipping substrate prep, and ignoring cure times or weather effects. Don’t apply thick layers or try to force a finish that your tools aren’t designed to reproduce. Always wear eye protection and gloves, keep dust under control, and ventilate when mixing or sanding. If a test panel delaminates, crumbles, or color shifts unpredictably, stop and reassess before touching the actual project.
If the project is large, or you’re unsure about substrate compatibility, permits, or code requirements, call a professional rather than pushing on. Use these tests to map out decisions, but don’t push past safe limits or structural concerns. Stay disciplined, stay safe, and you’ll finish with panels that guide the real work and look right when it’s done.
FAQ
How do I create a stucco sample board at home?
Pick a flat backing and a small, easy-to-manage size. Mix a small batch and apply a thin coat, then texture it with the same tools you’ll use on the real wall. Label each board with texture, finish, and date so you can compare later.
How can I compare different textures on samples?
Use the same backing, same application rate, and the same tools for every board. Apply textures in the same order and document how each one looks after curing. Check for uniformity across the sample and note any differences in depth or pattern.
How do I predict color outcome on stucco?
Color on stucco shifts with drying, finish, and lighting. Do a color test on a dry, flat area and compare to the color swatch in natural light. Always check the pigment label and manufacturer instructions for colorfastness and recommended finishing steps.
What about texture consistency during application?
Keep a steady trowel angle and pressure. Work while the surface is still workable and avoid reworking textures too much. Document the tool you used and the motion so you can replicate it on the full job.
What tools and materials should I have for making sample boards?
Have a clean backer board, release agent if needed, trowels, floats, a hawk, a straightedge, and labeling supplies. Also bring a damp sponge for cleanup and a ruler to keep textures or patterns consistent. Check each item’s label for suitability with your plaster or cement mix and follow the manufacturer’s instructions.