
Introduction
A laser level setup for concrete slab work is the process of aligning a beam reference to the slab plane and keeping it calibrated for accurate layout. Start with regular calibration checks and use a stable tripod to maintain a true reference throughout the job. Always verify the setup after adjusting or moving equipment to prevent drift.
A common tripod mistake is loosening clamps or re-aiming the device without rechecking the level, which can introduce errors. Pay attention to mounting stability, proper height, and avoiding soft or uneven ground that can shift during concrete work. Safety considerations include following beam eye safety guidelines and inspecting equipment for protective features, and it helps to understand the range and visibility expectations when choosing a laser level type and mounting options.
Key takeaways
- Ensure laser level is calibrated daily before slab layout to avoid errors.
- Secure tripod on stable surface and check leg locks before measurements.
- Choose appropriate laser type for slab tasks: dot, line, or rotary.
- Verify accuracy and compensator functioning with manufacturer procedure using checkpoints.
- Follow safety features: eye protection, beam visibility, and restricted access zones.
- Account for maintenance costs and warranty coverage when selecting brands.
Table of Contents
- Introduction
- Key takeaways
- Why Precise Laser Setup Matters for Concrete Slabs
- Types of Laser Levels Suited to Slab Work
- Tools, Materials and Visual Checkpoints Checklist
- Key Laser Features to Prioritize for Concrete Slabs
- Tripod Setup — Step-by-Step Best Practice
- Calibration Habits and Routine Checks
- Common Tripod Mistakes and How to Avoid Them
- Verification, Troubleshooting and Maintenance
- Conclusion
- FAQ
Why Precise Laser Setup Matters for Concrete Slabs
A precise laser setup keeps the reference plane stable throughout the pour, reducing slab deviations that affect flatness and drainage. Misalignment or an unstable tripod translates into bow, crown, or edge lift that can drive rework and add costs. Setup accuracy directly influences safety and long-term performance in common slab applications.
Think about residential floors, garage slabs, driveways, patios, and elevated slabs, and how each tolerates flatness differently. Critical calibration habits and routine checks—pre-job calibration, reference grids, self-level verification, height and zenith adjustments, and environmental considerations—support consistent results. Recognize and avoid common tripod mistakes that degrade accuracy, such as leaning legs, over-tightened joints, non-level supports, insufficient anchoring, and movement during pours.
Project tolerances and stakes
Before setting up your laser level, it’s crucial to understand the project’s flatness criteria. These specifications ensure that your slab performs well and lasts for years.
Verify your laser level’s capability matches or exceeds these requirements using its datasheet or instructions. For high-precision projects like residential floors, use a laser level with fine adjustment capabilities.
Review project plans and specifications to understand required flatness, drainage, and tolerance limits. This ensures that your setup meets the project’s needs and avoids costly rework.
Safety and compliance considerations
Ensuring safety and compliance protects workers, maintains project integrity, and prevents delays. Start by conducting site-safety checks for tripod placement, laser visibility, and potential hazards like power lines.
Position personnel safely relative to lasers, following manufacturer guidelines and local regulations. Regularly inspect your setup for any damage or wear that could compromise safety or accuracy.
Verify that your setup meets applicable codes and contract requirements. This ensures you’re working within legal parameters and maintaining project quality.
Types of Laser Levels Suited to Slab Work
Dot, line, and rotary lasers each serve different slab tasks: a dot laser provides essential reference points; a line laser supports layout and screed control; a rotary laser is best for long runs and high-visibility transfer on larger slabs. Consider beam brightness, color, line thickness, and how dust or glare on fresh concrete affects readability.
Assess range and accuracy benchmarks relevant to slabs to choose appropriately for small versus large pours. Mounting and stability come into play as well, including tripod compatibility and how height affects the visible area on the slab. Workflow implications, such as setup speed and transfer routines, should guide when to switch types for efficiency, along with practical buying or renting guidance and basic maintenance checks.
Dot Laser Levels
Dot laser levels are ideal for establishing essential reference points on concrete slabs. They project a single point of light that can be used to mark precise locations for layout tasks.
Best use cases: Dot lasers excel at creating elevation control points, marking high spots or low spots, and setting grades for slab pouring.
However, dot lasers have limitations. They require manual measurement between points, which can be time-consuming and less accurate than other laser types. Additionally, they may not be suitable for long-range tasks or large pours.
Line Laser Levels
Line lasers project a straight line of light that can span across the length of your concrete slab. They are particularly useful for short-span alignment and edge control tasks.
Key advantages: Line lasers allow you to quickly mark multiple points along a single line, ensuring consistent spacing and alignment.
However, they may not be the best choice for large pours or long-range tasks. The visibility of the laser line can decrease with distance, making it difficult to see on larger surfaces. Additionally, dust or glare from fresh concrete can affect readability.
Rotary Laser Levels
Rotary lasers are designed for large-area elevation control and slab grading tasks. They emit a rotating laser beam that creates a complete plane of light, allowing you to mark multiple points simultaneously.
Ideal for: Rotary lasers are perfect for long runs and high-visibility transfer on larger slabs. They can quickly set grades and elevations across wide areas.
However, rotary lasers typically require a detector for accurate readings at longer distances. They also tend to be more expensive than dot or line lasers. Consider your project’s size and budget when deciding whether to rent or purchase a rotary laser.
Tools, Materials and Visual Checkpoints Checklist
Core equipment includes a laser level (rotary or line), a sturdy tripod with mounting adapters, and a laser detector with a compatible rod. Bring spare batteries, a remote control if available, and a protective carrying case. Have chalk line and markers for quick visual cues and easy reference marks.
Check mounting stability: ensure the tripod sits on firm ground with locked joints and that the laser plane is at the intended height above the slab. Protect the setup from accidental bumps and verify the base is level before starting. Establish primary reference points and calibrated targets to hold temporary marks as you work.
Site tools and accessories checklist
Before starting any work, ensure you have all the necessary tools and accessories in good working condition.
- Tripod: Provides stability for your laser level. Check that all legs are secure, locks tighten properly, and the base is sturdy.
- Laser detector/receiver: Receives signals from the laser level. Ensure it’s compatible with your laser level and has fresh batteries.
- Target pole or staff: Helps locate and mark points on the slab surface. Verify it’s long enough for your pour area and in good condition.
- Mounting adapters: Securely attach the laser level to the tripod. Check that they fit both devices correctly.
- Batteries (spare): Essential for keeping your tools powered throughout the job. Carry extras of the correct type and size.
- Plumb bob: Helps establish vertical lines. Make sure it’s functional and attached to a suitable string or cord.
- Measuring tape: Measures distances accurately. Inspect for any damage that could affect readings.
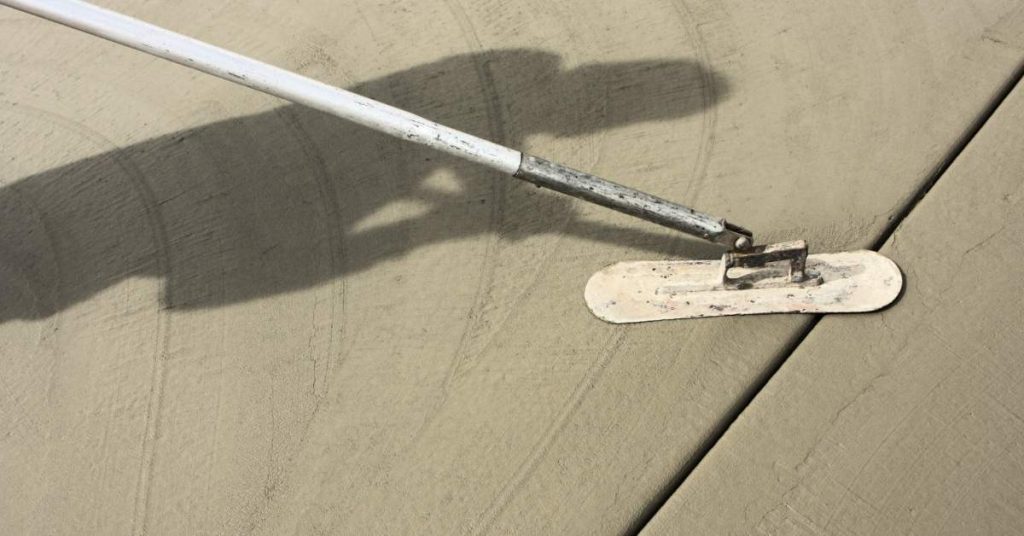
- Straightedge or aluminum profile: Ensures straight lines on the slab surface. Check for bends or warping before use.
Visual checkpoints for setup and pour
Before pouring, verify your laser level setup with these quick visual checks to ensure accuracy and prevent issues.
- Tripod stability: Check that the tripod is stable and level. Adjust legs as needed or relocate if necessary.
- Laser plane alignment: Ensure the laser plane is perpendicular to the slab surface and correctly positioned above it.
- Unobstructed beam path: Confirm that nothing blocks the laser beam’s path across the pour area. Remove any obstructions if found.
- Reference points: Verify that primary reference points (true 0/bench marks) are correctly placed and visible.
- Calibrated target poles/stakes: Check that these are properly positioned and aligned with the laser line.
- Brackets or screws: Ensure any temporary marks are securely held in place with brackets or screws.
- Chalk lines and markers: Confirm quick visual cues like chalk lines and markers are clearly visible and accurate.
- Line-of-sight: Validate that the laser line can be seen across the entire slab footprint. If not, adjust your setup or remove obstructions.
- Plumb over controls: Check that plumb lines are correctly aligned with vertical surfaces and reference points.
Quick rule: Regularly perform these visual checks throughout the setup process to prevent errors and ensure a successful pour.
Key Laser Features to Prioritize for Concrete Slabs
Identify which laser type fits your slab tasks best—self-leveling for fast setup on dusty slabs or rotary for long runs and high visibility. Each type impacts accuracy, line visibility, and setup speed in typical concrete environments. Consider how dust, vibration, and temperature may affect performance.
Focus on critical specs such as grade and accuracy, line/plane precision, working distance, and tolerance ranges relevant to slabs. Understand line options and visibility factors, including 360-degree versus cross-line layouts and beam color, to ensure reliable readings on site. Review environmental durability, calibration intervals, and how these specs translate into workflow decisions for calibration rhythms and error management.
Accuracy and Leveling Mechanism
The accuracy of a laser level significantly impacts the quality of your concrete slab work. Understanding the different leveling mechanisms is crucial:
- Manual: Requires manual adjustment using built-in vials or bubbles.
- Self-leveling: Automatically adjusts within a certain range (usually 4°) but may require manual intervention if out of level.
- Auto-level: Electronically self-levels and maintains accuracy even when tilted up to 5°. This is ideal for slab work as it ensures consistent elevations.
Stable, repeatable accuracy is crucial for consistent slab elevations. Always inspect the leveling bubble/vials before use and ensure they’re within acceptable range. Additionally, verify the system type in the datasheet or instructions:
- For manual or self-leveling lasers, check and adjust manually to keep the laser within acceptable tilt angle.
- For auto-level lasers, confirm the auto-level feature works correctly before use.
If accuracy issues persist after initial checks, recalibrate or replace the laser as needed.
Range, Detector Compatibility and Beam Options
The range of your laser level should match your site size to ensure reliable measurements. Consider ambient light conditions and receiver use as well:
- Large sites with high ambient light: Use pulsed mode or additional receivers for better signal detection.
- Small sites with low ambient light: Opt for a green beam option for better visibility; use continuous mode.
Appropriate range and beam visibility ensure reliable site measurements. Inspect laser’s beam strength before starting work and adjust if necessary:
- Check required range in project specs and ensure the laser can cover your site size.
- Consider ambient light conditions and receiver use when choosing a laser level.
If poor signal strength persists, adjust laser settings, add receivers, or change beam color as needed.
Durability, Power and Mounting Options
A rugged design with suitable power sources and compatible mounts ensures reliable operation in harsh slab environments. Consider the following:
- IP Rating: Choose a laser with an appropriate IP rating for your site conditions (e.g., IP54 for dusty or wet environments).
- Battery Type and Runtime: Opt for lasers with long battery life, especially for long work periods. Consider external power supplies if needed.
- Mounting Options: Ensure your laser is compatible with survey tripods and has the necessary threads or adapter plates.
Before use, inspect the laser’s physical condition, check battery level, and ensure mounts are secure. Verify these aspects with project requirements and site conditions:
- If working in dusty or wet environments, choose a laser with high IP rating for better protection.
- For long work periods, opt for lasers with long battery life or consider external power supplies.
Replace damaged parts, change batteries, or upgrade mounts if issues arise during use to maintain optimal performance.

Tripod Setup — Step-by-Step Best Practice
Choose a tripod location with clear line-of-sight to the target while minimizing vibrations, and maintain a safe distance from edge forms and obstacles. Ensure footing is solid and the surface is clean to prevent wobble during pours. Avoid placing on uneven or dusty patches that compromise stability.
Perform coarse leveling and rough centering before final alignment. Extend legs evenly, level the top plate, and align the laser vertically with a plumb or known reference. Establish a repeatable centering method and confirm the laser is centered over the chosen reference point before locking. Use a step-by-step sequence with verification checks after each move to catch drift early and prevent rework.
Step-by-Step Process
The following step-by-step sequence ensures an efficient, accurate tripod setup for laser level operation in under a minute per lift-and-set operation.
- Preparation: Clear the area of debris and ensure stability. Use anti-slip feet or mats if necessary.
- Positioning: Place the tripod near the target area, ensuring minimal vibrations and clear line-of-sight to the laser’s destination.
- Extension: Extend the tripod legs evenly for coarse leveling and centering of the laser.
- Mounting: Securely attach the laser to the tripod, following manufacturer instructions. Avoid over-tightening clamps.
- Leveling: Roughly level the top plate using a plumb or known reference point to ensure the laser is within its self-level range.
- Centering: Establish a repeatable centering method (visual crosshair, reflex target, or optical plumb line) and confirm the laser is centered over the chosen reference point.
- Final Checks: Re-check leveling, re-center if necessary, confirm height, and re-align with a secondary reference to catch any drift early.
- Cleanup: After use, carefully retract legs, clean the tripod, and store it properly for future use.
Choosing Tripod Location and Placement
Selecting a stable location for your tripod is crucial for accurate laser readings. Here’s how to choose the best spot:
Stability: Look for flat, even ground with minimal vibrations. Avoid areas with transient loads or heavy machinery nearby.
Line-of-Sight: Position the tripod so it has a clear view of the target area. Ensure there are no obstructions that could interfere with the laser beam’s path.
Minimal Repositioning: Plan your tripod placement before setup to minimize repositioning during operation. Pre-measure distances and consider any obstacles that may arise.
Mounting, Centering and Coarse Leveling
Safely attaching the laser to the tripod and getting it within its self-level range ensures accurate readings. Follow these steps:
Mounting: Securely attach the laser to the tripod using the manufacturer’s recommended method. Avoid over-tightening clamps, as this can damage both the tripod and the laser.
Centering: Extend the tripod legs evenly for coarse leveling. Use a plumb or known reference point to roughly center the laser vertically.
Coarse Leveling: Roughly level the top plate using a bubble vial or digital level. Ensure the laser is within its self-level range before fine-tuning.
Fine Adjustment and Transfer Methods for Slabs
Using a laser with a receiver or rod to transfer elevations across concrete slabs requires precise adjustments. Here are some tips:
Alignment: Ensure the laser is aligned with the target area before taking readings. Use a small reference sheet of target heights to maintain consistency across multiple operations.
Receiver/Rod Placement: Position the receiver or rod at the desired elevation, ensuring it’s within the laser’s detection range and not obstructing the beam’s path.
Readbacks: If readbacks are inconsistent, re-check the laser’s leveling and centering. If necessary, recalibrate the laser according to manufacturer instructions. Ensure there are no obstructions between the laser and the receiver/rod.
Calibration Habits and Routine Checks
Establish a daily calibration routine before slab work, after any transport or setup changes, and after any trip or jolt to the equipment. At startup, run the core checks: verify level and bin, confirm verticality, and test line accuracy against a known reference point. If the laser line appears uneven or drifts after movement, relevel, re-center, and re-zero to restore proper alignment.
This routine relies on practical, non-lab checks that crews can perform in the field, such as cross-checking against known reference points and confirming horizontal and vertical alignment with a plumb line or spirit level on a wall. A simple on-site cue is to visually inspect the laser line for consistency and straightness, and a chalk line or string can verify perpendicularity and distance checks with a calibrated tape. Documentation helps accountability: maintain a lightweight log with date, operator, equipment details, ambient conditions, results, adjustments, and next due date; a quick sign-off confirms completion. Calibration cadence depends on project tempo and environmental factors like temperature, wind, and vibration, so adjust the frequency from daily to per shift as needed. For quick verification, use a one-page, repeatable checklist with checkboxes, and note fallback methods using a smartphone inclinometer or app-based level when professional tools aren’t available.
Daily warm-up and pre-pour checks
Before starting any slab work, perform a quick daily check on your laser level to ensure accurate layout and pour.
Upon powering up, allow the instrument to self-check. Then, conduct a two-point or three-point verification by aligning the laser line with known reference points in your workspace. This helps confirm that the beam is stable and accurate.
Pro tip: Always perform a visual inspection of the laser line and test the detector response to ensure they’re functioning correctly.
After-move, drop, or shock recalibration
If your laser level has been moved, dropped, or otherwise subjected to a significant impact, it’s crucial to recalibrate the instrument before using it again.
First, cross-check the laser line against known reference points in your workspace. Then, confirm that the horizontal and vertical alignments are still accurate using a plumb line or spirit level.
If the laser line appears uneven or inconsistent, recalibrate the instrument immediately. Re-level, re-center, and re-zero it to ensure accurate readings.
Recordkeeping and acceptance checks
Maintaining a setup log for your laser level helps keep everyone accountable, supports quality assurance, and aids in dispute resolution. Here’s what to include:
Operator: Who set up the instrument?
Verification Results: Document the results of your alignment checks.
Attachments: Include any relevant attachments, such as photos or notes, to support your records. Additionally, implement a sign-off workflow using common consumer tools like smartphone inclinometers or app-based levels to confirm alignment.
Common Tripod Mistakes and How to Avoid Them
Frequent instability comes from mis-set legs on uneven ground, loose locks, soft footing, or wind and vibration. Include quick checks at the start of each shift to confirm stability. Avoid over-extended legs and ensure even distribution of weight on solid surfaces.
Mounting orientation matters: keep the laser unit clean and mounted square to the tripod head, with all clamps locked. Re-check leveling before slabs, after adjustments, and at key milestones. For on-site remedies, tighten connections, reposition on stable ground, add ballast if needed, and re-level after any ground movement or vibration event.
Unstable ground and anchoring errors
To ensure accurate laser level readings and prevent rework, avoid these common tripod anchoring mistakes.
- Mis-set legs on uneven ground: Causes drift and inaccurate readings. Solution: Distribute feet wide and on solid surfaces; use rubber feet or spikes for soft ground.
- Loose leg locks: Allows tripod to shift, affecting level. Solution: Tighten leg locks securely before use and check periodically.
- Soft or excavated footing: Tripod can sink or shift, leading to mislevels. Solution: Use a platform or add ballast (sandbags) to base for stability.
- Wind or vibration affecting the tripod: Can cause sudden shifts and inaccurate readings. Solution: Perform quick-checks at start of each shift; monitor for vibrations or shifts during operation.
Relocate tripod on stable ground and re-level immediately after any shift to minimize errors.
Over-extending tripod legs and balance issues
Extending tripod legs unevenly or fully can compromise stability, leading to increased wobble and reduced accuracy.
To maintain optimal stability: Keep legs at a stable, not overextended length. Use minimal extension needed to reduce wobble.
Distribute feet wide on solid surfaces for better balance. If legs are extended unevenly, adjust to equal length.
Mounting thread, quick-release and tilt mistakes
Incorrect mounting can lead to sudden misalignment, inaccurate readings, and damage to equipment. Avoid these common mistakes:
- Mismatched threads: Can cause instability and mislevels. Solution: Use appropriate adapter for correct fit.
- Loose mounts or quick-release clamps only: Allows laser unit to shift, affecting level. Solution: Engage secondary lock for added security.
- Tilted laser unit: Can result in inaccurate readings and mislevels. Solution: Ensure the laser unit is clean, oriented correctly, and mounted square to the tripod head.
Clean laser unit before mounting; check for play or movement before use; re-level after any movement to maintain accuracy.
Verification, Troubleshooting and Maintenance
Use field tests to verify repeatability by taking multiple shots at a fixed height and marking reference points, then compare readings to ensure consistency. Troubleshoot drift by checking tripod stability, leveling locks, battery levels, and temperature effects. Investigate inconsistent readings by verifying reference marks and surface conditions.
Follow a step-by-step verification workflow: baseline calibration check, known reference distance, live tests on the pour area, and a reading log with environmental notes. For maintenance, clean optics, inspect moving parts, tighten mounting hardware after use, and store in a rugged case. Establish criteria to trigger factory calibration if drift or instability exceed defined thresholds, and maintain a calibration log and quick-reference tests for field use.
Simple Field Verification Tests and Repeatability Checks
To ensure your laser level’s stability and reproducibility, perform simple yet effective field tests. Start by running a few shots at fixed heights on the slab. Mark these reference points clearly.
Record any deviations from the expected readings. Then, move to different positions around the pour area and re-check these reference points. Compare the readings across multiple targets to ensure consistency.
This quick check helps confirm that your laser level is performing accurately and reliably before you begin work. It’s a crucial step in maintaining confidence in your measurements throughout the project.
Environmental Factors and Corrective Measures
Temperature shifts, wind, vibrations, and reflective surfaces can all impact your laser level’s readings. To minimize these effects:
Temperature Shifts: Allow the instrument to acclimate to the ambient temperature before use. Check the manufacturer’s recommended operating range and adjust your schedule if necessary.
Wind: Shield the laser level from strong winds, especially during critical measurements. If possible, reschedule work for calmer conditions.
Vibrations: Secure the tripod on a stable surface. Avoid placing it near heavy machinery or other vibration sources. Use vibration-dampening pads if needed.
Reflective Surfaces: Be aware of nearby reflective surfaces that could cause false readings. Shield the laser level from these surfaces, if possible.
Cleaning, Storage, and Service Intervals
Proper care of your laser level preserves its accuracy and longevity. Here are some basic care tips:
After each use, clean the optics and glass to remove any dirt or debris. Inspect moving parts for wear and apply a light layer of grease as needed. Tighten all mounting hardware.
For long-term storage, remove the batteries to prevent corrosion. Store the instrument in a rigid case in a climate-controlled space, away from extreme temperatures and humidity.
Consult your manufacturer’s guidance for recommended service or calibration intervals. If you notice persistent issues, arrange professional calibration before major pours to ensure accurate readings.
Conclusion
Maintaining precise laser setup for a concrete slab protects safety, improves durability, and yields a clean, level surface with fewer callbacks. Focus on stable equipment, careful calibration habits, and disciplined verification before you proceed with any critical pours or form work.
Begin with a simple, practical checklist: ensure tripod legs are planted firmly and locked, the laser is level and locked, run a calibration check against a known reference, verify repeatability at multiple points, document the readings, and perform a final cross-check before moving to the next area. Keep the workflow in a calm sequence and re-check anytime you move the setup or the slab area.
Avoid common pitfalls by never rushing setup, avoiding over-tightening or moving parts after you establish a baseline, and always re-checking after any adjustment or weather change. Protect yourself and the project by following safe practices, testing in a small area first, and consulting manufacturer instructions if a reading seems inconsistent or out of tolerance.
If the project involves unusually large slabs, tight tolerances, or persistent instability in readings, consider bringing in a professional for an initial calibration and setup check. With careful steps and disciplined checks, you can keep the work steady, reduce rework, and finish with a solid, durable slab surface.
FAQ
What are the differences between dot, line, and rotary laser levels for concrete slab work?
Dot lasers project single points for alignment tasks, while line lasers cast one or more beams across a plane to guide level and plumb work. Rotary lasers spin a laser beam to cover a full 360 degrees, useful for large slabs and extended layouts. Check the product label or manufacturer instructions to confirm beam type, visibility options, and suitable ranges for your project.
What key features should I verify when choosing a laser level for slabs?
Look for clear indications of accuracy, the leveling mechanism type, number and type of beams, and projection options. Also consider range, visibility in bright conditions, battery type, durability, mounting options, and available accessories. Always check the label, datasheet, or manufacturer guidance for limits and proper use.
What safety considerations are important when using laser levels on a concrete slab?
Review safety features such as eye protection recommendations and any beam class information. Follow user guidelines for setup, avoid direct eye exposure, and use appropriate protective gear as advised by the manufacturer. Local rules or site policies may specify additional precautions.
How should I plan my purchase and budgeting for a laser level used on slabs?
Assess project type and required accuracy before selecting a model. Consider total ownership factors like maintenance needs, replacement parts, and warranty terms. For cost guidance, compare purchase options with manufacturer instructions and local supplier details to understand long-term value. If in doubt, check official product documentation and authorized retailers.