
Introduction
Interior moisture management on block walls is the practice of keeping the wall assembly dry by separating the concrete from finishes with furring, insulation, and a controlled vapor path.
This hands‑on approach focuses on airflow, condensation control, and dry finishes rather than relying on the concrete to act as a wet surface. Work with the wall in stages, checking that moisture moves away from the interior and does not trap water between layers.
Types of furring strips for block walls include solid wood or metal channels installed in a staggered pattern to create a vented cavity. Use proper insulation techniques that fit the cavity and won’t bridge the vapor drive, and place a vapor barrier or sealant where required by local rules. Plan for condensation prevention by keeping the interior surface warmer than the dew point and ensuring a clear path for any moisture that intrudes.
Key takeaways
- Consider furring strip types for block walls, including aluminum, galvanized metal, and wood.
- Ensure proper interior insulation technique to avoid moisture trapping on block walls.
- Plan vapor barriers and retarders with correct placement relative to air gap.
- Use vapor barrier installation methods that minimize punctures and leaks.
- Safety: prevent mold by avoiding condensation through proper insulation, sealing, and ventilation.
- Check GBA Detail Library and related questions for current guidance.
Table of Contents
- Introduction
- Key takeaways
- Overview: Moisture Behavior in Concrete Block Walls
- Furring Strips, Air Gap, and Drainage Plane Strategies
- Insulation Options for Block Walls and Placement Strategies
- Vapor Control: Barriers, Retarders, and Smart Placement
- Moisture-Resistant Materials, Fasteners, and Finishes
- Planning, Tools, and Step-by-Step Execution Checklist
- Common Mistakes, Troubleshooting, and Repairs
- Air Sealing, Ventilation, and Indoor Air Quality Implications
- Conclusion
- FAQ
Overview: Moisture Behavior in Concrete Block Walls
The moisture regime in block walls includes liquid water intrusion, capillary rise, vapor diffusion, and interactions with indoor humidity in porous masonry. Each pathway behaves differently within joints, cores, and porous faces, with the most transfer often occurring where materials contact water or capillary paths. The goal is to keep interior finishes dry without creating conditions that trap water or block wall drying.
You should monitor moisture content, relative humidity, condensation risk, and dew point concerns to assess drying potential and performance. Diagnostic checks should consider interior finishes, permeance targets for still-air versus ventilated cavities, and when vapor sealing is counterproductive. The implications for furring, insulation, and vapor strategy emphasize drainage, permeable vapor flow where feasible, and avoiding interior layers that hinder moisture migration toward the interior.
Key terms and moisture drivers
To effectively manage moisture in concrete block walls, it’s crucial to understand key terms:
Bulk water: Liquid water that can be seen or measured. It enters through cracks, gaps, or by capillary action.
Capillarity: The ability of porous materials to draw liquid water upwards due to surface tension and adhesion.
Hygroscopic moisture: Water vapor absorbed by porous materials, making them feel damp but not necessarily wet. It’s influenced by indoor humidity levels.
Vapor diffusion: The movement of water vapor through permeable materials driven by concentration gradients and temperature differences.
Dew point: The temperature at which water vapor in the air condenses into liquid water. It’s a key indicator of condensation risk.
Review these definitions before proceeding to ensure you’re familiar with the technical guidance.
Why traditional interior barriers can fail
Traditional moisture management strategies often rely on impermeable finishes and vapor barriers. However, these can fail due to several reasons:
1. Trapping moisture: Impermeable finishes prevent water from escaping, leading to increased humidity levels and potential condensation.
2. Misplaced vapor barriers: Installing vapor barriers too close to the interior can trap moisture within the wall assembly, preventing it from drying.
3. Lack of drainage: Without proper drainage or ventilation, water can accumulate in the wall cavity, leading to deterioration over time.
To avoid these common pitfalls, consider permeable finishes and adequate ventilation. If impermeable finishes are planned, ensure there’s a way for moisture to escape towards the interior.
Furring Strips, Air Gap, and Drainage Plane Strategies
The primary goals are to establish a continuous ventilated cavity and drainage path that promotes drying, reduces capillary transfer, and prevents water from wicking into finishes. Furring configurations can be wood or metal, with spacings that maintain an unobstructed air gap and fastening methods compatible with masonry to avoid wall damage. Fastening strategies should rely on appropriate anchors and tie-ins to preserve the cavity.
Design the air gap and drainage plane to be continuous behind finishes, using drainage mats or weep strategies to channel moisture down and out. Consider vapor-permeable versus vapor-impermeable layers and insulation placement relative to the furring to avoid dew-point traps. Detail sequence and QA checks that verify moisture indicators, air-gap integrity, and finish adhesion throughout installation.
Furring Strip Types and Installation Best Practices
Selecting appropriate furring strips and installing them correctly is crucial for creating a continuous drainage path that prevents water buildup and finish damage. The primary choices are treated wood or metal strips.
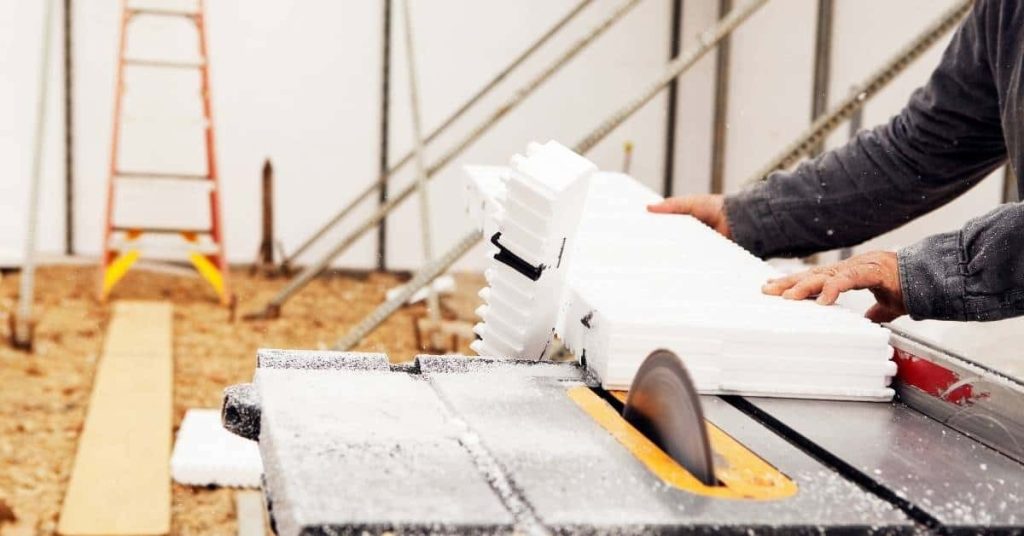
Wood Furring Strips: Choose treated lumber to resist rot and decay. Ensure proper spacing, typically 1/4″ to 3/8″, for adequate ventilation. Secure with appropriate fasteners compatible with masonry (e.g., anchor types, epoxy anchors).
Metal Furring Strips: Opt for galvanized or stainless steel for corrosion resistance. Verify the manufacturer’s warranty covers corrosion. Install using suitable fasteners and ensure proper spacing for ventilation.
Creating and Detailing an Effective Drainage/Ventilation Gap
Designing an adequate cavity between the block wall and finish promotes drying, reduces capillary transfer, and prevents water wicking. The recommended cavity thickness range is 1″ to 2″.
At the base, include weep details such as drainage mats or weep holes to channel moisture down and out. Ensure these are properly installed and functional.
Terminate and vent the cavity safely. If terminating to interior space, use a vapor-permeable membrane or strip at the top to prevent moisture entry while allowing drying. If venting to exterior or conditioned space, ensure proper vent placement, size, and consider using insect screens.
Safety and Durability Considerations for Furring Work
Prioritizing safety and using durable materials extends the lifespan of the wall assembly. Inspect the work area for hazards, ensure proper fall protection, and wear appropriate PPE when handling metal furring strips.
Use proper drilling techniques, pilot holes, and suitable anchor types to avoid damaging masonry when installing fasteners. Review local codes for masonry anchor requirements and verify fasteners meet or exceed these standards.
To prevent corrosion, use galvanized or stainless steel for metal furring strips, or ensure the manufacturer’s warranty covers it. Regularly inspect work for any signs of damage or loosening fasteners, and address them promptly to maintain a durable wall assembly.
Insulation Options for Block Walls and Placement Strategies
Compare continuous interior rigid foam, mineral wool in a furring cavity, and hybrid systems, noting effects on drying potential, vapor movement, and condensation risk. Each option interacts with the masonry differently, so assess how drying pathways are preserved. Consider practical constraints and compatibility with interior finishes when choosing a system.
Placement decisions should address interior surface mounting versus in-cavity furring, including air sealing and thermal bridging reductions. Vary vapor management by locating barriers relative to insulation, and evaluate how inside or outside placement changes condensation risk near the interior finish. Map how the chosen system alters moisture storage and drying during wet periods.
Rigid Foam vs. Cavity Insulation vs. Mineral Wool
When insulating block walls, the choice of insulation type significantly impacts moisture management and drying potential.
Continuous interior rigid foam provides excellent thermal performance but may trap moisture if not installed correctly. It’s ideal for cold climates where preventing heat loss is crucial.
Mineral wool in a furring cavity offers good moisture tolerance and drying potential due to its high vapor permeability. It’s suitable for moderate to humid climates, allowing walls to breathe while providing insulation.
Hybrid systems combine the benefits of both rigid foam and mineral wool, offering flexibility in moisture management and thermal performance. They are ideal for climates with varying moisture levels and temperature extremes.
Cost-Effective Solutions and Tradeoffs
Balancing material cost, labor complexity, and long-term moisture risk is crucial when selecting an insulation approach for block walls.
Less expensive options like mineral wool in a furring cavity can be effective but may require more frequent maintenance due to potential moisture issues. They are best suited for budgets with lower upfront costs.
More robust, higher-performing systems like continuous interior rigid foam or hybrid systems typically come at a higher initial cost but offer better long-term performance and reduced risk of moisture damage. These are ideal when prioritizing durability over immediate expenses.
Always consider the tradeoffs between simplicity, cost, and performance to make an informed decision based on your specific needs and constraints.
Vapor Control: Barriers, Retarders, and Smart Placement
Vapor barriers and vapor retarders differ in permeance and in how they interact with mass walls, furring, and insulation. Understand how each type affects drying paths and dew-point logic in the wall assembly. The choice should reflect climate, interior humidity, and the wall’s design to prevent trapped moisture.
Develop placement rules of thumb for interior barriers in dry climates and exterior barriers when exterior drying is preferred. Describe practical detailing for block walls with furring and insulation to avoid hidden water traps, and highlight common mistakes to avoid, such as mismatched permeance or continuous barriers across openings. A simple decision flow can help select the appropriate barrier and placement.
Comparative overview of vapor control options
Vapor control in block walls involves managing moisture movement to prevent condensation. Key options include impermeable membranes, smart vapor retarders, and permeable finishes.
Impermeable membranes have low perm ratings (<1), preventing interior drying but reducing risk of exterior condensation. They are ideal for cold climates with low interior humidity.
Smart vapor retarders offer moderate perm ratings (1-5), balancing drying and prevention. They are suitable for mixed climates or when some interior drying is desired.
Permeable finishes have high perm ratings (>5) and promote interior drying but may increase exterior condensation risk in cold climates. Always verify product labels or datasheets for accurate perm ratings to make informed decisions.
Practical placement strategies to avoid trapped moisture
To prevent moisture buildup and damage, avoid these common mistakes when placing vapor control layers in block walls:
- Continuous barriers across openings: Avoid creating a sealed envelope that traps moisture.
- Mismatched permeance between layers: Ensure all layers work together to manage moisture effectively.
- Neglecting potential water traps behind insulation or membranes: Inspect and address any hidden moisture sources.
- Ignoring climate zone and existing moisture conditions: Evaluate these factors before choosing vapor control strategies.
In dry interior climates with reliable exterior drying, place low perm barriers at the interior face of insulation. In humid interior climates or where exterior drying is unreliable, use permeable membranes or breathable finishes to promote interior drying.
Moisture-Resistant Materials, Fasteners, and Finishes
Identify corrosion- and mold-resistant fasteners suitable for moisture-prone block walls and confirm compatibility with furring strategies and vapor barriers. Choose finishes and substrates that tolerate occasional dampness, such as cement board or mold-resistant gypsum alternatives, without deterioration. Plan finish systems that maintain drainage paths and avoid creating water-trapping cavities behind the interior surface.
Align the chosen materials with the vapor strategy to prevent hidden moisture behind finishes, and establish installation checks for substrate prep, fastener spacing, and sealed joints. Outline maintenance and lifecycle expectations for signs of corrosion or moisture damage and specify when upgrades may be required to maintain performance.
Material specs and compatibility explained
Choosing the right materials for your block wall project is crucial to prevent moisture-related issues. Here’s what to look for in product specifications:
- Fasteners: Stainless steel, hot-dipped galvanized, or ceramic-coated fasteners resist corrosion and mold. Spec: Look for ASTM A193/A193M standards for stainless steel, G90/G185 for hot-dipped galvanized, and manufacturer’s data on ceramic-coated options.
- Finishes: Cement board, fiber-cement alternatives, or mold-resistant gypsum products tolerate dampness without deterioration. Spec: Check for ASTM C1325 (cement boards) or ASTM C475/C475M (gypsum panels) ratings.
- Substrates: Ensure they are compatible with your chosen furring and insulation strategy. Spec: Review permeance values (perms) to match materials with the wall assembly’s moisture control needs.
- Hardware: Choose hardware that won’t corrode or promote mold growth. Spec: Look for stainless steel, plastic, or other non-corrosive materials.
- Vapor barriers/retarders: Select based on your chosen vapor strategy and compatibility with other materials. Spec: Check permeance values (perms) to ensure they match the intended role in your wall assembly.
Visual checkpoints for installation quality
Regular visual inspections help identify potential moisture issues early. Use this checklist during and after installation:
- Continuous cavity: Ensure no gaps or voids in insulation, allowing proper drainage/ventilation.
- Sealed penetrations: Check all holes, cracks, and gaps around pipes, wires, etc., are properly sealed to prevent water intrusion.
- Proper flashing/weep details: Verify that flashing is installed correctly at the base of walls and weeps are unobstructed for proper drainage.
- Furring strip alignment: Ensure furring strips are level, straight, and evenly spaced to support finishes properly.
- Insulation placement: Confirm insulation is properly placed within the wall cavity, filling it completely without gaps or voids.
- Vapor barrier/retarder placement: Verify that vapor barriers/retarders are installed according to your chosen vapor strategy and are continuous with no tears or holes.
- Finish material alignment: Ensure finish materials are properly aligned, level, and securely fastened to the furring strips.
Quick rule: Inspect work throughout the construction process, not just at completion. Address any identified gaps, penetrations, or flashing issues immediately to maintain a moisture-safe build.
Planning, Tools, and Step-by-Step Execution Checklist
Begin with a pre-work moisture risk assessment, noting signs of intrusion or mildew and setting interior humidity targets. Check codes, venting requirements, and define what constitutes success to avoid trapped moisture after finishing. Use this as the foundation for all subsequent steps.
Prepare the site by verifying wall straightness, addressing cracks, ensuring drainage, and deciding on furring depth and insulation details before materials arrive. Gather essential tools and materials, then follow a sequence that creates a dry-backed wall, an air gap, and the specified vapor strategy before finishing. Conclude with a maintenance plan and post-install checks to verify performance over time.
Tools and materials checklist
The right tools and materials ensure a successful moisture management project on your block walls.
- Laser level: Essential for ensuring straight furring strips. Tip: Consider renting to save costs.
- Stud finder: Helps locate studs for secure furring strip attachment.
- Respirator: Protects from dust and potential mold spores during installation.
- Utility knife: Cuts furring strips, insulation, and membranes to size.
- Snips: Used for cutting and trimming metal fasteners and flashings.
- Moisture meter: Measures existing wall moisture levels before and after installation. Tip: Check local rental stores for availability.
- Caulking gun: Applies sealant at edges, penetrations, and seams.
- Furring channels: Create an air gap between the wall and finish. Tip: Verify compatibility with your chosen insulation type.
- Resilient isolation: Prevents moisture transfer from walls to finishes.
- Rigid insulation: Provides thermal resistance and can act as a vapor barrier or retarder. Tip: Choose based on your defined vapor strategy.
- Interior vapor barrier/retarder: Controls moisture movement into the wall assembly. Warning: Incorrect placement can trap moisture.
- Fasteners: Secure furring strips and finish materials to walls. Tip: Use corrosion-resistant fasteners for longevity.
- Sealant: Prevents air and moisture leaks at edges, penetrations, and seams.
- Personal Protective Equipment (PPE): Includes safety glasses, gloves, and ear protection. Tip: Always follow manufacturer’s instructions for proper use.
Step-by-step implementation checklist
Following this sequence ensures a moisture-resistant interior wall finish that won’t trap water.
- Surface prep and moisture assessment: Inspect walls, address cracks or efflorescence, ensure proper drainage, and measure existing moisture levels. Quick check: Ensure walls are clean, dry, and structurally sound before proceeding.
- Install furring strips: Attach channels to walls using fasteners, maintaining a consistent air gap. Pro tip: Use a laser level for straight, even installation.
- Apply vapor control layer: Install the specified vapor barrier or retarder according to manufacturer’s instructions. Quick check: Ensure proper alignment and secure attachment at all points.
- Install insulation: Place rigid foam, mineral wool, or other chosen insulation within furring channels. Pro tip: Seal seams with expanding foam or sealant to prevent air leaks.
- Attach finish materials: Secure drywall, paneling, or other interior finishes to furring strips using appropriate fasteners. Quick check: Ensure all edges and corners are securely attached and aligned.
- Perform edge sealing: Apply sealant at all penetrations, seams, and edges to prevent air and moisture leaks. Pro tip: Use a caulking gun with a smooth, consistent motion for even application.
- Post-installation verification: Measure final moisture levels, inspect for condensation or cold spots, and ensure ventilation adequacy. Common mistake + fix: Regularly inspect work in progress to catch and address any issues early.
Common Mistakes, Troubleshooting, and Repairs
Identify patterns that trap moisture, such as interior vapor barriers used where they hinder drying, incorrect insulation placement, or furring that creates condensation-prone cavities. Use visual cues, odors, or moisture readings to detect hidden dampness and to guide repairs. A structured troubleshooting workflow helps separate installation flaws from service issues.
Implement remediation strategies that reconfigure furring, adjust insulation placement, and install appropriate vapor retarders or exterior moisture controls. Include decision trees to decide when DIY fixes are appropriate versus when professional assistance is needed, based on moisture load and potential structural concerns. Plan ongoing monitoring to prevent recurrence and establish a long-term moisture management routine.
Diagnosing trapped moisture and failure signs
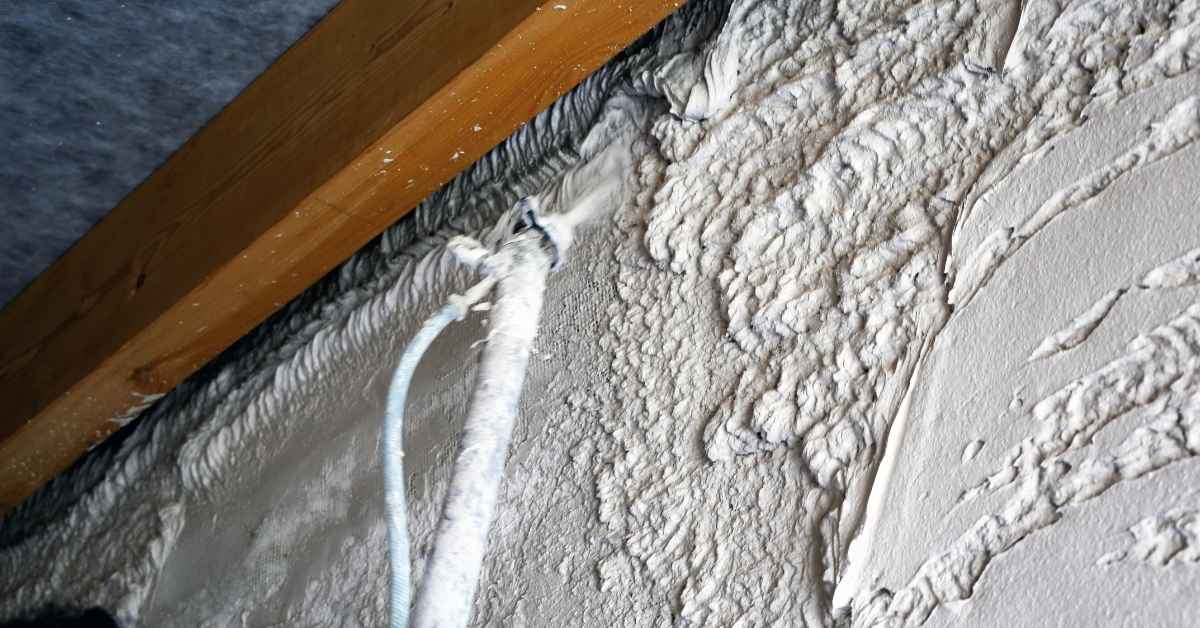
Inspect your block walls for visible signs of moisture entrapment. Efflorescence, a white powdery substance on the wall’s surface, indicates water migration. A musty odor suggests mold or mildew growth, which can cause health issues.
Check for paint blistering or peeling, as this could signify trapped moisture beneath. High relative humidity (RH) levels inside your home may also indicate a problem. Use a hygrometer to measure RH; values consistently above 50% warrant further investigation.
Thermal imaging can reveal hotspots on walls, indicating areas of heat loss or gain, which might be due to moisture trapped in the wall assembly. If you suspect hidden moisture, use a moisture meter to probe the wall’s interior. Always follow safety guidelines when performing invasive inspections.
Repair and retrofit strategies
To fix trapped moisture issues, consider adding a ventilated cavity behind your block walls. This allows moisture to escape while preventing condensation. Ensure proper air sealing at the exterior of the wall assembly to maintain a vapor barrier.
If selective removal and replacement are necessary, consult local building codes and manufacturer guidelines before proceeding. For significant issues or complex retrofits, consider consulting a building science professional. They can provide tailored advice based on your specific situation.
In some cases, relocating or adjusting insulation may be required to prevent future moisture entrapment. Always ensure proper drainage and ventilation to manage exterior moisture effectively. Regularly inspect and maintain your walls to prevent recurrence of trapped moisture problems.
Air Sealing, Ventilation, and Indoor Air Quality Implications
Explain how air sealing interacts with wall moisture strategy to ensure a continuous, detectable barrier without trapping residual moisture in furring cavities or between block walls and insulation. Detail penetrations and terminations with robust sealant methods to maintain performance. A solid sealing approach supports IAQ when combined with proper ventilation.
Develop a ventilation framework that supports moisture control and IAQ, specifying when to employ mechanical ventilation and how to balance exhaust and supply. Include filtration considerations and how sealing interacts with air exchange to influence indoor contaminant levels. Conclude with commissioning, monitoring, and maintenance steps to verify performance and adjust as needed.
New developments in air-sealing
Air sealing has evolved significantly with new materials and techniques that can help manage moisture transport at block-wall interfaces. Today’s best practices include:
Advanced sealants: Use low-VOC, high-performance caulks, foams, or spray-applied membranes to seal penetrations, seams, and terminations effectively.
Integrated air barriers: Incorporate continuous, detectable air barrier materials like house wraps or foam boards that can be easily inspected for gaps or penetrations.
Infrared technology: Utilize infrared cameras to identify and address hard-to-detect air leaks, ensuring a thorough seal and minimizing residual moisture buildup.
Removing particulates from indoor air and IAQ checks
Maintaining good indoor air quality (IAQ) is crucial for occupant health, especially in homes with block walls. Here’s how to manage moisture-driven particulate issues:
Monitor humidity levels: Use a hygrometer to keep track of indoor relative humidity (RH). Maintain RH between 30-50% to prevent mold growth and particle resuspension.
Install appropriate filtration systems: Implement filters with a MERV rating of 13 or higher to capture dust, allergens, and other pollutants effectively. Ensure your HVAC system can accommodate the chosen filter size.
Regular maintenance: Clean or replace filters regularly, and address any moisture sources driving particulate problems promptly. If RH consistently exceeds 50%, consider increasing ventilation or adjusting humidity setpoints.
Conclusion
Protecting block walls from moisture is about deliberate, repeatable steps that keep water out while letting the assembly dry when needed. Focus on a well-planned combination of furring, air gap, drainage plane, insulation placement, and vapor strategy, and verify each part before closing up. When done carefully, you improve safety, durability, and the look of the finished space.
Check that the installation follows a practical sequence: secure furring strips plumb and level, maintain the intended air gap and drainage plane continuity, place insulation in the correct position without compressing the barrier, install vapor control elements per manufacturer instructions, and finish with properly sealed edges and fasteners rated for moisture zones. Confirm all penetrations are sealed, conduct a small-area test for leaks or condensation, and document any deviations from the plan so you can correct them before broader work continues.
Common mistakes to avoid include skipping the air gap or misplacing the drainage plane, using incompatible fasteners or finishes that trap moisture, and sealing over moisture sources or ventilation needs. Practice safe work by wearing eye protection and gloves, turning off related utilities when cutting or drilling, and testing joints and seals in a dry condition before expecting performance in a wet cycle. If any step feels uncertain, pause and verify guidance from product labels, manufacturer instructions, or local rules, and keep projects small and reversible where possible.
When the project involves complex moisture interactions, unseen leaks, or structural concerns, consider a professional consultation before proceeding. A measured approach, patience, and careful testing lead to lasting results and a safer indoor environment. With clear steps and prudent checks, you can move forward confidently and finish with a durable, moisture-resilient interior.
FAQ
What types of furring strips are suitable for interior block walls and how do I choose among them?
Use furring strips that remain stable with moisture exposure, such as treated or corrosion-resistant materials. Check the manufacturer’s guidance for compatibility with moisture and vapor strategies, and verify local building recommendations. Consider thickness, edge shape, and how the strips will support insulation and a drainage plane.
What are the best practices for insulating against interior moisture on block walls?
Install insulation with a continuous air gap and a drainage plane behind the finish. Ensure the insulation is secured to the furring with appropriate fasteners and that there is a path for any incidental moisture to drain or vent away. Always follow product instructions for installation, and avoid compressing insulation material to maintain its performance.
How should a vapor barrier be installed to avoid trapping moisture in block walls?
Place the vapor barrier on the warm side of the assembly and seal all seams and edges to minimize air leakage. Do not create gaps behind the barrier where moisture can bypass it. If in doubt, consult the barrier’s labeling and ensure compatibility with the chosen insulation and finishes.
How can condensation on concrete walls be prevented, and what should I watch for during installation?
Control indoor humidity and provide proper airflow near the wall surface. Use a drainage plane and ensure there is an uninterrupted air gap between the wall and insulation. Check for signs of moisture ingress during and after installation and adjust as needed based on the product instructions and local guidance.