
Introduction
Blisters in plaster happen when moisture is trapped behind the skim coat, causing bubbles. Before you re-skim, the goal is to dry out the area and reattach loose material. Check the plaster surface for loose edges and follow manufacturer instructions or local rules for drying.
Give the area plenty of ventilation and use gentle heat or airflow to encourage evaporation, never forcing it. Inspect the surface again after it dries and only then plan your re-skim hand-work with clean tools and proper bonding technique. If you’re unsure, verify labels and local requirements before proceeding.
Key takeaways
- Inspect plaster blisters for moisture signs before any re-skimming or sanding.
- Drying strategies should balance moisture removal with avoiding new damage.
- Test moisture levels with appropriate tools and follow manufacturer guidelines.
- Passive methods need time and ventilation; monitor progress daily.
- Active drying requires safety gear, proper electrical setup, and supervisor oversight.
- Prepare the wall surface and perform adhesion tests before re-skim.
Table of Contents
- Introduction
- Key takeaways
- What Causes Plaster Blisters and Trapped Moisture
- Diagnosing Severity: How Bad Is the Trapped Moisture
- Measuring Moisture: Tools and How to Interpret Readings
- Passive Drying Strategies (Low-Tech, Minimal Equipment)
- Active Drying: Equipment, Protocols, and Safety
- Preparing the Wall for Re-Skim: Surface Prep and Tests
- Regulations, Warranties, and When to Hire a Professional
- Common Mistakes, Troubleshooting, and Quick Reference Checklist
- Conclusion
- FAQ
What Causes Plaster Blisters and Trapped Moisture
Blisters form when moisture gets trapped behind plaster during or after application. Water ingress, rising damp, and condensation are common culprits that push moisture into the base layers. Wet trades and poor detailing can seal in this moisture behind an impermeable finish.
When the enclosure between plaster and substrate stays damp, the trapped moisture expands and creates blistering. Delayed drying after wet work and overly tight finishes prevent any natural evaporation, worsening the problem. Understanding these factors helps you target the right drying approach before re-skim.
Common sources of trapped moisture
Plaster blisters often start with water finding its way behind your walls. Here are the usual suspects:
From above: Roof leaks or pipework issues can drip water onto ceilings and down walls, leaving moisture to build up.
From outside: Ground moisture creeping up walls (rising damp) or external penetration points like cracks or gaps around windows and doors can let water in.
From within: Condensation forms when warm, moist air meets cold surfaces. Recent wet trades like plastering or painting also leave behind moisture that needs time to dry out.
How plaster reacts to moisture
When moisture gets trapped behind your plaster, it starts causing trouble:
The water weakens the bond between the plaster and the wall, making it lose its grip. This is when blisters start forming – the plaster lifts off the wall as it tries to escape the moisture.
Blisters aren’t just cosmetic; they’re a sign that your plaster’s integrity is compromised. Poke them gently with a screwdriver – if it goes in easily, the bond has been broken and you’ve got a problem on your hands.
Don’t ignore these signs. Left untreated, blisters can grow bigger, cause more damage, and even lead to mold growth.
Diagnosing Severity: How Bad Is the Trapped Moisture
Assess severity by looking at visible damage, how widespread it appears, and where the moisture likely originates. A small, localized blister differs from widespread surface deformation or staining. Pinpointing the suspected source helps decide if drying alone is enough or if remediation is needed first.
As damage increases, so does the time and method you’ll need to dry thoroughly. The extent of the affected area influences whether you can proceed with a re-skim after drying or if more extensive repair is required. Use a practical, stepwise approach to determine your next actions.
Visual checkpoints
Before you start poking and prodding, get a good look at the affected area. This checklist helps you spot signs of trapped moisture.
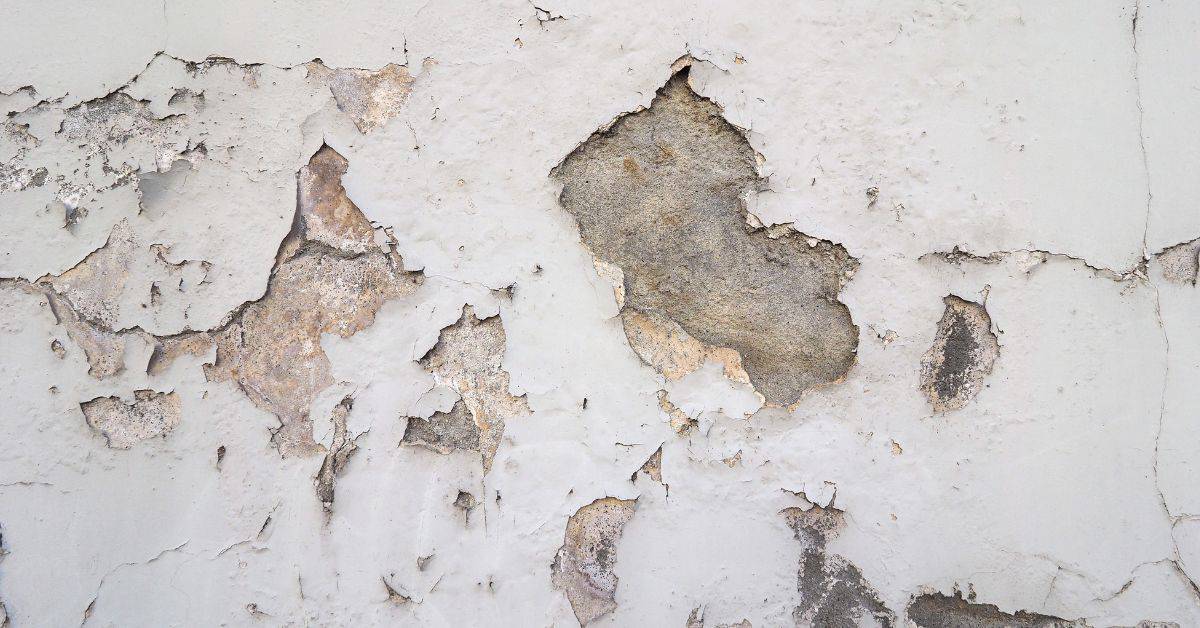
- Bubbles or blisters: These are the most obvious signs. They indicate that moisture is pushing through the plaster.
- Delamination lines: If you see cracks or lines where the plaster is peeling away from the wall, it’s likely due to trapped moisture.
- Staining: Dark spots or patches could mean water is seeping through.
- Efflorescence: A white, powdery substance on the surface might indicate rising damp.
- Mold: Black, green, or orange spots are a clear sign of moisture and potential mold growth.
- Soft or crumbly areas: If the plaster feels soft or crumbles easily, it’s likely been weakened by trapped moisture.
Quick rule: Don’t ignore any of these signs. Each one points to a problem that needs addressing.
Tactile and simple tests
Now it’s time to get hands-on. These tests help confirm if the moisture is active and where it’s coming from.
Gently press on the affected area. If it feels spongy or gives way, there’s likely trapped moisture behind it.
Tap on the plaster. A dull thud could indicate a void behind the surface, which might be filled with water.
Use your nose. A musty smell often accompanies trapped moisture and mold growth.
For a more definitive test, use a small probe to poke into the plaster. If it goes in easily and hits something solid (like timber or metal), you’ve found the source of the problem.
Risk assessment: structural and health risks
Trapped moisture isn’t just an aesthetic issue. It can cause serious problems if left untreated.
Structural risks: Moisture can weaken timber or metal structures, leading to costly repairs down the line. If you suspect this is happening, contain the area immediately and call in a professional.
Health risks: Mold growth can cause allergic reactions and respiratory issues. If you see mold, wear protective gear (gloves, mask) when working in the area, and consider getting an air quality test.
Remember, if the damage is extensive or you suspect structural compromise, don’t try to fix it yourself. Call a professional immediately.
Measuring Moisture: Tools and How to Interpret Readings
Use simple moisture meters to check surface conditions and deeper readings, plus a hygrometer for ambient humidity. Each instrument gives you different insights; surface readings can flag lingering dampness, while internal readings show where moisture sits. Learn what each tool measures to read the data correctly.
Interpreting readings means comparing them to manufacturer guidance and product data sheets for your wall system. Do not rely on a single value—look for trends across the area and over time. Always verify acceptance values with the specific materials and coatings you plan to use.
Types of moisture meters and when to use them
Moisture meters are your eyes into the walls. Here’s what you need to know about the three types:
Pin Meters: These are great for surface checks. Stick the pins in, and it’ll tell you if there’s moisture at that exact spot.
Pinless Meters: For depth profiling, these are your go-to. They use a sensor to scan deeper into the wall without needing to poke holes.
Probe Systems: When you’ve got hard-to-reach areas or need to check behind obstacles, probe systems come in handy. They’re inserted through small holes and can measure moisture up to 3 inches deep.
Using hygrometers and assessing drying conditions
A hygrometer measures humidity in the air. It’s crucial for spotting ongoing condensation risk and checking if your drying efforts are paying off.
Relative humidity above 60% can lead to condensation, so keep an eye on that number. Also, monitor temperature – it affects how much moisture the air can hold.
Place your hygrometer in a representative area, away from drafts and direct sunlight. Check it regularly until you’re consistently below that 60% mark.
Recording and documenting for re-skim approval
Keeping a log of your moisture readings is vital. It shows consistent drying progress and satisfies contractors or insurers.
Here’s what to record: date, location (wall, floor, etc.), instrument used (meter type), and the reading itself. Take readings in multiple spots for a thorough record.
Keep this log simple and organized. A spreadsheet or even a notebook will do. The key is to show that moisture levels are consistently dropping over time.
Passive Drying Strategies (Low-Tech, Minimal Equipment)
Ventilation is your first line of defense: move air through the space and around the affected wall. Isolating the moisture source, if possible, helps prevent cross-contamination of other areas. Use natural air movement and gentle, consistent warmth where appropriate.
Passive methods work best for mild cases or as a supplementary step. They may not fully dry heavy moisture pockets or structural dampness, so monitor progress and be prepared to escalate if needed. Always verify that passive strategies align with local guidance and manufacturer recommendations for your materials.
Ventilation and humidity control
To tackle trapped moisture, you need to increase air changes safely. Open windows regularly, especially after cooking or showering.
Use trickle vents if fitted. If not, consider installing some temporarily. They let in fresh air while keeping out rain.
Reduce indoor moisture generation too. Fix leaks promptly and don’t overwater plants.
Monitor humidity levels with a hygrometer. Aim for 40-60% relative humidity (RH). If it’s higher, ventilation needs boosting.
Removing external moisture sources
First, isolate or repair any leaks from outside. Check roof, walls, and windows. Temporarily patch if necessary.
Ensure gutters and downspouts are clear and draining away from the property. Fix any issues with external drainage.
Protect vulnerable areas with temporary covers or sheeting to stop further ingress while drying out.
Remember, these steps won’t fix severe cases alone. They’re best for mild issues or as part of a broader strategy.
Safe heating and airflow
Domestic heaters can help dry out plaster, but go slowly. Sudden heat can cause thermal shock, leading to cracking.
Start with a low setting. Gradually increase over a few days. Keep the room at a consistent temperature.
Use fans to promote airflow too. But avoid pointing them directly at the walls as this can cause drafts and slow drying.
Monitor the surface for any signs of stress. If you see cracks, reduce heat and airflow until it stabilizes.
Active Drying: Equipment, Protocols, and Safety
Active drying uses devices like dehumidifiers and axial fans to move air and remove moisture more aggressively. Place units to cover the damp zone without creating drafts that dry too quickly and damage finishes. Consider low-pressure extraction or drying mats for targeted areas as needed.
Follow safety and household considerations by sizing equipment to the space and using safe electrical practices. Check that the equipment capacity matches the room or wall area per the manufacturer guidance, and never exceed safe operating limits. Always review product instructions and local rules when in doubt.
Dehumidifiers and fans: selection and placement
Choosing the right dehumidifier and fans is crucial for effective drying. Select a unit with capacity matching your room size, not horsepower or brand.
For example, a 70-pint dehumidifier works well in a 150 sq ft room. Place it centrally, away from walls to maximize airflow. Use axial fans to exhaust humid air out and draw fresh air in.
Ventilation strategy is key. Exhaust fans should face windows or doors for fresh air intake. Keep doors open between rooms for cross-ventilation.
Heating strategies and controlled drying
Heat gently to avoid rapid surface drying. Start with low heat, around 68°F (20°C). Increase gradually as moisture levels drop.
Use space heaters or baseboard heating for even heat distribution. Avoid direct heat sources like fireplac