

Introduction
Learn how to test for lead paint safely and accurately.
The guide walks through practical steps, common pitfalls, and tips to help you determine risk and avoid costly or misleading results.
Key takeaways
- Lead paint hazards require caution; never sand or heat without containment.
- Visual cues indicate possible lead paint; assume risk in homes built before 1978.
- DIY test kits vary in accuracy; follow manufacturer steps and date checks.
- Professional testing provides definitive results; expect a written report and standards.
- Interpreting results guides remediation choices; consider scope, budget, and occupancy.
- Containment, proper disposal, and avoidance of DIY removal improve safety.
Table of Contents
- Introduction
- Key takeaways
- What is lead paint and why it matters
- Visual checkpoints and initial home assessment
- DIY testing methods (step-by-step)
- Professional testing options and what to expect
- Interpreting results and deciding next steps
- Safe removal and remediation practices (what to avoid)
- Practical next steps and trusted sources
- Cost, budgeting, and decision-making guide
- Conclusion
- FAQ
What is lead paint and why it matters
Lead paint is paint that contains lead pigment and old finishes in many homes. It was widely used in houses built before 1978, and today’s paints do not have lead; there’s no safe level of lead exposure.
Testing matters for DIY projects because even tiny amounts can become risks during sanding or repainting. Options include in-home test kits and sending samples to a lab, but always check labels and manufacturer instructions for interpretation. If in doubt, hire a certified lead-safe contractor and follow local hazardous waste disposal rules.
History and common uses of lead-based paint
Lead-based paint was widely used from the late 19th century through the mid-20th century. It provided a durable, long-lasting finish that resisted moisture and corrosion. In residential settings, it was applied to walls, doors, windows, and trim in homes built before 1978. Commercial and industrial buildings also used lead paint extensively on metal surfaces like pipes, machinery, and structural supports.
The pigment added strength and durability but came with significant risks. Lead-based paints were phased out due to health concerns, especially for children who could ingest flakes or dust from deteriorating finishes. Today, modern alternatives are safer and equally effective without the toxic ingredients.
Identifying lead paint can be tricky since it looks similar to non-lead paints. However, knowing where it was commonly used—such as on window frames, doorways, and exterior surfaces—can help narrow down high-risk areas in older homes.
Health risks from lead paint exposure
Lead exposure poses serious health risks, particularly for children. It can cause irreversible damage to the brain and nervous system, leading to developmental delays, learning difficulties, and behavioral problems. Pregnant women are also at high risk as lead can cross the placenta and affect fetal development.
In adults, chronic exposure leads to kidney issues, high blood pressure, and reproductive health concerns. Short-term exposure might cause abdominal pain, headaches, or muscle weakness. The effects accumulate over time, making early detection crucial for prevention.
Children under six are most vulnerable because their bodies absorb lead more readily than adults do. Even small amounts can have long-lasting impacts on cognitive function and physical growth. That’s why testing homes built before 1978 is essential to protect the youngest members of your household.
Who should be concerned and when to test
If you live in a home built before 1978, there’s a good chance it contains lead-based paint. Visible signs like peeling, chipping, or cracking finishes indicate potential hazards that need addressing.
Renovations can release lead dust into the air, posing risks to everyone present. Sanding old surfaces without proper precautions is especially dangerous and should be avoided unless you’re certified in safe practices for handling lead paint.
Having young children or expecting a baby increases urgency for testing since they are particularly sensitive to lead exposure. Regular maintenance checks can help identify deteriorating areas early, allowing for timely intervention before problems escalate.

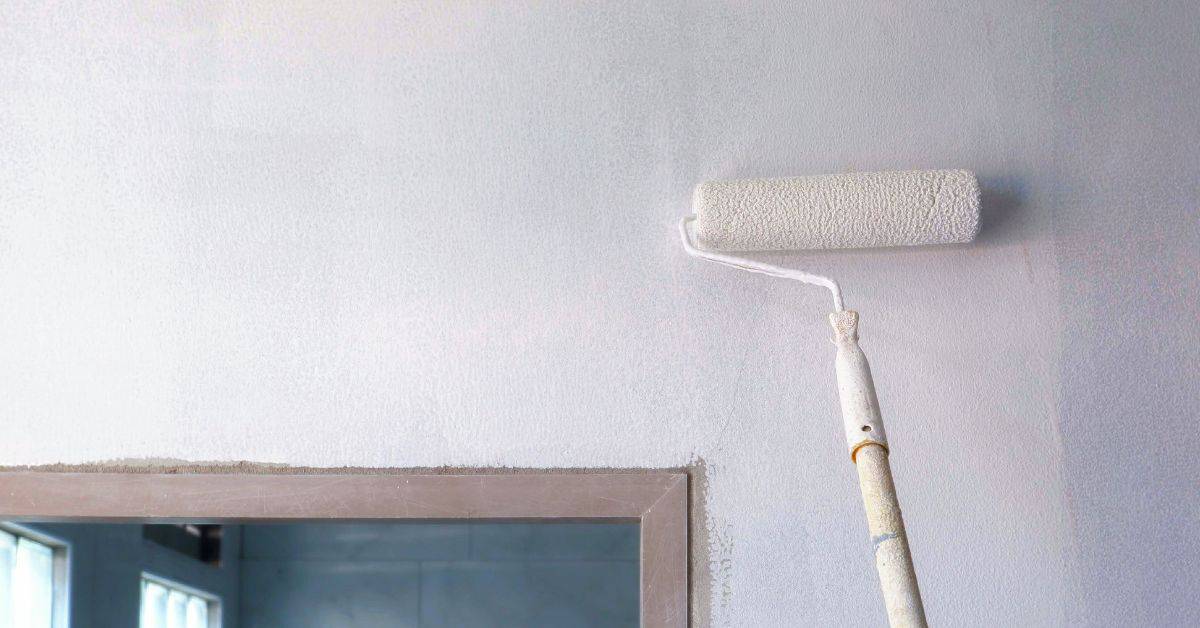
Visual checkpoints and initial home assessment
Start with a quick visual sweep of high‑risk zones: look at windows and sashes, interior and exterior trim, doors, porches, stair railings, and baseboards, especially where layers of paint may have built up or where glossy finishes were applied long ago. Seek indicators like peeling, chipping, cracking, chalky residue, bubbling, or surfaces that look discolored around places you touch often. Note older color palimpsests and any signs of moisture damage, then document your findings with photos and simple arrows, marking deteriorated zones on a rough map or checklist so you can target testing where it matters most.
This approach matters because it focuses effort on the areas most likely to release lead dust if disturbed, guiding you to test first on the surfaces that people touch and that show the worst wear. It helps you plan a safe workflow: avoid sanding or grinding, isolate zones if possible, and move to testing only after you’ve protected nearby areas and minimized disturbance. By prioritizing deteriorated, frequently used surfaces and areas near children or soil contact, you build a clear path for next steps and avoid guessing which spots require action.
High-risk areas to inspect
Use this checklist during your initial home assessment to identify surfaces that are most likely to contain lead paint.
- Window sills and frames: Look for peeling or chipping paint. If you see signs of wear, test here first.
- Door jambs and thresholds: Inspect for flaking paint layers; these areas often show the most damage from frequent use.
- Interior trim: Check around baseboards and door frames where paint is likely to chip or peel due to friction.
- Exterior trim: Focus on corners, edges, and any exposed wood that shows signs of weathering.
- Porch railings: Look for bubbling or cracking paint; these areas are prone to moisture damage.
- Baseboards: Inspect for peeling paint where walls meet the floor. This is a common spot for lead exposure.
- Stair railings: Check for signs of wear and tear, especially if they’re frequently touched or used.
- Kitchen cabinets: Look at edges and corners; these areas often show paint deterioration due to moisture and heat.
Quick rule: Any surface with visible damage should be tested for lead paint.
Safe ways to inspect without disturbing paint
Use these practices during your inspection to avoid creating hazardous dust or damaging the paint.
- Flashlight: Use a flashlight to highlight areas in shadow; this helps you see small details better.
- Inspect corners: Look for signs of flaking, cracking, or peeling at edges and joints.
- Avoid scraping: Do not scrape off loose paint as it can create lead dust. Instead, mark the area for testing.
- Check door frames: Inspect around hinges and locks where friction causes wear; avoid sanding or grinding these areas.
- Inspect windowsills: Look for signs of chipping paint without touching it; mark any damage found.
- Avoid sanding: Do not use sandpaper on suspected lead paint as this can release toxic dust. Mark the area instead.
- Check porches: Inspect railings and steps for signs of wear, but do not disturb them by scraping or grinding.
- Avoid using tools: Do not use any tools that could chip or grind paint; this can release lead dust into the air.
Quick rule: Always mark and document areas for testing without disturbing the paint surface.
DIY testing methods (step-by-step)
DIY testing methods give you a clear, step-by-step path to check for lead in common home surfaces using EPA-recognized lead test swabs and other basic kits. You’ll learn surface prep, where to sample, how to swab, and how to read color changes safely, plus how often to test for a practical baseline and follow-up checks. The guide emphasizes a simple sampling plan, proper safety precautions, and how to record results so you can track changes over time.
This matters because reliable results depend on where you test, how you collect samples, and how you interpret what you see. With a solid sampling strategy, you can focus on high-risk areas like peeling paint, sills, and dust-prone zones, while avoiding unnecessary tests. You’ll also learn how to log results, decide when to test indoors versus outdoors, and when a professional or lab analysis might be warranted, all while keeping disposal, ventilation, and hygiene in check.
Step-by-Step Process
This sequence guides you through safely testing for lead paint at home, from preparation to cleanup.
- Wear gloves and a mask before starting. Protect yourself first.
Check: No bare skin exposed. - Choose high-risk areas like window sills or peeling paint. Focus on these spots first.
Check: Areas have visible signs of wear. - Use a lead test swab kit to sample surfaces. Follow the instructions carefully.
Check: Swabs change color within 10 minutes. - Clean up all materials used, including gloves and masks. Dispose of waste properly.
Check: No residue left behind.
Using lead test swabs properly
Collect samples by pressing the swab firmly against the surface for 10 seconds. Look for a color change within minutes, indicating lead presence.
Avoid false readings by ensuring surfaces are clean and dry before testing. Do not use on wet or freshly painted areas.
If results are unclear, repeat tests in different spots to confirm findings. Always follow up with proper cleanup procedures afterward.
Visual and dust wipe screening for lead dust
To screen for lead dust, use a surface dust wipe kit designed for this purpose. Follow the manufacturer’s instructions carefully to ensure accurate results.
Wipe surfaces gently but thoroughly in high-traffic areas like doorways or floors where dust accumulates frequently. This helps identify potential contamination hotspots.
If wipes show significant lead levels, consider further testing and remediation measures. Consult EPA guidelines for next steps.
When a DIY test is insufficient
DIY kits can miss subtle signs of lead contamination or give false negatives due to their sensitivity limits. If you suspect high levels, professional testing may be necessary.
Professional labs offer more precise quantification and can confirm results from your initial tests. They also provide detailed reports on remediation needs.
If DIY kits show positive readings but are inconclusive about the extent of contamination, it’s wise to consult a licensed inspector for further evaluation.
Professional testing options and what to expect
There are three professional pathways to choose from: certified inspection, risk assessment, and paint testing (chemical spot testing or XRF). Each is performed by different people with different credentials, and each fits a lead-safe plan for historic homes or multi‑unit buildings in its own way. You’ll see how site prep, sampling methods, indoor scope, and how results are documented vary by option, so pick the path that matches your project goals and timeline.
Knowing the differences helps you make a smart call on budget and risk. Use this to decide when to test, what to test, and how results get written up in a report, all while keeping proper chain-of-custody and lab QA in mind. Always check labels and manufacturer instructions for the equipment, and verify credentials with the state or EPA-recognized programs before you hire.
XRF (X-ray fluorescence) testing explained
XRF is a non-destructive method that uses X-rays to detect the presence of lead and other metals in paint layers. The device emits a low-level X-ray beam onto the surface, which causes atoms within the material to emit their own unique X-rays back. This process allows for quick readings without damaging the paint or disturbing it.
The accuracy of XRF testing is high when done correctly. It can detect lead levels down to 0.5 milligrams per square foot and provides immediate results on-site. Safety-wise, there’s minimal risk involved as long as you follow proper handling procedures—wear gloves, avoid direct contact with the machine’s surface, and keep it away from children.
During an XRF test, we typically scan high-risk areas like windowsills, doors, and walls that show signs of wear. We mark these spots for future reference and ensure all readings are documented in a report along with any photos taken at each location.
Lab-based paint chip and dust analysis
To collect samples for lab testing, you need to take small chips of paint from suspect areas or wipe down surfaces with a special cloth to gather dust. These samples are then sent off to an accredited laboratory where they undergo rigorous chemical analysis.
The process starts by sealing the collected materials in protective bags and filling out chain-of-custody forms to track their journey. This ensures that your sample remains uncontaminated until it reaches the lab. Once there, technicians use precise instruments like ICP-MS (Inductively Coupled Plasma Mass Spectrometry) for accurate measurements.
Turnaround times can vary but usually range from a few days to two weeks depending on the lab’s workload and your urgency needs. When interpreting results, focus on concentration levels in parts per million (ppm). A reading above 1 mg/L is considered hazardous according to EPA guidelines.
Choosing a certified inspector or contractor
When hiring someone for lead testing, look for professionals with proper certifications like the EPA’s Renovation, Repair and Painting (RRP) certification or state-specific licenses. These credentials prove they have undergone rigorous training in safe work practices.
Questions to ask include their experience level, what types of tests they offer, whether they provide written reports, and if they follow strict chain-of-custody protocols during sample collection. Also inquire about insurance coverage and liability protection.
Costs vary widely based on the scope of work but expect to pay around $200-$500 for a basic inspection covering several rooms. More extensive testing or full building assessments will naturally cost more due to additional labor and equipment usage fees.

Interpreting results and deciding next steps
Read the test results by looking at whether lead is just present or actually at a measurable level, and understand what “below” or “above” thresholds might mean for safety and your risk tolerance. Use occupant vulnerability in the mix—kids, pregnant people, and health conditions matter—and decide if quarantining, restricting access, or interim controls are needed now.
This matters because it guides whether you focus on containment or cleaning, encapsulation, or more extensive work, based on how stable the lead is and where it is (high traffic or peeling paint). It also sets the plan: who to call, what to document, and how to schedule follow‑up testing to verify results and protect occupants over time.
Immediate interim measures after a positive result
If you get a positive test result for something like mold or asbestos, the first thing to do is contain it. Set up barriers and airlocks around the affected area to keep dust from spreading. Use plastic sheeting and tape to seal off doors and vents.
Next, clean frequently with wet methods. Mop floors and wipe down surfaces daily. Don’t forget to use a HEPA vacuum for any dry cleaning you need to do. Limit access to the area as much as possible until it’s safe again.
When removal, encapsulation, or enclosure is appropriate
If your concrete test shows issues like high levels of contaminants, you need to decide between full removal, encapsulating the surface, or enclosing the area. Removal is a big job and often necessary if there’s serious contamination that can’t be sealed in place safely.
Encapsulation means applying a special coating over the concrete to seal in any harmful substances. It’s less disruptive than removing everything but only works for certain types of contaminants, so make sure you check with experts or product labels first.
If contamination is severe and can’t be contained by encapsulation, consider enclosing the affected area instead. This might mean building a barrier around it to keep people away from the problem zone until proper removal can happen. Always consult local rules before taking any action.
Safe removal and remediation practices (what to avoid)
Safe removal of lead-containing paint starts with solid work practices: set up containment with negative pressure and plastic sheeting, wear proper PPE like respirators and disposable coveralls, and follow careful decontamination and waste disposal steps to minimize cross-contamination. DIY full-scale removal is risky because you can generate hazardous dust, expose yourself and others to elevated lead levels, and stumble into asbestos or other hazards in older homes, making it easy to fall out of OSHA, EPA, or local rules—so avoid methods like careless dry scraping, open-flame tools, or aggressive high-speed sanding.
Sticking to safer pathways matters because it reduces dust and exposure while preserving your home’s structure and your health, and it helps you decide when to call in a certified renovator or lead-safe contractor for major work. Safer options include encapsulation or enclosure where appropriate, wet-abrade methods, and using HEPA-filtered vacuums, with professional intervention guided by verification of qualifications and clear project scope; ask for EPA Lead-Safe Certified Renovator status or an equivalent state license, plus proof of experience in occupied spaces and a plan for containment, ventilation, and post-remediation cleaning. Communicate with your household about containment zones, restrict access for kids and pets, and plan for proper cleaning and hygiene after work to support a real, verifiable reduction in risk.”
Lead-safe work practices for small tasks
When tackling minor repairs or repainting areas with lead paint, it’s crucial to set up a containment zone. Start by sealing off the work area with plastic sheeting and ensuring negative air pressure using an exhaust fan. This prevents dust from spreading into other parts of your home.
Always use wet methods for any surface preparation. Wet-sanding or applying water-based solutions before scraping can significantly reduce airborne lead dust. After completing the task, clean up thoroughly with a HEPA vacuum and damp cloths to capture all remaining particles. Proper disposal of waste in sealed bags marked as hazardous is also essential.
Remember, even small jobs require serious precautions. Don’t cut corners on PPE like respirators or disposable suits. These measures might seem excessive for minor work, but they’re necessary to protect your health and the integrity of your home.
Certified abatement vs. renovation
Understanding the difference between lead paint abatement and renovation is crucial for homeowners dealing with significant amounts of lead paint. Abatement involves complete removal, which requires strict adherence to EPA regulations and certification as a Lead-Safe Certified Renovator or equivalent.
Renovation focuses on controlling exposure through containment and minimizing dust generation without necessarily removing the paint entirely. For major projects like full room renovations, hiring certified professionals ensures compliance with OSHA and local health codes, reducing legal risks and potential health hazards.
When choosing a contractor, verify their certifications and experience specifically in lead-safe practices. Ask for proof of EPA certification or state equivalents, confirm they have handled similar projects before, and ensure they provide clear communication about containment strategies and waste disposal methods.
Practical next steps and trusted sources
Federal regulations set the baseline for lead testing, disclosure, renovation, and abatement, while state and local rules can add requirements or tighten timelines. The key is to understand that testing and disclosure obligations vary by jurisdiction and project type. Always check current registries or dashboards for updates and new guidance as rules change.
For a DIY homeowner, this matters because you need to know when professional testing or a risk assessment is required versus when you can handle simple steps safely yourself. Rely on trusted sources and your local agencies to confirm what applies to your home, especially for real estate transactions or renovations in older housing. Look to federal agencies like the EPA, HUD, and OSHA, plus state health departments, local building codes, and utility or public health offices to guide decisions and to verify credentials for contractors or testers.
Disclosure and property-sale obligations
If you’re selling a home built before 1978, federal law requires you to disclose any known lead-based paint hazards. This means handing over the Risk Reduction Report, which outlines steps for reducing lead exposure, and signing a disclosure form stating that you’ve provided this information.
Landlords must also inform tenants about potential lead hazards before renting out properties built before 1978. Non-compliance can result in fines or legal action against the seller or landlord. It’s crucial to stay updated with local regulations, as some areas may have stricter requirements than federal guidelines.
To avoid penalties and ensure compliance, consult your state health department or local housing authority for specific rules on disclosure forms and timelines. They’ll provide guidance tailored to your area, helping you navigate the legal obligations effectively.
Where to find local help and funding
To get reliable information about lead paint testing and abatement in your area, start by contacting your state or city health department. They often have resources and programs specifically designed for homeowners dealing with lead hazards.
The EPA and the CDC also offer valuable guidance and databases on their websites. These agencies provide detailed information about local contractors certified in lead-safe practices, as well as educational materials to help you understand your responsibilities.
If you’re a low-income homeowner struggling with the costs of abatement or renovation, look into federal and state programs that may offer financial assistance. Some cities have grants specifically for lead-safe housing improvements, so it’s worth checking if there are any local initiatives available in your area.
Cost, budgeting, and decision-making guide
This section lays out a practical cost taxonomy for DIY lead paint test kits, professional inspections, laboratory analysis, and each remediation option, with notes on regional variation. It explains what DIY and pro paths cover, how long they take, what skills are needed, and where risk tolerance matters (children, renovation plans, or deteriorated paint). It also sets expectations for budgeting by room and for choices like encapsulation versus removal, so you can see how costs flow from screening to cleanup.
Use the guidance to build a stepwise plan: assess risk, verify test results, estimate total project cost, set a contingency, and decide whether to phase the work. Practical tips cover saving money through bulk orders, negotiating with contractors, and choosing interim controls when you need time, plus when delaying nonessential work makes sense based on results and budget. Always check kit validity, follow proper sample collection procedures, document results, and confirm any contractor is certified or licensed for lead-safe work.
Cost drivers to expect
The cost of testing for and remediating lead paint can vary widely based on several factors. First, the size of your home—square footage—is a major driver. Larger homes will naturally incur higher costs due to more extensive testing and remediation needs.
Another key factor is the complexity of the work involved. If you have intricate architectural details or multiple layers of old paint, it can increase both labor time and material requirements. This means higher costs for professional inspections and full-scale removal projects.
The type of testing you choose also impacts your budget. DIY kits are generally cheaper but may not provide comprehensive results compared to lab-based analysis or XRF testing by a certified inspector. For thorough coverage, especially in high-risk areas like nurseries or kitchens, opting for more detailed professional inspections is often necessary.
Finally, containment needs can drive up costs significantly. Proper containment measures are crucial to prevent lead dust from spreading during remediation work. This includes setting up barriers and air filtration systems, which add to the overall project expense.
To get a clear picture of your total cost, it’s wise to get multiple quotes. This helps you understand regional price variances and ensures you’re not overpaying for services or materials. It also allows you to compare different contractors’ approaches and identify any potential oversights in initial estimates.
Cost-saving and risk-reduction tips
To manage costs while ensuring safety, focus on targeted testing. Instead of testing every inch of your home, prioritize areas where children under six years old spend time or where there is visible paint damage. This approach helps you identify high-risk zones without incurring unnecessary expenses.
Implementing interim controls can also save money by delaying full-scale remediation efforts. For example, sealing cracks and peeling paint with a certified encapsulant can prevent further deterioration and reduce the risk of lead exposure until you’re ready for more extensive work.
Prioritize areas that are critical to your family’s health and safety. High-priority rooms like nurseries, bedrooms, and kitchens should be addressed first. This ensures that vulnerable occupants are protected while allowing less urgent spaces to wait for budget availability or future renovations.
When negotiating with contractors, ask about bulk discounts on materials and services. Also, consider the long-term value of your choices—full removal might cost more upfront but could save you money in the long run by eliminating ongoing maintenance needs compared to encapsulation options.
Conclusion
Safety first when dealing with lead paint. Know the risk, test what you can, and make solid, measured moves to keep your family and home safe.
Start with a visual check, pick a DIY test method, follow the step-by-step instructions, collect samples in the designated area, note the results, compare them to guidance, and decide whether to proceed with removal or call a professional.
Common mistakes to avoid include testing too large an area before doing a pilot, skipping proper PPE and containment, leaving dust and waste unsealed, and misreading results or rushing to removal without confirmation. Keep the work small, protect yourself and nearby surfaces, and dispose of material correctly so you don’t spread dust.
If results are unclear, show higher levels, or you’re working near children or pregnant occupants, call a professional when unsure. Trust the process, follow the plan, and you’ll finish safe and solid—one careful step at a time.
FAQ
1. Do I need to test for lead paint myself or hire a pro?
If you’re unsure about lead, hire a certified lead tester or a qualified contractor. DIY testing can miss high-risk areas or give false readings if not done right. When in doubt, call in a pro to confirm the situation.
2. What are the quickest ways to test for lead paint?
Use a certified lead test kit and follow the product instructions exactly. For best accuracy, have a lab analysis done on paint chips or dust samples. Don’t rely on rough visual checks or old home remedies.
3. Where should I test first on an older home?
Test in areas where kids spend time and where chipping is likely, like exterior trim, window sills, and near doors. Focus on layers around the lowest window and any areas with peeling paint. Test multiple spots per surface for a true read.
4. What should I do if lead paint is found?
Contain the area and avoid disturbing the paint until you know the plan. Hire a licensed professional to determine safe removal or encapsulation options. Don’t attempt messy or cheap fixes that spread dust.