
Key Takeaways
- Ensure HEPA filtration system is operational and properly sealed to prevent dust leakage.
- Maintain water levels between 30% and 50% of the mixture volume for optimal mixing consistency.
- Start the mixer at a low speed and gradually increase to achieve thorough blending of materials.
- Regularly inspect equipment and replace worn parts to prevent malfunctions and enhance safety.
Introduction
Setting up a dustless mixing station using HEPA filtration and water is a practical approach to minimizing airborne dust during material mixing. This method not only enhances the efficiency of the mixing process but also promotes a safer working environment by reducing respiratory risks associated with dust exposure.
By following a structured setup process, you can ensure that your mixing station operates effectively. Key considerations include maintaining proper water levels and ensuring the HEPA system is functioning optimally to trap fine particles, thereby creating a cleaner workspace.
Step-by-Step Setup Process
Setting up a dustless mixing station requires careful planning and attention to detail. Each step is designed to ensure that your system minimizes airborne dust, operates safely, and produces a consistent mixture. The process below outlines the proper setup sequence, equipment checks, and best practices for achieving optimal dust control.
Step 1: Prepare Your Work Area
Before beginning, choose a well-ventilated workspace, ideally indoors or under a covered area to prevent external dust interference. Ensure the floor is level and free of debris. Position your mixing station on a stable surface where the mixer and container will not shift during operation. If you are working in an enclosed space, make sure that additional ventilation, such as an exhaust fan, is available to maintain air quality.
Check that all necessary materials and tools—HEPA filtration system, mixing container, water source, measuring equipment, and safety gear—are within reach. Wearing protective equipment such as safety goggles, gloves, and a respirator mask adds an extra layer of safety, even when using a dustless system.
Step 2: Inspect and Set Up the HEPA Filtration System
The HEPA filtration system is the cornerstone of a dustless mixing setup. Begin by visually inspecting the unit for any signs of wear or damage, paying close attention to seals, filters, and connections. Ensure that the filter housing is tightly sealed, as even small gaps can allow fine dust particles to escape.
Connect the filtration unit securely to your mixing enclosure or dust hood using airtight ducting or hoses. Turn on the HEPA system briefly to confirm that it powers on and that airflow is consistent. If you detect weak suction or noise irregularities, check for blockages or consider replacing the filter before proceeding. A properly functioning HEPA system can capture particles as small as 0.3 microns, making this step essential for maintaining a clean environment.
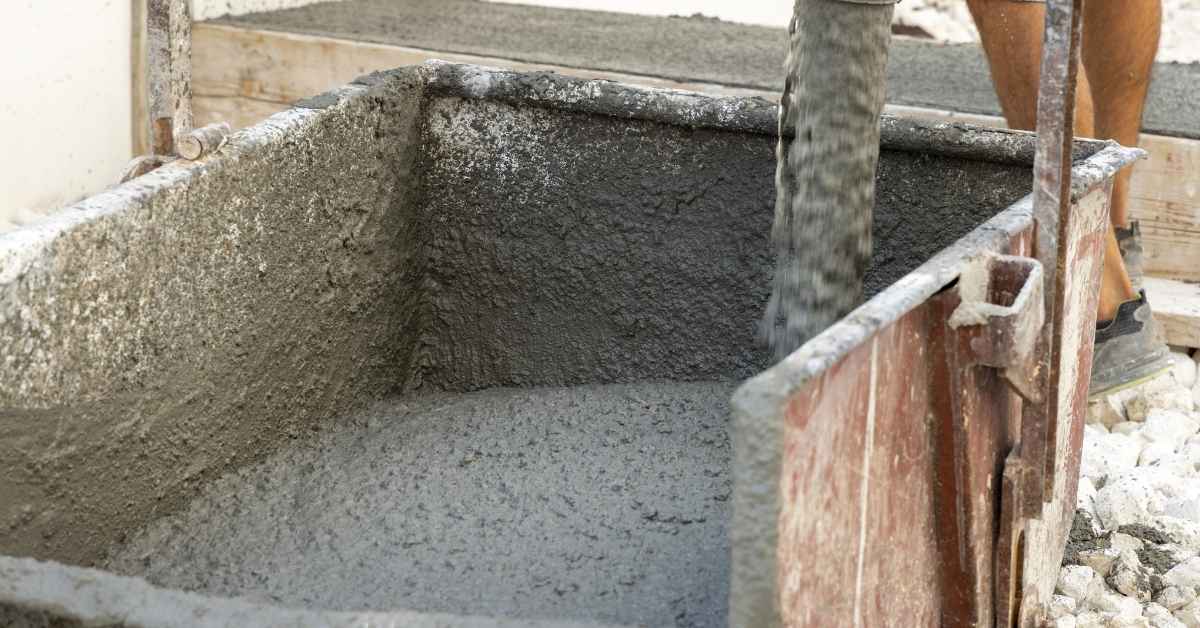
Step 3: Fill the Mixing Container with Water
Add the correct amount of water before introducing dry materials. The recommended range is typically 30% to 50% of the total mixture volume, depending on the type of materials you’re using. Start with a lower amount if unsure, as it is easier to add more water later than to correct an overly wet mixture.
Water serves as a binding agent, helping to trap dust and reduce particle release during mixing. Ensure that the water is evenly distributed across the bottom of the container to provide a uniform base layer before adding dry materials.
Step 4: Add Dry Materials Gradually
Slowly pour the dry materials—such as cement, plaster, or other powdered substances—into the mixing container. Avoid dumping large quantities at once, as this can cause clumping or temporary dust bursts. Introduce materials in small, measured portions while the HEPA system is running to immediately capture any airborne particles.
This gradual process allows the dry materials to absorb moisture progressively, minimizing dust formation. Between additions, briefly mix at a low speed to ensure even hydration before continuing.
Step 5: Start the Mixer at a Low Speed
Once all materials have been added, start the mixer at its lowest speed setting. This helps the materials begin to blend without agitating excess dust. Gradually increase the speed to about 50–70% of the mixer’s capacity, depending on the viscosity of the mixture.
Maintain a consistent rhythm and monitor the texture closely. The goal is to achieve a smooth, homogenous blend without creating splashes or releasing air pockets that could carry fine particles. If the mixture appears too dry or powdery, add small amounts of water incrementally, mixing thoroughly after each addition.
Step 6: Monitor and Adjust During Mixing
During the mixing process, observe both the HEPA filtration system and the mixture itself. Ensure that the filter intake remains unobstructed and that airflow continues steadily. If you notice reduced suction, pause the mixing briefly to check for filter clogs or hose kinks.
At this stage, you can also make fine adjustments to the water content or mixer speed to achieve the desired consistency. Properly balanced mixtures should appear smooth and pourable without visible dust plumes.
Step 7: Finalize and Shut Down Safely
After reaching the desired consistency, turn off the mixer first, followed by the HEPA system. Allow the dust collector to run for an additional 30–60 seconds before shutting it down completely—this ensures that any residual airborne particles are captured.
Carefully remove the container and cover it immediately to prevent drying or contamination. Clean the mixing equipment promptly using a damp cloth to prevent buildup. Empty the HEPA system’s collection bin as recommended by the manufacturer and inspect filters for signs of wear.
Step 8: Routine Maintenance and Inspection
To keep your dustless mixing station performing efficiently, establish a routine inspection schedule. Check seals, hoses, and filters regularly—ideally every 3–6 months—and replace any worn components. Lubricate mechanical parts of the mixer if needed, and confirm that the electrical connections are secure. Maintaining proper water ratios and keeping the workspace clean will extend equipment life and ensure consistent dust control performance.
Quick Facts
Typical setup time is around 30-45 minutes. Common pitfalls include inadequate water levels and improper HEPA system sealing.
Failure Modes & Fixes
- Inadequate Filtration: Check HEPA connections; ensure all seals are tight to prevent dust leakage.
- Incorrect Water Levels: Measure water accurately; adjust as needed to avoid dry mixing.
- Uneven Mixing: Start at a lower speed; gradually increase to ensure thorough blending of materials.
- Material Overfill: Monitor container levels; avoid exceeding capacity to prevent spills.
- Equipment Malfunction: Inspect mixer and HEPA system before use; replace any worn parts to ensure proper function.
Common Issues & Troubleshooting
Even with careful setup, users may encounter common issues such as unexpected dust release or improper mixing consistency. These problems can often be traced back to incorrect water levels, typically ranging from 30% to 50% of the total mixture volume, or a malfunctioning HEPA filtration system, which should be checked regularly to ensure it is operating at peak efficiency. Regularly inspecting these components can prevent many operational headaches and maintain a safe working environment.
If you notice that the mixer is not achieving the desired consistency, typically defined as a smooth and homogenous mixture, consider adjusting the speed settings, which should generally be between 50-70% of maximum capacity. Additionally, ensuring that all materials are properly wetted before mixing can help achieve the desired outcome. Maintaining the right balance of water, usually around 40% of the total mixture volume, can significantly enhance mixing efficiency and reduce airborne particles.
Quick Facts
Typical troubleshooting time: 15-30 minutes. Best practices: Regularly inspect equipment, maintain proper material ratios, and ensure water levels are within the recommended range.
- Issue: Unexpected dust release
- Fix: Check the HEPA filtration system and ensure it is functioning properly, typically requiring replacement every 6-12 months.
- Fix: Verify that water levels are adequate, ideally between 30% and 50% of the mixture volume.
- Issue: Improper mixing consistency
- Fix: Adjust the speed settings of the mixer, which should be set between 50-70% of maximum capacity.
- Fix: Ensure all materials are adequately wetted before mixing to prevent clumping.
- Fix: Maintain the correct balance of water, typically around 40% of the total mixture volume, for optimal results.

Why This Works: The Science Behind Dustless Mixing
- Water as a Binding Agent: Water, typically used in ratios of 5-10% of the total mix, reduces dust generation and enhances the uniformity of the mixture. This leads to consistent results, as the moisture helps to bind particulate matter together, preventing it from becoming airborne.
- HEPA Filtration: HEPA filters, which can capture particles as small as 0.3 microns with an efficiency of 99.97%, ensure that fine particles that may escape are effectively trapped. This guarantees a cleaner environment during the mixing process, significantly reducing the risk of respiratory issues.
- Minimized Dust Exposure: The combination of water and HEPA filtration typically reduces airborne particles by 80-90%, promoting a safer workspace. This reduction is crucial for maintaining air quality, particularly in enclosed environments where dust accumulation can pose health risks.
- Enhanced Safety: The dustless mixing method not only improves effectiveness but also contributes to a safer working environment by minimizing exposure to harmful dust and allergens. This approach is particularly beneficial in industries where prolonged exposure to dust can lead to serious health complications.
Quick Facts
- Setup time is typically around 15-30 minutes, depending on equipment and site conditions.
- Inadequate water levels, usually below the 5% threshold, can hinder performance and lead to increased dust generation.
- Proper sealing of the HEPA system is essential, as leaks can significantly reduce filtration efficiency.
- Regular equipment inspections are recommended, ideally every 3-6 months, to ensure optimal performance.
- Maintaining optimal water levels, typically between 5-10%, ensures consistent mixing and minimizes dust.
Tips & Alternatives for Enhanced Performance
To further optimize your dustless mixing station, consider incorporating additional techniques and alternative materials that can improve performance. Experimenting with different water-to-material ratios may yield better results in terms of consistency and dust reduction. Additionally, using alternative binding agents can enhance the mixture’s stability and reduce the likelihood of clumping.
Utilizing sealed space can also help prevent dust from spreading.
- Monitor humidity levels in the workspace to enhance the effectiveness of the dustless mixing process.
- Consider adding a surfactant to improve the binding properties of the mixture.
- Test different mixing durations to find the sweet spot for your specific materials.
- Keep mixing equipment clean to prevent cross-contamination of materials.
- Use transparent containers to visually monitor the mixing process.
Quick Facts
Best practices involve regularly checking humidity levels and ensuring all equipment is clean and free of residue.
Failure modes & fixes
- If the mixture becomes too watery, reduce the water content gradually until desired consistency is achieved.
- For uneven mixing, adjust the mixer speed or duration to ensure thorough blending.

Conclusion
The dustless mixing station setup process involves several key actions to ensure a safe and efficient environment. First, confirming that the HEPA filtration system is operational and filling the mixing container with the appropriate water level are essential steps.
Following this, gradually adding dry materials and adjusting the mixer speed are critical for achieving a consistent mixture while minimizing dust release. However, challenges such as inadequate water levels and improper HEPA system sealing can arise during the process.
These issues may lead to unexpected dust release or poor mixing consistency, which can hinder operational effectiveness. Regular inspections and adjustments, particularly concerning water levels and filtration system functionality, can mitigate these challenges and ensure optimal performance. To enhance your dustless mixing experience, prioritize adherence to the outlined setup and troubleshooting steps.
Regularly monitor equipment functionality and maintain proper material ratios to achieve the best results. By doing so, you will not only improve mixing efficiency but also create a safer workspace. Start implementing these practices today to ensure a cleaner and more effective mixing process!
FAQ
What is the ideal water level for dustless mixing?The recommended water level for effective dustless mixing is typically between 30% to 50% of the total mixture volume. This ensures proper moisture absorption, minimizing dust release during the mixing process.
How often should the HEPA filtration system be checked?It is advisable to inspect the HEPA filtration system regularly, ideally every 6-12 months. This maintenance ensures that the system is functioning properly and effectively capturing fine particles to maintain air quality.
What should I do if the mixer isn’t achieving the desired consistency?If the mixer is not achieving the desired consistency, consider adjusting the speed settings to between 50-70% of maximum capacity. Additionally, ensure that all materials are adequately wetted before mixing to prevent clumping.
How can I enhance the performance of my dustless mixing station?To optimize your dustless mixing station, monitor humidity levels and experiment with different water-to-material ratios. Adding a surfactant can also improve binding properties, resulting in a more stable mixture.