
Introduction
Saw-cut control joints in fresh concrete are planned lines cut with a saw to guide cracking and keep the slab straight.
Timing, planning, and good joint spacing matter, so map out the pattern before you start. Make the cuts while the concrete is workable but set enough to hold its shape, and practice on a scrap area if you can. Avoid common mistakes like rushing cuts or forcing the blade; consult the manufacturer’s instructions and your local codes if you are unsure.
Key takeaways
- Plan joint spacing and layout before pouring to avoid rework and chipping.
- Wait until surface is firm enough to support saw weight and blade.
- Wear eye protection and hearing protection; keep bystanders clear during cuts.
- Verify cut depth and alignment per manufacturer instructions and local rules.
- Cut in straight, deliberate passes and avoid forcing blade through hardened sections.
- Inspect joints after cutting, seal promptly and protect from construction traffic.
Table of Contents
- Introduction
- Key takeaways
- Why Control Joints and Proper Saw Cutting Matter
- Timing: When to Make Saw Cuts for Fresh Concrete
- Planning Joint Layout and Exact Cut Locations
- Tools, Blades, and Materials Checklist
- Step-by-Step Procedure for Saw-Cutting Fresh Concrete Without Chipping
- Common Mistakes and How to Avoid Them
- Safety Precautions and Site Management
- Post-Cut Care, Sealing, and Maintenance to Preserve Joints
- Conclusion
- FAQ
Why Control Joints and Proper Saw Cutting Matter
Control joints guide where cracks will form, so they don’t run randomly across the surface. This protects the slab’s structural integrity and keeps the finish looking clean for years. Proper planning avoids unsightly hairline cracks and costly repairs later.
Compared with leaving cracks to chance, planned joints reduce maintenance and long-term durability risks. Saw cuts relieve tensile stresses near the surface, directing movement along the joint lines. The spacing and depth of joints influence how well cracking is controlled and how the surface holds up under use.
How cracking happens in fresh concrete
As concrete cures, it naturally shrinks and cools. This causes tensile stresses near the surface.
Without control joints, these stresses can exceed the concrete’s strength, leading to early surface fractures – random cracks that mar your slab’s appearance and compromise its integrity.
Think of it like drying mud: if you don’t score it first, it’ll crack on its own as it dries. But with control joints, we direct those cracks where we want them to go.
Benefits of clean, chip-free saw cuts
A clean saw cut relieves tensile stresses evenly across the entire depth of the slab. This prevents random cracking and maintains structural integrity.
Chipping or raveling (when concrete crumbles along the joint) weakens the slab and creates unsightly edges. It also invites water intrusion, leading to long-term durability issues like freeze-thaw damage.
Proper saw cutting preserves your slab’s appearance and reduces maintenance costs in the long run. Plus, it helps protect against trip hazards and other safety concerns caused by uneven or damaged surfaces.
Timing: When to Make Saw Cuts for Fresh Concrete
Cutting window refers to the period when the concrete can still be relieved by the joint without causing damage. Timing affects durability and how well the joints function. It also influences the risk of chipping if cuts are made too soon or too late.
Look for readiness cues rather than sticking to a clock. Bleed water status, surface firmness, and initial set indicators help you judge when to cut. If one cue is off, recheck in a short window and adjust blade depth or delay the cut as needed.
Practical tests to assess readiness
Before you grab your saw, perform these quick field checks to ensure your concrete is ready for cutting.
Thumbprint Test: Press your thumb into the concrete. If it leaves a clear imprint but doesn’t stick to your skin, it’s starting to set. Recheck in 1-2 hours.
Walking Test: Walk on the surface. If it feels solid and doesn’t leave footprints, it’s ready for cutting. Be careful not to scuff the surface with your boots.
Scratch Test: Use a trowel or screwdriver to scratch the surface. If you can’t remove material easily, the concrete is hard enough to cut.
Environmental and mix factors that change timing
Weather conditions and mix design can speed up or slow down setting time. Here’s how:
Temperature: Warmer temps accelerate setting. In hot weather, cut earlier. In cold, delay.
Humidity & Wind: High humidity slows setting. Wind speeds it up. Adjust your cutting plan accordingly.
Admixtures & Mix Design: Retarders slow down setting, accelerators speed it up. Richer mixes set faster. Check with your supplier for specific times.
Planning Joint Layout and Exact Cut Locations
Start with a layout that matches slab thickness, anticipated shrinkage, and how the space will be used. Use practical maximum spacing as a starting point for residential slabs, then refine for edges and openings. A clear plan reduces guesswork and misaligned cuts.
Align joints with reinforcement to avoid chopping into bars or mesh. Decide joint depth in relation to the slab and choose a timing that minimizes chipping while still providing relief. Adapt patterns for edges, doors, fixtures, and irregular shapes to keep the surface looking tidy.
Matching joints to reinforcement and slab geometry
First off, you gotta understand that your rebar or wire mesh ain’t just there for decoration. It’s the backbone of your slab, so your joints need to work with it, not against it.
Here’s what you do:
Check your reinforcement layout. See where those bars and meshes are running? Your joints should align with them. You don’t want ’em crossing each other at odd angles, that’s asking for trouble.
Now, about those joint types. Most of the time, you’ll be using tooled joints. They’re easy to do and strong enough for most slabs. But sometimes, you might need something different:
– If your slab is thick or has a lot of reinforcement, consider sawed joints. They go deeper and give more support.
– For really big slabs or when you’re using lightweight concrete, think about formed joints. They help control cracking and keep your slab looking sharp.
Visual checkpoints for a professional layout
Before you start cutting and placing concrete, use this checklist to ensure your joint layout is accurate and well-planned. This will help prevent costly mistakes and rework.
- Check reference points: Ensure they are clearly marked and easily visible. Verify their accuracy by measuring from known points on the formwork.
- Verify straight lines: Use a laser level or string line to confirm that your planned joint lines are straight. Check both horizontally and vertically.
- Match joints to reinforcement: Ensure that your planned joint locations align with the steel reinforcement. Misaligned joints can lead to weak spots in the slab.
- Check joint spacing: Measure the distance between planned joints to ensure they are within the recommended range (usually 24″ to 36″). Inconsistent spacing can cause cracking.
- Protect planned lines: Use tape or chalk lines to mark and protect your planned joint locations. This helps prevent accidental damage during finishing.
- Check for obstructions: Ensure there are no formwork ties, bolts, or other obstacles that could interfere with your planned joint layout.
- Confirm slab geometry: Double-check that your joint layout matches the shape and size of the slab. Incorrect layouts can lead to poor concrete distribution and weak spots.
- Inspect formwork joints: Ensure that the joints in the formwork are clean, tight-fitting, and aligned with your planned joint locations to prevent leaks and improper curing.
Quick rule: Always double-check your measurements and layout before placing concrete. A few extra minutes spent verifying can save hours of rework later on.
Tools, Blades, and Materials Checklist
Choose the right saw for the job: a larger walk-behind for long runs and a hand-cut option for tight spots. Match blade type and size to the job and to the saw’s arbor compatibility. Budget for a blade designed for fresh concrete to reduce chipping risk.
On safety, wear the essentials and plan for water control or dust mitigation. Include marking tools, guides, and a reliable water delivery setup. Also consider sealant options and when to apply them in relation to the cut.
Blade selection and maintenance for minimal chipping
Choose the right blade to minimize chipping when saw-cutting fresh concrete.
- Bond type: Latex-impregnated or resin-bonded blades are best for early-entry cutting. They hold segments better and reduce chipping.
- Grit size: Coarser grit (e.g., 24-36) is suitable for fresh concrete to minimize chipping. Finer grit can cause more chipping due to increased friction.
- Diameter: Match blade diameter to your saw’s capacity. Too small can lead to blade wobble, causing chipped edges.
- Arbor hole size: Ensure the arbor hole matches your saw’s spindle. A wrong fit can cause blade wobbling and chipping.
- RPM rating: Use blades rated for your saw’s RPM to avoid excessive heat buildup, which can damage the blade and cause chipping.
- Blade sharpness: Inspect blades before use. Dull blades increase friction, causing more chipping and reducing cut quality.
- Segment design: Diamond segments should be evenly spaced and well-bonded to the blade’s core. Inadequate segment bonding can lead to chipping.
- Blade condition: Check for cracks, chips, or other damage. Using damaged blades increases the risk of chipping and may cause blade failure.
Quick rule: Regularly inspect and maintain your blades to minimize chipping and extend their lifespan.
Accessories to reduce raveling (guide rails, water control, edge guards)
Use these accessories to produce clean cuts and minimize raveling when saw-cutting fresh concrete.
- Guide rails: Use straight guides or edge rails for long, accurate cuts. They help maintain a consistent depth and prevent wandering.
- Edge guards: Protect slab edges with guard strips to prevent chipping and raveling during cutting.
- Water control: Use continuous water supply or misting methods to keep blades cool, reduce dust, and maintain cut quality. Inadequate water can cause blade overheating and increased friction, leading to chipping.
- Splash guards: Protect yourself and your surroundings from water spray using splash guards or shields.
- Dust/water containment: Use dust collectors or contain water runoff to maintain a clean work area and prevent slip hazards.
- Marking tools: Use chalk lines, markers, or reference grids for accurate cut placement. Inaccurate marking can lead to misaligned cuts and increased labor.
Quick rule: Properly set up and use these accessories to ensure clean, consistent cuts with minimal raveling.
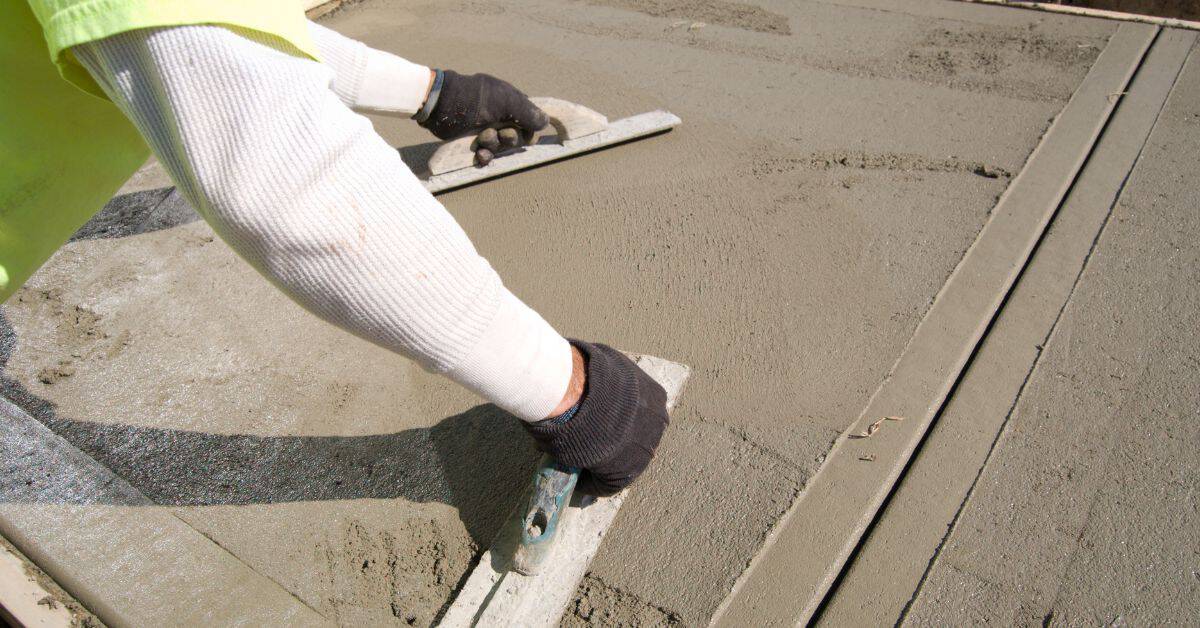
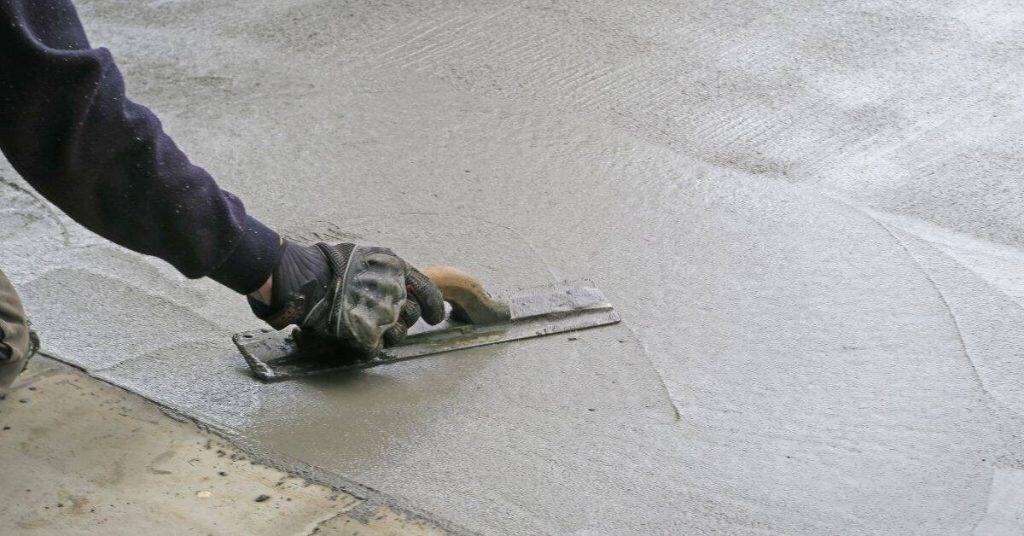
Step-by-Step Procedure for Saw-Cutting Fresh Concrete Without Chipping
Begin with precise pre-marking and a clean layout. Confirm joint lines align with the planned grid and fixtures. Accurate marks minimize rework and miscuts later on.
Select the right saw and blade, set the depth, and ensure water or dust control is in place. Maintain a steady feed and entry to keep the kerf clean and edges intact. Follow a practical sequence and manage depth with shallow passes if needed.
Step-by-Step Process
This section guides you through the practical steps to saw-cut fresh concrete without chipping, from preparation to cleanup.
- Preparation: Inspect your layout marks. Ensure they’re clean and straight. Check for any obstacles like rebar or wires.
- Safety first: Put on appropriate PPE (Personal Protective Equipment). Follow lockout procedures if necessary. Ensure the work area is clear.
- Main cut: Start at a corner or free end, using your saw’s guide rail to maintain a steady feed rate and depth. Keep the blade entry angle consistent.
- Check progress: Regularly inspect your cuts for any signs of chipping or unevenness. Adjust your technique if needed.
- Cleanup: After completing all cuts, remove debris immediately. Inspect your work for any missed spots or areas that need touch-up.
Setup and First Pass Technique
Starting right is crucial to avoid chipping. Here’s how to set up your saw and make the first pass.
Begin at a corner or free end of the slab. This gives you room to control the saw without tight corners causing stress on the blade.
Control your feed rate. Too fast can cause stalling, too slow may result in chipping. A steady, consistent pace is key.
Do not force the blade into the concrete. Let it bite in naturally at a steady angle, usually around 45 degrees.
Deepening the Cut and Multi-Pass Strategy
Sometimes, one pass isn’t enough. Here’s how to deepen your cut and use multiple passes effectively.
For thicker slabs (over 6 inches), consider a multi-pass strategy. The first pass should be shallow – around 1/4 of the slab thickness. This helps prevent chipping.
After the initial pass, allow the concrete to rest for about 30 minutes before making deeper cuts. This gives it time to recover from the stress of cutting.
Avoid tearing edges by ensuring your blade is fully submerged and maintaining a consistent feed rate throughout the cut.
Common Mistakes and How to Avoid Them
Avoid cutting too close to edges or corners by using a layout plan and chalk lines. Verify minimum edge distances before starting and adjust as necessary. Pre-planning helps prevent regrettable mistakes on the first pass.
Keep blade speed consistent and use cooling water to reduce heat. Use a blade appropriate for fresh concrete and inspect wear before starting. Plan multiple shallow passes rather than a single deep cut to relieve stress gradually.
Prevention of edge spalling and raveling
When saw-cutting fresh concrete, it’s crucial to avoid edge spalling and raveling. These issues weaken your slab and make it look unprofessional.
Minimum distances: Don’t cut within 1-2 inches of the slab edge or corners. This helps prevent chipping and maintains structural integrity.
Edge supports/guards: Use them to protect edges from damage during cutting. They also help maintain a clean, straight line.
Starting/stopping techniques: Begin and end your cuts near the middle of the slab, not at the edges. This reduces stress on the concrete and prevents spalling.
Operator errors and machine maintenance tips
To avoid common mistakes while saw-cutting fresh concrete, follow these operator and machine maintenance tips:
- Steady feed rate: Maintain a consistent speed to prevent chipping. Too fast or too slow can cause damage.
- Blade cooling: Keep the blade cool with continuous water supply. This extends blade life and prevents thermal damage.
- Proper tension and guard use: Ensure your saw’s blade is properly tensioned for safe cutting. Use guards to protect yourself from debris.
- Vibrations or binding troubleshooting: If you feel vibrations, slow down or stop. Check for any obstructions causing binding.
Regularly inspect and maintain your saw to avoid these common operator errors and keep your machine in top shape.
Safety Precautions and Site Management
Wear proper PPE and ensure gear is intact before each cut. Check guards, starting procedures, and manufacturer guidance for the saw. Stay current on operator training and tool maintenance.
Manage wet cutting safely with a proper water setup and electrical protections. Control site traffic with barriers and signage, and coordinate timing with finishing crews to minimize disruption and vibration exposure.
Emergency and first-aid considerations
Always have a well-stocked first-aid kit on site. It should include bandages, antiseptic wipes, gauze, medical tape, and gloves.
In case of injury: Stop work immediately, assess the situation, and provide first aid if you’re trained to do so. Call emergency services if necessary.
For blade kickback, stop the machine, clear the area, and check for injuries before resuming work.
If conditions become unsafe, such as severe weather or equipment failure, stop work immediately. Notify your supervisor or the site manager and follow their instructions.
Post-Cut Care, Sealing, and Maintenance to Preserve Joints
Clean the joints right after cutting to remove slurry and debris. Clear pathways help joints seal correctly and prevent tracked debris from causing issues. A clean joint is the foundation for good sealing.
Sealants require a curing window and compatibility with the concrete. Select a material suited to movement, exposure, and UV or wear, then follow proper surface prep and masking steps. Establish a routine inspection to catch and address failures early.
When and how to seal joints
Sealing control joints is crucial to prevent water intrusion, cracking, and other damage. But timing’s key.
Water-based sealants: Apply within 24-72 hours after cutting, once the slab’s surface is dry but still slightly damp. This lets the sealant bond well.
Solvent-based sealants: Wait longer – up to a week or more. They need a drier slab and can take longer to cure.
Consider local conditions: Hot, humid weather speeds curing; cold, dry slows it down. Adjust waiting times accordingly.
Long-term visual checkpoints
Regular inspections keep your joints in top shape. Here’s a seasonal checklist:
- Spring inspection: Check for any cracking or deterioration after winter freeze-thaw cycles.
- Summer inspection: Ensure sealant hasn’t dried out, cracked, or lost flexibility under heat and sun exposure.
- Fall inspection: Inspect for any widening joints before winter sets in. Reseal if needed.
- Winter inspection (if accessible): Ensure no ice buildup or frost damage has occurred.
Quick rule: Inspect every 3-6 months, after freeze-thaw cycles, and after heavy construction. Address any issues promptly to prevent bigger problems down the line.
Conclusion
The key is to finish cuts that guide cracking without creating chips or edge damage, so the joints stay smooth and durable. Do the work with focus on safety and control, and you’ll protect the surface from costly repairs and keep the project looking right.
First, confirm the plan in your head and in the marks on the slab: time the cut correctly, place joints where you planned, mark exact cut locations, gather and test the blade and dust control, set the blade depth to the joint rule you chose, move the saw steadily with a light touch, keep an orderly workspace free of debris, and inspect the edges as you go; seal after cure following the post-cut care steps, and maintain the joints over time to prevent future damage.
Common mistakes to avoid include rushing cuts or forcing the blade, using a dull blade, cutting too early or too late for the concrete’s strength, skipping edge protection, neglecting to clean the cut and curb dust, and ignoring proper PPE or cord management; remember safety first, test in a small area if unsure, and don’t compromise form or depth for speed.
If the project involves complex layouts, large areas, limited access, or uncertain cure timing, consider bringing in a pro rather than pushing on alone; with careful planning and clear safety rules, you’ll seal the joints properly and finish with confidence that lasts. Stay deliberate, stay safe, and you’ll see a clean, durable joint that serves the concrete for years to come.
FAQ
What affects the timing of saw-cutting fresh concrete?
The concrete’s setting progress varies with mix, temperature, and humidity. Check the product label or the contractor data from the mix supplier to match hardness or set time. When in doubt, err on the side of testing a small section with a evaluation cut and compare how it takes to chip.
How should I plan joint spacing and the pattern before I cut?
Think about shrinkage and load paths. Keep joints aligned with doors, walls, and columns where possible, and stagger patterns to avoid too-long spans. If you’re unsure, review the layout plan and confirm with the mix instructions or local guidelines before cutting.
What’s the safest, most reliable step-by-step approach to making the saw cuts?
Mark the joints first, then bring out the saw when the surface has firm but not slick resistance. Use a light touch at first to avoid tearing the surface, then deepen the cut to full depth as allowed by the blade and machine instructions. Keep the blade cool and follow manufacturer directions for water use or dust control.
What are common mistakes to avoid, and how can I keep joints from chipping?
Avoid cutting too early or too late. Don’t cut with dull blades or when the surface is still plastic. Maintain steady speed, perpendicular cuts, and straight lines. If chipping happens, pause and recheck surface hardness and blade condition per label guidance.