

Introduction
Patching an over-drilled anchor hole in concrete without losing strength means cleaning the hole, choosing a compatible filler or epoxy, and installing the repaired anchor so the load transfers into sound material. This is a hands-on fix: identify whether the hole is shallow, deep, or into cracked concrete and pick a material rated for structural anchoring—check product labels and manufacturer instructions for suitability. Prepare basic tools and materials like a brush, vacuum, mixing stick, appropriate filler or epoxy, and proper safety gear before starting.
Start by removing dust, loose concrete, and debris so the patch bonds to solid substrate, then follow the filler or epoxy mixing and working time exactly. Apply the patch so it fills around the anchor zone, allow full cure as instructed, and test the anchor per manufacturer guidance or local practice before loading. If the hole is large, into fractured concrete, or under critical load, consult a structural pro or follow manufacturer installation instructions for larger repair systems.
Key takeaways
- Identify anchor hole type (through-hole, sleeve, guide pin) before patching.
- Gather patching materials: concrete filler or epoxy compatible with substrate.
- Clean hole thoroughly: remove dust, debris, grease, and loose concrete before repair.
- Mix and apply according to manufacturer instructions, avoiding air pockets.
- Patch flush with surrounding surface, tamping to seat patch and rebalance load.
- Cure, verify strength per guidance, and reinstall anchors with caution.
Table of Contents
- Introduction
- Key takeaways
- Assess the Damage and Plan the Repair
- Tools and Materials Checklist
- Material Specs and Selection Guidance
- Preparing the over-Drilled Hole for Repair
- Techniques for Applying a Concrete Repair Compound
- Step-by-Step Patching Procedure
- Curing, Strength Verification, and Reinstalling Anchors
- Safety Precautions, Common Mistakes, and Budget Options
- Conclusion
- FAQ
Assess the Damage and Plan the Repair
Start by deciding whether the over-drilled hole is repairable in place or needs a larger intervention; measure the hole diameter and depth, check the surrounding concrete for soundness, and verify whether you encounter rebar or utilities that change the approach. If you see spalling, corrosion, moisture ingress, or extensive cracking, note those conditions because they directly affect whether a patch will hold under the expected load.
Match your findings to the load demands and intended anchor use: light, non-structural fix may tolerate a simple plug, while tension or cyclic loads can require chemical anchors, sleeves, or even enlarging and rebuilding the repair area. Before you start, make a concise plan listing repair options, required materials and tools, the work sequence, and clear decision points where you will pause or stop if you find unexpected deterioration or rebar conflicts.
When a Patch is Appropriate vs. Full Replacement
The first step in deciding whether to patch or replace an over-drilled anchor hole is understanding the extent of damage.
Patching is usually sufficient: when the hole diameter is less than 1/2″ and depth doesn’t exceed 1.5″, surrounding concrete is sound, no signs of corrosion or moisture infiltration, and load requirements are minimal.
Consider full replacement or professional evaluation: if the hole is large (over 3/4″), deep (more than half the slab thickness), surrounding concrete shows signs of deterioration like cracks or spalling, there’s evidence of corrosion, or moisture intrusion. Always prioritize safety and structural integrity.
Measuring Hole Dimensions and Surrounding Concrete Condition
Before starting any repair, measure the hole dimensions accurately. Use a tape measure or ruler to determine the diameter and depth.
Inspect the surrounding concrete for signs of damage like hairline cracks, spalling (flaking or crumbling), or moisture stains. These can affect bond strength and longevity of your patch.
Check if there are any visible signs of rebar or utilities nearby to avoid unexpected clashes during repair work. If unsure, consult utility locating services before proceeding.
Tools and Materials Checklist
Gather the essentials: a drill with suitable bits, a dust extractor or shop vacuum, chisels and wire brushes, mixing containers, trowels or putty knives, and an injection gun or grout bag if using resin or injectable compounds. Include PPE, containment for dust, and spare consumables; note that a rotary hammer, mechanical mixer, or cordless vacuum are optional upgrades if you have them.
List repair materials by function and budget tier: injectable epoxies or polyurethanes for void filling, cementitious repair mortars or polymer-modified blends for larger patches, and hydraulic cement for quick stops—check each product label or data sheet for coverage and recommended use. Add surface-prep items (solvent, primer, bonding agent), and plan mixing/application tools and documentation supplies to record hole sizes and materials used.
Essential tools (drill, brushes, applicators)
Before you start patching, make sure you have these essential tools on hand. They’ll help you prep the surface and apply the repair material correctly.
- Drill: Needed for mixing and applying repair materials. A cordless drill is convenient but a corded one will do.
- Hole cleaning brush: Essential for removing dust and debris from the hole. Stiff bristle brushes work best.
- Wire brush: Helps remove rust or old concrete from anchor holes.
- Chisel: For roughening the hole’s rim to improve adhesion.
- Putty knife: Useful for applying and smoothing repair materials.
- Mixing container: A sturdy, disposable container is ideal for mixing small batches of repair material.
- Trowel or grout float: For spreading and leveling patching mortar.
- Grout bag or injection applicator: For filling deep voids or injecting repair materials into holes.
Quick rule: Don’t skimp on tools. The right ones make the job easier and ensure a strong, lasting patch.
Repair materials and anchors (epoxy, patch mortar, anchors)
Choose the right repair material and anchors to restore your concrete’s strength. Here’s a checklist of options.
- Epoxy: High-strength, fast-setting, ideal for heavy loads. Look for 100% solids content for best results. Covers approx. 1/2 inch per hole (basic).
- Cementitious repair mortar: Strong and versatile, good for most patching jobs. Cures slower than epoxy but cheaper. Covers approx. 3/4 inch per hole (mid-range).
- Hydraulic cement: Quick-setting, ideal for emergency repairs. Weaker than epoxy or mortar, not suitable for heavy loads. Covers approx. 1 inch per hole (premium).
- Polymer-modified blends: Flexible and crack-resistant, great for areas with movement. More expensive but lasts longer. Covers approx. 3/4 inch per hole (mid-range to premium).
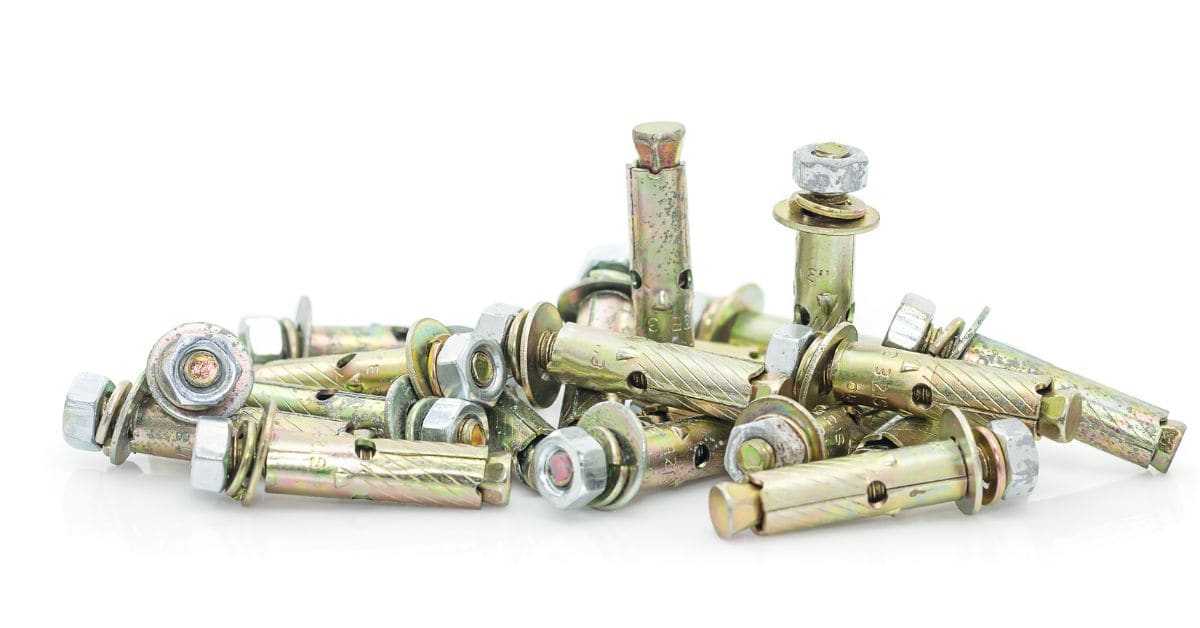
- Anchors: Choose expansion anchors for concrete with good strength. Sleeve anchors are better for weaker or cracked concrete.
Quick rule: Always check product labels for intended use and load conditions. Don’t compromise on safety.
Material Specs and Selection Guidance
Decide the performance target from the start by classifying the load: static versus dynamic, shear versus tension, and any uplift or cyclic conditions that affect anchor choice and compound selection. Use that loading profile to guide whether a cementitious mortar, epoxy/polymer resin, or a mechanical/chemical anchor system is required—consult product technical sheets for allowed loading scenarios and compatibilities.
Consider environmental exposure and concrete compatibility: check product recommendations for moisture, temperature, and freeze-thaw resistance, and match the repair material to the concrete’s condition (porosity and pH). Also plan installation checks—proper cleaning, use of primer or damp vs. dry substrate, and post-cure inspection or pull testing—to verify the chosen material and anchor meet onsite needs before reloading.
Types of repair compounds and when to use them
When patching over-drilled anchor holes, you’ve got two main repair compound options: epoxy resins or cementitious patch mortars. Each has its strengths and limitations.
Epoxy resins are great for high-strength repairs where load-bearing is crucial. They bond well with concrete, have excellent compressive strength, and can be used in wet conditions. However, they’re more expensive and require careful mixing and application.
Cementitious patch mortars, on the other hand, are cheaper and easier to use. They’re suitable for low to medium load-bearing situations and can be applied dry or wet. But they may not match the strength of the existing concrete and could crack under high loads.
Anchor types suitable after patching
After patching, you’ll need to reinstall or replace your anchor. Here are two common options:
Mechanical anchors, like expansion bolts, can be reused if the hole is still in good condition. Just ensure the threads aren’t stripped and the hole isn’t too oversized. Check the packaging for suitable hole sizes and materials.
Adhesive anchors, like chemical anchors or sleeves, are often better after patching. They bond directly to the repair material. Choose ones designed for your specific repair compound (epoxy or cementitious) and check they’re suitable for your load requirements and environmental conditions.
Preparing the over-Drilled Hole for Repair
Prepare the hole in a defined sequence: remove loose debris, vacuum or blow out dust, clean with the appropriate solvent if oil or contaminants are present, and allow the substrate condition required by your product (dry or saturated surface-dry). Use hand or power brushes, compressed air, and chisels to reach sound concrete and expose any hairline cracks or voids that will influence patch geometry.
Create a mechanical key by roughening the rim and interior surfaces—score or scarify the edges, or use sandblasting where feasible—and check for moisture intrusion or rebar exposure that would force a different repair. Follow the repair product’s prep instructions for priming or bonding agent use, then stage filling so you can compact material, avoid air pockets, and finish flush with the surrounding surface.
How to clean and remove loose material
The first step in preparing your over-drilled hole is cleaning it thoroughly. The right cleaning method ensures a strong bond between the patch and the concrete.
- Brushes: Use stiff-bristled brushes to scrub out dust, debris, and loose material. Look for brass or nylon bristles that won’t damage the hole walls. Avoid wire brushes as they can leave metal shavings behind.
- Compressed air: Blast away remaining debris with compressed air. Ensure your compressor is rated at least 100 PSI to get a good clean. Be careful not to overdo it and damage the hole walls.
- Vacuum: Use a wet-dry vacuum to suck up any remaining dust or moisture. This helps maintain a clean, dry surface for better adhesion.
- Solvents (optional): For tough grease or oil stains, use an appropriate solvent like acetone or denatured alcohol. Apply with a cloth or brush, then wipe off and vacuum again.
- Avoid: Don’t use water alone to clean the hole as it can weaken the concrete and cause cracking when the patch is applied.
Creating a keyed surface and controlling moisture
The next step is to roughen the hole walls, creating a ‘key’ for better adhesion. This can be done through etching, scoring, or sandblasting.
Etching: Apply an etchant like muriatic acid diluted with water (1 part acid to 6 parts water). Let it sit for 10-15 minutes, then rinse and neutralize with a base solution. Be sure to follow safety precautions and manufacturer’s instructions.
Scoring: Use a hammer and chisel or a rotary tool with a masonry bit to score the hole walls. This creates small grooves for better mechanical keying.
Regardless of your chosen method, always ensure the hole is dry before applying the patch material. Some products can be used on damp surfaces, but others require a completely dry substrate. Always follow the manufacturer’s instructions regarding moisture levels.
Techniques for Applying a Concrete Repair Compound
Choose your path—epoxy/polymer resin for high bond and low permeability, or cementitious mortars for bulk fills and compatibility with concrete—and adjust prep accordingly: epoxies often require very clean, dry surfaces while cementitious products may need dampening. Mix and handle each material per its instructions; for resins, measure resin-to-hardener accurately and respect pot life, and for mortars follow water and additive guidance to reach the recommended consistency.
Apply in a way that prevents voids and ensures bond: inject resins from the back out or fill in layers, tamping or rodding each lift for compaction; for mortars, press into place and strike off to match the surface. Protect the patch during cure from temperature swings and moisture, perform visual and tactile checks for voids, and follow product guidance before loading or reinstalling the anchor.
Mixing and Working Time Considerations
Follow your manufacturer’s mix ratios to the letter. Too much or too little of any component can weaken your patch.
Epoxies: Typically, it’s one part resin to one part hardener by volume. But check your specific product.
Cementitious mortars: Usually, it’s a 3:1 or 4:1 ratio of sand to cement. Again, confirm with your product.
Filling Strategies for Deep or Oversized Holes
For deep or oversized holes, don’t try to fill them in one go. That’s a recipe for voids and weak spots.
Instead, use the slug method: Mix a small batch of compound, pack it into the hole, let it set slightly, then repeat until full.
Or, if your hole is wide but not deep, you can use the backfill method: Fill the sides first, let them set, then fill the middle.
Step-by-Step Patching Procedure
Organize the repair as a sequential checklist: confirm hole measurements and concrete condition, choose the patching system suited to the load and environment, and prepare tools and PPE. Clean, roughen, and, if required, prime the hole; mix the repair compound exactly to the product instructions and pre-place any backer rod or sleeve to control depth and avoid voids.
Place the patch in controlled lifts, compacting each pass and finishing flush with the surrounding concrete; protect the repair while it cures under the conditions recommended by the product. After cure, perform a visual inspection and any required pull or load test per manufacturer guidance before reusing or reinstalling the anchor.
Step-by-Step Process
The following is a clear, numbered sequence of practical steps to patch an over-drilled anchor hole in concrete without losing strength. It starts with preparation and safety checks, then guides you through the main work, and finishes with cleanup or final checks.
- Assess the hole: Check size, depth, rebar presence, and cracks. Choose a compatible repair product based on load, humidity, and exposure.
- Prepare the surface: Remove debris, lightly roughen edges for bonding, and dampen without soaking to optimize adhesion.
- Prepare patch material: Select a suitable repair product; mix according to manufacturer’s instructions; gather additives or primers if required.
- Clean and re-enter the hole: Clear residue from tools and hole interior; ensure clean channels for patch ingress; pre-insert or backfill if using backer material.
- Apply patch in stages: Fill first to seat anchor or sleeve, compact with a hammer or rod, then build up in layered increments if required. Use a palette knife or trowel to achieve a flush surface.
- Cure and test: Allow proper cure time protected from moisture and load; finish with a smooth surface or form to match surrounding concrete; reinsert anchor, test pull/load per product guidelines, and address any voids or weak spots.
Applying the first layer and consolidating the repair
Start by filling the hole with your prepared patch material. Use a trowel or similar tool to ensure even distribution and to seat the anchor or sleeve properly.
Consolidation is crucial to remove air pockets that could compromise the strength of your repair. You can use a hammer or rod to gently tap around the edges of the hole, working your way inwards to force out any trapped air.
Once you’ve consolidated the first layer, allow it to set slightly before building up further layers if required. This will help ensure good adhesion between layers and prevent delamination.
Finishing surface and protecting the patch during cure
After applying the final layer of patch material, use a trowel or float to smooth the surface and align it with the surrounding concrete. This will help ensure a seamless finish once the repair is complete.
Protecting the patch during cure is vital for a successful repair. Keep the area moist using plastic sheeting or damp cloths, but avoid soaking to prevent weakening the patch. Shield the area from rain, freezing temperatures, and heavy traffic until the patch has fully cured according to the manufacturer’s guidelines.
Once the patch is fully cured, you can remove any protective measures and test the repair by pulling on the anchor as per the product guidelines. If there are any voids or weak spots, address them immediately to maintain the strength of your concrete repair.
Curing, Strength Verification, and Reinstalling Anchors
Follow the cure environment and timeframes specified by the product you used—monitor temperature and humidity and protect the patch from moisture or traffic until it reaches the manufacturer’s cited readiness for testing or re-drilling. Ensure the substrate is clean and in the condition recommended (dry or saturated surface-dry) before attempting to install any anchor into the repaired material.
Verify restored strength with an appropriate test: perform a controlled pull-out or load check using the method suggested by the product data sheet or local practice, and document the results before final loading. When reinstalling, select an anchor type compatible with the patch material and the expected load, and follow installation sequence and torque or embedment depth recommendations from the anchor manufacturer.
Curing best practices and environmental factors
Proper curing is crucial for your patch to reach its full strength. Always follow the manufacturer’s guidelines, but here are some general tips:
Temperature: Keep the patched area between 50°F (10°C) and 90°F (32°C). Too cold or too hot can slow down or prevent proper curing.
Humidity: Maintain high humidity around the patch, ideally above 75%. This helps keep the concrete moist during the critical early stages of hydration. You can use plastic sheeting to create a humid environment.
Ventilation: Ensure good ventilation once the initial curing period is over. This allows excess moisture to escape and prevents mold growth.
Verifying holding capacity before loading
Before you put any significant weight back on your patched area, it’s important to verify that the repair is strong enough. Here are some simple checks and tests:
First, visually inspect the patch for any signs of cracking or delamination. If it looks sound, gently tap the surface with a hammer. A solid, ringing sound indicates a good bond.
For a more thorough check, you can perform a simple load test. Use a jack and some strong, stable supports to apply a known force to the patched area. If there’s no movement or cracking after a few minutes, your patch is likely strong enough.
If your repair is critical or you’re unsure about any aspect of the process, always consult with a structural professional. They can perform more advanced tests and ensure your repair is up to code.
Safety Precautions, Common Mistakes, and Budget Options
Prioritize PPE, dust control, and ventilation; isolate the work area and confirm structural conditions before starting—stop and get an engineer if you discover significant reinforcement issues or unexpected deterioration. Avoid shortcuts like skipping thorough cleaning, using mismatched materials, or rushing cure times—these are frequent causes of repair failure.
For budget decisions, weigh basic cementitious mortars with bonding agents for small, low-load fixes against higher-cost epoxies or polyurethane injections for critical anchors; consult product labels or data sheets for suitability and expected performance. Keep records of materials used, cure times, and any tests performed so future inspections can verify the repair history.
Personal protective equipment and site safety
Safety is paramount when working with concrete. Here’s what you need to protect yourself and your work area.
- Eye Protection: Use safety glasses or goggles to shield from debris during grinding, drilling, and mixing.
- Respiratory Protection: Wear a dust mask or respirator to prevent inhaling harmful particles. Consider using a HEPA vacuum for cleanup.
- Gloves: Protect your hands with work gloves suitable for the task at hand – heavy-duty for mixing and handling materials, lighter ones for fine work.
- Hearing Protection: Use earplugs or earmuffs when using power tools to prevent hearing damage.
- Clothing: Wear long sleeves, long pants, and sturdy boots to protect your skin and feet from injuries. Consider renting a full-body suit for heavy-duty work.
Common pitfalls and how to avoid them
To ensure a strong, lasting patch, steer clear of these common mistakes.
- Inadequate Cleaning: Skipping thorough cleaning leaves behind loose debris that weakens the bond. Use a wire brush or vacuum to remove all loose material.
- Wrong Compound Choice: Using the wrong patch material can lead to poor adhesion and strength loss. Match the compound to your concrete type and hole size (refer back to earlier sections).
- Neglecting Bonding Agents: Applying a bonding agent primes the surface, promoting better adhesion of the patch material.
- Rushing Cure Times: Allowing insufficient cure time weakens the patch. Follow manufacturer guidelines for proper curing.
- Failing to Test Strength: Not verifying post-patch strength can lead to anchor failure under load. Perform a small test load after curing (refer back to ‘Curing, Strength Verification…’).
Addressing these pitfalls ensures your patch maintains the concrete’s original strength.
Cost-saving alternatives and when to upgrade
Budget-friendly materials can save you money, but knowing when to invest in higher-spec products is crucial. Here are some options:
Cementitious Patch Mortars: These are cost-effective for small to medium holes. They’re easy to apply and set within 24-72 hours. However, they may not reach the strength of concrete.
For larger holes or higher load-bearing needs, consider Epoxy or Polyurethane: These are more expensive but offer superior strength and durability. They’re ideal for structurally critical patches and can be applied by DIYers with proper knowledge.
Professional-grade products often come at a premium price but ensure quality and consistency. Consider hiring professionals for complex repairs to avoid costly mistakes.
Conclusion
Patching an over-drilled anchor hole correctly keeps the structure safe, looks right, and preserves long-term strength. When you follow solid preparation, proper material choice, and careful curing, you avoid costly mistakes and future failures.
Proceed step by step: assess the hole and surrounding concrete, confirm the hole size and condition, select a repair compound that fits the load and moisture, prepare the opening cleanly, mix and apply the patch evenly, shape and finish flush, allow the cure time without disturbance, verify the repair by light loading or testing, and reinstall anchors only after the patch has cured fully. Do all of this with safety at the top of the list, and keep the work area dry and stable while you work.
Two common mistakes to avoid are rushing the prep or cure phases and using the wrong material for the load and environment. Never skimp on cleaning the hole, and never try to load an unrepaired patch or partially cured repair. safety-first means test in a small area first, follow the cure times, and keep hands and eyes protected. If the crack or hole is larger than your plan covers, if the load is critical, or if you’re unsure about the material spec, don’t push on—call a professional. When you take it calmly, check each step, and let the cure finish, you’ll have a solid repair and a confident finish to the job. test before load and reinstall anchors only after cure are the practical rules to keep you safe and successful. You’ve got this.
FAQ
What kinds of anchor holes might I be dealing with after over‑drilling, and how do I identify them?
Look at the hole size and depth relative to the original anchor. If the bore is larger than the anchor, you may have an oversized hole. Check if the hole is clean through the base material or if the threads or sleeve remain visible.
What materials are suitable for patching an over‑drilled concrete hole?
You can use a concrete filler or epoxy repair product designed for patching holes in structural concrete. Always read the label to confirm compatibility with concrete and application temperature ranges.
What steps should I take to clean the hole before patching?
Remove loose debris and dust with a brush or vacuum. If there are protruding particles, knock them back and re‑open the hole to a clean, open cavity. Do not leave oil, loose grit, or old patch material in the hole.
How do I mix and apply concrete filler or epoxy for the patch?
Follow the product instructions for mixing ratio and pot life. Apply the patch material into the hole in layers if needed, pressing firmly to avoid trapped air, and finish flush with the surrounding surface before curing begins.
How can I ensure the repair maintains structural integrity and stays safe?
Choose a patch material rated for load transfer and compatible with your anchor type. Allow proper curing time per the product label and test the patch lightly before reinstalling anchors. If anything looks questionable, re‑evaluate or consult a professional.