
Introduction
Organization and management of painting supplies means sorting, storing, and tracking brushes, rollers, paints, and accessories so you can find what you need without chaos.
Keep items grouped by type and project, and set up a simple station on a workbench or cart. Label containers, store lids on, and separate clean tools from dirty ones to cut down on mess. If a system feels off, tweak how you group things and where you store them, and check manufacturer instructions or local rules for storage specifics.
Key takeaways
- Start by inventorying paints, solvents, and brushes before organizing storage space.
- Use labeled bins and clear containers for quick, mess-free access daily.
- Separate oil- and water-based products to prevent cross-contamination and odors.
- Hang rollers and brushes on brackets to dry and avoid floor clutter.
- Schedule regular cleanup and material rotation to extend lifespan and reduce waste.
- Verify local safety data sheets and label warnings before using any chemical.
Table of Contents
- Introduction
- Key takeaways
- Assess Your Painting Needs and Space
- Setup Tips for Efficient Workspace
- Tools and Materials Checklist
- Labeling, Cataloging, and Tracking Systems
- Cleaning, Maintenance, and Lifespan Extension
- Fixes for Common Messy Systems (Troubleshooting)
- Small-Space and Budget-Friendly Solutions
- Safety, Material Specs, and Regulatory Basics
- Conclusion
- FAQ
Assess Your Painting Needs and Space
Start by noting how often you paint and which media you use. Sketch out the rough square footage you’ll devote to supplies and cleanup. Check how your space handles ventilation and shelves.
Use that information to shape a practical organization plan. If you’re unsure about limits or compatibility, verify details on the product label or in the manufacturer’s instructions before you commit to a layout.
Inventory and usage audit
First things first, homeowner. You gotta know what you’ve got.
Grab a pen and paper, or use your phone to make a list of all your painting supplies. Include everything – paints, brushes, rollers, tape, drop cloths, the works.
Now, check each item’s condition and note any expiration dates. Some paints go bad over time, you know? And those old brushes might not be as good as they used to be.
Mark which items you use most often. This’ll help you prioritize storage later on. And while you’re at it, cross off any supplies that are past their prime or just plain useless. It’s time for a purge, homeowner.
Define workflow and painting frequency
Next up, let’s figure out how often you paint and what that means for your setup.
Think about your typical painting session. How long does it take to set up? What do you need to have on hand while you’re working? And don’t forget cleanup – what needs to be put away right after?
Now, consider how often you paint. Is it daily, weekly, or just once in a blue moon? Your storage solution should reflect that.
If you’re a frequent painter, you’ll want easy access to your supplies. But if you only pick up a brush now and then, it’s okay for them to be tucked away somewhere safe until next time.
Setup Tips for Efficient Workspace
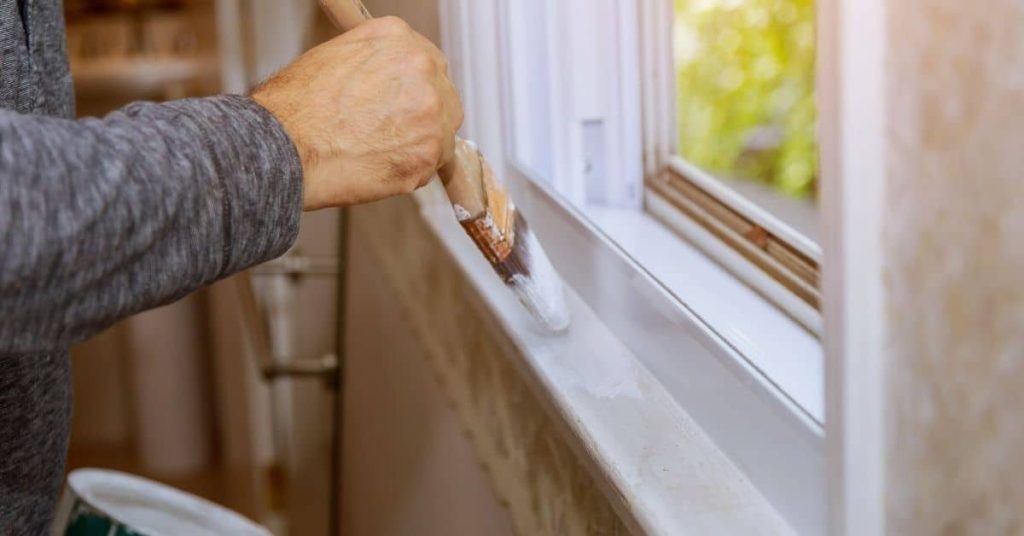
Map a layout that separates preparation, painting, and drying into distinct zones. Place a sturdy work surface near the prep area and nail down a drying nook with good airflow. Keep frequently used items within easy reach to cut steps you take repeatedly.
Try small, repeatable adjustments like relocating a trash bin or adding a foldaway table to adapt to different projects. If you’re unsure about fits, check your space measurements and the product documentation before you place items.
Workstation zones (wet, dry, storage)
Set up distinct zones for your painting workspace to keep tasks organized and minimize mess. Here’s how:
Wet zone: This is where you’ll prepare paint and clean brushes. Keep it near a sink or water source.
Dry zone: Position this area away from the wet zone to store dry supplies like drop cloths, painter’s tape, and trays. It should be close to your painting surface.
Storage zone: Keep extra paint, tools, and equipment here. This zone can be further away from your work areas as it doesn’t need to be accessed frequently.
Lighting and ventilation
Proper lighting and airflow are crucial for a safe and efficient painting workspace. Here’s how to set them up:
Task lighting: Use portable work lights or clamp lamps to illuminate your work surface directly. This helps you see brush strokes clearly and ensures accurate color application.
Position lights at eye level, casting light downwards onto your work surface. Avoid placing lights behind you as this can create shadows.
Ventilation: Good airflow prevents fumes from building up and keeps your workspace comfortable. Open windows if possible, or use fans to circulate air.
If using fans, position them so they blow across your work surface rather than directly at it to avoid disturbing paint drips.
Tools and Materials Checklist
Build a DIY-friendly list of organizers, containers, and protective items that fit your studio size. Include clear bins for loose components and labeled jars for liquids or powders. Add a dedicated space for used tools waiting for cleaning.
Choose options that can be reorganized as your needs change. If you’re unsure about a container’s suitability, verify with the label, data sheet, or manufacturer guidance before purchasing.
Recommended containers and organizers
Use this checklist to organize your painting supplies effectively. It’s ideal for both studio and home-based setups.
- Airtight jars: Store wet brushes, palettes, or small tools. Prevents drying out and keeps things clean.
- Compartment trays: Organize paints, mediums, and varnishes. Easy access, no mixing up.
- Labeled bins: Group similar items like brushes, rollers, or rags. Quick identification, easy cleanup.
- Stackable containers: Maximize space usage in small studios. Keep things off the floor.
- Canvas carriers: Protect and organize your artwork. Easy transport, prevents damage.
- Magnetic strips: Hang tools on walls or metal surfaces. Keeps workspace clear.
- Easel with storage: Combine work area and supply organization in one piece.
- Shelving units: Maximize vertical space for larger supplies like canvases, paper, or boards.
Quick rule: Match container type to item size and function. Keep similar items together.
Portable kits and on-the-go setups
Use this checklist when you’re painting outdoors or need a quick, compact setup at home.
- Spill-proof containers: Use for paints, mediums, and solvents. Prevents leaks, easy cleanup.
- Compact easel: Foldable or lightweight design. Easy to carry, sets up quickly.
- Pre-mixed palette: Prepare colors at home. Saves time on-site, reduces mess.
- Disposable gloves: Protect hands from paint and solvents. Easy cleanup, no washing needed.
- Small tool kit: Include essentials like brushes, knives, or sponges. Keep it minimal.
- Carrying case: Store and protect your portable setup. Easy transport, keeps things organized.
- Portable stool/chair: Comfortable seating for plein air sessions. Foldable design for easy carrying.
- Water container: Keep water on hand for rinsing brushes and cleaning up spills.
Quick rule: Prioritize essentials, pack smartly, and keep it spill-proof. Less is more with portable setups.
Labeling, Cataloging, and Tracking Systems
Start with simple, low-effort labeling for all containers. Use a basic log or shelf map to show what’s in each bin and where it belongs. Track quantities as you use items to avoid duplicate buys.
Keep the system visible and easy to update. If you’re unsure about the best method, review the product instructions or manufacturer tips for labeling and data keeping.
Simple labeling methods (color-coded, date)
A simple label can save you time and money. Here’s how to make them practical.
Use colored dots or stripes for quick identification of paint types. Red for reds, blue for blues, etc. Keep it consistent across your workspace.
Include the following metadata on each label:
- Medium: Type of paint (latex, oil, etc.)
- Pigment: Color name or code
- Date opened: When you first used the can
- Notes: Any specific details about the paint’s condition or usage
Digital inventory options and templates
When your supply grows, a digital inventory helps keep track. Use it when you have more than a dozen items to manage.
- Paint name/color: The exact name or code of the paint
- Type: Latex, oil, etc.
- Size: Gallon, quart, etc.
- Quantity on hand: How much you have left
- Location: Where it’s stored (shelf, bin, etc.)
- Date opened: When the can was first used
- Notes: Any specific details about the paint or its usage
- Reorder reminder: A note to restock when supplies run low
Quick rule: Update your inventory after each use. It’s a quick habit that saves time in the long run.

Cleaning, Maintenance, and Lifespan Extension
Develop routines that protect brushes, containers, and surfaces from damage. Rinse and dry brushes promptly, and store them in a way that keeps the bristles from bending. Clean up spills and wipe down work surfaces after each session.
Schedule periodic checks for wear and replace parts before they fail. If you’re unsure about how to care for a tool or container, consult the label or manufacturer care instructions for guidance.
Brush Care Routines by Medium
Proper brush care extends their lifespan and keeps your workspace clean. Here are short, medium, and deep-clean steps tailored to different painting mediums:
Acrylics: After use, rinse thoroughly with water. For medium cleaning, use a mild soap and warm water. Deep clean every few uses with a specialized acrylic brush cleaner.
Oils: Wipe excess paint off with a rag, then use odorless mineral spirits for cleaning. Medium cleaning involves soaking in spirits, while deep cleaning requires a dedicated oil brush cleaner.
Watercolors: Rinse under running water after each use. For medium cleaning, use a mild soap and warm water. Deep clean occasionally with a specialized watercolor brush cleaner.
Safe Disposal and Recycling Tips
Proper disposal of painting materials keeps your home and environment safe:
Solvents: Never pour down the drain. Allow to evaporate in a well-ventilated area, then dispose of the container according to local hazardous waste rules.
Rags: Wring out excess liquid, allow to dry, then launder or dispose of with regular trash. Do not burn or throw away while wet.
Excess Paint: Let it solidify in the can, then scrape into a plastic bag for disposal. Check local rules for hazardous waste days or facilities accepting leftover paint.
Fixes for Common Messy Systems (Troubleshooting)
Identify frequent failures like mixing station spills, tangled cords, or lost lids. Break down the fix into clear steps: contain the mess, regroup items, and create a simple reminder for future use. Reassess the layout after the fix to prevent recurrence.
Use quick, repeatable methods you can reuse on future projects. If you’re unsure about a repair approach, check the product instructions or local guidelines for safe handling.
Tackling paint spills and stained surfaces
First, contain the spill. Use rags or paper towels to soak up as much paint as possible. Don’t spread it around.
For hard surfaces like wood or metal, use a scraper to remove excess paint. Then, clean with soap and water. For carpets or fabric, act fast – blot the spill, then use a mixture of dish soap and warm water to clean.
To prevent future spills, keep your workspace tidy. Use trays for paints and applicators. Secure lids on jars when not in use.
Preventing cross-contamination and clogs
To keep your paints and tools clean, dedicate applicators to single media. Use different brushes or rollers for oil-based, latex, and other types of paint.
For palettes and jars, label them clearly. This helps prevent mix-ups. When you’re done, rinse tools thoroughly and store separately from other mediums.
To avoid clogs in applicators, clean them immediately after use. For brushes, use a brush comb to remove dried paint. For rollers, soak in water with some fabric softener to break down the paint.
Small-Space and Budget-Friendly Solutions
Explore clever, low-cost storage ideas that maximize vertical space and corner corners. Consider foldaway tables, stackable bins, and magnetic strips for small tool sets. Prioritize solutions that can be deployed without major renovations.
Evaluate options based on your actual space and media types. If you’re unsure about a particular solution’s suitability, verify measurements and manufacturer recommendations before buying.
Upcycling household items for storage
Don’t spend money on new organizers. Look around your house first.
Plastic containers, old drawers, and even shoe boxes can be repurposed. Just make sure they’re clean and safe to use with paint.
Pro tip: Line the inside of containers with plastic bags to keep paint from leaking.
Vertical and foldaway storage strategies
Wall space is your friend. Install shelves or a pegboard for easy access to supplies.
Use collapsible furniture like step stools or tables that can be folded away when not in use.
Consider using over-the-door organizers for small items like brushes and rollers.
Remember, the key is to maximize space without taking up too much room.
Safety, Material Specs, and Regulatory Basics
Cover essential safety steps like ventilation, eye protection, and proper disposal. Learn how to read basic material labels and what the symbols mean. Know when to consult local rules for hazardous materials.
Keep a simple one-page reference nearby with primary precautions and contact numbers. If you’re unsure about regulatory requirements, check the label, safety data sheets, or your local environmental or building authority for guidance.
Ventilation and protective gear
Protect yourself and your workspace from paint fumes and splashes.
- Gloves: Protect hands from chemicals. Choose nitrile or latex for most paints, < $5/pair.
- Eye protection: Goggles or safety glasses shield eyes from debris. < $10/pair.
- Respirator: For oil-based paints and stains, use a half-face respirator with organic vapor cartridges. < $25.
- Ventilation fan: For enclosed spaces, use a box fan in a window to exhaust fumes. < $30.
- Drop cloths: Protect floors and surfaces from drips. Canvas or plastic, < $10-$20 each.
Label reading and storage of hazardous materials
Read labels to ensure safe handling, storage, and disposal of paints and supplies.
- Hazard symbols: Look for skulls/crossbones (poisonous), exclamation points (irritant).
- Flammability: Check flashpoint to prevent fires. Store away from heat sources.
- Storage temperature: Some paints freeze/thaw poorly. Keep within recommended range.
- Disposal guidance: Look for words like ‘recycle’, ‘dispose of in trash’, or consult local hazardous waste facilities.
- Segregation: Store materials separately to prevent reactions. Keep acids away from bases, metals apart from certain chemicals.
Conclusion
Set up a system you can trust. A clean, well-organized workspace reduces mistakes, protects finishes, and keeps your project on time and on budget.
Now: confirm your space and needs, plan a simple workflow, label and catalog every item, test changes in a small area, and commit to regular cleaning and maintenance. Start by checking your space size, the most used tools, and where mess tends to accumulate, then decide a logical sequence for setup, labeling, and tracking. Make a quick checklist in your mind and follow it in order: secure a work zone, gather and label materials, align a storage plan with your catalog, and schedule routine cleanups and inspections.
Common mistakes to avoid include skipping a test patch before any change, letting bottles or brushes pile up, and ignoring safety gear or ventilation. Always wear basic PPE, vent when using solvents, and never mix cleaners or paints in unapproved containers. Keep materials clearly labeled, trash out of reach of kids or pets, and inspect containers for leaks or damage before use. If something feels risky or you’re unsure about material compatibility, stop and reassess with a quick safety check.
If the job grows beyond a single project—complex finishes, large quantities, or unfamiliar materials—consider bringing in a pro for a quick assessment or to handle a risky step. Otherwise, stay disciplined, follow your plan, test changes first, and push forward with confidence. You’ve got a solid, practical system—use it to finish strong and keep the space ready for the next project.
FAQ
How do I prevent paint can spills and leaks in a busy painting setup?
Keep lids fully closed when not using a can. Use paint can pour spouts or liners in the lids to limit drips, and store cans upright in a dedicated, stable bin or tote. Check for damaged lids or rims and replace them if needed.
What’s the easiest way to organize brushes, rollers, and trays without cross-contamination?
Group tools by type and by water- vs oil-based uses. Use color-coded bins or labeled totes, and keep rollers and trays in separate trays or bags to avoid transfer of solvents or paint.
How should I handle drying times and shelf life without guessing?
Always read the manufacturer instructions on the can label. Note the open time and cure expectations, and avoid reusing a container beyond reasonable signs of spoilage or skin formation.
What should I do when brushes, rollers, or rags start to get messy or shed lint?
Clean brushes and rollers promptly according to the product instructions and solvent or water type. If a tool is shedding frayed fibers or shows cracking, retire it and replace with a new one. Keep rags in a proper waste container and follow safe disposal guidelines.