
Introduction
Concrete garden edging is a concrete strip that defines borders around plant beds and paths.
It’s a hands-on project that you pour or lay with forms and simple tools. Check local rules and product labels for curing times, mix ratios, and any height limits. Keep the work area clean and plan for a snug fit against the soil or edging to minimize gaps.
Common issues include cracking, uneven edges, and chipping from ground movement. Fixes involve solid forms, proper jointing, and careful curing; follow the instructions on the product you choose and adjust based on your climate. If in doubt, consult the label or local guidance for safety and compatibility.
Key takeaways
- Plan edging color, width, and substrate compatibility before mixing concrete.
- Use proper formwork and level to prevent future uneven edges.
- Check local codes for edging setbacks, drainage, and runoff considerations.
- Wear eye protection and gloves during mixing and placement for safety.
- Cure in shade, keep from drying too fast with damp methods.
- Inspect joints and transitions for gaps; patch promptly to avoid cracking.
Table of Contents
- Introduction
- Key takeaways
- Planning Your Edging Project
- Tools and Materials Checklist
- Material Specs and Site/Substrate Preparation
- Step-by-Step Installation (Pour and Finish)
- Common Issues — Identification and Causes
- Repairs and Fixes — Practical DIY Solutions
- Preventative Measures and Maintenance Schedule
- Design Variations, Finishes, and Integration with Landscape
- Conclusion
- FAQ
Planning Your Edging Project
Before you start digging, map out where the edging will go and what it will accomplish. Think about function, sight lines, and how it will interact with existing pathways and plants. Check site conditions and the overall landscape flow to avoid surprises later.
Define the style you want early on and note any constraints like slopes or drainage. Consider how the edging will look from different viewpoints and how maintenance will work. Verify any local guidelines or property lines that could affect placement.
Determining height, width, and layout
The first step in planning your concrete garden edging is deciding on its dimensions. You’ll want to consider both function and appearance.
Height: Aim for 4-6 inches tall. This provides enough depth for plant roots and stability while keeping it low-profile.
Width: 6-8 inches wide is standard. It’s practical, allows for easy mower clearance, and looks balanced with most landscapes.
Layout: Keep it simple – straight lines or gentle curves work best. Avoid sharp turns that could weaken the edging.
Permits, codes, and neighbors
Before you start digging, check local regulations. Some areas require permits for concrete work or have setbacks from property lines.
Property Boundaries: Ensure your edging stays within your property lines. You don’t want to encroach on a neighbor’s space.
HOA Rules: If you live in an HOA community, check their guidelines. Some have restrictions on materials or design elements.
It’s always best to communicate with your neighbors too. They might have concerns or preferences you should consider.
Project timeline and staging
Planning your project timeline helps ensure everything goes smoothly. Here’s a basic sequence:
Preparation (1-2 days): Mark out the layout, dig trenches, prepare forms.
Pouring (1 day): Mix and pour concrete, level it off, and smooth the surface.
Curing (3-7 days): Keep the edging moist to allow proper curing. This is weather-dependent – hot, dry conditions may require more watering.
Finishing (1 day): Once cured, remove forms, clean up any excess concrete, and let it set for a few more days before using or planting near it.
Tools and Materials Checklist
Gather the essential tools you’ll need for a straightforward install, plus a few handy extras for efficiency. A couple of common hand tools, a level, and a straightedge go a long way. Have a way to mix and place materials cleanly for consistent results.
List the material types you plan to use, including edging material, bedding mix, and any sealants or joints. Include optional items like rubber mallets, tampers, and sprayers for cleanup. Always check product labels or manufacturer instructions for compatibility and safety notes.
Essential tools
Before you start mixing and pouring concrete, make sure you have all the essential tools on hand. This checklist will help you verify that you’ve got everything you need to get the job done right.
- Concrete forms: Check they’re sturdy enough for your pour size. For small jobs, consider using alternative materials like plywood or plastic sheeting.
- Tape measure: Ensure it’s in good working condition to accurately mark out form dimensions and rebar placement.
- Level: Verify it’s functioning properly by checking on a flat surface. A 2-foot level is usually sufficient for most DIY jobs.
- Rebar cutter/bender: Confirm they’re in good condition and suitable for the rebar size you’ll be using.
- Shovel: Check it’s sturdy enough to handle concrete. A square-nose shovel is typically best for this task.
- Wheelbarrow: Ensure it’s in good working order and large enough for your pour size.
- Concrete trowel (hand float): Verify it’s the right size for your job. A 48-inch trowel is standard but may need to be adjusted based on your specific needs.
- Edging tool: Check you have one suitable for your form type and pour size.
- Safety gear: Ensure you have a hard hat, safety glasses, work gloves, steel-toed boots, and ear protection. For small jobs, consider using alternative PPE if appropriate.
Quick rule: Always double-check your tools before starting any concrete work to avoid costly mistakes and rework.
Concrete and mix options
Before you start mixing or pouring, use this checklist to ensure you’ve got the right materials for your job. This is crucial as using the wrong mix can lead to expensive rework.
- Bagged concrete: Check product label for type (e.g., Type N, Type S). Ensure it matches your project’s needs (check manufacturer instructions).
- Mortar mixes: Confirm mix is suitable for edging or other specific tasks. Check if it’s a 4:1, 5:1, or other ratio.
- Ready-mix concrete: Order the correct strength (e.g., 3000 psi, 4000 psi). Specify any additives needed (fiber reinforcement, water reducer).
- Cement-to-sand ratio: For most projects, aim for a 5:1 or 6:1 ratio. Check manufacturer recommendations.
- Water content: Aim for a consistent water-cement ratio (e.g., 0.4 to 0.6). Too much water weakens concrete; too little makes it hard to work with.
- Admixtures: If using, check they’re compatible with your cement and aggregates. Follow manufacturer guidelines for dosage.
- Aggregates (rock/sand): Ensure they’re clean, dry, and within size specifications (check local rules or supplier recommendations).
- Concrete color: If desired, ensure pigment is compatible with your mix. Follow manufacturer guidelines for dosage.
Quick rule: Always check product labels and manufacturer instructions to ensure you’re using the right materials for your specific job. This simple step can save you a lot of time and money in the long run.
Accessories and finishing supplies
Before you start pouring, make sure you have all these accessories and finishing supplies ready. This will ensure your concrete project turns out durable and attractive.
- Colorant: Check that it’s compatible with your chosen concrete mix (check manufacturer instructions).
- Sealer: Ensure it’s suitable for your specific concrete type and climate (check product label).
- Jointing tools: Verify they’re the right size for your slab thickness (check local codes or manufacturer recommendations, typically 1/4″ to 3/8″).
- Curing cover: Make sure it’s large enough to cover the entire slab (usually 50% coverage is sufficient).
- Finishing trowel: Check that it’s the right size for your project (common sizes are 12″, 18″, and 24″).
- Edging tool: Ensure it’s suitable for your slab edges (check local codes or manufacturer recommendations).
- Concrete vibrator: Confirm it’s powerful enough for your mix design (typically 3,000-5,000 RPM).
- Leveling tool: Check that it’s long enough to span the width of your slab.
Quick rule: Always follow manufacturer instructions for specific products. Skipping this can lead to improper curing, discoloration, or reduced durability, costing you time and money in rework.
Material Specs and Site/Substrate Preparation
Start with a solid substrate to prevent long-term failures. Assess the existing soil and base to ensure it can support the edging system. A proper subgrade helps keep the edging from shifting or settling.
Test for moisture and compaction, and plan based on what the site needs. Check local guidance or product data sheets for recommended base types and thicknesses. Confirm any requirements for drainage or backfill materials with the manufacturer or code authority.
Excavation and Base Layer
Start by removing all organic material from the site. This includes grass, weeds, and any other vegetation.
Compact the subgrade using a plate compactor or tamper to create a solid foundation for your edging. Aim for at least 95% compaction.
Install a granular base or bedding material on top of the compacted subgrade. A 4-6 inch layer of clean, well-draining material like crushed stone or gravel works best. This provides stable support and promotes proper drainage.
Formwork, Alignment, and Reinforcement
Choose your form materials wisely. For garden edging, pressure-treated lumber or composite materials work well. Ensure they’re straight and sturdy.
Stake out your lines using batter boards and strings for straight edges or use flexible forms for curves. Maintain a consistent height and width throughout.
Reinforcement may not always be necessary for thin garden edging, but if you’re going thick or expect heavy loads, consider adding simple reinforcement like mesh or rebar. Place it in the middle of your formwork to distribute stress evenly.
Drainage and Freeze-Thaw Considerations
Maintain surface drainage by ensuring the top of your edging is slightly below the surrounding grade. This prevents water from pooling on top.
Consider subsurface drainage as well. A perforated pipe along the base of your edging can help prevent water buildup underneath, which could cause long-term issues.
In colder climates, consider local freeze-thaw cycles. These can cause expansion and contraction, so you might need to adjust your mix design or use air-entraining admixtures to improve freeze-thaw resistance.
Step-by-Step Installation (Pour and Finish)
Set up forms and align them carefully to the layout. Secure the forms and verify alignment before any material goes in. Begin with a clean, level base and place the edging components as designed.
Monitor pour or placement progress and keep the surface smooth. Apply any edging finishes and cure-time notes from the product instructions. Maintain safety by using the right PPE and following mixing or handling guidelines.
Step-by-Step Installation Process
The following steps guide you through the installation of your concrete garden edging, ensuring a solid and durable result.
- Preparation: Check safety gear (gloves, goggles), gather tools, and ensure the site is clear. Safety first!
- Checklist: Review your plans, measurements, and material list to avoid mistakes.
- Pouring: Start at one end, pour concrete into forms, keeping them full as you move along. Keep it consistent!
- Leveling: Use a straight edge or screed to level the top of the forms. Check for bubbles or voids!
- Finishing: Smooth the surface with an edging tool, create joints every 10-15 feet, and apply cure-and-seal compound.
- Cleanup: Remove forms, clean tools, and dispose of waste properly. Respect your workspace!
- Final Check: Inspect your work for any issues, and address them promptly. Quality control is key!
Setting forms and leveling guides
Proper formwork ensures your edging has the right shape, size, and alignment.
Lay out forms according to your plans. Use stakes and string lines for straight edges or batter boards for curves. Accuracy pays off!
Secure forms with nails or screws every 12-18 inches. Ensure they’re tight against each other for a smooth edge.
Level forms using shims or wedges, checking elevations at both ends and in the middle. Consistency is crucial!
Mixing, placing, and consolidating concrete
Proper mixing and placement prevent voids and ensure a strong edging.
Mix concrete according to the manufacturer’s instructions. Aim for a workable consistency – not too wet or dry. Follow directions!
Place concrete into forms using a shovel, keeping them full as you move along. Vibrate the forms to consolidate the mix and remove air pockets. Avoid overworking the surface!
Use an edging tool or trowel to smooth the top of the forms, ensuring a level finish.
Finishing techniques and curing
Proper finishing and curing create a durable, long-lasting edging.
Create control joints every 10-15 feet using a jointing tool. This helps prevent cracking due to shrinkage. Plan your joints!
Apply cure-and-seal compound immediately after finishing, following the manufacturer’s directions. This protects against moisture loss and early drying.
Keep edging moist for at least 7 days, using wet burlap or plastic sheeting if necessary. Follow weather guidance!

Common Issues — Identification and Causes
Look for cracking, settlement, or misalignment as the project settles in. Note staining or surface spalls that indicate moisture or chemical exposure. Identify any edge gaps or shifting that affect appearance and integrity.
Link symptoms to likely causes such as improper base, poor compaction, or inconsistent joint work. Consider drainage, reactivity to moisture, and thermal movement as common drivers. When in doubt, compare to product guidance or local recommendations for root causes.
Crack types and where they start
Concrete cracks can be your first sign of trouble. Here’s how to spot them:
Hairline cracks are thin, usually less than 0.1mm wide. They’re often due to poor curing, where the concrete dried out too quickly.
Shrinkage cracks happen when concrete loses moisture over time. This is normal, but excessive cracking might mean your mix was too dry or you didn’t cure properly.
Structural cracks are wide and often run deep. They’re usually caused by load stress, like heavy vehicles driving over the edging, or an inadequate base that couldn’t support the weight.
Sinking, heaving, and separation
Movement can wreak havoc on your concrete edging. Here’s what to look for:
If your edging is sinking, it’s likely due to poor compaction under the slab. The base might have settled or eroded over time.
If it’s heaving, tree roots could be pushing up from below. Or, it might be frost heave if you live in a cold climate and didn’t consider freeze-thaw protection.
Separation happens when pieces of your edging pull apart. This is often due to movement in the base or inadequate reinforcement.
Surface defects and aesthetic problems
Sometimes, concrete issues are more than skin deep. Here’s how to spot them:
Scaling is when the surface flakes off in small pieces. This can be due to freeze damage, especially if you live in a cold climate and didn’t protect your edging properly.
Efflorescence is a white, powdery deposit on the surface. It’s usually caused by salts leaching out of the concrete. This isn’t structural, but it can be unsightly.
Uneven color or texture might mean your finishing technique wasn’t consistent, or perhaps your mix was inconsistent. Both can lead to an unappealing final product.
Repairs and Fixes — Practical DIY Solutions
For small cracks or surface flaws, clean and fill with an appropriate repair material and blend edges to match. If edging has shifted, re-secure and relevel with proper backfill and compaction. Use temporary fixes only while planning a longer-term solution.
Longer-term fixes involve more thorough prep, re-setting or replacing panels, and ensuring a stable base. Evaluate whether professional help is needed for structural issues or complex repairs. Always follow product instructions and local rules for safe, durable results.
Repairing and sealing cracks
First, clean the crack thoroughly using a wire brush. If it’s wide, widen it slightly with a chisel to give the patch a better grip.
Use an appropriate concrete patch or flexible sealant. For hairline cracks, a flexible sealant like silicone is best. Wider cracks need a concrete patch mixed according to the package instructions.
Fill the crack completely, then smooth it with a trowel or putty knife. Let it cure as directed before finishing to match the original surface.
Addressing sinking or misaligned edging
For minor sinking, lift and reset the affected section. Dig out around it, compact a new base, then reset the piece using leveling guides.
If it’s more than an inch down, you might need to underpin with compacted base or grout. Remove soil, add a layer of gravel or sand, compact it, then pour grout before resetting the piece.
For severe misalignment or sinking, partial removal and re-pouring may be required. This involves cutting out the bad section, preparing a new base, and pouring fresh concrete.
Restoring surface appearance
To patch spalled areas, first remove loose material with a chisel. Clean the area, then apply a concrete patch mixed according to the package instructions.
For stains, use a concrete cleaner and neutralizer. Apply it, let it sit, then scrub and rinse thoroughly. Re-texture the patched areas using a broom or comb to match the original surface.
Finally, re-seal the entire edging with an appropriate sealant to protect it from future damage. This will help maintain its appearance and longevity.
Preventative Measures and Maintenance Schedule
Establish a simple routine to inspect edging after major weather events or seasonal changes. Clean the joints and surface to prevent buildup that can trap moisture. Address minor issues promptly to avoid bigger problems.
Schedule periodic checks of alignment, base stability, and drainage performance. Apply protective coatings or sealants if recommended by the manufacturer. Verify maintenance steps against the product label or manual to stay within guidelines.
Seasonal and Annual Checks
Concrete edging needs regular check-ups to keep it in top shape. Here’s what you should inspect each season:
Spring: Check for any cracks or chips that may have occurred over winter. Inspect joints to ensure they’re still tight and aligned.
Summer: Look out for signs of heaving, which can occur due to heat and moisture. Ensure drainage is working properly to prevent water buildup.
Fall: As leaves fall, clear them from around your edging to prevent decay and potential damage. Inspect alignment one last time before winter sets in.
Winter: If you live in a cold climate, apply a protective sealant before the first freeze. During snowfall, keep edging clear of heavy snow buildup.
Cleaning, Sealing, and Vegetation Control
Maintaining your concrete edging involves more than just occasional repairs. Here’s how to keep it clean and protected:
Cleaning: Use a mild detergent and soft-bristled brush to clean dirt and stains. Avoid power washers as they can damage the surface.
Sealing: Apply a concrete sealer every 2-3 years to protect against moisture and stains. Choose a sealer that suits your climate and edging type.
Vegetation Control: Keep plants and trees at least 18 inches away from edging to prevent roots from pushing it out of alignment. Regularly trim any overgrown vegetation.
When to Plan Replacement
While regular maintenance can extend the life of your concrete edging, there comes a time when repairs aren’t enough. Here are signs it’s time for replacement:
1. Recurring Problems: If you’re constantly repairing cracks or alignment issues, it might be more cost-effective to replace the entire edging.
2. Extensive Damage: Large cracks, crumbling edges, or significant heaving can’t always be fixed with repairs. Consider replacement if damage is extensive.
3. Change in Landscape Design: If you’re planning a major landscape overhaul, it might be best to replace your edging as part of the project to ensure a cohesive look.
Design Variations, Finishes, and Integration with Landscape
Explore different textures, profiles, and colors to match your landscape style. Consider how the edging integrates with plants, soil, and hardscape elements for cohesive design. Think about durability alongside aesthetics for lasting appeal.
Assess how finishes will wear over time and how maintenance might affect appearance. Review colorfastness, grain patterns, or surface treatments per the manufacturer’s guidance. When unsure, check product data sheets or consult the installer instructions for compatibility with your landscape plan.
Textures, stamping, and coloring options
Concrete’s versatility lets you match your garden edging to your landscape. Here are some popular finishing treatments:
Textured Finishes: Broom-finished or exposed aggregate surfaces add grip and slip-resistance. They’re low-maintenance but may show wear over time.
Stamped Concrete: Stamping creates patterns like stone, brick, or wood. It’s attractive but requires more care to prevent pattern loss from erosion or de-icing salts.
Colored Concrete: Integral colors mixed into the concrete provide consistent hue throughout. Alternatively, surface-applied stains offer deeper shades but may fade with sun exposure and foot traffic.
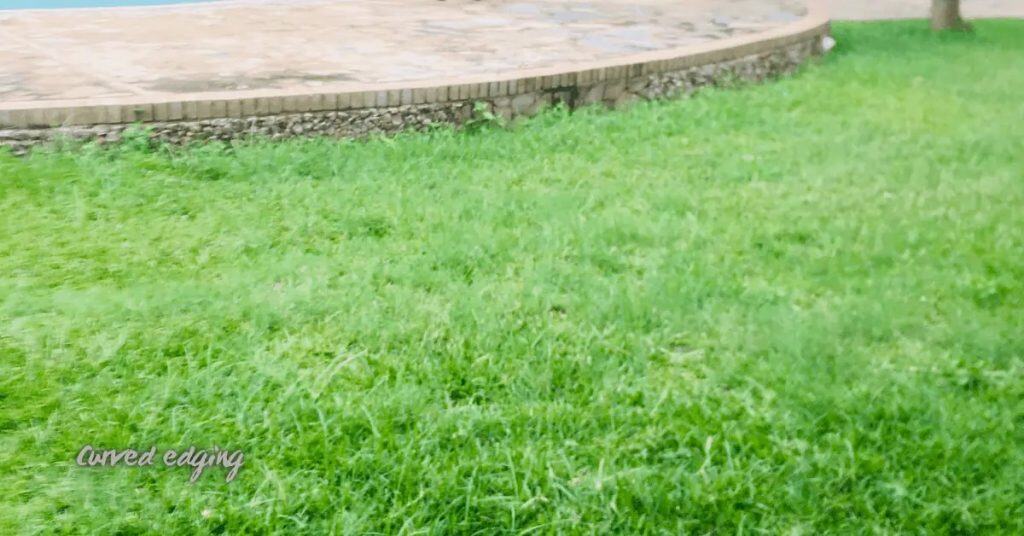
Curved vs. straight profiles and transitions
Straight edging is simple to install, using standard forms. For curves:
Flexible Forms: Use flexible forms for tight radii. They’re more expensive but allow smooth curves.
Transition Pieces: Connect edging to paths or lawn edges with transition pieces. These help maintain a clean, seamless look and prevent tripping hazards.
For both straight and curved sections, use proper formwork alignment and secure forms tightly to avoid uneven surfaces or gaps.
Sustainable and cost-conscious alternatives
Consider these eco-friendly and budget-friendly options:
Reclaimed Formwork: Use reclaimed wood or metal forms to reduce waste. They may require more prep work but add character at little extra cost.
Fiber Reinforcement: Add synthetic fibers to concrete for strength, reducing the need for steel reinforcement. It’s cheaper and more sustainable.
Permeable Pavers: For small-scale edging, consider permeable pavers. They allow water absorption, reducing runoff and installation costs.
Conclusion
Keep it simple, safe, and solid. A well-planned edge lasts years and makes your landscape look finished, but a rushed job or sloppy prep can crack, shift, or fail in a season.
Check your work as you go: confirm the layout and line with stakes, verify depth and compacted subgrade, prep a clean base, mix and pour to the right consistency, set and level the edge, cure with appropriate protection, and then inspect for gaps or misalignments before finishing. Test a small section first, then scale up, and always follow the material specs and site conditions you established during planning.
Common mistakes to avoid include skipping proper subgrade preparation, not checking for a level line or proper drainage, and rushing the pour or cure. Wear eye protection and gloves, keep tools from contacting damp soil, and work in dry conditions when possible. If you encounter stubborn rock, unstable soil, or a long run crossing existing structures, pause and reassess rather than forcing a fix that could fail later. If uncertainty or larger structural issues show up, call a professional and get a quick assessment to prevent costly damage. Finish strong: with careful prep, steady hands, and smart upkeep, your edging will hold its shape and enhance the whole yard for years to come.
FAQ
Why does garden edging sometimes crack after installation, and how can I prevent it?
Cracks happen when the concrete stiffens too fast or right where the ground shifts. Use a proper joint every few feet to relieve stress, and keep edges supported until the mix gains enough strength. Check the product instructions for recommended curing and joint spacing, and follow local weather guidance for curing times.
What should I do if the edging leans or settles after a few days?
That usually means the base wasn’t compacted enough or the subgrade moved. Recheck the base, compact it again if needed, and ensure forms stay square during set. If the problem persists, inspect the drainage around the edge and consult the manufacturer or local guidance before pouring again.
How can I fix surface cracking or a rough edge after finishing?
Fine surface cracks are common with shrinkage; a light re-trowel or a simple skim coat can help, but avoid overworking. For rough edges, use a damp sponge or edging tool to clean up the line, and verify you used the correct finishing technique for the chosen edge profile. Always follow product label directions and safety notes.
What should I check if the color or stain on the edging looks uneven?
Uneven color comes from inconsistent mixing, curing, or exposure. Verify you mixed thoroughly and stayed consistent with the batch, and protect the surface during curing as the product instructions specify. If problems persist, compare to the manufacturer’s guidance or consider a uniform sealant after full cure.