
Introduction
Install a water softener by selecting the right unit, preparing the area, and following a simple, step-by-step installation.
The guide walks through what to plan before you start, the practical steps you’ll take, and pro tips to help you avoid mistakes and complete a reliable setup.
Key takeaways
- Determine water hardness level and flow rate to select capacity correctly.
- Choose a location near main water supply and drain within reach.
- Shut off main water, relieve pressure, and protect floors with towels.
- Gather tools and materials: bypass valve, salt, brine line, fittings.
- Program salt dosage and regeneration cycle lengths according to manual.
- Test water quality after startup and adjust hardness setting if needed.
- Schedule regular maintenance: resin cleaning, filter checks, and salt top-offs.
Table of Contents
- Introduction
- Key takeaways
- Why Install a Water Softener — benefits and quick considerations
- Planning & site prep — choosing the ideal location
- Tools and materials checklist (before you start)
- Step-by-step installation guide
- Programming, testing, and first startup
- Maintenance, troubleshooting, and common mistakes to avoid
- DIY vs hiring a pro — costs, timelines, and when to call an expert
- Pro tips, safety precautions, and project wrap-up
- Conclusion
- FAQ
Why Install a Water Softener — benefits and quick considerations
Installing a water softener can protect your appliances, improve cleaning in dishes and laundry, and leave skin feeling softer. It also helps reduce mineral buildup and may lower energy use over time. You’ll want to weigh salt-based versus salt-free options and how system size affects ongoing costs and maintenance.
Think about your home’s hardness, family size, and how much DIY you’re willing to tackle versus hiring a pro. Consider where it fits in your main water line, the space needed, drainage, and what this means for long-term salt use, maintenance, and capacity. These factors affect upfront costs, ongoing operation, and whether a hands-off install is realistic for you.
Key benefits explained
Installing a water softener can save you time and money in the long run. It reduces mineral buildup in your pipes and appliances, which means less maintenance and fewer repairs down the line. Plus, it makes cleaning easier since there’s less soap scum to deal with.
Check your local rules before installing a water softener, as some areas have regulations about how softened water is discharged. Also, consider the salt usage; while it’s necessary for operation, you’ll need to monitor and adjust it regularly to keep things running smoothly.
The upfront cost of a water softener might seem high, but think about the ongoing savings from reduced detergent use and less wear on your plumbing system. It’s worth doing some math to see how quickly those savings add up compared to regular maintenance costs without one.
When a softener is necessary (signs of hard water)
If you’re seeing scale buildup on your fixtures or soap scum in the shower, it’s time to think about installing a water softener. Scale buildup can be a real pain, clogging pipes and shortening appliance life. Plus, dry skin and dull hair are common when hard water is an issue.
To know for sure if you need one, grab a simple test kit from the hardware store or get your local water report to check hardness levels. If it’s over 10 grains per gallon, consider getting a softener installed.
Salt-based vs. salt-free — quick comparison
When deciding between a salt-based and salt-free water softener, think about your long-term goals and maintenance preferences. Salt-based systems are tried-and-true for tackling hard water issues by exchanging minerals with sodium or potassium. They require regular salt refills and can increase your water bill due to higher usage.
Salt-free systems don’t use salt but instead modify the structure of calcium and magnesium ions, reducing scale buildup without softening the water in the traditional sense. These are easier to maintain since they don’t need salt or electricity, making them a no-fuss option for those who want minimal upkeep.
Check your local regulations before installing either system as some areas have restrictions on salt-based systems due to environmental concerns. If you’re unsure about which type suits your needs best, consult with a professional or review manufacturer instructions carefully.

Planning & site prep — choosing the ideal location
Choose the best spot by weighing main line entry, position upstream of the water heater, and indoor vs outdoor placement to balance accessibility and future needs. Aim for a straight path from entry to the softener, room to maneuver salt, and clearances for valves, bypasses, and filter changes.
Check nearby cold water supply, a reliable outlet (GFCI where required), and a proper drain path with slope and backflow protection. Assess climate—outdoor installs need weatherproof housing and protection from freezing, indoor placements should avoid heat and damp areas. Ensure enough room for salt storage, bypass plumbing, maintenance, and verify local rules, permits, and HOA requirements.
Indoor vs. Outdoor Placement and Climate Considerations
When deciding between indoor and outdoor installation, consider the climate and potential for freezing. Outdoor installations are risky in cold climates, as pipes can freeze and burst. If you must go outdoors, ensure proper insulation or a heat source to protect against freezing.
Indoor placement is generally safer and more convenient. It keeps your water softener out of the elements and makes maintenance easier. However, avoid placing it near sources of extreme heat or dampness that could damage the unit over time.
In areas with mild climates, outdoor installation might be acceptable if you can provide adequate protection against freezing temperatures and moisture. Always check local building codes and HOA rules before making a final decision.
Space, Access, and Service Clearance
Adequate space is crucial for easy maintenance. Ensure there’s enough room around the water softener to maneuver salt bags and service tools comfortably. A minimum of 24 inches on all sides is ideal.
The unit should be placed near your main water line entry point, ideally with a straight path from the entry to the softener. This minimizes plumbing complexity and reduces installation time.
Positioning relative to other appliances like the water heater or service valves also matters. Keep it close enough for easy access but far enough away to avoid interference during maintenance. Ensure there’s clearance around any bypasses, filters, or control panels for regular servicing.
Preparing the Site (Floor, Drain, Electrical, and Floor Protection)
Start by leveling the base where you’ll place the water softener. Use a pallet or concrete pad to ensure stability and prevent movement over time.
A nearby floor drain or standpipe is essential for handling overflow from salt brine or maintenance activities. Ensure there’s a proper discharge path with adequate slope to avoid flooding issues.
Access to a reliable electrical outlet is crucial, especially if your softener requires power. Check local codes; you may need a GFCI (Ground Fault Circuit Interrupter) outlet for safety in wet environments.
To protect the floor from potential spills or damage during installation and maintenance, use drop cloths or plastic sheeting under the unit’s base area. This keeps your workspace clean and prevents costly repairs later on.
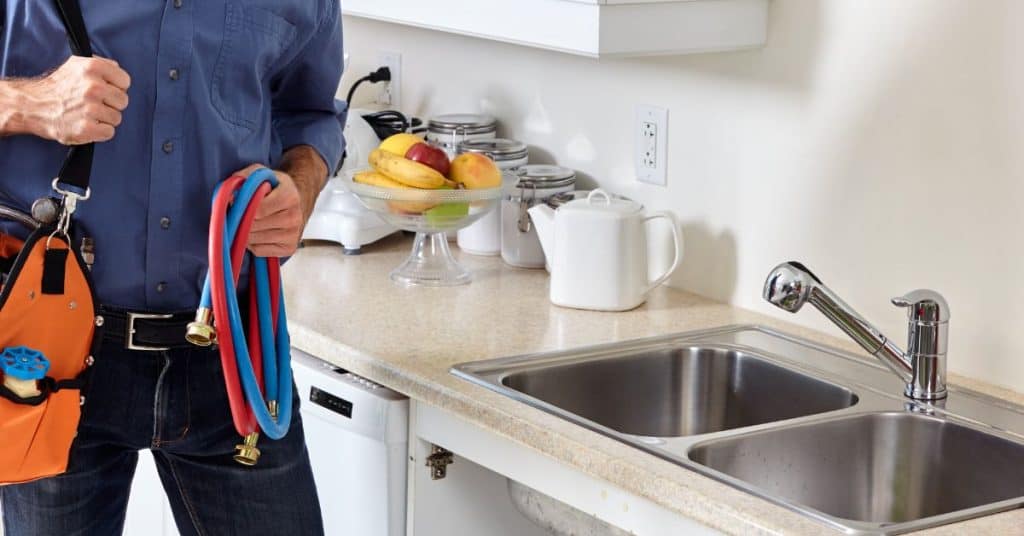
Tools and materials checklist (before you start)
Before you start, have a homeowner-ready checklist: organize tools by category (hand tools, power tools, measuring/marking) and note any power needs or safety steps like GFCI outlets and extension cords. Gather materials in logical groups: pipe types (PEX, copper), common main-line sizes, fittings (unions, elbows, T-fittings, adapters), and compatible valve types (bypass, service inlet/outlet), plus drain fittings, tubing, salt, and PPE. Include consumables and incidental supplies (thread sealant, Teflon tape, pipe insulation, and sealants approved for potable water) and check sizes on manufacturer specs when in doubt.
This matters because a complete, organized kit helps you avoid rework, keeps you safe, and makes setup smoother. It also makes it easier to verify space for the unit and salt storage, plan drainage routing, and ensure future maintenance access. Do quick checks on local rules and manufacturer specs for sizes, and outline a simple on-site sequence for unboxing, inventory, and setup to prevent surprises.
Standard tools and consumables
Before you start, gather your tools and materials to ensure a smooth installation process.
- Pipe cutters: Use for cutting pipes accurately. Check if blades are sharp; dull blades can cause leaks.
- Wrenches: For tightening fittings securely. Confirm sizes match pipe diameter; wrong size can damage threads.
- Tubing: Flexible tubing for bypass lines. Verify length and type (e.g., PEX); insufficient tubing leads to rework.
- Plumber’s tape: Wrap around threads before assembly. Ensure it’s applied correctly; improper application can cause leaks.
- Fittings: Elbows, unions, T-fittings. Confirm compatibility with pipe type and size; mismatched fittings lead to leaks.
- Hose clamps: Secure tubing connections tightly. Check for rust or damage; damaged clamps fail under pressure.
- Silicone sealant: For sealing joints against water. Ensure it’s food-grade approved; non-approved sealants can contaminate water.
- Salt type: Choose high-quality pellets. Confirm purity and size compatibility with your softener model; wrong salt type reduces efficiency.
Quick rule: Always double-check tool sizes and material compatibility to avoid leaks or rework.
Plumbing materials and fittings by pipe type
Select the right plumbing materials based on your existing setup and installation requirements.
- Copper pipes: Use for durability. Confirm soldering equipment is available; no soldering kit means delays.
- PEX tubing: Flexible, easy to install. Verify crimp tools are ready; missing tools stall progress.
- PVC pipes: For drain lines and non-potable water. Confirm solvent cement is on hand; wrong adhesive causes leaks.
- Compression fittings: Secure connections tightly. Ensure wrenches fit; improper fitting leads to leaks.
- Push-to-connect fittings: Quick installation. Verify pipe ends are clean and straight; dirty or bent pipes cause leaks.
Quick rule: Always match plumbing materials with your existing setup for a seamless installation.
Safety gear and preparatory items
Ensure you have all necessary safety equipment before beginning the water softener installation.
- Gloves: Protect hands from cuts. Confirm fit; ill-fitting gloves reduce dexterity.
- Eye protection: Prevent chemical splashes. Ensure glasses are scratch-free and securely fastened; damaged gear can cause injury.
- Bucket: For catching water during shut-off. Verify it’s large enough to catch overflow; undersized bucket leads to spills.
- Towels: Absorb excess moisture. Confirm they are clean and dry; wet towels spread contaminants.
- Water shutoff plan: Locate main valve. Ensure you know the exact location; missing this step causes water damage.
Quick rule: Always prioritize safety gear to prevent injuries during installation.
Step-by-step installation guide
We start by shutting off the main water and relieving pressure. Then we mount the unit, connect the inlets and outlets, and install the bypass. Route the drain and prime the system for the first regeneration, with safety checks at each step.
After each major step, verify leaks, correct flow direction, and proper valve positions. Check that brine components are seated, and confirm electrical connections before tests. This workflow reduces surprises, speeds up troubleshooting, and gives you a clear path to a reliable, documented install.
Step 1 — shut off, drain lines, and install bypass
This sequence ensures your water system is safe for installation work by cutting off the main supply and installing a bypass valve.
- Turn off the main water shutoff valve to stop all incoming water. This prevents flooding during the installation process.
- Relieve pressure in the lines by opening a faucet near the softener location until no more water comes out, ensuring safety while working.
- Drain existing pipes using a garden hose or bucket to remove standing water and clear debris from old connections.
- Cut into the main line where you’ll install the bypass valve. Use a hacksaw for copper or PVC pipe depending on your setup.
- Install the bypass valve between the main supply and the softener inlet, allowing future maintenance without shutting off the whole house water system.
Step 2 — cut and connect inlet/outlet, install control valve
This sequence involves cutting your supply lines to fit the softener’s connections and ensuring watertight seals.
- Measure from the bypass valve to the water softener inlet. Mark where you’ll need to make cuts for both inlet and outlet pipes.
- Cut the pipe using a hacksaw or tubing cutter, making sure your cuts are straight and clean.
- Deburr any rough edges on the cut ends of the pipe to prevent leaks when connecting fittings.
- Attach compression or union fittings to the softener’s inlet and outlet ports. Tighten with wrenches until snug but not over-tightened.
- Connect the control valve to the softener’s plumbing system, ensuring proper flow direction as indicated by arrow markings on the unit.
Step 3 — drain, overflow, brine tank hookup, power and initial fill
This sequence ensures proper drainage for the softener’s waste water and sets up the unit to begin operation.
- Rout a drain line from the softener’s discharge port with an air gap to prevent backflow into your home’s plumbing system.
- Connect the overflow hose to the brine tank, ensuring it drains safely outside or into a utility sink.
- Add salt to the brine tank according to manufacturer instructions. This is crucial for the softener’s regeneration process.
- Plug in the water softener and ensure electrical connections are secure and meet local code requirements.
- Prime the system by filling it with water until all air bubbles are expelled, then perform a backwash cycle as per manual instructions to prepare resin beads.

Programming, testing, and first startup
Set the target water hardness and choose a regeneration schedule (time-of-day or metered). Enter the control valve programming mode, adjust the cycle parameters, and save changes without triggering errors. Perform the first backwash and then start the first regeneration, watching for proper valve moves and complete brine draw and rinse steps.
After startup, test water hardness before and after the softener to confirm the system meets the target and note any odd tastes or odors. Keep a simple log of settings, reminders, and alerts, so you can tweak hardness and frequency if needed and ensure the system stays on target over the next day or two.
Program control settings and recommended defaults
Start by setting your water hardness level. Check the manufacturer’s guide for typical values, but a common starting point is around 10 grains per gallon (gpg). Adjust this based on your local water report.
Select your regeneration schedule next. Time-of-day settings are easy to set up and work well if you have consistent daily usage patterns. For more variable use, opt for metered cycles which trigger regenerations based on actual water volume used. Remember to program the system’s cycle parameters like brine draw length, backwash duration, and rinse times according to your softener’s manual.
Access the control valve by pressing or turning its programming button until you see ‘Program’ mode. Enter settings carefully to avoid errors. Save changes once done, but double-check everything before finalizing.
Flush, run initial regeneration, and check for leaks
Start by performing an initial backwash to clear out any debris from installation. Run this cycle until the water coming out is clear.
Next, initiate a full regeneration cycle. Monitor the system closely during this process to ensure all valve transitions occur smoothly and that brine draw and rinse steps complete without issues.
After running these cycles, check for leaks around connections, especially at the inlet/outlet pipes and control valve. Tighten any loose fittings but avoid over-tightening which can damage seals.
Validate performance with a hardness test
Use water testing strips or send samples to a lab to confirm your softened water meets expectations. Place the tap directly after the softener for an accurate reading.
Achieving a reduction down to 1 gpg or less is ideal, but results can vary based on initial hardness levels and system efficiency. If you notice any odd tastes or odors post-installation, it could indicate issues with your water quality or softener settings.
Note all test results in a logbook for future reference. This helps track performance over time and aids in making necessary adjustments if the water hardness drifts from target levels.
Maintenance, troubleshooting, and common mistakes to avoid
Maintain your softener with routine tasks like watching salt levels, cleaning the brine tank, checking the resin bed, replacing the pre-filter if you have one, and rechecking settings after power outages or repairs. Watch for and avoid common installation mistakes such as leaving the bypass valve in bypass mode at startup, wrong resin bed or tank size, salt bridges forming, and improper brine line routing or drainage that can cause backflow.
This matters because poor maintenance or sneaky install errors can ruin softening performance and lead to costly repairs. If you notice no softening, salt bridges, or drain issues, verify regeneration settings, hardness configuration, water pressure, and resin condition, and consider professional help for electrical, plumbing, or valve problems to prevent bigger damage.
Routine maintenance checklist and schedule
Follow this checklist every three months or after each regeneration cycle.
- Check salt level: Refill when below half full; avoid running out. Salt shortage means no softening.
- Clean brine tank: Inspect for debris, rinse if needed to prevent salt bridging.
- Verify regen cycles: Confirm settings match manufacturer’s recommendations; adjust as necessary.
- Inspect resin bed: Look for fouling or channeling. Replace if performance drops.
- Test water hardness: Ensure the system is set to your current hardness level.
- Check pre-filter: If installed, replace as per manufacturer’s guidelines.
- Inspect seals and valves: Look for wear or damage; replace if needed.
Quick rule: Regular checks keep your water softener running smoothly without surprises.
Troubleshooting common issues and quick fixes
If the softener isn’t working, first check the salt level and ensure it’s not bridged. A low or empty tank means no regeneration.
Noisy operation often indicates a clogged brine line or air in the system. Bleed off any trapped air by opening the bypass valve slightly.
Continuous drain flow usually points to a faulty check valve or a stuck open drain solenoid. Turn off power and inspect for blockages; replace parts if necessary.
Low water pressure can be caused by clogged inlet screens, worn out seals, or improperly sized plumbing. Clean the screen and tighten connections to fix.
Top installation mistakes and how to avoid them
Avoid these common pitfalls during installation:
- No bypass valve: Essential for maintenance without disrupting water supply. Install before connecting the softener.
- Inadequate drainage: Ensure proper venting and air gap to prevent backflow; check local codes for requirements.
- Improper fitting installation: Use correct fittings and ensure tight seals to avoid leaks or blockages.
- Incorrect softener size: Choose a unit that matches your household’s water usage and hardness level.
Avoiding these mistakes ensures smooth operation and longevity of your water softening system.
DIY vs hiring a pro — costs, timelines, and when to call an expert
DIY can save money on simple jobs, but time, skill, and potential mistakes matter. Key cost drivers are unit price, installation labor, permits, and possible upgrades like valves or pressure changes. Some tasks should trigger a pro, especially when code compliance or high-pressure systems are involved.
Understanding your limits helps you avoid leaks and project delays. If you’re unsure about plumbing materials, access, electrical work, or venting, call in a pro and factor in warranty or inspection needs. Use a simple pro-vs-DIY check: cost savings, risk of leaks, required tools, and whether permits are available only to a licensed professional.
Rough time and cost considerations
The time and cost to install a water softener can vary widely based on several factors. A new installation will generally take longer than replacing an existing unit, especially if you’re dealing with older plumbing materials like galvanized steel or PEX tubing.
Costs also rise when electrical connections are needed for the control valve or if additional drain lines must be installed to handle overflow from the brine tank. Don’t forget that some areas require permits for water softener installations, which can add another layer of complexity and cost.
To get a rough estimate, start by checking with local building codes and permit requirements. This will give you an idea if there are any additional fees or inspections needed before starting the project. Remember, it’s better to know upfront than be surprised later on.
When to hire a pro — red flags
If your home has multi-zone plumbing or you’re dealing with high-pressure systems, it’s best to call in the pros. These situations can be tricky and require specialized knowledge to avoid damaging your pipes or causing leaks.
Another red flag is if your water source is a well without proper pre-treatment. Well water often requires additional filtration before being softened, which can complicate the installation process significantly.
If you’re unsure about local building codes or need specific permits for your area, it’s wise to consult with a professional. They’ll ensure everything meets code and avoid any legal issues down the road.
What a professional installation includes (what to expect on service day)
A pro will handle all aspects of your water softener install, from site prep to final cleanup. They’ll start by assessing the existing plumbing and making any necessary adjustments or upgrades.
The installer will then connect the new unit according to manufacturer specifications, ensuring everything is properly plumbed and wired if needed. After installation, they’ll program the control valve for optimal performance based on your water hardness levels.
Before leaving, a professional will demonstrate how to operate and maintain the softener, including setting up regular regeneration cycles. They’ll also provide any necessary documentation like warranties or service agreements.
Pro tips, safety precautions, and project wrap-up
This section covers advanced tips to extend your system’s life and keep you safe: salt handling and storage, winterization, thorough record-keeping, and using smart features to monitor performance. You’ll also see a quick post-install checklist and practical safety reminders for upkeep.
Why it matters: good practices prevent damage from salt exposure and cold weather, help you catch issues early, and make maintenance smoother. Use the label and manufacturer instructions for specifics, and rely on common sense for safety and routine checks—if something feels off, pause and verify before proceeding.
Pro installation and longevity tips
When it comes to installing a water softener, using quality fittings is key. Cheap parts can lead to leaks and system failure down the line. Consider adding a sediment pre-filter before your softener to extend its lifespan by keeping out dirt and debris.
Scheduling periodic resin checks will help you catch issues early. Resin can get clogged with iron over time, reducing efficiency. If you notice lower water pressure or harder water despite regular maintenance, it might be time for a professional inspection.
Lastly, avoid installing your softener in areas prone to freezing temperatures. Cold weather can damage the system and lead to costly repairs. Keep an eye on local regulations and ensure all electrical connections are up to code to prevent any safety hazards.
Safety and code compliance reminders
Before you start, make sure you have a clear shutoff valve nearby. This will allow you to quickly turn off the water supply if needed during installation or maintenance. Always wear protective gear like gloves and safety glasses when handling tools and materials.
Air gaps are crucial for preventing backflow into your home’s plumbing system. Ensure that any drain connections have proper air gaps installed according to local codes. This prevents contaminated water from entering your drinking supply.
Electrical safety is non-negotiable. Use GFCI (Ground Fault Circuit Interrupter) outlets near the softener and follow all electrical guidelines for installation. If you’re unsure about any aspect, consult a professional electrician before proceeding.
Lastly, check with your local building department to see if permits or inspections are required for water treatment system installations. Getting these approvals upfront can save headaches later on.
Final checklist before you call it done
Once your installation is complete, use this quick checklist to ensure everything is in order:
- No leaks detected: Check all connections for drips or wet spots. If any are found, tighten fittings and test again.
- Programming set correctly: Confirm that the softener’s settings match your water hardness levels and usage patterns.
- First regeneration complete: Run an initial regeneration cycle to ensure everything is working properly.
- Hardness validated: Perform a hardness test to confirm the system is reducing mineral content as expected.
- Salt installed correctly: Ensure that salt is added and distributed evenly in the brine tank.
- Clear access for service: Keep pathways clear around the unit so maintenance can be performed easily when needed.
Quick rule: Double-check everything before signing off. Missing a step now could mean big problems later.

Conclusion
A properly installed water softener protects your plumbing, reduces salt waste, and keeps your appliances running clean and efficient when you follow solid safety practices and the steps you laid out.
Check the location and connections in plain terms: the unit sits where it can drain, has a reliable power supply, access for maintenance, the correct size for your flow, and you’ve gathered the right tools and materials; then install, program, test, and run a careful startup to verify everything is working as intended.
Common mistakes to avoid are simple to fix: don’t overtighten fittings or skip the pressure relief steps, don’t ignore the bypass valve, don’t plumb into hot lines, and don’t skip purging air during startup; always turn off water and power first, wear eye protection, and test in a small area before a full load. Safety rules like checking for leaks, following manufacturer guidelines, and double-checking drainage and electrical connections will keep damage and costly mistakes at bay.
Call a professional when you hit a wall you can’t safely pass—if you lack a proper shutoff, encounter unfamiliar wiring, codes or permits, or see ongoing leaks after a test; otherwise, you can push forward with confidence and finish strong, knowing you’ve got a durable, reliable system that earns every drop of water you save.
FAQ
Do I need to shut off the main water supply before starting?
Yes. Shut off the main water line and, if needed, power to the unit. Open a faucet to relieve pressure and drain the system so you don’t get soaked when you work.
What tools will I need to install a water softener?
You’ll need basic hand tools, pliers, an adjustable wrench, a bucket, and Teflon tape. Have a knife or scissors for plastic fittings and a pipe cutter if you’re replacing tubing. Do not improvise with the wrong tool and strip a fitting.
How do I choose the right location and prep the installation?
Pick a dry, level spot near the main supply line and a nearby drain. Avoid places with freezing temps or constant moisture. Mark the connections and measure space so the unit fits and the drainage hose reaches the drain.
What are the essential pro tips after installation?
Flush the resin tank per the manual before use and check for leaks. Set the salt dosage and regeneration cycle to match your household needs, not what sheer guesswork dictates. If the system drips or leaks after testing, fix it before leaving it alone.