
Introduction
Repainting your bedroom to keep up with 2026 trends doesn’t have to be a time-consuming project. This guide focuses on the timeline, breaking down each step so you can complete it efficiently and enjoy your updated space in no time.
From assessing your current color to applying the final coat, we’ll walk you through the process with clear timelines for each task, ensuring you stay on track and within your desired schedule.
For the full guide, see How to Fix Bedroom Paint Colors Designers Don’t Want to See in 2026 (DIY Steps + Stop Rules).
DIY Steps by Time: Repaint Your Bedroom in a Weekend
Repainting your bedroom doesn’t have to span over multiple weekends. With careful planning and efficient execution, you can transform your space in just two days. Here’s a step-by-step timeline to help you achieve this:
- Day 1 (6-8 hours):
- Assess current color and lighting (30 minutes)
- Gather tools, materials, and supplies (30 minutes)
- Prepare the room for painting (2 hours)
- Apply primer and stain-blocking sealer (2-3 hours)
- Day 2 (4-6 hours):
- Paint walls with first coat (1.5-2 hours, plus drying time)
- Apply second coat (1 hour, plus drying time)
- Touch up and clean up (30 minutes)
By following this timeline, you can successfully repaint your bedroom in a single weekend, keeping the project manageable and minimizing disruptions to your daily routine.
Key takeaways
Proper preparation on Day 1 ensures that painting day goes smoothly, helping you stay on schedule and avoid delays.
- Note current 2026 bedroom color trends and what designers avoid now.
- Assess existing color with a visual checklist before choosing replacements.
- Sand and prime walls before repaint to improve coverage and longevity.
- Use progressive coats of paint to correct undertone mismatches safely.
- Follow local regulations and label instructions; wear ventilation mask during painting.
- Test large swatches on walls and adjust lighting fixtures accordingly.
Table of Contents
- Introduction
- Key takeaways
- Why Some Bedroom Paint Colors Fall Out of Favor in 2026
- How to Identify Outdated or Problematic Bedroom Paint Colors (Visual Checklist)
- Designer-Approved Color Directions for Bedrooms in 2026
- DIY Step-by-Step: Fixing a Problematic Bedroom Color
- Stop Rules — Common Mistakes to Avoid When Changing Bedroom Paint
- Tools, Materials, and Budget Checklist
- Safety, Cleanup, and Longevity Best Practices
- Real-Life Mini Case Studies and Quick Wins
- Conclusion
- FAQ
Why Some Bedroom Paint Colors Fall Out of Favor in 2026
Colors drift in and out of style as room use, lighting, and cultural cues shift. In 2026, designers watch how mood boards align with new palettes and how practical needs change with daily life. Expect to see more emphasis on versatility and longevity rather than bold experimentation. Lighting conditions, wall context, and adjacent finishes all alter color perception, turning what looked stylish in one space into a dated note in another. Undertones that read warm in one setting can tilt muddy under certain lights, while too-saturated choices clash with modern fixtures and furnishings.
Practical drawbacks often seal a color’s fate: undertone clashes, difficulty matching with updated hardware, and limited harmony across multiple rooms. For example, a white with yellow warmth may glow oddly under cool LEDs, or a gray that reads flat in a small room can feel oppressive when paired with reflective surfaces. Quick cues include walls that look off-white in daylight but too warm at night, or colors that clash with trim and hardware in the same space. A simple diagnostic approach is to observe the room at different times of day, test swatches directly on walls, and compare to current trend palettes and lighting plans. If a refresh aligns with new mood boards, it’s time to consider durable, easy-care finishes and accessible color schemes that age well.
Design trends vs. timeless choices
Colors that were once popular can quickly fall out of favor as design trends shift. Some colors age better than others, but how can you tell the difference?
Timeless colors typically have these characteristics:
- Neutral undertones: These help colors adapt to different lighting conditions and adjacent finishes.
- Soft saturation: Highly saturated colors can feel dated quickly as trends change.
- Universal appeal: Classic colors are often those that appeal to the broadest range of people.
Practical problems caused by bad color choices
Poor color choices can lead to a host of practical issues in your bedroom. Here are some common ones:
Perceived room size reduction: Dark colors and low-contrast schemes can make rooms feel smaller than they are.
Poor lighting interaction: Some colors may look great under incandescent light but clash with the cool tones of LED or fluorescent lighting.
Clashing with furnishings: A color that once worked well with your old furniture might not match your new pieces, making your room feel disjointed.

How to Identify Outdated or Problematic Bedroom Paint Colors (Visual Checklist)
This room by room checklist helps you spot outdated or loud colors without guesswork. Start with the walls and move to fabrics, furnishings, and fixtures to assess harmony. Quick visual cues include undertones that shift with light and colors that feel heavy or flat in the room’s context. Use daylight, warm LEDs, and cool LEDs to note how color shifts as lighting changes. Simpler checks like distance viewing and comparing swatches against furniture help reveal persistent clashes or overstated saturation.
Keep a short list of visual checkpoints: swatch layout on walls, blocks placed next to existing furniture, and a fast glance test at eye level and ceiling level. Note if it reads as neutral, a modern accent, or a dated tone. Pair this with a basic coordination rule for fabrics, drapes, and hardware to judge whether the color supports the overall mood. If problems show up, quick fixes include adjusting the base color, selecting a complementary accent, or reserving certain walls for a lighter or darker finish to restore balance.
Step-by-Step Process
Use this checklist to identify outdated or problematic bedroom paint colors. It’s best to do this before planning any major design changes.
- Preparation: Gather swatches, fabric samples, and note-taking materials. Ensure the room is well-lit with natural light.
- Safety first: Remove or cover any breakable items near the walls to prevent accidents while testing.
- Lighting test (daylight): Hold swatches against the wall in different areas and observe how they look under natural light. Note any shifts in undertones.
- Lighting test (artificial): Repeat the process with warm LED and cool LED lights to see how colors change at night.
- Undertone check: Compare swatches side by side to identify yellow-warmth, pink/purple hues, muddy grays, or overly saturated blues/greens. These can impact mood and perceived room size.
- Fabric and fixture coordination: Place fabric samples and swatches next to furniture, rugs, and wall art to see if they harmonize or clash with the current paint color.
- Wall test: Tape large swatches directly onto the wall in different areas to get a better sense of how the color will look when painted.
- Distance view: Step back and observe the room from across it. Check if the color looks balanced or overwhelming at eye level and near the ceiling.
- Reflectivity check: Look at the walls from different angles to see how light reflects off them. High-gloss paints can cause glare, while flat finishes may absorb too much light.
- Eye-level vs. ceiling-level color check: Observe if the color looks different when viewed from below or above eye level. This can help identify potential issues with the current paint choice.
Quick rule: If any of these checks fail, document the issue and consider a complete repaint or partial fix before moving forward with your design plans.
Simple tests to see color issues in your space
Use these simple tests to assess undertones and glare in your bedroom. It’s best to do this before investing in new paint.
- Morning test: Observe the room first thing in the morning under natural light. Note any shifts in color appearance compared to other times of day.
- Evening test: Repeat the observation in the evening with artificial lighting. This will help you understand how the color changes throughout the day.
- Undertone check (sample): Hold fabric samples or small swatches against the wall to identify any unwanted undertones that might be amplified when painted on a larger scale.
- Glare test: Look at the walls from different angles and under various lighting conditions. Check if there’s excessive glare or if the color absorbs too much light, making the room feel dark.
- Color harmony test (fabric): Place fabric samples next to your existing furniture, rugs, and wall art. Ensure they coordinate well with the current paint color.
- Color harmony test (swatch): Tape large swatches directly onto the wall in different areas. Check if they harmonize with other elements in the room or clash with them.
Quick rule: If these tests reveal any significant issues, consider adjusting your color choice before painting the entire room.
Signs you need a complete repaint vs. partial fixes
Use this checklist to determine when a complete repaint is necessary versus when partial fixes will suffice.
- Color consistency: Check if the current paint color is consistent throughout the room. If there are noticeable differences, a complete repaint might be needed.
- Wall condition (single wall): Inspect the walls for damage or stains on just one wall. If the issue is isolated, you may only need to repaint that wall.
- Wall condition (entire room): If multiple walls have damage, stains, or outdated colors, a complete repaint might be necessary.
- Design goals: Consider your overall design plans. If the current color doesn’t align with your vision for the space, a complete repaint could be beneficial.
- Undertone issues (single wall): If only one wall has an unwanted undertone, you might be able to get away with painting just that wall a different color.
- Undertone issues (entire room): If the entire room suffers from undertone issues, a complete repaint is likely necessary.
- Color harmony: Check if the current paint color harmonizes well with your existing furniture, rugs, and wall art. If it clashes, consider a complete repaint to improve overall design cohesion.
Quick rule: If multiple walls have issues or your design goals require a significant change, opt for a complete repaint. Otherwise, partial fixes might be sufficient.
Designer-Approved Color Directions for Bedrooms in 2026
Designers favor undertones that stay calm under various lights and avoid muddiness or dated warmth. Test undertones in natural and artificial light and document findings to keep decisions consistent across rooms. For reference, use a simple process to confirm whether a base hue remains coherent when furniture and textiles are added. A practical workflow helps you avoid drift between the wall color and the room’s overall mood.
Base color strategies prioritize function, lighting, and furnishings, with a rule-of-thumb that balances a dominant base with a supporting secondary hue. Avoid pure stark whites in favor of softer neutrals that read inviting under different lighting. Safe neutrals for 2026 include tones in warm whites, stone grays, and taupes that harmonize with wood, metals, and textiles. Accent choices should be restrained, using one or two supporting colors and employing ceiling or trim as intentional pops rather than overwhelm. Finish selection and testing steps help lock in decisions before you commit to a full repaint.
Modern neutral undertones and why they work
Neutrals are the backbone of any room, setting the tone for your space. In 2026, designers favor neutrals with specific undertones – warm, cool, or greige.
Warm neutrals, like beige and taupe, have pink, orange, or yellow undertones. They work best in rooms with natural light or warm artificial lighting. They also complement earthy furnishings and textiles.
Cool neutrals, such as gray and light blue-greens, have purple, blue, or green undertones. They’re ideal for spaces with northern exposure or cool artificial lighting. They pair well with modern furniture and cool-toned metals.
Greige is a mix of gray and beige, offering the best of both worlds. It works in various lighting conditions and complements a wide range of furnishings.
Accent colors and focal-wall alternatives that feel current
While neutrals are the foundation, accent colors add personality to your bedroom. In 2026, less is more – stick to one or two restrained accent hues.
Choose complementary hues for your accents. For instance, if your base color is a warm neutral, consider blues or greens as accents. If it’s cool, think about oranges or reds.
Instead of full accent walls, consider these alternatives: paint accent panels on the wall, use textiles like throw pillows and blankets, or paint your trim in an accent color. This adds interest without overwhelming the space.
Remember, accents should enhance, not dominate. Test colors in natural light to ensure they complement, not clash, with your base color and furnishings.
DIY Step-by-Step: Fixing a Problematic Bedroom Color
Begin with a quick color assessment by testing swatches in multiple lighting conditions and against existing furniture palettes. Decide early if a color revision is needed before you commit to a full repaint. This saves time and material if the shade isn’t behaving in the space.
Prep the walls by inspecting for stains, moisture, cracks, or peeling paint and address these issues first. Choose primer types that suit the surface and seal potential stains, then protect floors and trim with masking and drop cloths. The rest of the steps guide you from primer to final coat with careful attention to drying and edge control, and you’ll know when to call a pro if structural issues or persistent problems arise.
Step-by-Step Repair Process
Follow these clear, sequential steps to fix your problematic bedroom color like a pro.
- Inspect walls for stains, moisture, cracks, or peeling paint. Address any structural issues before painting.
- Choose the right primer: stain-blocking for dark colors or stains, bonding for new drywall or damaged surfaces.
- Protect floors and trim with masking tape and drop cloths to keep your workspace clean.
- Apply the primer evenly using a roller or brush. Let it dry according to the manufacturer’s instructions before painting.
- Paint in manageable sections, starting with cutting-in edges and corners, then rolling out the main areas. Allow each coat to dry completely before applying the next one.
- Inspect your work for coverage, edge uniformity, and sheen. If satisfied, proceed with touch-ups and cleanup.
- If you notice deep cracks, mold, severe water damage, or persistent odor, stop immediately and call a professional.
Prep and Surface Correction Steps
Thorough preparation ensures your new paint adheres evenly and looks great. Here’s how to prep like a pro:
Clean walls using a mild detergent solution, then let them dry completely.
Lightly sand surfaces with 120-grit sandpaper to help paint adhere better. Wipe off dust with a damp cloth.
Use spackling compound and a putty knife to fill any holes or cracks, then let it dry. Lightly sand and wipe clean before priming.
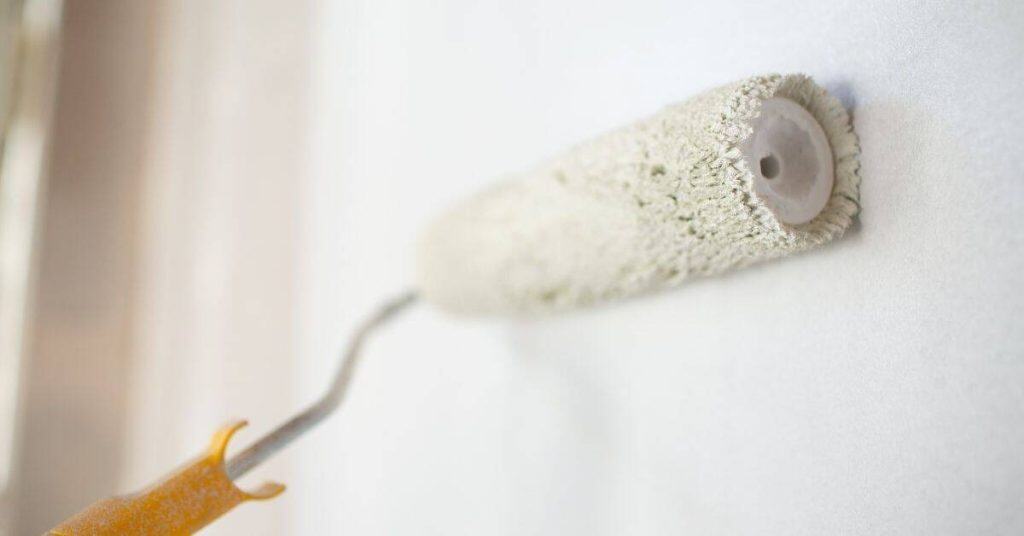
Painting Technique and Finish Selection
Master these painting techniques and finish selection tips for a professional-looking result:
Choose a 2-inch angled brush for cutting-in edges and corners, and a roller with a 3/8-inch or 1/2-inch nap cover for main areas.
For cutting-in, load your brush, tap off excess paint, then use long, smooth strokes along edges. Feather out to avoid harsh lines.
Select a sheen that balances durability and light reflection: flat or matte for hiding imperfections, satin or semi-gloss for easy cleaning, high-gloss for durability but shows imperfections.

Stop Rules — Common Mistakes to Avoid When Changing Bedroom Paint
Identify color missteps that can derail a project, such as picking overly saturated hues or tones that clash with existing furniture and lighting. Understanding the space helps you avoid a bedroom that feels loud or dissonant. These are rules to keep you on track.
Pay attention to prep and primer choices to prevent texture or adhesion problems. Skipping primer, neglecting surface cleaning, or failing to seal patches can lead to uneven results. Ventilation and safety are crucial, so never skip PPE and proper containment when using solvents. Use real-room swatches and test color shifts under different lighting before finalizing a choice, and avoid mixing brands or incompatible finishes that complicate cleaning or wear. A short don’t list helps you stay consistent and safe in the project.
Stop rule: Never skip sampling and observation
Relying on tiny paint chips or phone photos can lead to costly mistakes. Colors look different under various lighting, and small samples don’t show texture or undertones.
Instead, buy large swatches, stick them on walls at eye level, and observe throughout the day. Check how they look in morning light, afternoon sun, and evening artificial light.
Don’t rush your judgment. Live with the samples for a few days before making a final decision.
Stop rule: Don’t match paint to outdated fixtures blindly
Trying to match your new paint color exactly to old, outdated fixtures can result in a mismatch that ages your entire room.
Instead of forcing a perfect match, consider updating your fixtures. If that’s not an option, choose a complementary color. For example, if you have brass fixtures, opt for warm neutrals or deep blues rather than trying to match the brass exactly.
Remember, the goal is to create harmony, not an exact match.
Tools, Materials, and Budget Checklist
Assemble a practical tools list that covers hand tools, rollers, trays, brushes, and masking gear. Include device-specific items like a tape measure, level, stud finder, and safe safety gear for protection. This foundation keeps the job organized and efficient.
Choose paints and primers suitable for bedrooms with low or zero VOCs and washable finishes, plus stain-blocking or bonding primers as needed. Note general coverage guidance on labels and planned recoat times. Provide quantified quantity guidelines by room size and offer a buffer for touch-ups, avoiding exact price quotes while emphasizing practical budgeting and safe ranges. Always check VOC content, drying times, disposal rules, and any required surface prep steps that affect material needs.
Essential tools and materials for a smooth DIY job
Before you start, make sure you have all the necessary tools and materials to ensure your painting project goes smoothly.
- Paint brushes: Invest in high-quality, angled brushes (1.5″ – 2.5″) for cutting in edges. Cheap brushes can leave bristles in your paint and cause streaks.
- Rollers and covers: Choose rollers with medium to heavy nap covers (3/8″ – 1/2″) for semi-gloss or satin finishes. Light naps are suitable for flat paints, while heavy naps work best on textured surfaces.
- Painter’s tape: Use high-quality painter’s tape to protect trim and create clean lines. Cheap tape can leave residue and peel off prematurely.
- Drop cloths: Protect your floors with canvas or plastic drop cloths. Heavy-duty cloths are more durable but heavier to move around.
- Caulk gun: A caulk gun is essential for filling gaps and creating a smooth, seamless finish.
- Sanding block: A sanding block helps you maintain even pressure while sanding walls and trim. This ensures a smooth surface for painting.
- Primer: Choose a stain-blocking or bonding primer to seal surfaces, prevent tannins from bleeding through, and improve paint adhesion.
- Protective gear: Wear gloves, safety glasses, and a mask to protect yourself from paint fumes and splatters. A respirator is recommended for sanding or working with oil-based paints.
Quick rule: Don’t skimp on tools that make your job easier. High-quality brushes and rollers may cost more but will save you time and effort in the long run.
Budgeting tips and where to save vs. splurge
Sticking to a budget doesn’t mean you have to compromise on quality. Here’s how to prioritize your spending.
- Primer: Don’t skip primer, even if it means buying fewer paint cans. Primer improves paint adhesion and coverage, saving you money in the long run.
- High-quality brushes: Invest in a good quality paintbrush for cutting in edges. Cheap brushes may save you money initially but will cause frustration and poor results.
- Generic brands: Don’t be afraid to try generic or store-brand paints. Many have excellent reviews and can save you up to 30% compared to name-brand products.
- Multi-packs: Buy paint in multi-packs when possible. You’ll often get a discount, and it’s easier to touch up walls later on.
- Off-season sales: Plan your painting project for the off-peak season (fall or winter) when hardware stores offer deep discounts on paint and supplies.
- Primer/paint in one: Consider using a primer/paint combination product to save time and money. These products are designed to prime and paint in a single step.
- Caulk: Buy caulk in bulk or multi-packs for better value. Caulk is essential for creating a smooth, seamless finish and should not be overlooked.
- Safety gear: Don’t skimp on safety equipment like gloves, goggles, and masks. These items protect your health and are relatively inexpensive.
Quick rule: Know when to invest in quality tools and materials, and where to save money without compromising the final result.
Safety, Cleanup, and Longevity Best Practices
Ventilation is key for air quality and curing. Outline when to ventilate and how to use fans safely to minimize fumes while preserving proper sealing. Avoid drafts that disrupt the drying process while maintaining a comfortable workspace.
VOC safety and personal protection come next, with guidance on choosing low or zero VOCs and appropriate PPE. Provide clear instructions for safe disposal and waste handling, including how to seal and label cans and how to manage rags and brushes. Maintenance strategies focus on prep, topcoats, and cleaning methods that preserve color fidelity. Quick emergency reminders cover spills, exposure, rinsing, and basic first-aid, plus steps to take if fumes or symptoms trigger concerns.
Ventilation and VOC guidance
Proper ventilation is key to a safe and healthy painting job. Here’s how:
Before you start: Open windows and doors, weather permitting. Use fans to create cross-ventilation, but avoid pointing them directly at wet surfaces as this can cause drafts that affect curing.
During painting: Keep the door open if possible. If using a fan, place it near an open window to blow fumes out. Take breaks and step outside for fresh air every 15-20 minutes.
After painting: Keep windows open for at least 24 hours. Do not sleep in the room until fumes have dissipated.
Cleaning, touch-ups, and maintaining your finish
Proper care can extend the life of your new paint job:
Cleaning: Wipe up splatters immediately with a damp cloth. For tough spots, use warm water and mild soap. Avoid harsh chemicals that can degrade paint.
Touch-ups: Inspect your room periodically for nicks or scuffs. Touch up as needed to maintain the finish’s integrity. Follow the same painting technique used initially.
Maintenance: Dust regularly with a soft cloth or microfiber duster. For heavier dirt, use warm water and mild soap. Avoid using abrasive materials that can scratch the paint.
Real-Life Mini Case Studies and Quick Wins
Each mini case presents a real-world scenario with context like room size and light levels. Describe the current color misstep and why it would be flagged by a designer. These snapshots keep guidance practical and relatable.
State the diagnosis in plain terms and explain the chosen fix and rationale. Include the materials used, the key steps, and how the solution addresses lighting, mood, and perceived space. End with actionable takeaways that readers can apply to their own bedrooms, keeping the steps simple and repeatable for future projects.
Case study: Small, dark bedroom rescued with tone and finish change
The challenge here was a tiny (10’x8′) bedroom with low light, painted in a deep, dark blue. Designers flagged it as too dark, closing off the space.
Diagnosis: Too-dark color, insufficient contrast with furniture and flooring.
Fix: Switched to a lighter neutral (Benjamin Moore’s ‘Simply White’ in matte finish) on walls and trim. This opened up the room, creating an illusion of more space. Used a semi-gloss for trim to reflect light.
Materials: Benjamin Moore paint, primer, painter’s tape, brushes, and rollers. Steps: Prepped surfaces, taped off trim, applied two coats of paint on walls and trim, let dry, removed tape, and touched up any spots.
Quick win: Minimizing a bold, dated color without full repaint
This room (12’x10′) had high ceilings but low light, with walls painted in an outdated, bright orange. The problem? It was too overwhelming and didn’t work with the existing furniture.
Diagnosis: Undertone mismatch, insufficient contrast with furniture and flooring.
Fix: Added neutral trim (Sherwin-Williams’ ‘Alabaster’ in semi-gloss) to break up the orange. Repositioned textiles to complement the new trim color. Used a washable primer on walls to tone down the orange before painting trim.
Materials: Sherwin-Williams paint, primer, painter’s tape, brushes, and rollers. Steps: Prepped surfaces, taped off trim, applied washable primer on walls, let dry, painted two coats of trim color, let dry, removed tape, and touched up any spots.

Conclusion
Fixing a problematic bedroom color is about durability and good look, not guesswork. Start with a small test patch, verify that the color stays true, and protect the floor and furniture to keep the job from turning costly or permanent.
Check in this order: assess the room in our designer directions, pick a compatible shade, prep the surface properly, apply the fix in light, even coats, and monitor for color shifts or finish issues. If you can, tape off borders, clean walls first, and use the right tools to avoid drips and texture problems. Work in a well-ventilated area and clean up as you go, so nothing gets damaged or smeared into corners you’ll regret later.
Common mistakes to avoid are skipping a test area, rushing fixes with the wrong sheen or undertone, and ignoring safety gear. Always wear a mask when sanding or stamping down any rough spots, protect trim and hardware, and keep liquids away from fresh paint until it is fully dry. If you’ve got suspicious patches, peeling, or large color mismatches, pause and recheck your prep or seek a pro before you ruin a whole wall.
If the project starts to feel beyond your comfort zone—tricky patching, color matching, or ceiling-to-wall transitions—call a professional rather than pushing ahead. Stay deliberate, follow the steps you’ve planned, and you’ll finish with a space that looks deliberate, lasts, and feels right. You’ve got this.
FAQ
What small, quick fixes can modernize a dated bedroom color without a full repaint?
Swap accents like bedding, curtains, and artwork to shift the mood. Use a washable, neutral base and add one bold accent wall if needed, but keep the contrast modest. Always test patches on the wall and follow the paint label for recoat times and ventilation.
Which color trends are showing up in 2026 for bedrooms, and how can I adapt them safely?
Look for softer, earthy tones and quieter contrasts rather than loud hues. Start with a base color you already like and introduce trend elements with smaller items or a single accent wall. Check product labels for fading resistance, and follow manufacturer guidance on compatible topcoats and primers.
What steps should I follow if I’m repainting to update aesthetics but keep the job simple?
Prep the walls: clean, repair, and lightly scuff to help paint adhesion. Prime troubled areas if you’re changing from a dark to a light color or covering stains. Apply even coats, usually two, allowing proper drying time per label instructions, and don’t skip ventilation.
How do I handle paint compatibility and mixing tips to avoid dramatic color shifts?
Match base types (eggshell, satin) to the existing finish and surface. If you mix colors, test a small patch first and note any visible pigment bleed or texture changes. Always follow the label for mixing ratios and discard any product that looks separated or misbehaves on the patch test.