
Introduction
A bathroom vanity paint that survives water and cleaning chemicals is a moisture-tolerant coating chosen for cabinetry in wet areas. Start by matching your finish to the vanity material and plan proper prep like cleaning, sanding, and priming per manufacturer instructions. Check labels for water resistance and chemical resistance, and follow the guidance on your chosen product.
Use paints labeled for high humidity spaces, and consider sealing with a clear top coat to slow wear. Look at durable enamel or acrylic latex options and ensure they’re compatible with your surface, then apply and cure according to the manufacturer’s directions for best results in a DIY setting.
Key takeaways
- Know vanity material options (MDF, plywood, solid wood, thermofoil, Corian) and water risks.
- Choose paints and sealers labeled for high moisture and cleaning chemical exposure.
- Prepare surfaces with thorough cleaning, sanding, and compatible primer for long-lasting adhesion.
- Apply in light, even coats; control humidity and temperature to prevent blistering.
- Regular maintenance: wipe with mild cleaners and inspect edges for moisture damage.
- Safety: wear eye/skin protection, ventilation, and follow manufacturer instructions for products.
Table of Contents
- Introduction
- Key takeaways
- Know Your Vanity Material
- Choose Paint Chemistries That Resist Water and Cleaning Chemicals
- Surface Preparation for a Waterproof, Long-Lasting Finish
- Application Methods and Environmental Controls
- Maintenance and Cleaning to Preserve the Finish
- Real-World Case Studies and Common Failure Modes
- Budgeting, Cost Trade-Offs, and Longevity Planning
- Safety, Tools Checklist, and Material Specs Explained
- Conclusion
- FAQ
Know Your Vanity Material
Vanity substrates vary a lot in bathroom environments. MDF, solid wood, plywood, particleboard with melamine, stainless steel, thermofoil, and Corian all behave differently when moisture hits them. Each material has a typical finish path that influences paint choice and longevity. This primer and topcoat pairing matters just as much as the substrate itself.
Understanding moisture behavior, porosity, and edge stability helps you pick the right primers and bonding agents. Some surfaces need moisture-curing or stain-blocking products, while others tolerate simple acrylic primers. Surface prep, including proper sealing and sanding, sets the stage for a durable film. Plan for fillers or epoxy for cracks and stains where needed, and verify veneer integrity before coating. Then match topcoats to the substrate to resist humidity, cleaners, and UV. If a substrate shows signs of delamination or soft edges, refinish or replace before painting. Quick checks: test for moisture, assess edge stability, and choose a coating system designed for that base.
Material overview and vulnerabilities
The choice of bathroom vanity material significantly impacts how well paint adheres and performs over time. Each material has its unique structure and moisture behavior that can affect painted finishes.
- MDF: Moisture-sensitive, expands and contracts with humidity changes. Look for moisture-resistant MDF. Seal edges before painting to prevent water absorption.
- Solid Wood: Natural material, susceptible to warping and cracking if not properly sealed. Use kiln-dried wood for stability.
- Plywood: Strong but can delaminate when exposed to moisture. Seal plywood edges before painting.
- Particleboard with Melamine: Moisture-resistant, but melamine surface can peel if not properly prepared. Lightly sand and clean the surface before painting.
- Stainless Steel: Non-porous, resistant to moisture and chemicals. Priming is crucial for paint adhesion.
- Thermofoil: Plastic laminate over particleboard, can delaminate if not properly prepared. Lightly sand and clean the surface before painting.
- Corian: Non-porous solid surface material, resistant to moisture and chemicals. Priming is crucial for paint adhesion.
How moisture and cleaners interact with each substrate
Moisture exposure and cleaning chemicals can cause various issues on different vanity materials. Here’s what to watch for:
Swelling and warping: MDF, plywood, and solid wood are susceptible to these issues when exposed to moisture.
Peeling and delamination: Moisture can cause paint to peel or the surface material (like melamine on particleboard) to delaminate.
Corrosion and seam failure: Stainless steel can corrode if not properly protected, and joints in thermofoil or Corian can fail with repeated exposure to moisture and chemicals.
Best paint families per material (compatibility guide)
The right paint chemistry is crucial for long-lasting results on your bathroom vanity. Here’s a compatibility guide:
- MDF and Plywood: Use water-based acrylic or latex paints. Seal edges with a primer-sealer before painting.
- Solid Wood: Opt for oil-based or water-based acrylic paints. Ensure the wood is properly sealed to prevent tannin bleeding.
- Particleboard with Melamine and Thermofoil: Use water-based acrylic or latex paints. Lightly sand and clean the surface before painting.
- Stainless Steel and Corian: Opt for oil-based or water-based acrylic paints designed for non-porous surfaces. Priming is crucial for paint adhesion.
Choose Paint Chemistries That Resist Water and Cleaning Chemicals
We’re comparing epoxy/polyurethane enamels, marine-grade coatings, oil-based enamels, and water-based systems with protective topcoats. Each chemistry has different levels of water resistance and chemical resistance. The right choice hinges on where the vanity sits and how it’s used. Look for a system designed for humidity and frequent wipe-downs in bathrooms.
Check substrate compatibility and surface prep needs for MDF, plywood, or solid wood. Primers and moisture management steps vary by chemistry, so verify manufacturer instructions and data sheets. Performance features to prioritize include moisture vapor resistance, soap and cleaner wipeability, stain and scratch resistance, and yellowing behavior under heat from hot water. Consider maintenance implications like recoat intervals and ease of repair. In the end, align the chemistry with your budget, exposure level, and the vanity material to maximize a durable, low-maintenance finish.
Epoxy and polyurethane enamel options
Two-component epoxies and polyurethanes are top choices for bathroom vanities due to their exceptional chemical and abrasion resistance. They form a hard, durable film that withstands frequent cleaning and exposure to moisture.
Why they resist: Epoxies cure through a chemical reaction, creating a dense, cross-linked network. Polyurethanes form strong bonds with the substrate and have excellent flexibility, preventing cracks and peeling.
Trade-offs: These coatings often have strong odors during application, requiring proper ventilation. They also need careful handling as they can be difficult to recoat once cured.
Marine-grade and specialty coatings
For vanities exposed to high humidity or harsh chemicals, consider marine-grade or corrosion-resistant coatings. These are designed for demanding environments like boat decks and industrial settings.
When to use: Apply these coatings on stainless steel vanities or areas with heavy water exposure, such as near showers. They provide excellent resistance against saltwater, mold, and mildew.
Note: While effective, these coatings may have higher VOCs and stronger odors compared to other options. Always check local regulations before application.
Water-based systems with durable topcoats
Modern waterborne enamels offer a balance between low VOC emissions and decent chemical resistance. To boost durability, apply a protective topcoat of polyurethane or acrylic.
How they resist: Water-based enamels form a barrier against moisture and mild chemicals. Topcoats enhance this protection by adding a layer of tough, flexible resin that resists scratches and stains.
Benefits: These systems have low odor during application, making them ideal for indoor use. They’re also easy to clean up with just water, reducing waste.
Surface Preparation for a Waterproof, Long-Lasting Finish
Start with a substrate assessment and compatibility check. Identify the vanity material and note any prior coatings or water damage. Plan primer and sealer choices based on the substrate to avoid adhesion failures. This is the foundation of durability.
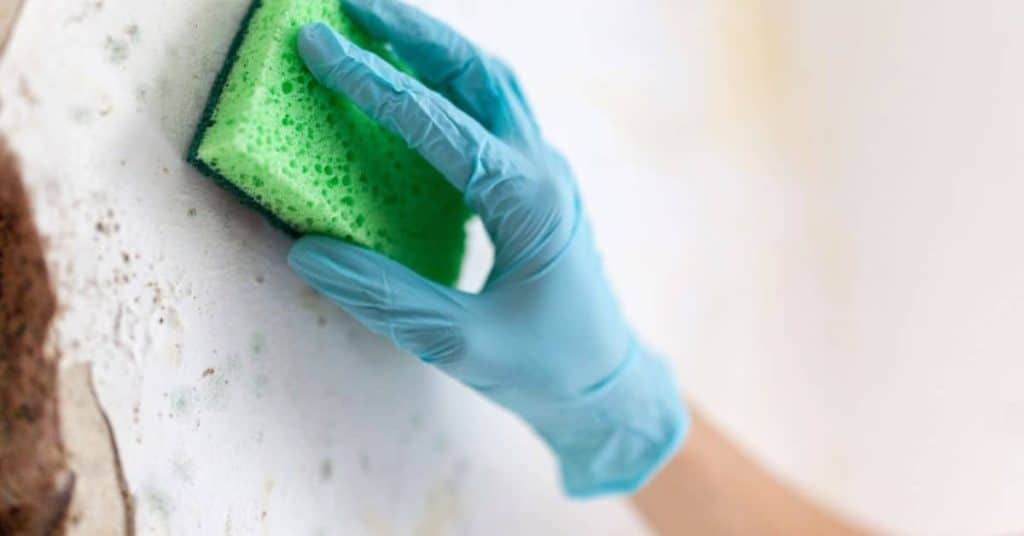
Thorough cleaning removes soap scum, oils, mildew, and conditioner residues. Use a bathroom-safe degreaser and mold/mildew disinfectant, then rinse and dry completely. If the surface is glossy, degloss or lightly sand to create a mechanical key. Address cracks, chips, or water stains with appropriate filler or epoxy and feather the edges for a smooth base. Ensure the area is dry and humidity controlled during prep and between coats. Select a moisture-resistant primer compatible with the topcoat, and consider epoxies or shellacs for stubborn stains. Wipe with a tack cloth and remove all dust before priming to maintain a clean surface for coatings.
Cleaning, de-greasing, and decontamination
Start by removing all hardware – knobs, handles, etc. Use a bathroom-safe degreaser to tackle soap scum, oils, and conditioner residues. Spray it on, let it sit for 5-10 minutes, then scrub with a non-abrasive pad or brush. Rinse thoroughly with clean water.
Next, address any mildew or mold. Use a disinfectant specifically designed for this purpose. Apply, let it soak, scrub, and rinse. Ensure all residue is gone – it can interfere with paint adhesion.
Finally, dry the area completely. Use fans or open windows to speed up the process. A hairdryer on low heat can help too. Do not rush this step. Moisture left behind can cause issues later.
Sanding, repairs, and corrosion treatment
For glossy finishes, lightly sand with 120-grit sandpaper to create a mechanical key. This helps paint adhere better. Wipe off dust with a damp cloth, then let it dry.
Inspect for cracks, chips, or water stains. Fill these with a suitable filler or epoxy, feathering the edges. For metal corrosion, use a wire brush or sandpaper to remove rust, then apply a rust converter primer before filling.
Once filled, lightly sand again to smooth out any ridges. Wipe off dust and let it dry. Do not over-sand. This can create valleys that trap moisture and lead to peeling.
Priming and sealing strategies
Choose a moisture-resistant primer compatible with your topcoat. For example, if you’re using an oil-based paint, choose an oil-based primer. Apply a thin, uniform coat. Let it dry according to the manufacturer’s instructions.
If your vanity has exposed edges or joints, apply a stain/moisture-blocking sealer before priming. This helps prevent moisture from getting in and causing issues later. Epoxy or shellac-based primers can also help with stubborn stains.
Before applying the topcoat, ensure the area is dust-free. Wipe down with a tack cloth to remove any remaining particles. Minimize disturbance during this stage to avoid recontamination.
Application Methods and Environmental Controls
Brushing, rolling, or spraying each have pros and cons on bathroom vanities. Brushing can yield a smooth edge on flat areas; rolling builds a uniform film on larger panels; spraying can deliver a flawless finish on tricky contours. Match the method to the substrate and the coating system.
Proper sanding, dust control, and patching are essential. Primer choice should support the chosen application method and enhance moisture resistance. For tool setup, know recommended nap sizes for rollers and brush types, plus whether to use HVLP or conventional spray. Plan coats and cross-coating steps to minimize runs and ensure even film across edges and corners. During cure, maintain ideal environmental control: stable temperature, low humidity, and good airflow to reduce tack and odors. After the final coat, protect the surface from moisture exposure until full cure is reached, using fans or dehumidifiers as needed.
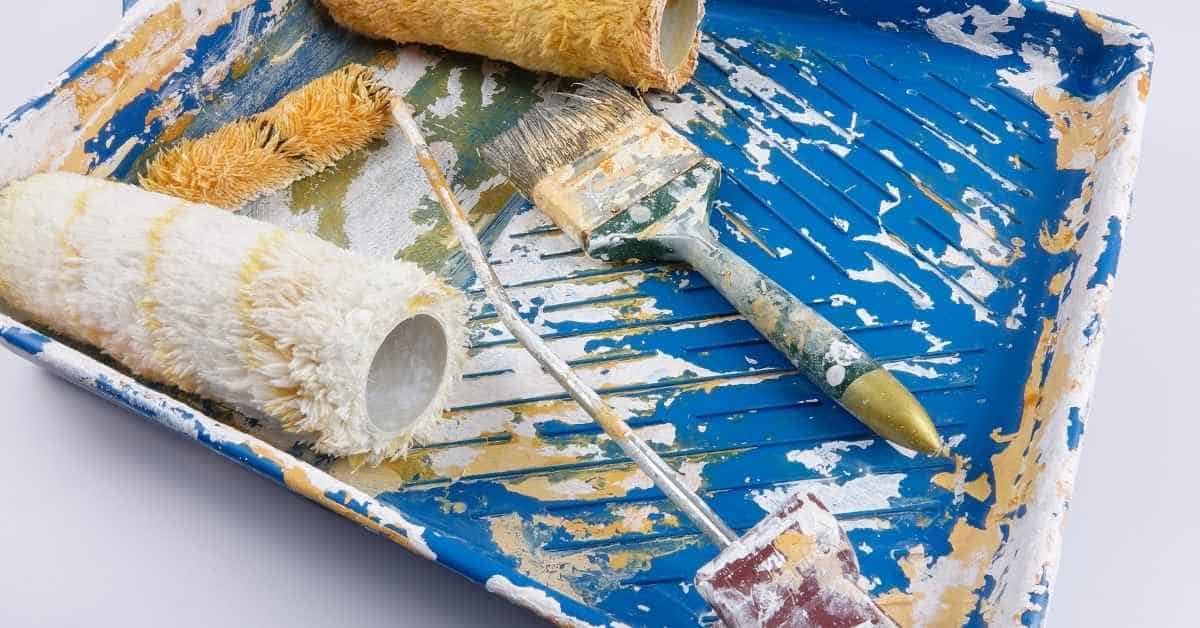
Brush, Roller, and Spray Pros/Cons
The application method you choose greatly impacts the finish of your bathroom vanity paint. Here’s a breakdown:
Brushing: Best for small projects and tight spaces. Offers good control but can leave visible brush strokes.
Rolling: Ideal for large, flat surfaces. Provides an even, smooth finish with minimal effort. Not suitable for intricate details or textured surfaces.
Spraying (HVLP): Produces a factory-like, ultra-smooth finish. Great for large projects and hard-to-reach areas. Requires more setup and cleanup but offers the most durability under water and cleaners.
Environmental Conditions and Cure Considerations
The environment plays a crucial role in how your paint cures and adheres. Here’s what you need to control:
Temperature: Ideal range is 70-85°F (21-29°C). Too hot or cold can affect cure time and adhesion.
Humidity: Keep it below 50% for best results. High humidity slows down cure time and can lead to poor adhesion.
Ventilation: Ensure good airflow to reduce dust and solvent buildup. This helps prevent tackiness, improper film formation, and strong odors. Always follow product labels for specific recoat times.
Maintenance and Cleaning to Preserve the Finish
Outline the vanity’s exposure: water splash zones, cleaners used, and typical cleaning frequency. This informs how harsh the environment is on the coating and what maintenance is needed.
Develop a safe cleaning protocol using pH-neutral or mild soaps and microfiber cloths. Wipe gently and dry thoroughly to avoid moisture creep. Identify cleaners to avoid, such as strong solvents or ammonia, and consider protective sealants if applicable. Create a routine calendar with daily, weekly, and quarterly steps to keep the finish looking fresh. Look for early signs of wear, moisture intrusion, or edge chipping and address them quickly. Test a cleaner in a hidden spot first, then proceed with a full plan, documenting results to guide future maintenance.
Daily and periodic cleaning recommendations
Your bathroom vanity’s finish is tough, but it’s not invincible. Daily wear and tear can dull its shine, so here’s how to keep it looking fresh:
Use mild detergent, like a pH-neutral soap or dishwashing liquid. Mix a few drops with warm water. Never use bleach, ammonia, or strong solvents – they’ll eat away at your paint.
Grab a soft cloth, microfiber if you’ve got it. Dab and wipe gently. No scrubbing; that’s for tough stains only. Rinse with clean water and dry thoroughly to keep moisture from creeping in.
Once a week, give it a good once-over. If you notice any wear or chips, touch them up right away. Better safe than sorry.
Handling chemical splashes and stains
Accidents happen. When chemicals splash onto your vanity, act fast:
First, wipe off excess liquid with a damp cloth. Then, test any cleaner you plan to use in an inconspicuous spot – like behind the sink or under the counter.
If it’s safe, clean gently but thoroughly. If there’s a stain, let the cleaner sit for a few minutes before wiping. Never scrub; that’ll just damage the paint.
After cleaning, dry well to prevent moisture from seeping in and causing problems later. If you notice any chips or wear, touch them up right away. And if the finish looks damaged, it might be time for a recoat – better safe than sorry.
Real-World Case Studies and Common Failure Modes
Four concise case templates help you translate lessons to your project. Two DIY successes and two failures show how substrate, prep, and coating choices matter. Note initial conditions, environment, and finish outcome for each case.
We’ll highlight failure modes like inadequate surface prep, incompatible primers, over-wiping, or premature exposure to water. For each, link a concrete remedy or preventive step you can apply on your vanity. Quick-audit checklists cover substrate verification, degreasing, test patches, cure times, and compatibility with nearby bathroom materials. Extract practical lessons to build a simple decision tree for epoxy, latex, or alkyd hybrids, and understand how gloss level affects washability. Finish with visual cues and a short takeaway for replication on your project.
Short DIY project examples and takeaways
Here are a few DIY bathroom vanity paint jobs, their outcomes, and lessons learned:
DIY 1: MDF with Thermofoil Edges – Surface: MDF with thermofoil edges. Prep: Light sanding, degreasing. Paint: Latex semi-gloss. Outcome: Successful, but edges started peeling after 6 months due to trapped moisture.
DIY 2: Solid Wood Vanity – Surface: Solid wood. Prep: Sanding, sealing with shellac. Paint: Alkyd hybrid satin. Outcome: Excellent adhesion and durability, even under daily cleaning.
DIY 3: Melamine Vanity – Surface: Melamine. Prep: Light sanding, degreasing. Paint: Epoxy for better adhesion and durability. Outcome: Successful, with no signs of peeling or staining after 2 years.
Typical failure patterns and how to prevent them
Understanding common issues helps you avoid them. Here are four frequent causes of bathroom vanity paint failures:
1. Insufficient Surface Prep – Cause: Poor adhesion due to contaminants or lack of sanding. Prevention: Thorough degreasing, light sanding (220-grit), and proper cleaning before painting.
2. Incompatible Primer/Paint – Cause: Delamination due to incompatible paint or primer. Prevention: Use compatible primers and paints, and follow manufacturer guidelines for application.
3. Exposed Edges or Over-Wiped Surfaces – Cause: Trapped moisture leading to peeling. Prevention: Seal edges with caulk or paint, avoid over-wiping, and allow proper cure time between coats.
4. Premature Exposure to Water or Harsh Cleaners – Cause: Staining, peeling, or loss of gloss. Prevention: Allow adequate cure time before exposing the paint to water or harsh cleaners, and use gentle cleaning methods.
Budgeting, Cost Trade-Offs, and Longevity Planning
Align upfront cost with expected longevity by comparing primer, stain-blocking undercoats, and bathroom-appropriate paint types. Consider cure times and durability under moisture and cleaners when evaluating value.
Estimate maintenance cycles and costs, including resistance to chemicals, touch-ups, and labor for refreshes. Emphasize how surface prep and waterproofing influence lifecycle and the need to keep joints sealed. Weigh budget-friendly options against premium finishes and calculate long-term cost trade-offs for durability and cleaning resilience. Create a simple lifetime budget with initial materials, expected repaint intervals, and 5–10 year projections. Use a practical decision checklist that considers exposure level, strongest cleaners used, repaint interval, and whether DIY or professional labor is preferred.
Upfront cost vs lifetime value
When choosing a bathroom vanity paint, it’s tempting to go for the cheapest option. But remember, you get what you pay for. Higher-quality paints and proper prep can increase your vanity’s lifespan and reduce replacement frequency.
Quality paints are formulated to withstand moisture and cleaning chemicals better. They might cost more upfront but save you money in the long run by lasting longer.
Proper surface preparation is also crucial. Sanding, priming, and sealing joints create a solid foundation for your paint to adhere to and protect against water damage and mold growth. It’s an investment that pays off over time.
So, while it might seem counterintuitive, spending a bit more upfront on quality materials and thorough prep can actually save you money in the long run.
Cost-saving strategies and where to invest
If you’re working with a tight budget, there are ways to cut costs without compromising quality. The key is knowing where to spend and where lower-cost choices are acceptable.
Invest in prep work. Proper sanding, priming, and sealing are non-negotiables. They create a barrier against moisture and mold, extending the life of your paint job.
Spend on a good quality primer with stain-blocking capabilities. This will help your paint adhere better and last longer. It’s also a good idea to choose a bathroom-suitable paint type, like eggshell or satin, which are more resistant to moisture and cleaning chemicals.
For the topcoat, consider a mid-range option that balances cost with durability. You don’t need the most expensive paint on the market, but you should avoid the cheapest ones too. They often lack the necessary resistance to water and cleaning agents. For shorter-term projects or lower-traffic areas, a less durable paint might be acceptable.
Safety, Tools Checklist, and Material Specs Explained
Lay out safety foundations first: PPE, ventilation, solvent hazard signs, storage, spill cleanup, and disposal steps. Use a quick risk checklist tailored to bathroom environments.
Cover working solvents and coatings: safe handling, ventilation, skin and eye protection, and what to do if exposure occurs. List essential and optional tools: PPE, brushes, rollers, trays, mixing sticks, sanding blocks, tack cloths, drop cloths, painter’s tape, a respirator, extension cords, and a portable fan. Explain how to read material specs: coverage, dry film thickness, VOCs, shelf life, cure times, substrate compatibility, and resistance ratings. Show how to interpret primers, sealers, and topcoats, plus recoat windows and surface prep requirements. End with quick prompts to choose between water-based vs solvent-based coatings and when a specialty bathroom paint or epoxy sealer is appropriate.
Safety and Ventilation Guidelines
Before you start painting your bathroom vanity, ensure you’re well-prepared to handle solvents and coatings safely. Use this checklist to protect yourself and your workspace.
- Personal Protective Equipment (PPE): Gloves, goggles, and a respirator are must-haves when working with chemicals. They protect your skin, eyes, and lungs from harmful substances.
- Ventilation: Bathrooms can be small spaces. Open windows or use fans to ensure proper ventilation. Fumes can be dangerous if they build up.
- Solvent Hazard Signs: Post these signs at the entrance of your work area to warn others about potential hazards.
- Proper Storage: Store solvents and coatings in their original containers, tightly sealed, and away from heat sources. Keep them out of reach of children and pets.
- Spill Cleanup: Have rags or towels ready to clean up any spills immediately. Solvents can damage surfaces and pose fire risks if left unattended.
- Disposal Steps: Used rags and empty containers should be disposed of according to local regulations. Never throw them in the regular trash.
- Risk Checklist: Assess your bathroom environment for potential risks like electrical hazards, slippery surfaces, or poor lighting before you start working.
- MSDS Check: Always check the Material Safety Data Sheet (MSDS) of each product you’re using. It provides specific safety information and first aid instructions in case of exposure.
Quick rule: Never skip any item on this checklist. Each one plays a crucial role in ensuring your safety while painting.
Tools and Materials Checklist
Before you start painting, gather all the necessary tools and materials to ensure a smooth and efficient process. Here’s a comprehensive list to help you prepare.
- PPE: Gloves, goggles, and a respirator for your safety.
- Cleaners: TSP (trisodium phosphate) or a degreaser to clean the surface before painting.
- Sandpaper: 120-grit sandpaper for smoothing the surface. Avoid using anything coarser as it can damage the vanity.
- Primer: A suitable primer for your chosen paint type and substrate.
- Paint: Choose a water-based or solvent-based paint with good water and chemical resistance for bathrooms.
- Brushes/Rollers/Spray Gear: High-quality brushes, rollers, or spray equipment depending on your chosen application method.
- Masking Supplies: Painter’s tape and drop cloths to protect areas you don’t want to paint.
- Sealant: A suitable sealant for protecting the edges of the vanity top.
Quick rule: Always check your tools and materials before starting. Missing something mid-project can lead to delays or poor results.
Reading Product Specs and Standards to Verify Claims
Before purchasing paints and coatings, it’s crucial to understand their specifications and standards. This helps you choose the right products for your bathroom vanity and ensures they meet your expectations.
- Substrate Compatibility: Check if the paint is suitable for your vanity’s material (MDF, plywood, solid wood, PVC, etc.).
- Chemical Resistance: Ensure the paint can withstand water and cleaning chemicals to prevent damage over time.
- VOC Level: Lower VOC levels are better for indoor air quality. Check if the paint meets your local regulations.
- Cure/Recoat Instructions: Follow these instructions to ensure proper curing and allowable recoat times.
- Technical Datasheets: Consult these for detailed information about test methods used to determine product claims.
- Warranty/Compatibility Notes: Check if the paint comes with a warranty and if it’s compatible with other products you plan to use.
- Primer/Sealer/Topcoat Distinction: Understand the difference between these products to choose the right one for your needs.
- Safety Data Sheet (SDS): Review this for safety information, first aid measures, and proper handling and storage instructions.
Quick rule: Always verify product claims with their specifications. Don’t rely solely on marketing statements.
Conclusion
Get this right and your vanity withstands splashes, cleaners, and years of daily use without flaking or fading. The core is choosing the right material, the right paint chemistry, and a solid prep and cure process that keeps moisture out and the finish durable.
Proceed with a simple, practical checklist: confirm the vanity material, select a water- and chemical-resistant paint chemistry, clean and lightly sand the surface, repair any defects, mask and protect surrounding areas, apply in a well ventilated space at the right temperature, follow the manufacturer’s recoat and cure times, and test a small area before committing to the whole piece. Finish with a careful tack-free cure and plan for ongoing cleaning and gentle care to preserve the finish.
Common mistakes to avoid are skipping or rushing surface prep, using the wrong paint chemistry for the material, and neglecting proper ventilation or curing time. Safety rules are simple: work in a ventilated area, wear eye and skin protection, test any cleaners in a hidden spot first, and don’t shortcut the cure or skip a patch test. If in doubt about material compatibility or large-scale work, pause and verify the specs before proceeding.
If the vanity is carved, curved, or you see persistent peeling or water intrusion after careful work, it makes sense to bring in a professional. Stay focused on the basics, follow the checklist, and you’ll finish with a durable, good-looking result you can trust day in and day out. You’ve got this—just do the next practical step and keep safety at the top of the plan.
FAQ
What bathroom vanity finishes hold up best under water and frequent cleaning?
Solid wood, plywood, and MDF with proper sealing can resist moisture better than particleboard. Thermofoil and stainless steel finishes are common for high moisture, but check the surface coating and edge sealing. Always verify the manufacturer’s guidance for moisture limits and compatible topcoats.
Which paint types and coatings are suitable for high moisture bathroom vanities?
Look for paints or coatings labeled for bathrooms or high humidity. For most vanities, a resin or epoxy-based topcoat, or a water-based acrylic with a durable finish, works well when properly sealed. Read the product label for surface prep, recoat windows, and compatibility with your substrate.
What sealing techniques help protect painted vanities from water and daily cleaning?
Seal seams, edges, and any joins with a compatible clear sealant. Use a topcoat that provides a moisture barrier and apply according to the product instructions. If you have gaps or exposed raw edges, seal those first to prevent water ingress.
How should I maintain and touch up a painted vanity over time?
Clean with mild cleaners and avoid harsh solvents that can dull the finish. Touch up with the same type of paint and topcoat after scuffs or chips, following the manufacturer’s recoat guidance. Inspect edges and joints regularly and reseal as needed to stop moisture from penetrating.