
Introduction
The timeline of your painting project is crucial, especially when it comes to applying primers. Each primer type—shellac, oil, or waterborne—has its own application time, dry time, and recoat window.
Understanding these timelines helps you plan your project efficiently, ensuring you have enough time for each step without rushing through the process or waiting too long between coats.
For the full guide, see Shellac vs Oil vs Waterborne Primers: Odor, Dry Time, and Stain-Blocking Tradeoffs.
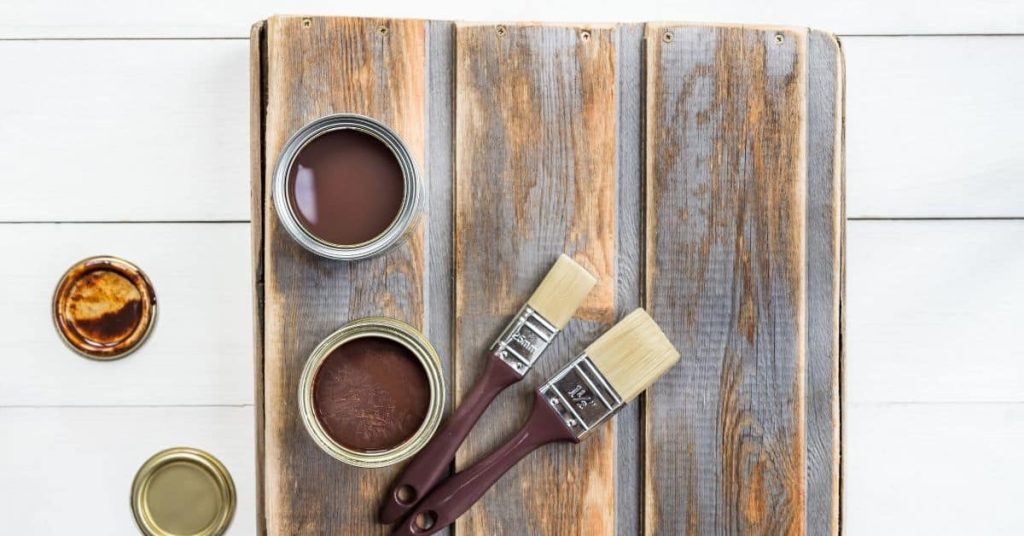
Application Timeline: Shellac vs Oil vs Waterborne Primers
The application timeline of primers varies depending on the type. Here’s a breakdown to help you plan your project:
- Shellac Primer: Application time is typically quick, around 15-30 minutes per coat due to its fast drying nature. However, it requires solvent-based clean-up and proper ventilation.
- Oil-Based Primer: Application time can range from 20-45 minutes per coat, depending on the surface and humidity levels. It has longer dry times compared to shellac but offers strong stain-blocking properties.
- Waterborne Primer: Application time is usually around 15-30 minutes per coat, similar to shellac. However, it dries quickly and allows for faster recoat times, making it ideal for projects with tight deadlines.
Consider these timelines when planning your project, including prep work, application, drying time, and recoating. This will help you stay on schedule and achieve the best results.
Key takeaways
The preparation time for each primer type also affects the overall project timeline. For instance, shellac requires proper sanding and cleaning to ensure adhesion, while oil-based primers may need a longer wait time before applying paint due to their slower drying nature.
- Shellac minimizes odor during cure, but initial odor and smell can be noticeable.
- Oil-based primers offer strong stain-blocking, but long drying times and fumes.
- Waterborne primers dry quickly and are easier cleanup, but may require more coats for tough stains.
- Ventilate well and wear respirator when applying any solvent-based primer.
- Roll or brush waterborne primers; spray can primers for large areas.
- Stain-blocking effectiveness varies by stain type and primer.
Table of Contents
- Introduction
- Key takeaways
- Executive Comparison and When to Choose Each Primer
- Odor, Vocs, and Safety During Application
- Dry Time and Recoat Scheduling
- Stain-Blocking Effectiveness and Types of Stains Addressed
- Surface Preparation and Application Methods
- Durability and Long-Term Performance
- Environmental Impact and Cleanup
- Cost, Availability, and Brand Considerations
- Conclusion
- FAQ
Executive Comparison and When to Choose Each Primer
This section gives a compact, jobsite-style snapshot comparing shellac, oil-based, and waterborne primers on odor, dry time, and stain-blocking so you can pick the right primer for common DIY scenarios. Think of it as a quick decision tree: which primer to reach for when you need fast turnaround, strong stain blocking, or low-odor work near occupied rooms.
For each primer I contrast odor intensity (low, moderate, high) and typical ventilation needs, outline touch-dry versus full-cure behavior in real conditions, and list the stain types each one reliably seals. Check product labels or the manufacturer data sheet for exact recoat windows, VOC content, and coverage so you can match the primer to your room size, substrate porosity, and topcoat choice.
At-a-glance pros and cons
Here’s a quick rundown of each primer type’s strengths and weaknesses.
Pros
- Shellac: Fast drying, natural look, seals tannins.
- Oil-based: Excellent stain-blocking, good adhesion, leveling.
- Waterborne: Low odor, quick cleanup, wide topcoat compatibility.
Cons
- Shellac: Short pot life, not ideal for high-traffic areas.
- Oil-based: Strong odor, slow drying time, poor for sensitive occupants.
- Waterborne: May raise grain on wood, less stain-blocking power.
Choose based on your project’s specific needs and constraints.
Quick decision guide by project type
Not all primers are created equal. Here’s what works best for common DIY projects:
Interior trim, cabinets, or painted surfaces? Go with waterborne. It’s low-odor, cleans up easily, and plays nice with latex topcoats.
Stained wood or tannin-rich substrate? Shellac is your friend. It seals tannins fast and lets the natural grain shine through.
High-traffic areas like floors or stairs? Opt for oil-based. It’s tough, levels well, and blocks stains effectively. But be prepared for a longer drying time and stronger odor.
Odor, Vocs, and Safety During Application
Here I compare how shellac, oil-based, and waterborne primers smell during application and dry-down, and what that means for health precautions on a home project. Expect differences in peak odor timing and duration tied to the solvent carrier; I note when application or cure produces the worst exposure so you can plan ventilation and occupancy.
I list practical PPE recommendations and ventilation tactics for each primer type, and when to consult product labels or manufacturer instructions for respirator ratings and exposure limits. If you have limited ventilation or sensitive occupants, follow conservative strategies and check the product data sheet for exact VOC figures and re-entry guidance.
Odor profile for shellac, oil, and waterborne primers
Each primer type has its unique odor profile, linked to their chemical makeup.
Shellac: Has a mild, natural scent due to its plant-based origin. Odor is lowest among the three but can still cause minor irritation in sensitive individuals.
Oil-based: Strongest odor, thanks to petroleum solvents like mineral spirits. Peak odor occurs during application and dry-down, with some lingering during cure.
Waterborne: Least noticeable odor due to water as the primary carrier. However, some products may still emit a mild chemical scent, especially during drying.
Ventilation, PPE, and fire safety recommendations
Proper ventilation is crucial to dilute primer odors and reduce exposure. Use fans, keep windows open, and seal adjacent spaces if possible.
PPE: Wear a respirator during application, especially with oil-based primers. Safety glasses and gloves protect against splashes and contact dermatitis.
Fire safety: Keep primers away from heat sources and open flames. Oil-based primers are flammable until fully cured (at least 24 hours).
What to check on product labels and SDS
Before starting, review product labels and Safety Data Sheets (SDS) for crucial information.
- VOC statement: Check VOC content. Lower VOCs mean less odor and better air quality.
- Recommended PPE: Follow manufacturer’s advice on protective gear.
- Flash point: Know the product’s fire risk, especially for oil-based primers.
- Application instructions: Follow guidelines to minimize odor and ensure proper curing.
- Safety precautions: Read and follow any specific safety measures.
- First aid measures: Know what to do in case of accidental contact or ingestion.
- Disposal instructions: Learn how to safely dispose of leftover product and containers.
- Storage guidelines: Follow storage advice to maintain product quality and safety.
Quick rule: Always read labels and SDS before starting any project. It’s your best defense against unexpected hazards.
Dry Time and Recoat Scheduling
This intro lays out how quickly shellac, oil-based, and waterborne primers go from tacky to recoat-ready and what commonly shifts those timelines on real jobsites. I focus on practical indicators—tack-free feel, odor drop, and adhesion checks—rather than only relying on label hours that assume ideal lab conditions.
Expect drying to slow with low temperature, high humidity, heavy film, or porous substrates; confirm label recoat windows and plan buffers for sanding or topcoating. Use simple watchpoints—tack test, crosshatch adhesion, and a small blind-sand—to decide if a primer is ready rather than guessing from a clock alone.
Factors that affect dry and cure times
Dry and cure times for primers vary based on several factors. Here’s what you need to know:
Humidity and temperature play a big role. Warmer temps and lower humidity speed up drying, while cooler temps and higher humidity slow it down.
The substrate matters too. Porous surfaces like raw wood soak up primer, slowing dry time. Smooth, non-porous surfaces like glass or metal dry faster.
Coat thickness and ventilation also impact drying. Thicker coats take longer to dry. Good ventilation helps primers cure faster by allowing solvents to evaporate quicker.
How to determine safe recoat and topcoat windows
To avoid lifting or peeling your primer, follow these steps:
First, check if the primer is tack-free. Gently press a piece of paper against it. If no residue sticks, it’s tack-free.
Next, confirm on the technical data sheet that enough time has passed for your specific primer and conditions. This ensures the primer has cured enough to accept the next coat without lifting.
Before sanding or applying a topcoat, always perform a test patch. Apply the topcoat to a small, hidden area to ensure it adheres properly before proceeding with the rest of your project.
Techniques to speed or delay drying safely
Need to speed up drying? Here are some safe methods:
Increase temperature and reduce humidity. Use heaters, dehumidifiers, or open windows to create better drying conditions.
Apply thinner coats. Multiple thin coats dry faster than one thick coat. Just ensure you’re getting adequate coverage.
To delay drying, do the opposite:
Reduce temperature and increase humidity. Cover your project to trap moisture in the air around it. This works best with waterborne primers, which are more sensitive to humidity changes.
Stain-Blocking Effectiveness and Types of Stains Addressed
This section categorizes common stains—tannin bleed, water/mineral marks, smoke soot, and marker/ink—and explains how each primer type performs against them. I describe which stains are usually sealed by shellac, which oil-based primers handle well, and where waterborne products can be hit-or-miss, plus the typical failure modes you’ll see on site.
Testing method and substrate matter: the success of any primer depends on the stain source, surface porosity, and whether the stain is old, seeped, or active. When in doubt, test on a scrap or hidden area and check manufacturer guidance for stain-blocking claims and recommended prep for persistent or mixed stains.
Which primer blocks which stains best
Shellac is the gold standard for stain-blocking. It seals wood tannins (tannin bleed) like a champ, preventing them from bleeding through your topcoat.
Oil-based primers also do a good job on tannins but may need an extra coat or sanding between coats to ensure complete blockage. They’re not as effective on water marks (mineral stains) and smoke soot.
Waterborne primers are great for water marks and marker/perm ink. They form a barrier that keeps these stains from seeping through. However, they might not be as effective on tannins or smoke soot alone. For multi-stain surfaces, consider using shellac as the first step followed by an oil or waterborne primer.
Testing and verification of stain blocking
Before applying your topcoat, test for stain blockage. Apply the stain to a small, hidden area. If it doesn’t show through, you’re good to go.
Keep an eye out for signs of re-emergence. If stains start showing after a few days or weeks, your primer might not have sealed properly. This could be due to inadequate surface prep, high humidity, or using an incompatible topcoat.
If you’re unsure about stain blockage, apply a test patch of your topcoat color. Let it dry, then check for any discoloration or bleed-through.
Long-term stain resistance and failure modes
Stain blockage can degrade over time. This is more likely with oil-based primers due to their slower drying time, which can trap moisture and allow stains to migrate.
Moisture-laden stains (water-tannin combos, nicotine residue) are the toughest to block long-term. They can re-emerge if the surface gets damp or if the topcoat fails. Ensure your substrate is dry and well-sealed before priming.
If stains reappear, it’s often due to inadequate surface prep (sanding, solvent wipe) or applying incompatible materials. Always follow manufacturer guidelines for surface prep and topcoat selection to prevent long-term stain breakthrough.

Surface Preparation and Application Methods
This intro outlines the prep and application workflow for bare wood, previously finished surfaces, and porous substrates so the primer can do its job. I focus on practical steps you’ll actually do on site: moisture checks, cleaning choices, sanding sequence, and how to create the right surface profile for adhesion.
Make moisture and dew-point checks before priming and follow product directions for recommended surface cleanliness and tooling. If you’re unsure about a specific substrate or repair method, refer to the product label or technical data sheet for restrictions and recommended application techniques.
Tools and materials checklist
Before you start any primer application, make sure to gather all the necessary tools and materials. This list will help you ensure you have everything you need to get the job done right.
- Primer: Check label for compatibility with your surface type (concrete, masonry, etc.) and desired finish. Ensure it’s within its usable lifespan.
- Brushes: Inspect bristle condition; replace if worn or bent. Choose the right size for your job: 2-3″ for edges, 9-12″ for large areas.
- Rollers: Check nap length (3/4″ to 1″ for primers) and roller cover condition; replace if damaged. Ensure it’s the right size for your surface.
- Spray equipment (if using): Inspect nozzle, filter, and pump. Test spray pattern before use. Check paint cup or tank capacity.
- Abrasives: Choose appropriate grit (24-36 for concrete) and check condition; replace if dull or worn. Ensure you have enough for the entire surface area.
- Tack cloths: Check for cleanliness and proper tackiness before use. Replace if dirty or ineffective.
- Respirator: Inspect seal and filter; replace if damaged or expired. Ensure it’s rated for the primer you’re using.
- Cleanup supplies: Gather soap, water, rags, and any specific cleaner recommended by your primer manufacturer.
Quick rule: Always check your tools and materials before starting. Skipping this can lead to poor coverage, wasted product, and rework.
Application techniques by primer type (brush, roll, spray)
Alright, listen up. You’ve prepped your surface like I told you earlier, now let’s get that primer on right.
Brush-on primers, they’re simple but need some elbow grease. Dip about a third of the bristle length into the primer, then off-load excess onto the lip of the can. Work in small sections, about 3′ x 3′, and use long, steady strokes to avoid lap marks.
Roll-on primers, these are quick but need a bit more care. Use a 9″ roller cover with 3/8″ or 1/2″ nap for smooth surfaces, or a 6″ cover with 3/4″ nap for textured ones. Pour some primer into a paint tray, then roll it out evenly onto the surface in ‘M’ or ‘W’ patterns to avoid lap marks.
Spray-on primers, now we’re talking! But listen, you need a steady hand and good ventilation. Use a spray tip size that matches your primer’s recommended range (usually 1.8-2.0mm). Hold the gun about 10-12″ from the surface and use smooth, side-to-side sweeps to avoid drips.
Common application mistakes and how to avoid them
Even with the right tools and materials, mistakes can happen. Here are some common ones to steer clear of.
- Skipping surface preparation: Don’t rush this step. A clean, dry, and primed surface is crucial for a good bond. Refer back to our section on Surface Preparation if needed.
- Overthinning primer: Adding too much water or thinning agent weakens the primer. Stick to the manufacturer’s recommended ratio to maintain its effectiveness.
- Applying in wrong temperatures: Most primers work best between 50°F and 90°F (10°C and 32°C). Check the product label for specific temperature guidelines before application.
- Using incorrect application method: Different primers require different application methods. Brush, roll, or spray as recommended by the manufacturer to ensure even coverage.
Double-check these points before you start. A little extra time spent planning can save a lot of trouble later on.
Durability and Long-Term Performance
Here I compare how shellac, oil-based, and waterborne primers hold up over time for adhesion, flexibility, and resistance to traffic, moisture, and temperature cycling. The aim is to help you choose a primer whose long-term behavior matches the use—high-traffic floors, damp basements, or exterior exposures require different expectations.
Key factors I cover include bond longevity to common substrates, crack-bridging capacity, and vulnerability to moisture cycling or efflorescence; check manufacturer guidance for substrate-specific performance. If long-term durability is critical, verify adhesion testing data and follow recommended substrate prep and moisture limits on the technical sheet.
Adhesion and Topcoat Compatibility
Each primer has its own adhesion strengths to concrete. Shellac, for instance, bonds well to cured surfaces but needs a clean, dry substrate. Oil-based primers like Bin or Varathane also adhere well, given proper prep.
Moisture checks are crucial. If your slab’s relative humidity (RH) is above 15%, wait until it drops before priming. High moisture can cause adhesion failure over time.
When choosing a topcoat, consider compatibility and durability. Waterborne primers like Zinsser B-I-N work well under latex paints or stains. Oil-based primers pair best with oil-based topcoats. Shellac is versatile but may tarnish under certain conditions.
Aging, Yellowing, and Maintenance
Over time, primers age differently. Oil-based primers can yellow or darken, especially in direct sunlight. Shellac may also discolor with age but typically holds color better than oils.
Waterborne primers usually maintain their appearance longest but aren’t immune to aging effects. Expect periodic maintenance, like touch-ups or refinishing every 5-10 years, depending on traffic and environment.
Maintenance intervals vary by primer type and use. In high-traffic areas like garages or workshops, expect shorter intervals. Basements with low light and humidity may last longer before needing maintenance.
Environmental Impact and Cleanup
This intro compares environmental considerations for shellac, oil-based, and waterborne primers and lays out cleanup best practices so you minimize health and disposal risks. I focus on VOC-related indoor air concerns, proper solvent or water cleanup, and when materials should be handled as hazardous waste under local rules.
Follow local disposal guidelines and the product label for container and rag disposal, and pick cleanup solvents or cleaners the manufacturer recommends. When unsure about disposal classifications or recycling options, check local hazardous-waste rules or the product safety data sheet for exact handling instructions.
Relative environmental footprint and VOC concerns
Solvent-based primers like shellac and oil have higher volatile organic compounds (VOCs) compared to waterborne ones. Check product labels or technical data sheets for exact VOC content.
Shellac: Typically around 450-600 g/L, exceeds EPA’s 350 g/L threshold for high-VOC products.
Oil-based: Around 250-450 g/L, may still exceed local regulations. Waterborne primers are typically below 100 g/L.
Lower VOCs mean better indoor air quality and reduced environmental impact during application.
Cleanup, disposal, and local regulations
Proper cleanup minimizes waste and reduces exposure. Follow these steps:
Brushes/Rollers: Clean with appropriate solvent (mineral spirits for oil/shellac, water for waterborne) immediately after use.
Rags: Dispose in sealed plastic bags as hazardous waste. Check local regulations for specifics.
Leftover product: Keep containers tightly sealed and store upright until disposal. Check local hazardous waste rules; some areas require special collection events or facilities.
Always follow EPA guidelines for handling and disposing of hazardous materials. Contact your local waste management department for specific rules.
Cost, Availability, and Brand Considerations
This section helps you compare real-world cost and availability without invented prices, showing how to calculate true project cost by checking coverage, container sizes, and expected yield. I point out typical purchase venues—big-box, specialty stores, online, or contractor suppliers—and what to check for stock or seasonal shortages.
Use a checklist to verify the product is specified for your substrate, stain-blocking needs, and odor constraints, and review packaging sizes and return policies before buying. If you need precise coverage or cost-per-area numbers, confirm the coverage rates and recommended film thickness on the manufacturer’s technical data sheet.
How to compare product value
Don’t be fooled by the headline price. You need to dig deeper to find the true value of a primer.
Coverage per container: Check how many square feet each gallon or quart covers. Some primers may seem cheaper but require more coats, costing you more in the long run.
Number of coats required: Consider how many coats you’ll need to apply for adequate protection. Some primers offer better coverage with fewer coats.
Technical performance: Look at the primer’s specs – stain-blocking ability, dry time, and odor levels. These factors can save you time and hassle in the long run.
Where to find reliable products and reviews
Finding trustworthy info on primers is key to making a good choice. Here’s where to look:
Manufacturer technical data sheets: These provide detailed specs about the primer, including intended use, coverage rates, and application instructions.
Independent lab tests: Websites like Consumer Reports or independent testing labs offer unbiased reviews. They can help you compare primers side by side.
Contractor feedback: Talk to local contractors or check online forums where they share their experiences. They often have firsthand knowledge of what works best in your area.
Conclusion
Choosing the right primer is about safety, durability, and avoiding costly mistakes. If you pick the wrong one, you’ll pay in odor leakage, poor stain blocking, or lifted finishes. Do it right, and you get a smooth, lasting result that looks good and stays that way.
First, assess the job in practical terms: identify the stain or odor you’re blocking, confirm the surface type, check the room ventilation, and read the primer’s data for dry time and recoat windows. Then confirm your plan in one go: prep the surface clean and dry, choose the primer that addresses the stain and odor without overdoing odor control, apply in the recommended thin coats, ventilate well, wait the stated dry times, and then proceed with the top coat. Finally, test a small area, maintain PPE, and clean up per the product guidelines to avoid smell buildup or residue.
Two common mistakes to avoid are skipping surface prep and overloading the primer, which can trap moisture or blister footage later. Don’t skip the test patch, don’t ignore wind or ventilation, and don’t skip the recoat timing. Safety rules to follow are simple: use gloves and a respirator or mask in poorly ventilated spaces, keep kids and pets out during setup and drying, and dispose of rags and excess correctly to prevent spontaneous combustion. State the odor and VOC expectations up front and verify you can meet them with proper ventilation and containment.
If you’re unsure about unusual stains, heavy odors, or large-scale projects, call a pro before you invest time and materials. When in doubt, err on the side of testing a small area and using the safer primer for your surface. Stay focused, follow the data, and you’ll finish strong with a durable, clean result.
FAQ
Which primer type has the strongest odor right after you open the can?
Shellac tends to have a stronger odor than most waterborne primers. Oil-based primers also carry noticeable fumes, while waterborne options usually smell milder. Check the product label for ventilation and open-time guidance.
How long should I expect each primer type to dry before handling or recoating?
Dry times vary by product and conditions, so follow the label for recoat windows. Shellac dries quickly in calm, dry conditions but can stay tacky in high humidity. Oil and waterborne primers have different timelines; look up the manufacturer instructions for your exact product.
Are shellac, oil, and waterborne primers any good at blocking stains?
All three can block stains, but effectiveness depends on the stain and surface. Shellac is often noted for strong stain blocking, especially water stains, but test on a small area first. If in doubt, check the product datasheet for stain-blocking claims and compatible substrates.
What are practical ways to apply each primer type on common DIY substrates?
Shellac is thinned and brushed or rolled in thin coats; use on difficult sealers and resinous surfaces with proper ventilation. Oil-based primers are brushed or rolled; they cover well but dry slowly and need solvent cleanup. Waterborne primers are easy to clean and apply with brushes or rollers; they work on most interior substrates but may raise grain on some woods. Always follow label instructions and local rules for ventilation, drying, and cleanup.