
Introduction
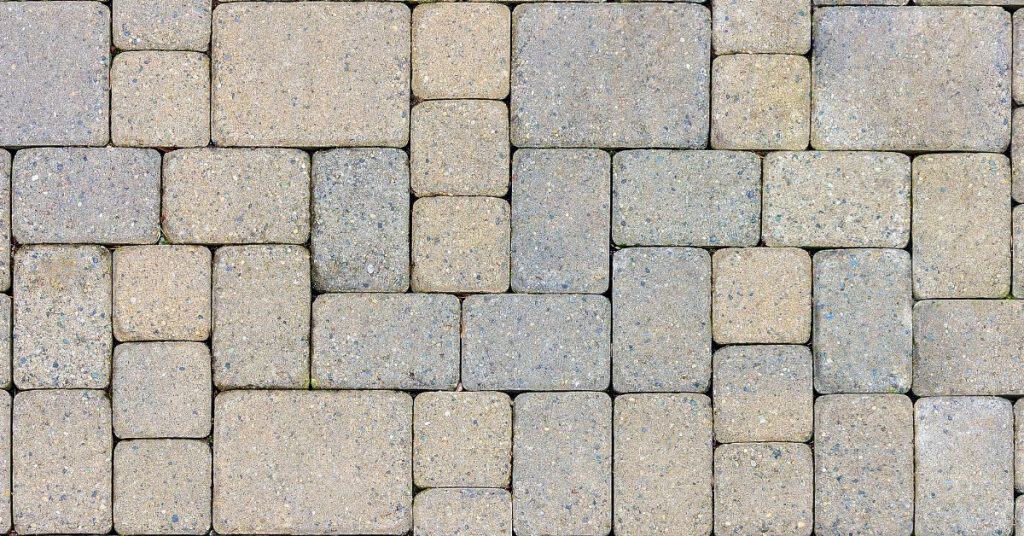
Removable concrete pavers with built-in lifting slots are modular paving units cast with recessed grips to lift and reposition.
This is a practical, hands-on overview you can follow in a DIY setup for long-term flexibility and easy maintenance. When selecting materials and planning, check product labels and manufacturer instructions for slot design, heel protection, and slip resistance, and consider any local rules or standards that apply to your project.
Key takeaways
- Plan lifting-slot locations to maintain ADA path width and edge stability.
- Use heel-resistant slot design and labeling per manufacturer guidance for safe removal.
- Choose pavers with anti-slip surfaces and appropriate edge finishing for wet conditions.
- Inspect molds for integrated lifting slots to avoid slot damage during demolding.
- Follow safety procedures during installation and removal to prevent trips and pinches.
- Consider bicycle safety by clarifying pedestrian-only zones and load limits at sites.
Table of Contents
- Introduction
- Key takeaways
- Project Planning and Design Considerations
- Material Specs and Standards Explained
- Tools and Materials Checklist
- Designing and Fabricating Molds with Integrated Lifting Slots
- Step-by-Step Casting Process
- Curing, Finishing, and Quality Checks
- Installation, Removal, and Safety Procedures
- Maintenance, Troubleshooting, Costs, and Environmental Considerations
- Conclusion
- FAQ
Project Planning and Design Considerations
Start by defining the paver footprint, thickness, and built-in lifting slot geometry based on how you expect loads to travel through the surface. Consider how the slots will affect surface quality and long-term removal access. Check local requirements and project labels to confirm what the design must achieve before any forms or concrete go down.
Assess the site and subgrade early, noting drainage, frost risk, base preparation, and edge restraints. Map the installation sequence so you can coordinate forms, lifts, and future maintenance. Verify that your plan aligns with regulatory expectations for load capacity, slip resistance, and accessibility codes, and keep a record of approvals as you proceed.
Site assessment and load requirements
First, assess your site’s subgrade. It needs to support the pavers’ weight and any loads they’ll bear. Check for compaction, drainage, and frost risk.
Loads: Estimate pedestrian and vehicular loads. For pedestrians, assume 200 lbs per paver. For vehicles, consult local codes or engineers. Size your pavers to handle these loads safely.
Reinforcement might be needed if loads are high. Consult a structural engineer for advice.
Paver layout and lifting slot placement
Plan your paver layout first. Consider expansion joints to control cracking. Slots should be placed where they won’t interfere with this.
Slot placement: Locate slots near the paver’s center of gravity for even load distribution during lifting. Avoid edges to maintain structural integrity.
For minimal visual impact, stagger slots in adjacent pavers like bricklaying. This also helps distribute loads evenly across multiple pavers.
Permits and standards to consult
Before you start, check local building codes and accessibility standards. These can vary by location.
Accessibility: ADA guidelines require pavers to be slip-resistant and have a minimum 4-inch thickness. Check for specific requirements in your area.
Heel resistance: Some areas require pavers to withstand a certain load applied at the edge without breaking or displacing more than 1/8 inch. Confirm exact limits with local authorities.
Always get necessary permits before starting any concrete work.
Material Specs and Standards Explained
Identify core material options and their performance properties, including cement content, aggregate size, water-cement ratio, and any reinforcement if used with lifting slots. Understand how inserts influence mix behavior and cover around the slots. Review manufacturer data sheets for compatibility with your chosen design.
Document the applicable standards and tests that affect your mix and finishes, such as interlocking paving unit criteria, slip resistance targets, and curing requirements. Explain how these standards drive mix design, quality checks, and ongoing documentation for compliance. Include how to assess lift-slot compatibility within the mix, including embedment depth and spacing considerations and any needed chamfers.
Concrete mix and additives
The concrete mix is the backbone of your pavers. Here’s what you need to know:
Workability: You want a mix that’s easy to pour and vibrate, but not so wet it flows out of place.
Strength class: For removable pavers, go for a medium-strength mix (around 3000 psi). Too strong, and lifting gets tough; too weak, and they crack under load.
Consult your supplier or engineer for exact mix proportions. They’ll consider factors like cement content, aggregate size, and water-cement ratio to give you the right balance of strength and workability.
Reinforcement, lifting inserts, and hardware
Reinforcement makes your pavers tough. Here’s how to choose the right stuff:
Reinforcement types: Fibers are cheap but weak. Welded wire mesh is stronger and more durable.
Lifting inserts: For repeated lifting, use corrosion-resistant inserts. Galvanized or stainless steel works best.
Embed hardware like lifting eyes or loops at the factory. Make sure they’re compatible with your mix, providing enough coverage and embedment depth. Space them evenly for balanced lifting.
Surface and slip-resistance standards
Slip resistance keeps folks safe on your pavers. Here’s how to meet standards:
Tests/Classifications: Look for DCOF (Dynamic Coefficient of Friction) or ASTM-like tests. They measure slip resistance under wet conditions.
Surface finish selection: Broom-finished surfaces are standard but can be slippery when wet. Exposed aggregate provides better grip but may be harder to clean.
Choose a surface treatment that boosts slip resistance, like a textured sealant or anti-slip coating. Document all tests and treatments for compliance.
Tools and Materials Checklist
Define essential molds and inserts, noting slot size, quantity, and orientation, plus gaskets or spacers to keep consistent depth. Ensure repeatable tolerances so every paver can be lifted without surprises. Prepare a plan for mold coating or release to protect surfaces.
List tools and equipment you’ll rely on, such as mixing gear, trowels, release agents, mallets, levels, and alignment aids. Include safety gear and a simple workspace plan that keeps dust and spills contained. Have curing and sealing supplies on hand for the finished pavers.
Mold and Formwork Components
Before you start casting, ensure you have the right molds and formwork components to create accurate, repeatable pavers.
- Removable paver molds: Check dimensions match your design. Ensure they’re in good condition with no cracks or warping.
- Lifting-slot inserts: Verify size (e.g., 1/2″ x 3″) and quantity needed. Position them consistently across all molds.
- Gaskets/spacers: Use to maintain uniform slot depth. Check they’re the right thickness for your desired slot depth.
- Release agent: Choose a penetrative release agent suitable for concrete and your mold material (e.g., silicone for rubber molds).
- Mold coating: If using, ensure it’s compatible with your mold material and release agent. Follow manufacturer’s instructions.
- Trowels: Include various sizes (e.g., 4″, 6″, 12″) for finishing and leveling concrete.
- Levels and straightedges: Check accuracy before use. Ensure they’re long enough to span your molds.
- Vibration or tamping tools: Choose one suitable for your mold size and concrete mix. Ensure it’s in good working order.
Quick rule: Skipping any of these can lead to inconsistent slots, damaged molds, or pavers that don’t release properly.
Lifting-Slot Inserts and Attachment Hardware
Select the right lifting-slot inserts and hardware to ensure your pavers can be removed easily and safely.
- Insert material: Choose corrosion-resistant materials like stainless steel or plastic. Verify they’re compatible with your concrete mix.
- Insert size: Ensure inserts fit snugly in your molds without leaving gaps that could allow concrete to leak.
- Insert quantity: Calculate based on paver size and weight. Too few can cause pavers to break when lifted.
- Insert placement: Position them consistently across all molds for even lifting force distribution.
- Hardware type: Choose between removable inserts (e.g., bolts) or cast-in inserts (e.g., anchor pins).
- Hardware corrosion resistance: Ensure hardware is resistant to the chemicals in your concrete mix and any environmental factors.
- Mechanical anchoring: Verify inserts have secure mechanical anchors (e.g., threads, retaining clips) to prevent them from falling out during casting.
Quick rule: Inadequate hardware can result in pavers that won’t lift properly or break under stress.
Casting, Finishing, and Safety Equipment
Gather the right tools and safety gear to cast, finish, and handle pavers efficiently and safely.
- Mixing bucket and paddle: Check size matches your batch needs. Ensure the paddle is in good condition with no missing or broken blades.
- Concrete vibrator/tamper: Choose one suitable for your mold size and concrete mix. Ensure it’s in good working order.
- Protractor/square: Verify accuracy before use. Use to ensure slot inserts are positioned correctly.
- Rubber mallet: Check condition. Use to gently tap molds to remove air bubbles and settle concrete.
- Safety goggles: Ensure they provide adequate eye protection from debris and chemicals.
- Dust mask/respirator: Choose one suitable for concrete dust. Ensure it fits properly and is in good condition.
- Hearing protection: Use when operating power tools like mixers or vibrators to protect your hearing.
- Knee pads: Protect your knees from injury during prolonged periods of kneeling.
Quick rule: Missing safety gear can lead to injuries, while inadequate casting tools can result in poor-quality pavers.
Designing and Fabricating Molds with Integrated Lifting Slots
Choose mold materials and surface finishes that minimize sticking and wear, and compare removable cores against insert-based systems for repeatability. Consider how you will manage core removal without marring the surface.
Detail integrated slot designs and how they affect strength, extraction ease, and compatibility with common lifting hardware. Outline tolerances, alignment, and shrinkage allowances to ensure repeatable slots across pours. Include practical steps for core/insert setup, venting, and cleaning between cycles.
Mold design options and pros/cons
When designing molds for removable concrete pavers, you’ve got two main choices: solid molds or those with removable cores. Let’s weigh the pros and cons of each.
Solid Molds: These are simple to make but lack flexibility. Once cast, you can’t adjust slot positions without making a new mold. They’re great for small batches where consistency isn’t critical.
Removable Core Molds: With these, you can create modular inserts or use removable cores to form lifting slots. This allows for more flexibility and easier adjustments between casts. They’re ideal for larger production runs where slot accuracy is crucial.
Modular inserts can be swapped out, allowing for different slot patterns or sizes. Removable cores let you adjust slot positions within the same mold. Both options offer better durability and slot accuracy than solid molds but require more initial setup time.
Slot template, alignment, and tolerance control
Before pouring, ensure your slots are consistent. Use this checklist to maintain slot dimensions and placement across casts.
- Check mold dimensions: Ensure the mold’s overall size is correct before starting.
- Use a slot template: Create a template for your lifting slots to ensure they’re consistently placed.
- Align template accurately: Use alignment features like pins or spacers to position the template precisely.
- Verify slot size: Measure slot dimensions against your design specs.
- Check slot spacing: Ensure slots are evenly spaced across the paver.
- Inspect core/insert fit: Check that cores or inserts fit snugly within the mold to prevent leaks.
- Measure shrinkage allowance: Account for concrete shrinkage by adding a small gap between the slot template and the mold’s edge.
- Test pours with dry concrete: Before mixing, test your setup using dry concrete to ensure everything fits as expected.
- Inspect after each pour: Check finished pavers for any signs of misalignment or inconsistent slots.
Quick rule: Regular inspection and measurement are key to maintaining slot consistency.
Prototyping and test casts
Before committing to full production, create prototype pavers. This helps validate your design, lifting performance, and surface finish.
Start small: Make a few test pavers using the same materials and methods you plan for full production.
Test lift slots: Use your chosen lifting hardware to ensure it fits and functions as expected. Check slot dimensions and alignment at this stage too.
Inspect surface finish: Examine the paver’s surface for any signs of imperfections or inconsistencies. Make adjustments to your mold, release agents, or pouring technique if necessary.
Iterate and adjust: Based on your findings, make changes to your design or process before moving into full production.
Step-by-Step Casting Process
Lay out a clear workflow from mold prep to demolding, focusing on consistent slot integration and reusable mold paths. Plan for alignment checks and edge protection to achieve uniform pavers.
Cover concrete mix decisions and the exact method for embedding lifting-slot hardware or inserts without shifting. Address slot size, spacing, and depth per paver thickness, plus guides that keep slots flush and accessible for lifting tools. Include demolding, curing, and surface checks as part of the routine.
Step-by-Step Process
Follow this clear, numbered sequence to cast high-quality removable concrete pavers with built-in lifting slots. Safety checks, main work, and cleanup are all covered.
- Preparation: Gather tools, materials, and safety gear. Check mold design and slot alignment.
- Mold Setup: Assemble molds, apply release agents, protect edges, and insert slot templates.
- Concrete Mixing: Prepare concrete mix according to specified target slump, cement-to-aggregate ratio, water content, and admixtures.
- Pouring and Consolidation: Pour concrete into molds, vibrate or consolidate to remove air pockets. Ensure slots remain flush.
- Initial Finishing: Level the surface, smooth edges, and protect from early moisture loss. Allow initial set before demolding.
- Demolding: Remove molds carefully after specified time, ensuring slot inserts are intact.
- Curing: Place pavers in a controlled curing environment with proper moisture management.
- Quality Checks: Inspect slots, surface finish, edges, and alignment. Document any defects for corrective action.
Preparing molds and applying release agents
Clean and seal your molds to prevent concrete from sticking, ensuring easy demolding without damaging inserts or slots.
Start by cleaning molds thoroughly. Remove any dust, debris, or old release agent using a wire brush or compressed air.
Next, seal the molds with a suitable mold sealer to create a barrier between the concrete and the mold surface. This helps achieve a smooth, uniform paver surface.
Finally, apply a release agent liberally across the entire mold interior using a spray or brush-on application. Ensure edges are well-covered to prevent concrete from sticking during curing.
Placing reinforcement and lifting inserts
Position reinforcement and lifting inserts correctly for proper bonding and easy lifting of the finished pavers.
First, place reinforcement (if any) in the mold according to your design. Ensure it’s centered and won’t interfere with slot alignment or lifting hardware.
Next, insert lifting inserts or attach hardware securely. Align them precisely with the slot templates for flush slots that are accessible for lifting tools.
If using temporary guides, ensure they’re securely attached to maintain slot depth and prevent shifting during concrete placement. Check insert alignment before pouring.
Pouring, consolidating, and initial finishing
Mix, place, consolidate, and finish your concrete to achieve desired density and surface texture for high-quality pavers.
Begin by mixing concrete according to specified ratios. Aim for the target slump to ensure proper flow into mold details like slots.
Next, pour concrete into molds, starting from one corner and working across in a systematic pattern. Ensure slots remain flush as you pour.
Use a vibrator or consolidation tool to remove air pockets and ensure complete fill of the mold, especially around reinforcement and lifting inserts. Level the surface with a screed, then smooth edges with a trowel or float.
Protect pavers from early moisture loss by covering them with plastic sheeting or dampening the surface lightly. Allow initial set before demolding to prevent damage.
Curing, Finishing, and Quality Checks
Outline curing methods and durations that fit your climate, including moisture cure and sealed options. Note how long to wait before handling pavers with slots and stripping forms. Emphasize maintaining proper humidity to protect slot integrity.
Describe finishing options around slots, such as edge treatments and surface texture, while maintaining slip resistance and slot accessibility. Include checks for slot integrity, dimensional accuracy, and debris or residue that could affect safety or function. Add a simple QA checklist to document post-cure results.
Curing methods and timing
Proper curing is crucial for your concrete pavers to gain strength and prevent cracking. Here’s what you need to know:
Moisture cure vs. sealed curing: Moisture curing keeps the concrete damp, promoting hydration. Sealed curing prevents moisture loss but can trap heat, so monitor temperatures.
Curing duration: Follow your mix supplier’s or engineer’s recommendations. Typically, it’s 3-7 days for initial cure and up to 28 days for full strength. Keep pavers moist during this time.
Temperature and humidity targets: Ideal curing conditions are between 50°F (10°C) and 90°F (32°C), with relative humidity above 70%.
Surface finishing and anti-slip treatments
Finishing your pavers is about aesthetics, safety, and maintenance. Here’s how to balance these:
Edge treatments: Rounded or beveled edges prevent trips and make handling easier.
Surface texture: Broom-finished surfaces provide grip. Trowel-finished or stamped surfaces can be slippery, so consider adding a textured sealer.
Slip resistance: Use a non-slip additive in your sealer to enhance traction, especially for outdoor or wet areas.
Dimensional checks and load/lift testing
Before installing, check your pavers’ dimensions and test their lifting slots:
Slot dimensions: Measure slot width, depth, and spacing to ensure they match your design.
Alignment and deformation: Check that slots align with overall panel geometry. Look for any warping or deformation during curing.
Load/lift testing: Gently lift each paver using the slots to confirm their strength. If unsure, consult a structural engineer before installation.
Installation, Removal, and Safety Procedures
Describe bed preparation and base conditions that promote stable, removable units, including drainage and slope considerations. Define tolerances so the base supports repeated lifts without shifting edges or joints.
Explain how to set pavers with a repeatable grid, using spacers or shims for levelness while avoiding mortar that would hinder removal. Cover lifting protocols, compatible hardware, and PPE requirements, plus a step-by-step removal sequence and how to reinsert pavers without damaging slots.
Bedding, edge support, and setting patterns
Prepare a uniform base for your removable pavers. Use a compacted granular material with proper drainage and slope. Ensure the subgrade is stable and has minimal moisture content to prevent frost heave.
Edge support is crucial. Use continuous edging or restraints to keep pavers in place. This prevents edge movement and maintains joint integrity.
Establish a consistent bedding thickness using dry-pack sand or low-friction bedding. This allows for liftable retrieval while keeping alignment. Align paver slots with seams to facilitate removal and reinstallation.
Avoid voids under removable units by ensuring proper compaction of the base material. Maintain joint integrity by using appropriate spacing between pavers during installation.
Safe lifting techniques and hardware use
Specify lifting point locations on your removable pavers. These should be evenly distributed to balance the load.
Use compatible lifting hardware like hooks, clamps, or suction lifters. Always check their condition before use. Never exceed the maximum load per paver, as indicated by its design.
Use tag lines or spotters for heavy pavers to guide and stabilize them during lifting. Ensure you have a clear path for removal with no obstructions overhead or adjacent work zones.
Inspect lifting slots before each lift. Check for wear, damage, or debris that could cause instability or injury. Always use appropriate personal protective equipment (PPE) when handling heavy pavers.
Site safety and risk mitigation
Implement traffic management to control access around the work area. This helps prevent accidents from vehicles or pedestrians.
Ensure all workers wear appropriate PPE, including hard hats, safety glasses, and high-visibility vests. Establish clear exclusion zones where heavy lifting is taking place.
Conduct regular inspection routines to identify any potential hazards. Check for loose or damaged pavers, unstable edges, or other signs of wear that could cause accidents during installation or removal.
Consider environmental factors like wind and moisture. High winds can make lifting difficult and dangerous; wet conditions can affect the stability of pavers and their bedding material.
Maintenance, Troubleshooting, Costs, and Environmental Considerations
Provide a practical maintenance routine for cleaning, sealing, and inspecting slot integrity. Establish a cadence for checks that catch wear or movement early. Include notes on adjusting or replacing worn components during service life.
Discuss environmental considerations and durability factors, including material choices, permeable options, and the impact of maintenance on lifecycle costs. Offer strategies to minimize ecological footprint while preserving functionality and long-term performance of the built-in lifting slots.
Routine inspection, repairs, and extending service life
Regularly inspecting your concrete pavers ensures their longevity and prevents minor issues from turning into major problems. Here’s a simple checklist to follow.
- Every 6 months: Check for surface spalling, color fade, and erosion around edges. These can be signs of water damage or improper curing.
- Annually: Inspect slot integrity to ensure lifting inserts are secure and functional. Damaged slots may cause pavers to shift or break during removal.
- Every other year: Check edge restraints for stability and proper alignment. Loose or misaligned edges can lead to paver movement and uneven surfaces.
- After heavy rain or snowmelt: Assess drainage performance. Standing water can cause pavers to shift, crack, or become damaged over time.
Quick rule: Address any issues promptly to prevent them from worsening and causing more extensive damage.
Common casting and installation mistakes
Avoid these common pitfalls during the casting and installation process to ensure your concrete pavers last and function as intended.
- Misaligned slots: Incorrectly placed lifting inserts can lead to uneven paver removal or damage. Always follow the mold’s guidelines for insert placement.
- Improper curing: Pavers cured too quickly may crack or break during handling or installation. Follow recommended curing methods and timelines.
- Inadequate reinforcement: Reinforcement provides structural support to pavers, preventing cracking under load. Ensure proper placement of reinforcement during the casting process.
Regularly review your work throughout the process to catch and correct any mistakes early.
Cost comparison and environmental impact
Understanding cost drivers and environmental implications helps you make informed decisions when selecting materials, inserts, and maintenance strategies for your concrete pavers.
Material costs: Concrete mix, aggregates, and sealers vary in price. Opting for recycled aggregates can reduce costs and minimize environmental impact.
Inserts and labor: Lifting-slot inserts add to the initial cost but enable paver removal and reuse. Proper installation reduces long-term maintenance needs and extends service life, offsetting additional upfront costs.
Environmental considerations: Concrete pavers have a significant embodied carbon footprint due to cement production. Using low-carbon cement alternatives or extending service life through proper maintenance can help mitigate this impact. Additionally, selecting permeable pavers and using low-VOC sealers can minimize heat island effects and improve stormwater management.
Conclusion
Safe and durable results come from solid planning, proper molds, and careful curing. When you do it right, the pavers stay flat, the lifting slots work, and the surface looks good for years to come.
Checklist: review the design and slot placement, confirm mold build and release margins, gather the exact materials and tools, assemble the mold, mix and pour in steady layers, keep the form level and aligned as it sets, maintain proper curing conditions, test the lift points before final demolding, strip the molds carefully, install with correct alignment, and plan for maintenance checks after installation.
Two or three common mistakes to avoid are skipping proper curing, rushing demolding, and ignoring weather or moisture conditions. Wear eye and hand protection, keep the work area clear, and never force a damaged slot or loose edge. Stay mindful of temperature, moisture, and time; these control strength and finish.
If you run into persistent cracking, poor mold performance, or unsure load paths, call in a professional rather than pushing on. Otherwise, follow the plan, test small patches first, and proceed with care. You’ve got this.
FAQ
Are these removable concrete pavers ADA compliant?
Check the paver label and manufacturer instructions for any slip and slope guidance. ADA compliance depends on the finished surface, edge conditions, and transitions; verify limits with the product datasheet and local rules before installing.
What heel-resistant slot specifications should I aim for?
Use slots that are built into the design with reinforced edges as indicated by the product specs. Always confirm slot dimensions and edge details on the label or instructions, and follow the manufacturer’s guidance for load and wear limits.
Do these pavers have anti-slip properties?
Look for a slip-resistance rating or texture note on the label or datasheet. If in doubt, test the surface when wet and avoid highly polished finishes; sealers or surface treatments may affect slip resistance—check manufacturer guidance.
What about water drainage and bicycle safety?
Ensure the slot pattern and gaps promote drainage without creating trip hazards. For bicycle use, keep wheel paths clear and avoid narrow slots near turning points; consult product instructions for acceptable gap sizes and installation tips.