
Introduction
A concrete unit weight test measures how heavy a batch of fresh or hardened concrete is per unit volume to spot mixes that are too wet, too porous, or otherwise off before you place it. This simple check helps you decide whether to accept, adjust, or reject a load on-site; check the mix design and product label or manufacturer instructions for the target range to compare against. I’m a foreman — think hands-on sampling, a scale or container, and a practical eye rather than textbook theory.
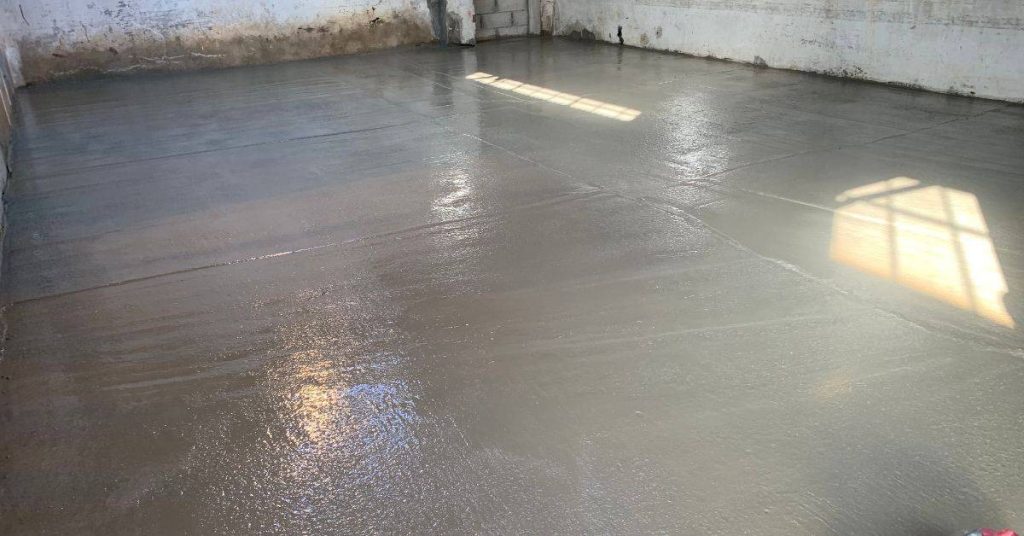
Cast-in-place concrete is poured and cured where it stays, so batch consistency matters for strength and how the concrete works with rebar and forms. Also consider your environment — wind, rain, temperature, and whether you’re building for high-wind or seismic areas — and check local rules and manufacturer guidance for materials and placement methods. Keep the test simple and repeatable so you can catch bad batches before they cost time or safety on the job.
Key takeaways
- Understand that cast-in-place concrete relies on in-situ unit weight to verify consistency.
- Test timing should align with crew schedule, weather, and formwork stage changes.
- If results drift, inspect slump, aggregates, moisture, and potential rebar interference.
- Plan for cast-in-place procedures where environmental pressures like storms or quakes affect curing.
- Coordinate concrete and rebar work early to avoid conflicts during placement.
- Include safety checks and PPE, verify equipment calibration before each test.
Table of Contents
- Introduction
- Key takeaways
- What Is the Concrete Unit Weight Test?
- Why Unit Weight Testing Matters: Risks, Benefits, and Cost Avoidance
- When to Test: Routine Schedule and Special Triggers
- Step-by-Step Unit Weight Test Procedure (Field-Friendly)
- Interpreting Results and Acceptance Actions
- Prevention Strategies and Quality Controls to Avoid Bad Batches
- Common Mistakes, Troubleshooting, and Calibration
- Safety, Cost Considerations, and Planning for Regular Testing
- Conclusion
- FAQ
What Is the Concrete Unit Weight Test?
The unit weight (density) test measures the mass per unit volume of fresh concrete and is used to check whether the batch matches expected mix proportions and consistency. It’s reported in common engineering units; check the project spec or product data sheet for the unit your job uses.
On site the test is done by sampling fresh concrete, placing and compacting it in a calibrated mold, and comparing mass to known mold volume to calculate unit weight per ASTM-style procedures. Unlike a slump test that shows workability, the unit weight test detects bulk density issues—too light or too heavy—related to entrained air, water content, or aggregate packing, so it complements but does not replace strength or air-content tests.
Definition and basic principles
The concrete unit weight test measures the density of fresh concrete. It’s like finding out how heavy a certain volume of concrete is.
Unit weight matters because it helps confirm if your mix proportions are right. Too light, and you might have too much air or water. Too heavy, and there could be issues with compaction.
Think of it this way: concrete is like a big, heavy sandwich. The unit weight test checks if all the ingredients (sand, gravel, cement) are well mixed and packed together.
How unit weight relates to mix proportions and quality
A proper concrete mix should have a consistent unit weight. Deviations can tell you if something’s gone wrong.
If the unit weight is too light, it might be because there’s excess air or water in your mix. This could happen due to improper batching or segregation during transport.
On the other hand, if it’s too heavy, it could indicate compaction issues. Maybe the concrete wasn’t mixed or placed properly, leaving large voids between aggregates.
Why Unit Weight Testing Matters: Risks, Benefits, and Cost Avoidance
Unit weight testing acts as a quality gate before placement by revealing mix proportion and consistency problems that other quick checks might miss. For specifics on acceptance values, consult the project specifications, mix design sheet, or supplier instructions.
Failure to catch an out-of-spec unit weight can create safety and structural risks during handling and long-term performance, and can trigger schedule delays and costly rework if pours must be removed or repaired. Regular testing reduces downstream surprises: it helps decide whether to accept, adjust, or reject a batch and supports cost avoidance by preventing wasted labor, forms, and curing time when a bad batch would otherwise be placed.
Typical problems the test uncovers
The unit weight test is your first line of defense against bad batches. It catches issues that could slip through other tests or visual inspections.
Overly wet mixes, for instance, might look fine but have a low unit weight. These can lead to handling hazards and structural risks during placement.
Segregation – where the mix separates into different components – also shows up in unit weight tests. This can weaken your concrete’s strength and durability.
Abnormal air content, too high or too low, affects unit weight. Too much air can lead to weak concrete, while too little can cause excessive bleeding, leading to surface defects.
Financial and schedule impacts of catching issues early
Catching problems early with unit weight testing saves you money. It’s cheaper to fix a bad batch before it goes into your forms than to remove and replace it later.
Think about the costs: additional curing, formwork, labor for removal and replacement, potential structural repairs. All these add up fast.
Early detection also keeps your project on schedule. It prevents work stoppages while you deal with rejected batches or rework. This is especially important for critical pours that could delay your entire project.
So, it’s not just about catching bad batches – it’s about preventing downstream issues and keeping your project on budget and on time.
When to Test: Routine Schedule and Special Triggers
Include unit weight testing in your quality plan at a cadence that reflects project risk—examples include first batch of a pour, periodic checks during long pours, and shift-start verifications; confirm the required frequency with the contract documents or QC plan. The appropriate schedule ties to critical milestones and weather windows that affect concrete behavior.
Trigger immediate tests whenever you see suspicious batches, a new supplier, a change in mix design, delivery or pump problems, or unexpected slump/air readings. Assign who runs tests, what calibrated equipment to use, and how results are reported back to the plant, superintendent, and engineer so teams can act quickly when readings fall outside the agreed tolerance.
Establishing a routine testing plan
To ensure consistent quality, set up a regular unit weight testing schedule. This should align with your project’s quality plan, weather conditions, and critical milestones.
Typically, test every shift or batch, depending on pour size. For smaller projects, once per typical pour might suffice.
Consult your contract documents and industry standards like ASTM C138 for guidance. Adjust as needed to fit your project’s specific needs.
Triggers for additional tests
Beyond routine checks, certain situations demand immediate unit weight testing:
New suppliers, especially for cement or aggregates, can introduce variations in material properties.
Unusual weather conditions, like extreme heat or cold, can affect concrete’s behavior. Batch ticket anomalies or visible inconsistencies in delivered concrete should also raise a red flag.
Other triggers include significant changes in mix design, issues with pump or delivery equipment, and noticeable deviations in slump or air content.
Step-by-Step Unit Weight Test Procedure (Field-Friendly)
Start with a sampling plan that captures variability: take representative samples from the batch or specified points in the load, and follow the project-required sample count. Gather test tools—a clean calibrated mold, accurate scale, water for surface finish if needed, thermometer, and PPE—and verify calibration before use.
Collect the fresh concrete, fill and compact the mold per the agreed procedure, determine mass and confirm mold volume to compute unit weight, and note temperatures and test times on the log. Finish by recording batch ID, time, ambient and concrete temperature, slump or consistency notes, and attach the calculation so the result is traceable to the pour and batch ticket.
Step-by-Step Process
Follow these practical steps to perform a unit weight test on your concrete batch, ensuring you catch any issues before placement.
- Preparation: Gather all tools and equipment. Ensure your scale or balance is calibrated. Put on safety gear.
- Sampling: Collect fresh concrete from the batch. Take samples from first and last pours if relevant, then composite to form a single test sample.
- Measurement: Measure mass and volume. Use a calibrated container or graduated cylinder for volume. Weigh using your scale or balance.
- Calculation: Compute unit weight. Apply temperature corrections if needed. Divide mass by volume to find unit weight (kN/m3 or lb/ft3).
- Final Checks: Document and verify results. Record batch ID, time, temperatures, moisture condition, slump/consistency notes. Check calculations for accuracy.
Equipment and materials checklist
Use this checklist before starting your unit weight test to ensure you have all necessary tools and consumables on-site.
- Container/Bucket: For collecting concrete samples. Ensure it’s clean and dry.
- Scale or Balance: To weigh the concrete sample. Calibrate before use.
- Graduated Cylinder: To measure the volume of the concrete sample.
- Water: For cleaning tools and equipment.
- Measuring Tape: To ensure accurate depth measurements for volume calculation.
- Thermometer or Temperature App: To record ambient and concrete temperatures.
- Safety Gear: Gloves, safety glasses, hard hat, etc. to protect you during sampling.
- Data Log Sheet: To record test data for each batch.
Quick rule: Always double-check your tools and equipment before starting a test to avoid errors and delays.
Sampling and test execution steps
Follow these steps to sample and test your concrete batch accurately, ensuring representative results.
First, collect a composite sample from the batch. This involves taking smaller samples from different parts of the batch, mixing them together, and then using this composite as your test sample. This method helps account for any variability within the batch.
Next, measure the mass of your test sample using a calibrated scale or balance. Then, determine the volume using a container of known volume or a graduated cylinder. Apply temperature corrections if necessary, and calculate the unit weight by dividing the mass by the volume.
Pro tip: Always ensure your tools are clean and dry before use to avoid contamination or inaccurate measurements.
Documentation and chain-of-custody
Accurate documentation is crucial for accepting test results and resolving any disputes. Follow these guidelines to keep clear, organized records.
Record the batch ID, date, time of testing, ambient temperature, concrete temperature, moisture condition, and slump/consistency notes on your data log sheet. Also, tag each sample clearly with this information for easy identification throughout the chain-of-custody.
Why it matters: Clear records help ensure that everyone involved in the project is working from the same information. In case of disputes, they provide a solid foundation for resolution.

Interpreting Results and Acceptance Actions
Compare the measured unit weight to the design mix target and the project’s acceptance tolerances stated in the specs or mix documentation; if you’re unsure, verify limits with the engineer or QC manual. Treat single readings in context—consider nearby tests, slump and air content, and temperature before making a call.
If a result falls outside tolerance, follow the project’s decision logic: retest, hold placement, or suspend the batch pending approval from QC or the engineer. Document every action, notify stakeholders, and implement corrective steps such as re-batching, adjusting water or admixtures, or isolating the pour; then re-test to confirm the fix before resuming work.
Comparing results to the mix design or spec
The first step after getting your unit weight test results is to compare them with what you expected. You’ll find this info in your mix design or project specifications.
Check these:
- Design unit weight from your mix design.
- Allowable tolerances for unit weight deviations, usually found in the project specs or ACI 211.1/AASHTO T 19.
If results fall within these ranges, you’re good to go. If not, keep reading.
Actions after a failing or borderline result
When your unit weight test results don’t meet expectations, don’t panic. Take these steps to get back on track:
First, hold the batch. Don’t let them pour until you’ve figured out what’s going on.
Next, retest. Sometimes, a single test can be off. Retesting ensures accuracy.
If results are still off, sample additional loads. This helps confirm if the issue is consistent across batches.
Then, coordinate with your supplier or QC manager. They can help pinpoint the problem and suggest corrective actions. It could be an adjustment in mix proportions, additional QA sampling, or even relocating pours to avoid temperature extremes.
Avoiding misinterpretation
Before you jump to conclusions about your unit weight test results, consider these common mistakes that can skew results:
- Temperature fluctuations. Extreme temperatures can affect concrete’s unit weight. Make sure your testing and curing conditions are consistent with the design mix.
- Improper sampling. Taking samples from the wrong part of the load or not mixing them properly can give you inaccurate results.
- Uncalibrated scales. If your testing equipment isn’t calibrated, your results won’t be reliable. Always check and calibrate before testing.
- Moisture content variations. Changes in moisture content can affect unit weight. Keep an eye on curing conditions to prevent this.
By avoiding these pitfalls, you’ll get accurate test results that help you make informed decisions about your concrete pours.
Prevention Strategies and Quality Controls to Avoid Bad Batches
Reduce nonconforming batches by enforcing plant-level QA: validate incoming material specs, keep clear batch records, and qualify suppliers so variability is minimized before mixing. On site, control aggregate storage and moisture, weigh materials consistently, and follow the verified mix design rather than guessing additions on the fly.
Supplement plant work with pre-pour spot checks—slump, air content, and temperature monitoring—and use batch tracking with unique IDs to trace any issue back to source. Train operators on standard mixing procedures, rotation counts, and water additions, and put clear stop criteria in place so crews halt placement when inputs don’t meet acceptance standards.
Plant-side controls and supplier verification
Before any mixing starts, set up a solid quality control system at the plant. This helps reduce variability and ensures you’re working with good materials.
Review batch tickets from suppliers to ensure they match your order. Check for correct materials, quantities, and moisture content.
Require supplier QC documentation. Ask for their test results, certifications, and any other quality control records. This helps you verify they’re using good practices too.
Conduct periodic plant audits. Visit suppliers to check their facilities, equipment, and processes. Seeing things firsthand builds trust and helps catch any issues early.
On-site checks and corrective actions
When a delivery arrives on site, don’t just start mixing. Do some quick checks to ensure you’re working with good concrete.
First, do a visual check. Look for any signs of contamination or segregation. If it looks off, dig deeper.
Take verification samples. Test the moisture content and slump of the concrete. Compare these to what you expected based on your mix design.
If something’s not right, take immediate corrective action. Stop any ongoing mixing or placement. Document the issue, and notify the plant immediately. They might need to send a new batch or adjust their process.
Common Mistakes, Troubleshooting, and Calibration
Frequent errors include poor sample handling, unclean or non‑calibrated molds and scales, and ignoring moisture or temperature effects that bias density readings. Avoid confusing unit weight with yield or strength; if you’re unclear on units or conversions, check the specification or test standard before interpreting results.
If readings vary, run immediate retests using a fresh sample and verify equipment calibration and mold volume. Log inconsistent results, investigate causes (mixing, water, air, compaction), and follow a documented troubleshooting path that includes recalibration, repeat testing, and escalation to QC or the supplier as needed.
Sampling and procedural mistakes
To get accurate unit weight readings, avoid these common sampling errors and procedural shortcuts.
- Inadequate mixing: Ensure samples are well-mixed to represent the entire batch. Inconsistent samples can skew results.
- Improper container handling: Use clean, dry containers for sampling. Contaminants or moisture from previous batches can affect readings.
- Taking too much time: Test samples promptly after taking them to prevent changes in moisture content and temperature.
- Not following standard procedures: Stick to established testing methods like ASTM C138. Deviations can lead to inaccurate results.
Consistency is key in sampling. Follow these guidelines to avoid misleading unit weight values.
Equipment calibration and maintenance
Regularly check and maintain your equipment for reliable unit weight readings.
- Scales: Calibrate scales annually using certified weights. Check tare accuracy before each test.
- Mold: Inspect molds regularly for cracks or warping that could affect volume accuracy. Replace if necessary.
- Thermometer/hygrometer: Calibrate these tools annually and check them before each test to account for temperature and humidity effects.
- Sampling tools: Keep trowels, scoops, and other sampling tools clean and in good condition. Replace worn-out tools.
- Optional tools: Consider renting a moisture meter (<$50/day) or a digital density gauge (<$100/day) for added accuracy.
Environmental and handling influences
Temperature, evaporation, and time delays can alter concrete unit weight readings. Mitigate these effects with careful handling and testing procedures.
Temperature: Test samples at the same temperature as the batch. Extreme temperatures can affect moisture content and density.
Evaporation: Minimize exposure to air and heat during sampling and testing to prevent water loss, which can increase unit weight readings.
Time delays: Test samples promptly after taking them. Delays allow for changes in temperature, moisture content, and even concrete setting, all of which can affect unit weight results.
Safety, Cost Considerations, and Planning for Regular Testing
Plan testing with safety in mind: use appropriate PPE, secure work zones around sampling and testing activities, and follow your site safety plan and applicable standards for handling samples and equipment. For any specific PPE or safety steps, consult the project safety documents or manufacturer guidance.
Budget for testing by accounting for labor, equipment upkeep, and the frequency needed to manage risk; consider the cost trade-off between more testing and the expense of prevented rework. Assign responsibilities, embed testing into the work schedule, and create simple reporting forms so results feed back into procurement and batching decisions quickly to avoid delays.
Safety precautions and PPE
Safety is paramount when handling fresh concrete. Always wear appropriate personal protective equipment (PPE). This includes:
Steel-toed boots to protect your feet from falling objects or heavy equipment. A hard hat to guard against head injuries. And safety glasses or goggles to shield your eyes from debris.
Additionally, use ear protection if noise levels are high, and gloves for handling materials. Always follow site-specific safety protocols and adhere to ACI/ASTM guidelines.
Cost drivers and budgeting advice
Regular unit weight testing isn’t free, but it’s worth the investment. Here are some cost factors:
The frequency of tests. More checks mean higher costs. But remember, prevention is cheaper than rework.
Travel and lab fees can add up if samples need to be sent off-site for testing. Consider using local labs or mobile testers.
Equipment wear and maintenance. Regular calibration and upkeep are necessary but add to costs. Plan for these expenses in your budget.
Implementing a repeatable testing protocol
A consistent testing routine ensures quality control. Here’s how to integrate it into daily operations:
Assign clear responsibilities. Know who’s taking samples, when, and where. Who’s responsible for lab confirmation? Make sure everyone knows their role.
Create a simple reporting template. This could be a spreadsheet or a dedicated app. Record test dates, locations, results, and any corrective actions taken.
Archive results securely and accessibly. You’ll need them for audits or to track trends over time. Link test outcomes to concrete pours, batch records, and punch lists for easy reference.
Conclusion
Getting the unit weight right matters for safety, durability, and a clean look. It helps you catch bad batches before they ruin the slab or wall and save costly rework.
Check in plain language: confirm your mix design and labeled batch, run the field test in a small area, weigh and calculate the unit weight, compare it to the spec, document the result, and repeat if needed until you’re within tolerance. If you see out-of-tolerance results, stop and reassess the process, then retest a fresh sample before proceeding anywhere near critical pours.
Common mistakes to avoid are skipping calibration, using improper sample sizes, misreading the scale, and neglecting safety gear or job-site hazards. Always wear PPE, test in a controlled, small area first, and keep tests separate from ongoing work to prevent cross-contamination or premature settling. If a test or equipment issue isn’t clear, don’t push ahead; fix the setup or call for help before proceeding.
If repeated tests stay out of spec or you’re unsure about any step, it’s wise to bring in a professional rather than gamble with a bad batch. Stay disciplined, follow the checks, and you’ll keep the project moving safely toward a solid, lasting result.
FAQ
What is cast-in-place concrete, and how does it differ from other types?
Cast-in-place concrete is poured and set on site, right where the structure will stay. It cures in place, giving a monolithic mass that bonds with embedded steel and forms. Other methods use precast panels or modular pieces that arrive finished and are installed later.
How do environmental conditions affect concrete placement and curing?
Weather and moisture affect strength gain and finish. Extreme heat, cold, wind, rain, or humidity can cause cracking or slow curing. Plan pours for stable conditions and protect the surface so you don’t trap improper moisture or temperature stress.
What should I know about concrete span limits and rebar when planning a pour?
Large spans rely on proper reinforcement and formwork to avoid sagging or cracking. Rebar and ties must be placed exactly where the design calls for them, with appropriate covers and clearances. If you’re unsure, double-check with the project’s drawings and follow the manufacturer’s guidance for placement.
Why is the slump test important, and how do I handle it on site?
The slump test gives a quick sense of workability. It helps you catch stiff or overly flowable mixes before pouring. Follow the test instructions on the bag or supplier sheet and match the mix to what your job needs; if it’s off, don’t pour until it’s corrected.