
Introduction
Galvanic corrosion is a common issue that affects stucco accessories, particularly metal beads and trims. This process causes rust stains on your otherwise pristine exterior, marring its appearance and potentially leading to more serious damage over time.
The good news? Understanding the cause of this problem can help you prevent it from happening again. Let’s dive into why these beads rust and how you can stop repeat staining.
Key Takeaways
- Understand galvanic corrosion: Dissimilar metals corrode due to electrochemical reactions in the presence of moisture and an electrolyte.
- Identify rust sources: Rusting often starts where stainless, galvanized, or aluminum trims meet untreated steel fasteners or damaged finishes that collect water.
- Prevent repeat staining: Separate incompatible metals, use suitable fasteners and coatings, and keep details dry. Consult product labels, manufacturer instructions, and local regulations for guidance.
Key takeaways
- Galvanic corrosion occurs when dissimilar metals share an electrolyte causing rusting.
- Rusting in stucco beads arises from moisture, contact with dissimilar metals, and coatings.
- Common metals: aluminum, stainless steel, galvanized steel, copper; compatibility matters.
- Visual cues: staining, pitting, rust smears near joints indicate possible galvanic activity.
- Protection: select same-metal fasteners, barrier coatings, and proper detailing to reduce contact.
- Safety and maintenance: wear gloves, eye protection when inspecting for corrosion or removed beads.
Table of Contents
- Introduction
- Key takeaways
- What Is Galvanic Corrosion and Why It Affects Stucco Accessories
- Common Stucco Bead Materials and Compatibility Guidance
- Visual Checkpoints and Symptoms of Corrosion and Staining
- How Environmental and Site Factors Influence Corrosion Risk
- Prevention Strategies: Materials, Coatings, and Detailing
- Proper Installation Practices to Minimize Galvanic Corrosion
- Repair, Remediation, and DIY Stain Removal
- Cost, Maintenance Plans, Tools Checklist, and Safety Precautions
- Conclusion
- FAQ
What Is Galvanic Corrosion and Why It Affects Stucco Accessories
Galvanic corrosion occurs when two dissimilar metals come into contact in the presence of an electrolyte, such as moisture-laden or salt-containing stucco and trapped water. This electrochemical reaction causes the less noble metal to corrode preferentially, leading to rust, staining, and metal loss over time.
Corner beads and stop beads are particularly vulnerable due to their constant or intermittent exposure to moisture, crevices where salts can concentrate, and large surface areas of contact with other metals or fasteners. Look for rust halos, speckling, staining at bead joints, and loose or weakened attachments as early signs; always check product labels or manufacturer instructions for material compatibility and recommended isolation methods when selecting or replacing beads.
Basic electrochemistry behind galvanic corrosion
Galvanic corrosion happens when two different metals are connected and exposed to moisture. It’s akin to a tiny electrical circuit.
The metal with the higher electrode potential becomes the anode, losing electrons and corroding. The other, less reactive one is the cathode, gaining electrons.
The electrolyte in this case is the moisture trapped within your stucco assembly, completing the circuit and allowing electrons to flow from anode to cathode.
Why stucco systems accelerate corrosion
Stucco’s alkaline nature creates a harsh environment for metals, speeding up the corrosion process.
Moisture gets trapped in stucco due to its thick, porous nature, keeping the corrosion cell active even when it’s not raining.
Salts from construction materials or nearby roads can also accumulate, further fueling the corrosion process. Thicker plaster layers can hide signs of corrosion until it’s too late.
Common Stucco Bead Materials and Compatibility Guidance
Stucco accessories are available in various materials, each with unique corrosion resistance properties:
- Galvanized Steel: Offers good protection but can corrode if coatings break down.
- Stainless Steel: Highly resistant to corrosion; choose 304 or 316 for outdoor use.
- Aluminum: Can pit in chloride environments; anodized finish enhances durability.
- PVC/Vinyl: UV-stabilized for outdoor use, but thin walls can crack under stress.
- Zinc-coated Finishes: G90 or G185 galvanizing provides protection; thinner coatings may not suffice in harsh conditions.
Material Compatibility Matrix
Mixing materials can cause galvanic corrosion. Here’s how to pair them safely:
- Avoid: Galvanized steel with aluminum or stainless steel due to high galvanic risk.
- Use together: Stainless steel and aluminum, as they have similar galvanic potentials.
- Avoid: Zinc-coated finishes with other metals; zinc will sacrifice itself, leading to rapid loss.
- Use together: PVC/vinyl and any metal, as PVC doesn’t conduct electricity.
- Avoid: Different grades of stainless steel to prevent lower-grade corrosion.
Visual Checkpoints and Symptoms of Corrosion and Staining
Inspect your stucco for telltale signs of galvanic corrosion. Look out for:
- Reddish-brown streaks: These radiate from bead edges, indicating localized corrosion at metal contact points.
- Widening stains: Stains that grow wider away from joints suggest galvanic staining, not general water runoff or biological growth.
- Perforated beads: Holes in beads can signal advanced corrosion and the need for replacement.
- Loss of coating: Bare metal at bead edges accelerates corrosion and staining.
- White efflorescence: Powdery deposits at junctions may indicate water intrusion, which can lead to corrosion if left unaddressed.
Perform simple checks to confirm your observations:
- Clean a small stained spot to see if staining reappears.
- Compare beads of different materials to identify any patterns in corrosion or staining.
- Inspect shaded versus sun-exposed walls, as sunlight can accelerate corrosion.
- Record bead material and nearby metals, photograph progression, and note moisture sources. If you see pitting or through-thickness loss, plan for isolation or replacement rather than just surface cleaning.
Early-warning inspection cues
Conduct a thorough check every 6 to 12 months to catch early signs of corrosion and staining:
- Check for moisture: Look for water stains, damp spots, or musty smells.
- Inspect rebar spacing: Ensure rebar is properly spaced (usually 6 to 12 inches apart).
- Examine cracks: Inspect for hairline cracks that can widen over time due to corrosion or other factors.
- Feel for warmth: Concrete should feel cool to the touch. Warm spots could indicate a chemical reaction from corrosion.
- Check for efflorescence: White powdery deposits on the surface can signal water intrusion, which may lead to corrosion if left unaddressed.
- Inspect steel reinforcement: If accessible, visually check steel reinforcements. Rust-colored stains or rust particles indicate active corrosion.
- Check for delamination: Tap the surface with a hammer. A dull thud instead of a solid sound may indicate delamination caused by corrosion.
- Look for spalling: Pieces of concrete breaking off or falling out can signal advanced corrosion and structural damage.
Quick rule: Address any signs of moisture, cracks, or discoloration promptly to prevent further damage and costly repairs.
Advanced damage indicators
Use this checklist when you’ve already identified early warning signs. It helps determine if your concrete needs bead replacement rather than just surface cleaning:
- Visible cracks around beads: Check for hairline or larger cracks radiating from the anchor beads.
- Bead movement: Gently push or pull on the anchor beads. If they move more than 1/8 inch (3mm), it indicates that the bead is no longer securely embedded in the concrete.
- Rust stains around beads: Look for rust-colored stains around or under the anchor beads.
- Bead corrosion: Inspect the anchor beads for visible signs of corrosion such as flaking or pitting.
- Concrete spalling: Check for pieces of concrete breaking off or flaking around the anchor beads.
- Bead exposure: Inspect for any exposed anchor beads.
- Bead alignment: Ensure the anchor beads are still properly aligned.
- Bead type: Confirm that the anchor beads are still intact and not broken or missing. Also, check if they’re the correct type for your specific application.
Quick rule: If you find any of these advanced damage indicators, it’s time to replace the anchor beads rather than just cleaning the surface to prevent further deterioration and maintain structural integrity.
How Environmental and Site Factors Influence Corrosion Risk
Climate and exposure significantly impact corrosion risk on stucco accessories. Humid, coastal, or freeze-thaw climates, along with salt exposure from marine spray or road de-icing agents, accelerate galvanic attack and stain development.
Poor drainage, misaligned flashings, and improper construction sequencing can concentrate moisture at bead junctions, raising corrosion risk. Inspect flashing details, slope and weep arrangements, and the order of waterproofing and stucco application to mitigate repeat staining.
Role of Moisture, Salts, and Contaminants
Moisture, salts, and contaminants drive galvanic corrosion on stucco beads. Here’s how they contribute:
- Moisture enables ion flow between different metals, initiating the corrosion reaction.
- Salts increase electrical conductivity and lower coating protection potential, facilitating galvanic currents.
- Contaminants can alter surface moisture pH, promoting galvanic action.
Design and Detailing that Increase Risk
Improper design and detailing can trap moisture, fostering repeat staining. Avoid these common mistakes:
- Inadequate or misaligned flashings allow water penetration behind stucco, trapping it at bead junctions.
- Crevices from improperly spaced beads or lack of breaks in long bead runs can trap moisture, accelerating corrosion.
Proper design and detailing include adequate flashing, proper bead spacing with breaks at corners and joints, and a well-planned drainage strategy to minimize risks.
Prevention Strategies: Materials, Coatings, and Detailing
Minimize galvanic corrosion by selecting materials with low galvanic potential. PVC, appropriately specified stainless steel, or properly coated metal beads reduce risk when exposed to other metals.
When using dissimilar metals, isolate them using non-metallic spacers, neoprene washers, or barrier membranes. Always follow coating manufacturer guidelines for compatibility and maintenance.
Isolation and separation techniques
- Barrier membranes: Place these between the stucco substrate and metal beads to prevent direct contact.
- Rubber gaskets and neoprene washers: Use these to separate fasteners from the stucco, breaking the galvanic circuit.
- Non-metallic spacers: Keep metal components apart using these. Ensure proper coating interfaces to prevent corrosion.
Protective coatings and sealants
Apply compatible coatings to protect beads and accessories:
- Epoxy, elastomeric, or specialized anti-corrosion coatings work well. Ensure they’re suitable for exterior stucco exposure.
Check manufacturer guidelines for primer/paint compatibility, recoat cycles, and moisture-trapping prevention. Seal all joints, cracks, and openings with a high-quality sealant to keep moisture out.
Flashing, drainage, and ventilation best practices
- Flashing laps: Install them correctly around windows, doors, joints, control joints, and corners to divert water away from metal interfaces.
- Weep paths: Ensure they’re present at the base of walls to allow moisture escape. Use weep screeds if needed.
- Drip edges: Install them above openings to direct water away from metal interfaces. Maintain adequate air/vapor barriers for proper ventilation and moisture control.
Proper Installation Practices to Minimize Galvanic Corrosion
Begin with a clean, dry substrate. Ensure correct flashing and drainage to prevent beads from prolonged moisture contact. Position beads with proper gaps and alignment to avoid trapped water and incompatible material contact. Follow manufacturer’s substrate preparation instructions.
Use non-reactive or stainless fasteners sized for the substrate. Seal terminations with compatible sealants, and employ dielectric barriers where necessary. Conduct inline inspections during installation: verify sealant continuity, confirm isolation details, and document adjustments to prevent staining.
Fastening and Anchoring Recommendations
Avoid creating a conductive bridge between dissimilar metals to prevent accelerated galvanic corrosion. Stainless steel fasteners are non-reactive and safe for use with other metals. Avoid aluminum or galvanized steel, which can react with other materials.
Match fastener length to substrate thickness for a solid grip without over-tightening or damaging the material behind it. Space fasteners consistently and follow manufacturer’s recommended patterns to distribute stress evenly and minimize moisture intrusion.
Sealing, Lapping, and Finish Integration
Proper sealing is vital to prevent water from getting behind beads and causing corrosion. Use a compatible sealant at the bead flange, filling any gaps or voids. Backer rods can help maintain consistent seal thickness and provide a barrier for the sealant.
When integrating with base coats, maintain the continuity of your water-resistive barriers by sealing around each bead and at terminations to prevent longitudinal moisture movement. Lap seams properly, especially at corners and intersections where water tends to collect, creating a continuous barrier against water intrusion.
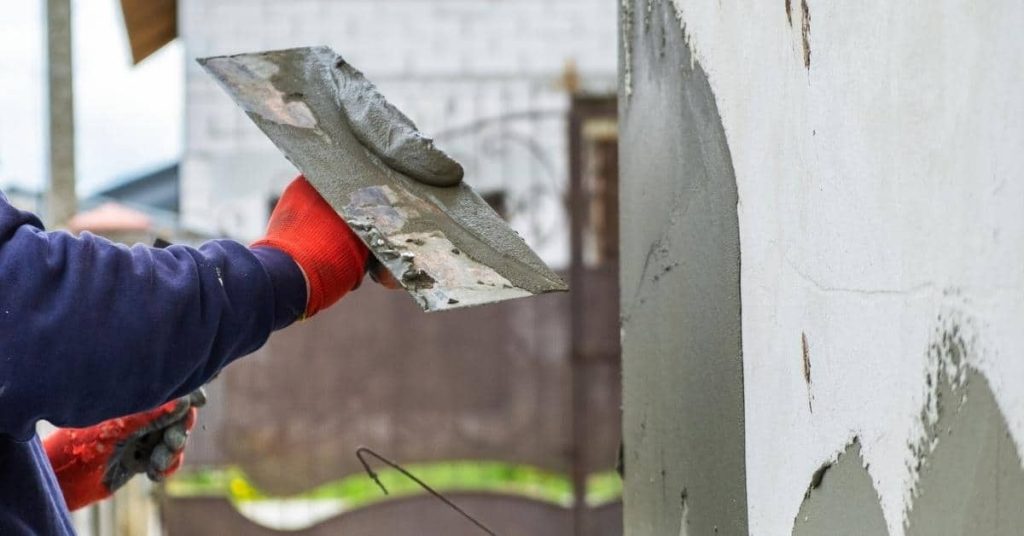
Repair, Remediation, and DIY Stain Removal
Before proceeding with any repair or cleaning method, confirm the cause of rust staining. Inspect beads for signs of galvanic corrosion such as pitting, coating loss, or anchor failure to determine if cleaning will suffice or if replacement and isolation are necessary.
For cleaning, always patch-test any cleaner or poultice on an inconspicuous area before application. Follow product instructions, protect surrounding stucco and vegetation, and rinse thoroughly. If corrosion has breached the bead or anchors are compromised, remove and replace the bead, add isolation barriers or non-metal spacers, and reseal joints according to manufacturer guidance.
Cleaning and Stain-Removal Techniques
Before starting any cleaning process, test your chosen method on a small, hidden area to ensure it doesn’t damage the stucco. Here are some safe methods:
- Mechanical: Gently scrub away surface rust using a soft-bristled brush or cloth with water. Be cautious not to scrub too hard and damage the stucco.
- Mild Chemical Cleaners: A mixture of water and mild dish soap can help remove some stains. Apply, let it sit for 15 minutes, then rinse thoroughly with clean water.
- Rust Stain Poultices: These are pastes that draw out rust. Follow the manufacturer’s instructions, apply to the stain, let it sit, then scrape off and rinse. Always test first!
Replacing Beads and Preventing Recurrence
If cleaning doesn’t work or you’ve found deep corrosion, replace the bead to prevent further damage.
- Remove the old bead using a utility knife. Vacuum away any debris and inspect the area for remaining rust. Treat if necessary.
- Select your replacement bead, choosing one with a non-reactive material or one that’s galvanically isolated to prevent future corrosion.
- Detail properly by sealing the joint with a compatible sealant, ensuring it doesn’t trap moisture. Consider adding a protective coating and installing non-reactive spacers to deter galvanic contact.
Cost, Maintenance Plans, Tools Checklist, and Safety Precautions
Consider the lifecycle of your stucco accessories when planning costs and maintenance. Initial material choice and installation impact future upkeep and replacement frequency. Estimate costs by comparing local quotes and product data, rather than relying on assumptions. Inspect your accessories regularly, with more frequent checks in coastal or high-humidity areas, to catch early signs like rust staining and bead degradation.
Prepare a comprehensive tools and materials list tailored to the job scope. Essential items include personal protective equipment (PPE), hand and power tools, compatible sealants, isolation materials, anti-corrosion coatings, and additional gear if hiring contractors. Follow basic safety protocols such as fall protection, eye/skin protection, dust control, and safe disposal of removed materials.
Tools and Materials Checklist
- Safety glasses: Protect your eyes from debris.
- Gloves: Prevent cuts and chemical exposure.
- Tape measure: Ensure accurate measurements for replacements.
- Chisel and hammer: Gently remove damaged beads.
- Wire brush: Clean rust and debris from metal surfaces.
- Phillips and flathead screwdrivers: Tighten or loosen fasteners.
- Cordless drill: Drill pilot holes for new screws.
- Corrosion-inhibiting coating: Protect metal from future rusting.
- Compatible sealant: Seal joints to prevent moisture intrusion.
- Galvanic isolation components: Isolate metals to prevent corrosion.
- Multimeter: Test for electrical conductivity between metals.
Maintenance Schedule and Cost Considerations
- Inspect quarterly: In high-traffic or coastal areas, check for rust staining, bead degradation, and moisture intrusion every three months.
- Biannual inspection otherwise: Twice a year is sufficient in less harsh conditions.
- Check joints: Ensure sealants are intact and not cracked or missing.
- Inspect fasteners: Tighten any loose screws or replace damaged ones.
- Examine metal components: Look for signs of rust, pitting, or other corrosion.
- Budget for replacements: Allocate funds for periodic bead replacement every 5-10 years.
- Consider preventive upgrades: Invest in better quality materials and coatings to extend lifespan.
Safety and Handling of Corroded Materials
- Wear PPE: Use personal protective equipment, including gloves, goggles, and a dust mask.
- Avoid skin contact: Rust can cause skin irritation. Keep it off your skin.
- Dispose properly: Do not throw rusted metal in regular trash. Recycle or dispose of according to local regulations.
- Wet cutting/fastening: To minimize dust, wet the area before cutting or drilling into metal.
- Avoid electrical hazards: Keep power tools away from wet surfaces and never use them when you’re wet.
- Proper chemical handling: Follow manufacturer’s guidelines for using cleaners. Never mix chemicals.
Conclusion
Galvanic corrosion in stucco accessories is preventable with careful material selection and proper installation. The aim is to safeguard your walls’ appearance and the longevity of metal beads, while avoiding leaks or staining.
- Compatibility Check: Ensure bead and stucco coating materials are compatible before use.
- Environmental Factors: Consider local environmental risks that may impact your installation.
- Proper Installation: Maintain correct spacing, apply sealants, and use appropriate coatings during installation.
Common mistakes to avoid include mixing incompatible metals, neglecting surface preparation or sealant steps, and overlooking drainage or flashing details that could trap moisture. Always prioritize safety: test in a hidden area, wear protection, and never force repairs that may crack stucco or trap moisture. If unsure about material compatibility, coatings, or disturbed stucco, consult a professional.
For complex repairs or persistent staining, engage a professional to assess coatings, flashing, or hidden moisture issues. Focus on achieving a clean, durable finish for long-lasting results and peace of mind.
FAQ
What exactly is galvanic corrosion in the context of stucco beads?
Galvanic corrosion happens when two different metals touch and an electrolyte (like rain or moisture) is present. One metal corrodes faster while the other may stay relatively intact. This process is driven by metals having different electrical potentials.
Why do stucco beads rust or stain even when they look solid?
Rust or staining usually comes from moisture and salts inside the wall, plus incompatible metals in contact. When beads are dissimilar to other metal components, the electrical couple accelerates corrosion at the contact points. Poor drainage or chronic dampness makes it worse.
What metals are commonly used in stucco accessories, and how should I choose them?
Beads and trim come in metals like aluminum, zinc, and steel in DIY kits. The key is to match metals with similar corrosion behavior and to avoid direct contact between dissimilar metals. Check labels or manufacturer instructions for material compatibility with stucco and substrates.
How can I prevent or reduce galvanic corrosion in new or repaired installations?
Use compatible materials and keep dissimilar metals from touching. Add protective coatings or sealants where metal meets stucco, and ensure proper drainage to limit moisture. If in doubt, follow the product instructions and, when necessary, consult the manufacturer or local pro for what works in your climate.