
Introduction
Frost heave is when the soil pushes up under a slab as water freezes and expands. You’ll notice uneven edges, cracks, or a section that lifts after cold spells. This is a hands-on issue you can spot by watching how the ground around the foundation sits through freezing and thawing cycles.
Moisture in the soil, soil type, and how the slab is anchored or formed all influence frost heave. Look for signs like doors or windows sticking, gaps along the base, or cracking that follows frost cycles. If you’re addressing this yourself, focus on drainage and moisture control around the slab and keep an eye on conditions during cold snaps; always check labels, local rules, and manufacturer instructions for any repair specifics.
Key takeaways
- Frost heave lifts slabs when moisture freezes and expands soils beneath.
- Signs include cracking, nonuniform elevation, and moved or seeping joints.
- Assess moisture, drainage, and seasonality to identify likely heave triggers.
- Improve drainage and grading to limit substrate saturation around foundations.
- Insulate slab edges and foundation perimeter to slow heat and moisture movement.
- Follow manufacturer guidance; use safety gear, and know when to call a pro.
Table of Contents
- Introduction
- Key takeaways
- What Frost Heave Is and How It Lifts Slabs
- Signs of Frost Heave Under Slabs and Damage Assessment
- Soil Types, Moisture Dynamics, and Seasonal Triggers
- Drainage and Grading Fixes to Reduce Soil Saturation
- Insulation Strategies Around Slab Edges and Foundations
- DIY Fixes, Tools, and Materials Checklist for Homeowners
- When to Call a Foundation Professional: Inspections and Interventions
- Budget Planning, Seasonal Timeline, Common Mistakes, and Safety Precautions
- Conclusion
- FAQ
What Frost Heave Is and How It Lifts Slabs
Frost heave is the upward movement of soil and slabs that happens when temperatures drop and moisture in the ground freezes. Ice lenses form as water in the soil migrates toward freezing zones, pushing against the concrete from below. This movement contrasts with other foundation issues that come from settling, shrinking, or lateral earth pressures rather than repeated freeze‑thaw action.
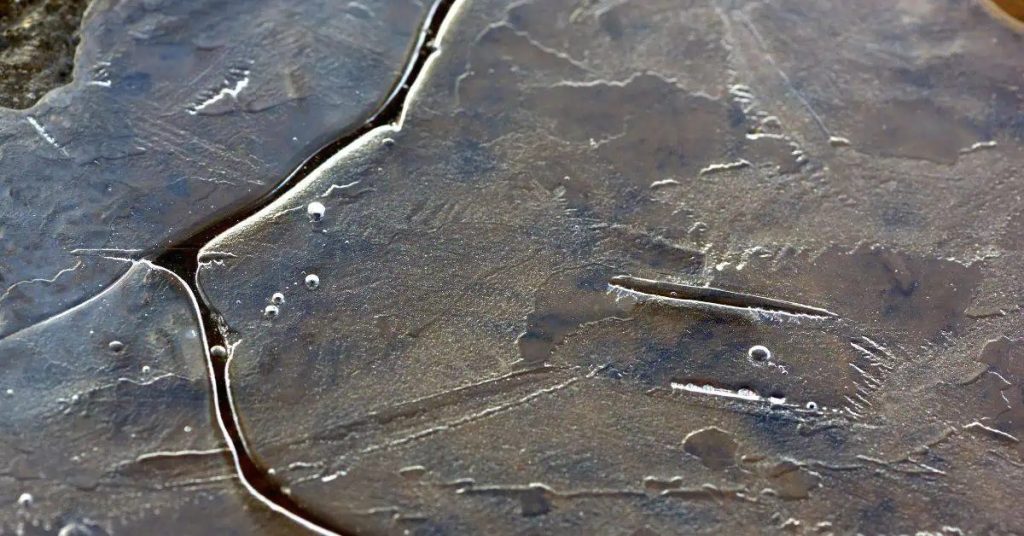
In the freeze‑thaw cycle, freezing expands soil aggregates and creates pressure under slabs that can lift edges or create voids. Ice lenses grow both vertically and horizontally as capillary action draws moisture into the freezing zone. Look for telltale signs like edge heave, cracks near joints, and patterns that fit a frost-driven story rather than uniform settlement.
Mechanics of ice-lens formation
Frost heave starts with moisture. When temperatures drop, water in the soil begins to freeze.
As it freezes, water expands by about 9% in volume. This expansion pushes against the surrounding soil particles, creating pressure.
Over time, this repeated freezing and thawing causes the soil to form vertical and horizontal ice lenses. These lenses exert an upward force on concrete slabs, lifting them off the ground.
Frost heave vs. settlement and heaving from other causes
Frost heave is different from other forms of foundation movement. Here’s how:
Settlement happens when soil compresses under the weight of a structure over time. It’s usually gradual and doesn’t have the sudden, seasonal pattern of frost heave.
Swelling from other causes, like expansive clay soils, can also lift slabs. But this happens year-round, not just in freezing temperatures. And it often causes cracks that run diagonally across the slab, unlike the radial cracking seen with frost heave.
Signs of Frost Heave Under Slabs and Damage Assessment
Exterior indicators include uneven slabs, raised or tapered edges, stair‑step cracks along the perimeter, gaps where the slab meets foundations or driveways, and water pooling near the foundation. Visible heave may show up near landscaping if irrigation zones saturate the soil.
Interior signs involve doors and windows rubbing or sticking, gaps around frames, floor slopes that follow a grid, and cracks that align with frost‑prone zones. Simple homeowner steps include comparing current slab levels to past photos and using a straightedge to gauge high spots, then documenting with timestamps and photos for reference.
Visual checkpoints and simple measurements
Before you grab your tools, walk around your property to spot any visible signs of frost heave. This checklist helps determine if you’re dealing with ice-lens formation under your slabs.
- Uneven slabs: Look for high and low spots; a straightedge or laser level can help confirm.
- Raised edges: Check where the slab meets foundations or driveways. If it’s lifted, you might have frost heave.
- Stair-step cracks: These along the slab’s perimeter are a telltale sign of upward movement.
- Gaps at corners: Check where slabs meet foundations or other slabs. Gaps can indicate lifting.
- Water pooling: If water collects near landscaping or downspouts, it could be causing heave.
- Crack patterns: Map any cracks that follow a grid pattern or align with frost-prone zones.
- Compare to past photos: See if slab levels have changed over time. Recent photos or measurements can help.
- Check drainage: Ensure water isn’t directed towards the slab, as this can exacerbate heave.
Quick rule: If you spot multiple issues here, it’s likely frost heave. Proceed with caution and document everything.
Structural red flags that warrant urgent action
Some signs of frost heave are more serious than others. If you notice any of these, stop what you’re doing and contact a professional immediately.
Large step cracks: Cracks wider than 1/4 inch or longer than 3 feet could indicate significant structural damage.
Separated joints: If joint fill is missing or displaced, it’s a sign of severe movement that needs immediate attention.
Rapid interior movement: If doors, windows, or floors are suddenly misaligned, warped, or sloping, don’t wait – call a professional right away. These could be signs of serious structural issues caused by frost heave.
Soil Types, Moisture Dynamics, and Seasonal Triggers
Soil texture governs how water is retained and moves in the ground, with clay and silty soils often carrying higher frost‑heave risk due to slower drainage. Sand drains more readily but can still transmit moisture to freezing zones. These differences influence how moisture builds under the slab.
Moisture dynamics include infiltration, storage, and evaporation interacting with the timing of freezing to generate pressure beneath the slab. Seasonal triggers linked to late‑season moisture pockets can worsen heave as soils approach peak saturation when temperatures drop. The interplay between soil structure and frost action helps explain why some areas move differently than nearby zones.
Risk profiles: clay, silt, sand, and organic soils
Soil texture plays a big role in frost heave risk. Here’s how:
Clay: High water retention. Swells when wet and freezes. Think of it like a sponge.
Silt: Moderate water retention. Can cause issues, but less than clay.
Sand: Low water retention. Less risk, but not immune to heave.
Organic soils: High water retention and can decompose over time, leading to settlement or heave.
Common moisture sources and seasonal triggers
Moisture comes from various sources before freezing:
Storm runoff can saturate soil. Poor grading lets water pool. Leaking utilities add unwanted moisture.
Irrigation systems, if not properly winterized, can cause issues. High water table means more moisture available for freeze.
Freeze-thaw cycles start when temperatures drop below freezing (32°F or 0°C). Late-season moisture pockets exacerbate heave as they freeze.
Drainage and Grading Fixes to Reduce Soil Saturation
The main goal of drainage work is to keep the soil near the slab drier, reducing saturation and minimizing freeze‑thaw cycling at the subgrade. Practical grading and drainage choices should support continuous moisture management without creating new erosion paths. Proper design helps prevent perched water that can lift or crack concrete.
Surface grading and water management include sloping away from the slab, extending downspouts, and using landscape contours to channel runoff away from the foundation. Subsurface options like French drains or trench drains have their own setup considerations, including depth, outlets, and connections to existing drainage. Regular maintenance keeps systems effective over time.
Surface grading, landscaping, and gutter solutions
Proper surface grading is crucial to keep water away from your slab. The ground should slope at least 1 inch per foot away from the foundation.
Landscaping plays a role too. Plantings should be at least 2 feet away from the slab to prevent water wicking and root intrusion. Consider using drought-tolerant plants to reduce irrigation needs.
Gutters and downspouts are your first line of defense against water intrusion. Ensure they’re in good repair, extend downspouts at least 5 feet from the foundation, and use splash blocks or gravel to disperse water further.
Subsurface drainage options and considerations
When surface grading isn’t enough, consider subsurface drainage. French drains are a common choice. They consist of perforated pipe wrapped in gravel, encased in a sock, and laid in a trench filled with clean stone.
Perforated piping systems can also be installed around the perimeter of your slab. These should be placed at least 1 foot below the slab’s edge and connected to a sump pump or daylighted where possible.
Under-slab drainage involves installing pipes directly beneath the slab, which requires more extensive excavation. This method is typically used in new construction but can be retrofitted in some cases.
Remember, subsurface drains should always slope towards an outlet point, and that outlet should be lower than any part of the drain system to ensure proper water flow.
Insulation Strategies Around Slab Edges and Foundations
Edge insulation and FPSF concepts work to limit frost penetration at slab edges and foundations, with each method offering a different approach to mitigate frost action. A quick comparison helps you choose what fits your project, whether retrofits or new construction. Note that local requirements and climate considerations apply to any choice.
Common insulation materials include rigid foam boards and mineral wool, each with pros and cons for exterior edge insulation and FPSF. Thickness and R‑values should be chosen based on climate guidance from label instructions and manufacturer resources, verified for your region. Plan installation details to maintain moisture control and compatibility with drainage and drainage barriers.
Types of insulation and recommended placement
To limit frost penetration, use rigid foam boards around slab edges and foundations. Here’s what works best:
Rigid Foam Boards (EPS, XPS, Polyiso): These are great for exterior edge insulation and FPSF applications. They come in various thicknesses; choose based on your climate zone.
In colder zones, use 2″ or more. In milder zones, 1″ may suffice. Pros: High R-value per inch, easy to install. Cons: Can degrade over time if not protected.
Retrofit limitations and new-construction best practices
Retrofitting: It’s tough but possible. You’ll need to expose the slab edge, install insulation, and protect it from moisture.
New Construction: Ideal for prevention. Here’s how:
Run insulation along the entire perimeter of the slab. Use foam boards or strips. Protect against moisture with a good vapor barrier. Anchor or fasten to foundation walls if needed.
DIY Fixes, Tools, and Materials Checklist for Homeowners
DIY work here centers on safe, minor drainage improvements and sealing fixes that homeowners can perform without specialized equipment. Define clearly what counts as minor versus professional work, and keep scope aligned with your comfort level. When in doubt, pause and check local codes or manufacturer guidance before proceeding.
Material and tool considerations include items for surface drainage, cracks sealing, and edge insulation checks. Keep the workflow simple and sequential to avoid rework, and document results with photos and notes. Safety practices and when to escalate to a pro help prevent costly mistakes or unsafe conditions.
Tools and materials checklist
Use this list before starting any DIY home improvement project to ensure you have the right tools and materials. It’ll save you time and money by avoiding common mistakes.
- Level: Check it works (bubble in the middle). You need a 2′ or 4′ level for most jobs.
- Soil probe: Ensure it’s sturdy and long enough to test soil depth. For plants, aim for 18-24″ deep.
- Shovels: Have a round-point and square-point shovel. Check they’re in good condition with no bent or broken handles.
- Gutter extensions: Measure your gutter’s width (usually 5″) to ensure the extension fits. Check if it comes with end caps and screws.
- Landscape fabric: Ensure it’s weed-blocking and permeable for water and air. Check its dimensions match your project.
- Rigid foam boards: Confirm they’re the right size (usually 4′ x 8′) and type (XPS or EPS) for your insulation job. Check their R-value meets local codes.
- Sealants: Read labels to ensure they’re suitable for your project (e.g., silicone for bathrooms, polyurethane for wood). Check expiration dates.
- Safety gear: Include work gloves, safety glasses, ear protection, and a hard hat if needed. Check all gear is in good condition.
Quick rule: Always check your tools and materials before starting any job. It’s better to find out something’s missing or wrong before you start digging or cutting.
Safe, step-by-step DIY fixes to try first
Before you call in the pros or start major projects, use this checklist for low-risk, high-reward DIY fixes. These steps help maintain your home’s exterior and prevent costly damage.
- Clear gutters: Inspect and clean gutters twice a year (spring and fall). Check for debris buildup and ensure water flows freely through downspouts.
- Extend downspouts: Ensure downspouts direct water at least 5-10 feet away from your home’s foundation. Extend them if necessary to prevent basement flooding.
- Regrade small areas: Check for low spots around your home where water can pool. Fill these with topsoil, ensuring a slope away from the house to prevent water intrusion.
- Seal cracks (exterior): Inspect your home’s exterior for hairline cracks in siding, stucco, or brick. Seal them with a suitable caulk or sealant to prevent water damage.
- Seal cracks (interior): Check interior walls and ceilings for small cracks. If they’re less than 1/8″ wide, use spackling compound or paintable caulk to seal them.
- Check insulation strips: Inspect the weatherstripping around doors and windows. Ensure it’s intact and seals tightly when closed to prevent drafts and energy loss.
- Inspect roof (safely): Using binoculars, check your roof for missing or damaged shingles. If you must climb a ladder, do so safely with another person present.
- Check exterior paint: Inspect painted surfaces for peeling or chipping. Touch up as needed to prevent further damage and maintain your home’s protective barrier.
Quick rule: Always prioritize safety first. If you’re unsure about any task, consult a professional or local guidelines before proceeding.
When to Call a Foundation Professional: Inspections and Interventions
Red flags that require professional evaluation include cracks that widen after freezes, doors or walls tilting, persistent damp or efflorescence, and noticeable stair stepping or misalignment. Document changes with photos and measurements to support a professional assessment. If you see movement across multiple areas, consider urgency and seek guidance quickly.
Typical remedies involve independent evaluation by a structural or foundation expert, with possibilities including underpinning or slab jacking and drainage improvements around the perimeter. When vetting contractors, check licenses, insurance, references, and written scope with clear timelines. Request reports that cover site assessment, soil observations, and long‑term maintenance recommendations.
Typical inspection checklist professionals will use
Before any work begins, a professional will conduct an inspection to identify the root cause of your slab problems. Here’s what they typically check:
- Elevation surveys: To map out areas where the slab has settled or heaved.
- Soil/moisture testing: To determine soil type and moisture content, helping to pinpoint problem areas.
- Structural crack mapping: To locate and document cracks in your slab and foundation.
- Drainage assessments: To identify any issues with water drainage around your home’s perimeter.
- Window/door alignment checks: To spot any signs of misalignment due to settling or heaving.
- Wall crack inspections: To check for cracks that may indicate structural issues.
- Moisture meter readings: To measure moisture levels in the soil and slab.
- Test pits/boreholes: In some cases, professionals may dig test pits or bore holes to get a better look at the soil conditions beneath your slab.
Quick rule: Always ask for a detailed inspection report outlining their findings and recommended solutions.
How to choose a contractor and what to request
When hiring a professional to fix your slab issues, it’s crucial to do your homework. Here’s how to vet contractors and what to request:
- Licensing and insurance: Ensure they have the necessary licenses and carry liability and workers’ compensation insurance.
- References and past projects: Ask for references from satisfied customers and photos of similar projects they’ve completed.
- Written estimate: Get a detailed, itemized written estimate outlining the scope of work, materials, and labor costs.
- Inspection report: Request a copy of their inspection report detailing the problem areas and proposed solutions.
- Warranty information: Ask about warranties on both labor and materials.
- Timeline with milestones: Ensure they provide a clear timeline outlining when work will begin, expected completion date, and key milestones along the way.
- Soil or engineering reports: If available, ask for soil or engineering reports that support their recommended solutions.
- Contract terms: Review and understand the contract terms before signing.
Quick rule: Never hire a contractor based solely on price. Quality workmanship and materials are crucial to prevent future issues.
Budget Planning, Seasonal Timeline, Common Mistakes, and Safety Precautions
A pre‑winter plan should outline month‑by‑month checks for drainage, insulation, and moisture control, with contacts for professional services if needed. The timeline helps you stay ahead of freeze events and observe any early warning signs. Use it to align tasks with seasonal weather patterns in your area.
Budget considerations focus on major cost drivers such as soil prep, drainage improvements, insulation, and concrete repairs. Avoid common missteps like neglecting drainage or delaying repairs after frost damage, and follow safety guidelines for inspections and repairs. Use practical prompts at home and know when to escalate to a foundation or drainage professional.
Seasonal planning checklist (pre-winter and post-thaw)
Use this checklist to prepare your concrete surfaces for winter and inspect them after the thaw. Timing is crucial to prevent damage and costly repairs.
- Clean gutters: Remove debris to ensure proper water drainage away from concrete. Check by visually inspecting gutters and downspouts.
- Grade soil around slabs: Slope soil away from foundations to prevent water pooling. Measure with a level or string line to confirm correct grading.
- Inspect utility lines: Check for any cracks, leaks, or weak points in underground utilities near concrete surfaces. Listen for leaks and check for soft spots in the ground.
- Add insulation (if applicable): Insulate exposed pipes and vulnerable areas to prevent freezing. Verify by touching insulated areas; they should feel warmer than uninsulated ones.
- Seal cracks: Fill hairline cracks with concrete caulk or sealant before freeze-thaw cycle begins. Check for proper curing by gently pressing on sealed area after 24 hours.
- Monitor joints: Ensure expansion and control joints are clean and functioning properly. Insert a screwdriver into joint to check depth; it should go in about 1/3 of the slab’s thickness.
- Post-thaw inspection: Check for signs of damage such as cracks, heaving, or settling after winter thaw. Walk surface and visually inspect for any issues.
- Follow-up repairs: Address any post-thaw damage promptly to prevent further deterioration. Consult a professional if needed; they can provide tailored solutions based on your specific situation.
Quick rule: Always prioritize proper drainage and insulation to protect concrete from freeze-thaw cycle damage.
Common mistakes and safety precautions
Here are some frequent errors I’ve seen on job sites that you should avoid, along with safety measures to keep in mind.
- Burying downspouts too deep: This can cause water to pool and damage your foundation. Keep them at a safe distance from your home’s structure.
- Ignoring small cracks: Even tiny cracks can grow into major problems over time. Address them promptly to prevent further damage.
- Improper backfill: Using the wrong material or not compacting it properly can lead to settling and structural issues. Follow local codes and manufacturer recommendations for backfill materials.
- Not wearing proper footwear: Slippery surfaces and heavy objects can cause falls. Wear sturdy, non-slip boots to maintain your footing.
- Working alone on heavy tasks: Lifting heavy materials or operating machinery without a spotter can lead to injuries. Always have someone to help you when needed.
Double-check these points before starting any work to ensure your project goes smoothly and safely.
Conclusion
Fixing frost heave after slabs settles is about keeping water away, keeping frost out, and keeping the slab stable. Do the work with durability in mind and safety at the top of the list.
Start by assessing drainage and grading, then verify moisture patterns around the slab, check insulation at the edges, and map out a simple, step-by-step DIY plan that fits your budget. Work in a small area first, document what you change, and test each fix before moving on to the next step; Safety comes first, and progress should be measured, not rushed.
Common mistakes to avoid: skimping on drainage fixes while padding the soil around the foundation without a proper grading plan, over-sealing or over-insulating without accounting for air movement and moisture, and applying fixes without verifying results because you assume the problem is solved. A few plain rules help: keep a clear drainage path, leave space for air and moisture exchange at the slab edge, and test any DIY repair in a controlled way before expanding.
If you see active cracking, ongoing movement after fixes, or the frost problem persists beyond a season, call a foundation professional for inspection and intervention. Stay disciplined, follow the plan, and you’ll keep the slab stable, safe, and looking right for years to come.
FAQ
What is foundation frost heave and how does it lift slabs?
Frost heave is when water in the soil freezes and expands, pushing the soil and any concrete slab upward. It happens most when the ground freezes under the slab and water can’t escape. The result can be raised edges or cracked concrete.
What signs on a foundation warn you that frost heave is at work?
Look for uneven slabs, gaps between the slab and walls, or first-floor cracks near doorways. You may also see the soil along the edge heave or pull away from the foundation. If doors stick or windows don’t latch, that can be a sign too.
What triggers frost heave during cold weather?
Cold, wet soil is the enemy. Water has to be present, the ground must freeze, and there must be a cycle of freezing and thawing. Areas with poor drainage or high clay content are more prone to heave when temps drop.
What proactive steps can help prevent heaving and improve drainage around the home?
Tighten up soil drainage around the slab and ensure water moves away from the foundation. Inspect and fix any gutter downspout outlets, splash blocks, and grading to shed water away. If you suspect wet soil under the slab, consult product labels or manufacturer instructions for proper drainage improvement methods and local guidelines before starting.