
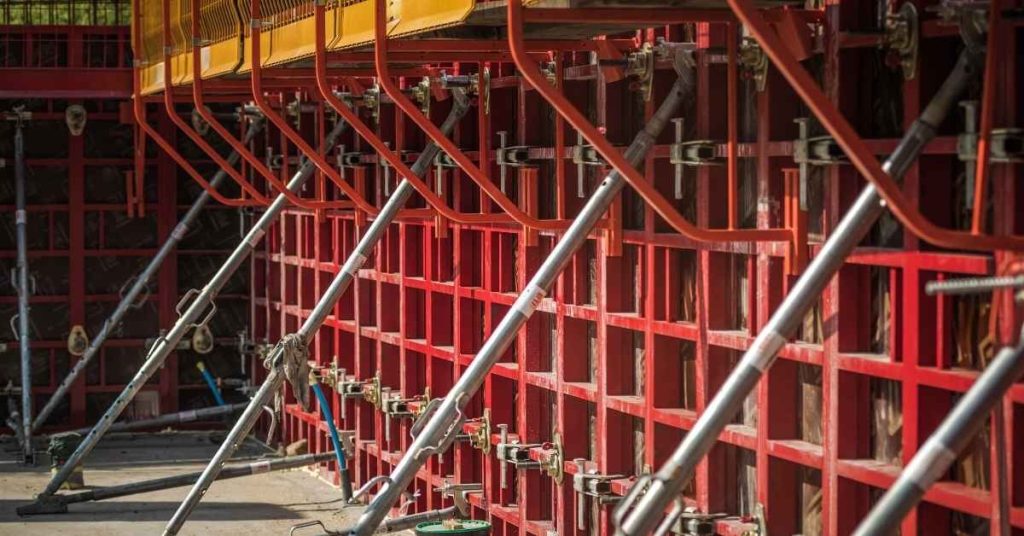
Introduction
Concrete formwork bulge and bow means the framed plywood or panels are deforming under pressure, creating outward or inward unevenness. Check that brace spacing is appropriate and perform quick, in‑place checks before the truck arrives to hold the form firmly. If you see obvious bow, slack in braces, or loose sheathing, pause and reassess rather than continuing to pile weight.
Keep braces tight, plumb, and aligned as you work, and note any signs of stress that could affect the pour. Be mindful of back safety: use proper lifting, keep loads close to your body, and stop if you experience sudden pain or numbness. When in doubt, check manufacturer guidance and local rules for brace spacing and formwork limits, and plan a safe fix before the truck shows up.
Key takeaways
- Prioritize back-safe practices: use proper brace spacing to reduce bending strain.
- Inspect for bulge or bow early; halt pours if signs worsen.
- Brace components: verify connections, alignment, and fasteners before concrete arrives.
- Document deviations with notes and photos; notify supervisor and file for safety.
- Quick checks: pump setup, placement sequencing, and formwork alignment before pour.
- Back-care plan: ergonomic lifting, short breaks, and early medical evaluation if pain.
Table of Contents
- Introduction
- Key takeaways
- Why Bulge and Bow Matter — Failure Modes and Consequences
- Quick Pre-Pour Walkaround: What to Check in the Last 60–90 Minutes
- Brace Spacing — Principles, Not Prescriptions
- Common Bracing Components — What to Inspect
- Pour-Day Controls: Pump, Placement, and Sequencing
- Detecting and Responding to Bulge/Bow During the Pour
- Tools, Materials and Visual Checkpoints (Jobsite Kit)
- Prevention, Documentation and “Who to Call”
- Conclusion
- FAQ
Why Bulge and Bow Matter — Failure Modes and Consequences
Bulge and bow appear as outward waviness, deflection, or twisting of form panels. Look for edges that aren’t flush with the line or panels that show visible gaps. Deflection can occur at corners, along long runs, or where bracing is weak or misaligned.
Lateral pressure from concrete during a pour drives deformation and can overload fasteners, ties, and supports. Pressure peaks are influenced by placement rate, lift height, and form stiffness, and they may intensify as concrete settles. Deformed forms threaten safety, access, and the ability to finish the pour on schedule.
Signs a form is at risk of failure
Regularly inspect your forms during the pour for any signs that immediate action is required. These visual and tactile indicators can help prevent catastrophic failures.
Out-of-plumb forms, growing gaps between forms and supports, visible cracks, loud creaking noises, or shifting shores are all red flags. If you notice any of these signs, stop pouring immediately and assess/address the issues.
Remember, quick checks like regularly inspecting form alignment, bracing integrity, and support stability can help catch potential problems early. Always consult your project engineer for guidance on corrective actions.
Typical failure causes on small commercial and residential pours
Understanding common drivers of form failures can help prevent them. On smaller pours, rapid pour rates, high slump concrete, weak or insufficient bracing, poor ties, soft foundations, and unexpected loads are often culprits.
Before each pour, review project plans, specifications, and your engineer’s notes to understand the pour sequence, formwork design, and support requirements. During the pour, verify that the pour rate, concrete slump, bracing strength and spacing, tie integrity, foundation stability, and load distribution are all as planned.
If any of these factors are compromised, consult your project engineer to confirm and address potential issues. Following your engineer’s recommendations can help mitigate risks.
Quick Pre-Pour Walkaround: What to Check in the Last 60–90 Minutes
Confirm formwork is plumb, square, and true to line, with panels seated evenly to avoid hiding bulge traps. Check lids, joints, and interfaces so they don’t create pressure points. Look for gaps that could allow concrete to escape or trap air.
Perform a brisk bulge/bow assessment by eye and with a quick tap test near corners and along long walls. Inspect braces, ties, and anchors for proper installation, security, and even spacing per the setup plan. Ensure clear pathways and unobstructed access for the pour crew and equipment.
Visual checkpoints (fast, high-impact)
Before the concrete truck arrives, quickly scan your formwork for any obvious issues. This checklist helps you identify potential bulge or bow problems in just a few minutes.
- Top line straightness: Check if the top edge of the formwork is level and true to line using a string line or laser level. If not, it could lead to an uneven pour and increased risk of bulge/bow.
- Edge alignment: Ensure all edges are aligned properly with no gaps between panels. Misaligned edges can cause leaks and weak spots in the final structure.
- Gaps at corners: Inspect corners for any visible gaps or misalignments. Corners are high-stress areas where bulge/bow often starts.
- Poured wall offsets: Verify that the formwork is correctly offset from the poured walls to allow for proper concrete flow and consolidation. Incorrect offsets can cause voids or weak spots in the final structure.
- Bracing anchor points: Check if bracing anchor points are secure and properly aligned. Loose or misaligned anchors can compromise the entire formwork system.
- Ground stability: Ensure the formwork is stable on the ground, with no signs of settling or shifting. Unstable forms can lead to bulge/bow and other structural issues.
- Lids and panels: Confirm that lids and panels are seated uniformly with no gaps or misalignments. Improperly seated formwork can trap concrete and cause bulge/bow.
- Formwork plumb, square, true to line: Quickly verify these using a level, tape measure, and string line. Any deviations could indicate a risk of bulge/bow or other structural issues.
Quick rule: If you spot any visible gaps, misalignments, or signs of instability, investigate further or notify your lead immediately to prevent potential bulge/bow problems.
Pre-Pour Formwork Inspection (2-5 minutes)
Before commencing concrete pouring, conduct a swift physical examination of your formwork components to ensure they are secure and stable. This helps identify any loose or failing parts early, preventing major issues.
- Walers: Gently pull on walers to confirm their security. Loose walers can cause formwork shifting, leading to bulge/bow.
- Studs: Check studs for any movement or play. Loose studs can compromise the entire formwork system’s stability.
- Shores: Test shores for any give or instability. Unstable shores can result in bulge/bow and other structural failures.
- Fasteners: Pull on fasteners to ensure they are tight and secure. Loose fasteners can allow formwork components to shift, leading to bulge/bow or other issues.
- Bracing: Inspect bracing for any signs of movement or instability. Unstable bracing can compromise the entire formwork system’s integrity.
- Anchors: Verify that anchors are secure and properly aligned. Loose or misaligned anchors can cause bulge/bow and other structural problems.
- Ties: Check ties for any signs of damage, wear, or loosening. Damaged or loose ties can allow formwork components to shift, leading to bulge/bow or other issues.
Quick guideline: If you discover any component that moves easily or shows signs of instability, promptly notify your lead or engineer for immediate attention before the pour begins.
Safety & site controls to confirm
Before the concrete truck arrives, ensure that all safety measures and site controls are in place to protect workers and equipment during the pour.
- Evacuation routes: Confirm that evacuation routes are clear and accessible. Blocked or inaccessible routes can hinder emergency response times.
- Signaling systems: Verify that signaling systems (e.g., radios, whistles) are functioning and understood by all workers. Effective communication is crucial for safety during the pour.
- Knee boards/walkways: Inspect knee boards and walkways to ensure they are secure, non-slip, and in good condition. Unsafe walkways can lead to slips, trips, and falls.
- Competent person present: Confirm that a competent person is on-site to oversee the pour and address any safety concerns. A competent person ensures that safety protocols are followed and hazards are mitigated.
- Pumps/hoppers staged per plan: Verify that pumps and hoppers are staged according to the approved pouring plan. Improperly staged equipment can cause delays, spills, or other safety issues during the pour.
Quick rule: If you find any safety issue or deviation from the approved plan, address it immediately or notify your lead to ensure a safe working environment and proper pour execution.
Brace Spacing — Principles, Not Prescriptions
Identify the main drivers of brace spacing, including wall height, form type, pour rate, slump, soil conditions, and waler stiffness. Recognize that these factors interact and change as conditions vary. The goal is to align spacing with the engineered loads and geometry.
Fixed numbers must come from the engineer of record. On-site adjustments should reference official drawings and calculations, with approvals documented. Check for non-destructive indicators like alignment, continuity of bracing, and proper tie-ins before proceeding.
Typical field ranges and when to question them
In the field, brace spacing often falls within certain ranges based on common practices. However, it’s crucial to understand that these are not hard rules but examples to guide your initial assessment.
For tall or heavy pours, closer spacing is typically required to support the increased loads. Conversely, for short/low-pressure pours, wider spacing might be acceptable due to reduced lateral pressure.
While these examples can help you make quick decisions, they should not replace the engineer’s judgment. Always review formwork details, pour rate, and concrete properties to estimate appropriate brace spacing and confirm with the project engineer or stamped design before proceeding.
How pour rate and slump change lateral pressure
Concrete’s properties significantly impact the lateral pressure exerted on formwork. Understanding this relationship helps prevent failures by allowing you to adjust bracing and pouring sequences accordingly.
Higher slump and faster placement increase lateral pressure due to the concrete’s fluidity and speed at which it fills the forms. This increased pressure may require closer bracing and slower pour sequencing to maintain formwork integrity.
Before pouring, assess slump, placement rate, and formwork conditions. Additionally, review the concrete mix design and pour sequencing plan to ensure they align with your formwork’s capacity and brace spacing.
Common Bracing Components — What to Inspect
Map each element—form ties, walers, studs, shores, diagonal braces, and ground anchors—and understand their load paths. This helps you spot a potential weak point at a glance. Know where failure or excessive movement could start.
Pre-load integrity matters: inspect fasteners, hardware compatibility, corrosion, and signs of fatigue. Verify alignment, spacing, and plumbness, and check load transfer at connection points to ensure no slippage or misfit.
Form ties and waler-to-form connections
Form ties and walers play a crucial role in maintaining the integrity of your concrete formwork. Before loading with concrete, ensure that:
Form ties are straight, properly set, and none are missing or bent. Bent ties can cause bulging and bowing, leading to form failure.
Check waler-to-form connections for consistent alignment and fastener torque along the run. Inconsistencies can lead to uneven load distribution, causing forms to bulge or bow.
Shores and props (internal and external)
Shores and props support form loads and maintain vertical alignment. Inspect them for:
Plumbness – Ensure they are perfectly vertical to prevent form bulging.
Base bearing on solid footing – Shores must bear on a stable, level surface to transfer loads effectively.
Snug headplates – Headplates should fit tightly against the forms to distribute loads evenly and prevent slippage.
Diagonal and external bracing
Diagonal braces resist lateral forces, maintaining form stability. Inspect them for:
Acceptable bracing angle – Braces should be set at the correct angle to effectively counteract late