
Introduction
Feather finish is a thin cement skin designed to feather the edges and blend with the surrounding concrete. Polymer patches are thicker repairs that use a polymer-based material to fill and bond, creating a solid patch that can be sanded smooth.
In winter, prep is key: make sure the area is clean, dry, and roughened, and follow the product’s cold-weather guidance. Always check the manufacturer instructions for bonding, cure time, and temperature limits, and plan for treating stains like oil or tree sap before patching.
Key takeaways
- Assess repair viability first: decide between feather finish and polymer patch based on conditions.
- Winter effects: moisture, freeze-thaw cycles, and surface prep dictate adhesion success.
- Know bonding methods: mechanical grip versus chemical adhesion; choose compatible substrate.
- Cold-weather steps: clean, dry surface; remove oil and sap residues before patching.
- Materials guidance: follow label instructions; test patches on scrap concrete when possible.
- Safety: wear eye protection, gloves; never apply patches on actively cracking slabs.
- Leave a Reply Cancel reply (2/2 competitors) to compare outcomes between feather finish and patch.
Table of Contents
- Introduction
- Key takeaways
- Repair or Replace: Deciding If the Slab Is Worth Fixing
- How Winter Weather Affects Concrete Repairs
- Material Comparison: Feather Finish Vs Polymer Patch
- Surface Preparation for Cold-Weather Repairs
- Bonding Methods: Mechanical Vs Chemical Adhesion
- Application Steps and Cold-Weather Best Practices
- Tools, Materials, and Product Guidance
- Cost, Longevity, and Common Mistakes to Avoid
- Conclusion
- FAQ
Repair or Replace: Deciding If the Slab Is Worth Fixing
Assessment starts with distinguishing cosmetic repairs from structural failure. Look for signs like displacement, ongoing movement, and visible cracking patterns that widen or reappear after patching. These cues guide whether to patch or to replace for a long-term fix.
On sidewalks, slabs, and steps, watch for spalling, extensive cracking, hollow-sounding patches, exposed rebar, and noticeable trip hazards. Use simple checks such as vertical offset observations, tracking crack progression over time, and a light prodding test to assess soundness and moisture presence. When in doubt, plan for professional input and consider the value of replacement in frost-prone conditions.
Structural assessment checklist
Before you start any repair work, use this checklist to assess the condition of your concrete slab. It’s crucial to understand the extent of damage before deciding whether to repair or replace.
- Check joint movement: Inspect expansion and control joints for excessive movement. Use a straight edge to check if there are any gaps wider than 1/8″.
- Inspect deep through-cracks: Look for cracks that go all the way through the slab, especially those wider than 1/4″. These could indicate serious structural issues.
- Check delamination: Tap the surface with a hammer. If it sounds hollow, there might be delamination – where the concrete has separated from its base.
- Examine corners and edges: Check for signs of spalling or crumbling at corners and edges. This could indicate reinforcement corrosion.
- Look for uneven settlement: Place a level on the slab to check if it’s still even. Uneven settlement could mean there are issues with the base or soil beneath.
- Check for moisture problems: Look for signs of water damage, like efflorescence (white powdery substance) or mold. Moisture can weaken concrete and cause further damage.
- Inspect reinforcement: If accessible, check the condition of the reinforcing bars. Rusting rebar could indicate serious structural issues that need immediate attention.
- Check for signs of fire or heat exposure: High temperatures can weaken concrete and cause it to spall. Look for discoloration, cracks, or other signs of heat damage.
Quick rule: If you find more than three significant issues, or if any single issue is severe (like deep through-cracks or reinforcement corrosion), it might be best to replace the slab rather than attempt repairs.
When replacement beats repair
Sometimes, trying to fix a concrete slab is like putting a band-aid on a broken leg. Here’s when you should bite the bullet and go for a full replacement:
Structural damage: If your slab has cracks wider than a credit card or shows signs of settlement (like dips or unevenness), it might have structural issues. A quick fix won’t solve these problems, and they’ll likely come back.
Water damage: If water’s been seeping under your slab for years, the base could be compromised. Even if you repair the top, the whole thing could collapse later. Check base compaction before proceeding with any repairs or replacements.
Repeated repairs: If you’ve patched and filled cracks multiple times already, it might be time to admit defeat. Each repair weakens the slab a little more, and eventually, it’ll be cheaper and easier to replace the whole thing.
How Winter Weather Affects Concrete Repairs
Freeze-thaw cycles drive damage as water in pores expands when frozen, creating microcracks and weakening bonds. Repetition of this action accelerates spalling and crack propagation at repairs. That is why winter is particularly harsh on fresh work.
Moisture ingress and daily temperature swings stress patches and feather finishes through capillary action and differential expansion. Cold exposure reduces cure strength and can impair adhesion at the repair-substrate interface. Plan repairs with these dynamics in mind and choose materials rated for low temperatures when possible.
Freeze-thaw and moisture effects
When water gets into concrete pores, it expands as it freezes. This creates microcracks, spalling, and weakens bonds over time.
Moisture ingress and daily temperature shifts put stress on repairs. Rising and falling moisture causes capillary action, pushing water deeper into the repair. Differential expansion between patch material and substrate can cause debonding.
Trapped moisture is a big problem in winter. It turns to ice, expands, and pops off repairs.
Temperature and curing challenges
Low temperatures slow down or stop the curing process of concrete and patch materials. This can lead to weak repairs that don’t gain full strength.
Cold exposure increases stiffness mismatch between the repair material and the substrate. This means they react differently to temperature changes, putting stress on the bond.
Proper curing is crucial in winter. It’s often slower and requires protection from freezing temperatures.
Material Comparison: Feather Finish Vs Polymer Patch
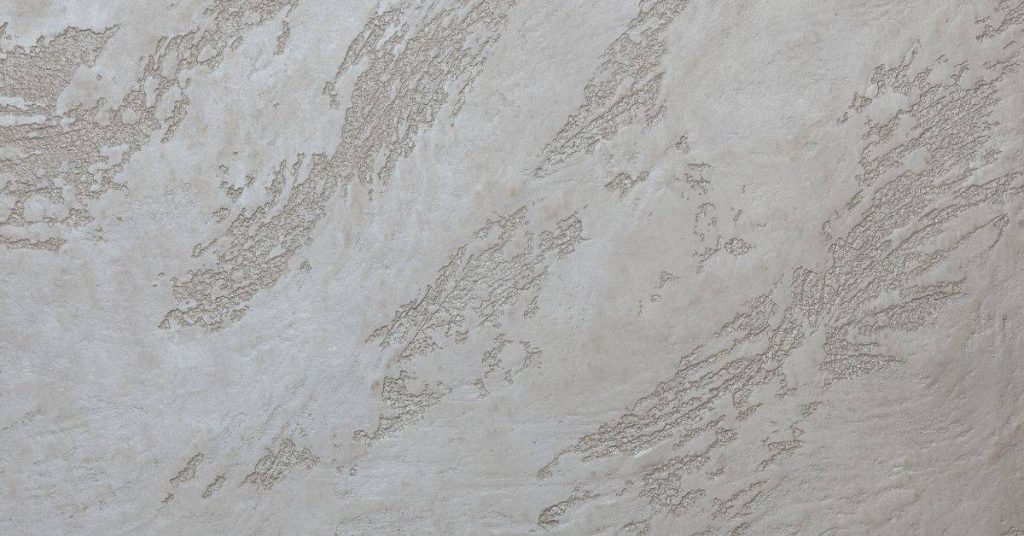
Feather finish is a cement-based skim coat with fine aggregates that adheres to concrete through mechanical bonding and surface porosity. It has specific curing needs and can be sensitive to moisture entrapment and surface texture. Winter performance hinges on porosity and proper moisture control during cure.
Polymer-modified or epoxy-polymer patches use binders that can improve flexibility or rigidity depending on formulation. They respond differently to cold temps, with bonding agents and substrate prep influencing longevity. The right choice depends on movement, moisture, and the ability to manage cure in cold weather.
Feather finish (cement-based skim coats)
A feather finish, also known as a cement-based skim coat, is a thin layer of cement and fine aggregates used to repair minor surface damage on concrete. It’s typically applied at thicknesses ranging from 1/8″ to 1/4″.
Feather finishes adhere well to sound concrete substrates due to their cementitious base. However, they’re sensitive to moisture and cold temperatures during curing. Moisture entrapment can lead to surface porosity and potential cracking in winter.
Strengths: Feather finishes are great for thin surface repairs and provide a smooth, finished look. They’re also cost-effective.
Limitations: They’re less flexible than polymer patches and may not perform as well in freeze-thaw cycles or on moving slabs.
Polymer patch (polymer-modified cement and epoxies)
Polymer patches, including polymer-modified cement and epoxy-polymer systems, offer higher adhesion and flexibility than cement-based finishes. They can be used to repair cracks and spalls up to 1″ thick.
These materials have better freeze-thaw resistance due to their polymer content. However, they’re more expensive and require different substrate preparation and curing needs. Polymer patches need a clean, sound surface and should not be applied when temperatures are below 50°F (10°C).
Strengths: Polymer patches offer superior adhesion, flexibility, and freeze-thaw resistance. They can bridge small cracks and reduce water ingress.
Limitations: Their higher cost and specific application requirements may make them less accessible for DIY homeowners.
Winter performance comparison
When it comes to winter performance, polymer patches outshine feather finishes. Polymer patches have better bond strength and substrate compatibility in cold temperatures. They’re more resistant to freeze-thaw cycles due to their ability to expand and contract with the substrate.
Polymer patches also control water ingress better, reducing the risk of moisture entrapment that can cause popping in winter. Additionally, they have a higher crack-bridging ability, making them suitable for repairing moving slabs.
Thickness limits: For feather finishes, keep it thin – no more than 1/4″. For polymer patches, you can go up to 1″ but avoid over-applying as this can also lead to popping off in winter.
Decision matrix: Choose feather finishes for minor surface damage and when cost is a primary concern. Opt for polymer patches when dealing with cracks, spalls, or moving slabs, especially in areas prone to freeze-thaw cycles.
Surface Preparation for Cold-Weather Repairs
Winter risks include ice, frost, salt residues, and laitance that hinder adhesion. Plan for thorough cleaning with methods suitable for cold conditions. A clean, sound surface is essential before any patch or feather finish goes on.
Focus on moisture management and profile creation. Use mechanical roughing to create a proper key and verify the surface is dry and above freezing before applying material. Keep patches protected from wind and cold during initial cure and follow product guidelines closely.
Cleaning and contamination removal
Before applying any repair, you must clean the surface thoroughly. Dirt, oil, tree sap, and salts can all inhibit adhesion.
Use detergents or degreasers to remove these contaminants. For tough stains, consider mechanical methods like pressure washing.
If deep stains persist, apply a sealer to isolate them before proceeding with repairs.
Mechanical preparation and profiling
The key to a strong bond is exposing sound concrete. Use a chisel or grinder to remove any weak, crumbling material.
To create a mechanical key for bonding, you can use a wire brush, grinder, or even light shot blasting if feasible in cold weather.
Pressure washing can also help, but avoid it if temperatures are below freezing as it may cause damage.
Temperature and moisture preconditioning
In winter, ensure your substrate is dry and above freezing. Use a moisture meter to check. Don’t patch frozen or damp surfaces.
If necessary, use temporary heaters or dehumidifiers to dry the area. Manage dew point to prevent condensation.
Match the material’s conditioning to the substrate temperature. Follow product guidelines for optimal results.
Bonding Methods: Mechanical Vs Chemical Adhesion
Mechanical adhesion relies on a solid surface key and sound substrate, while chemical adhesion uses bonding agents to improve bond with the substrate. Each method has places where it excels, especially in winter where moisture can undermine weak bonds. Choose based on substrate condition and repair type.
Prepare the surface with Cleaning, priming, and keying as needed. Select bonding agents that are compatible with feather finish or patch materials and follow manufacturer instructions. Be mindful of moisture control and timing to prevent debonding in cold temperatures.
Mechanical Bonding Techniques
Mechanical bonding relies on physical interlock between the repair material and the existing substrate. This method excels with feather finishes due to their cement-based nature.
To achieve a strong mechanical bond, roughen the surface of your concrete using a diamond blade or wire brush. Undercuts can also help by creating more surface area for the patch to grip onto.
Scratch coats are another effective technique. Apply a thin layer of your feather finish material and let it set slightly before applying the main patch. This creates microscopic grooves that improve adhesion.
Chemical Bonding Agents and Primers
Chemical bonding uses adhesives or primers to create a strong chemical bond between the repair material and the substrate. This method is ideal for polymer patches, which often require specific bonding agents.
Start by selecting a compatible bonding agent. It should work well with both your concrete substrate and chosen patch material. Apply it according to the manufacturer’s instructions, usually as a thin coat over the prepared surface.
For cold-weather applications, consider using a polymer-modified primer or slurry. These can improve adhesion in low temperatures and protect against freeze-thaw damage.
Application Steps and Cold-Weather Best Practices
Identify winter-specific surface prep requirements for both feather finish and polymer patch, focusing on moisture assessment and temperature control. Ensure the substrate is dry and above the product’s minimum temperature before starting. Plan to protect the work through the initial cure.
Outline step-by-step workflows for each repair type, including mixing, edge transitions, and layer thickness guidance suitable for cold weather. Establish curing conditions with blankets or enclosure strategies and monitor ambient temperatures to prevent pop-off and cracking.
Applying a Feather Finish in Cold Conditions
In winter, mix your cement-based skim coat with warm water to speed up setting time. Use a 4:1 or 5:1 ratio of powder to water.
Apply thin layers – no more than 1/8 inch at a time. Use a trowel to spread the mixture evenly and feather the edges to blend with the existing surface.
For faster curing, use accelerants like calcium chloride or heat blankets. Keep the area warm (above freezing) during application and initial cure.
Applying a Polymer Patch in Cold Conditions
Before applying, prime your substrate with a bonding agent to improve adhesion. Use a low-viscosity primer suitable for cold weather.
Mix your polymer-modified cement or epoxy according to the manufacturer’s instructions, using warm water if needed. Activate any two-part systems properly.
Apply the patch in small sections, troweling it smooth and level. Control cure time with heat blankets or enclosures to prevent rapid cooling and cracking.
Curing and Protection Strategies
Use insulated curing blankets or plastic sheeting to cover your repair during the initial cure. This retains heat and moisture, promoting a strong bond.
If temperatures drop below freezing, use gentle heat sources like heat lamps or space heaters. Keep them at a safe distance to avoid damaging the patch.
Monitor your patch closely for any signs of cracking or delamination during the cure period. If unexpected cold snaps occur, extend curing time accordingly.
Tools, Materials, and Product Guidance
Assemble essential tools and PPE: trowels, hawk, gauge tools, mixing gear, broom, and protective gear. Have moisture meters and temperature indicators on hand to help decide when to apply. Keep a clean work area to avoid cross-contamination.
Know your product options and how to read labels for temperature tolerance, pot life, cure time, and substrate compatibility. Compare feather finish, polymer patches, and cementitious patches, and verify data sheets or warranty terms before purchase. Use reputable references to confirm winter suitability and application steps.
Tools and PPE checklist
Before you start any repair, ensure you have the right gear. This list covers essential tools and personal protective equipment (PPE) for concrete repairs in winter.
- Gloves: Protect your hands from cold and chemicals. Choose insulated gloves for extra warmth.
- Safety glasses: Shield your eyes from debris and chemicals. Consider using goggles for better protection.
- Dust mask/respirator: Guard against concrete dust inhalation. Use a respirator with P100 filters for better protection.
- Knee pads: Protect your knees from cold and hard surfaces during prolonged kneeling.
- Non-slip footwear: Ensure stability on slippery surfaces. Wear boots with good traction and insulation.
- Grinders/chisels: Remove damaged concrete efficiently. Keep blades sharp and chisels well-maintained.
- Brooms/brushes: Clean the surface before application. Use stiff-bristled brooms for better cleaning.
- Mixer bucket: Ensure consistent mixing. Use a heavy-duty, 5-gallon bucket with a mixer attachment.
- Level: Achieve a smooth finish. Use a 4-foot level to ensure accuracy.
Quick rule: Always double-check your gear before starting any repair job in winter.
Product types and label checks
Choosing the right product is crucial for a successful repair that won’t pop off in winter. Here’s what to look for on data sheets:
First, consider the product type. For small repairs, feather finish might be sufficient. For larger areas or severe damage, use polymer patch or cementitious patch compounds.
Next, check the recommended substrate temperature. Most products require a minimum surface temperature of 50°F (10°C). In winter, ensure your surface meets this requirement before application.
Also, note the pot life and set time. These determine how long you have to work with the product before it hardens. In cold weather, these times may be extended, so plan accordingly.
Lastly, verify substrate compatibility. Ensure the product is suitable for concrete and can bond well in winter conditions. Reputable brands like Sakrete, QUIKRETE, MAPEI, or BASF/Ultrabond lines provide detailed data sheets to help with this.
Cost, Longevity, and Common Mistakes to Avoid
Consider upfront costs for feather finish versus polymer patches, including materials and basic tool needs. Translate these into practical budgeting guidance without guessing exact prices. Think about long-term maintenance implications as winter performance varies by material.
Identify common winter failures and their root causes, such as debonding, improper curing, or moisture entrapment. Use a clear decision framework to choose feather finish for fine cracks or patches for higher movement, and document steps to prevent repeating mistakes in cold weather.
Cost vs lifecycle tradeoffs
Feather finishes are typically cheaper upfront. You’ll need sand, cement, and maybe a little latex additive. Labor’s minimal too – just mixing and spreading.
But, they might not last as long in freeze-thaw climates. Expect to rework every 2-5 years.
Polymer patches cost more. You’ll need specialized material, equipment like a sprayer or trowel, and possibly hired help. But they often outlast feather finishes in cold weather, needing replacement every 5-10 years.
So, if budget’s tight but you’re willing to redo repairs sooner, go for feather finish. If longevity’s key and money’s no object, choose polymer patches.
Common mistakes and how to avoid them
Here are common pitfalls that’ll make your repairs pop off in winter. Avoid these:
- Skipping prep. Don’t just fill cracks – clean, test for moisture, size potholes.
- Working on frozen substrate. Thaw first. Apply bonding agents when temps are above 40°F (5°C).
- Ignoring primers. Use a bonding primer to ensure your repair sticks.
- Improper mix/water ratio. Follow product instructions. Too much water weakens the patch.
- Insufficient curing or moisture control. Keep repairs moist and covered for at least 72 hours after application.
- Using wrong product for substrate. Check if your chosen repair is suitable for your surface type.
Follow these steps to avoid winter failures. Prep right, apply smart, cure proper, and you’ll have lasting repairs.
Conclusion
Winter repairs have to be about durability and safety as much as appearance. Pick the option that holds up where it matters: under load, against freeze-thaw cycles, and with a finish you can trust won’t pop off in a cold snap.
Run this quick check in one smooth read: assess the crack or spall to decide if repair is worth it, confirm the surface is clean and dry for cold weather, confirm you will use a bonding method that matches the patch material, test a small area first, follow the product’s cure and temperature guidelines, and then apply the chosen repair with even pressure and proper thickness. If any step seems uncertain, stop and verify before you proceed.
Two big mistakes to avoid are skipping surface prep and applying in conditions that are too cold or damp, which leads to weak adhesion and early failure. Never skip testing, never mix or apply beyond the product’s stated limits, and always wear eye and skin protection while cleaning, mixing, and troweling. If you see evidence of slab movement, wide cracking, or moisture below the surface, or if you’re unsure about the weather window, call in a pro rather than forcing a DIY fix.
When it makes sense to bring in a pro, it’s typically for large areas, obvious movement, or repairs that must hold up under heavy use. Stay disciplined, work in small zones, and keep the site safe and dry. With the right choices and careful steps, you can finish strong and keep the repair from turning into a winter headache.
FAQ
Feather finish vs polymer patch for concrete repair: which should I choose for a winter-ready fix?
Feather finish spreads thin and blends with the existing slab. Use it when you need a smooth look and the patch is small. Polymer patches build up faster and handle more loading; use them for deeper fills or higher traffic areas, but follow manufacturer instructions for cold weather.
What preparation methods give the best results before patching in cold weather?
Clean the area thoroughly and remove loose material. Dry as much as you can; if moisture stays, choose products labeled for damp conditions or follow the product label. Roughen the surface slightly to improve bond, and remove oil or sap stains before applying repair material.
What are the essential surface bonding techniques I should know as a DIYer?
Mechanical bonding helps with rougher textures or feather finishes; scratch and key the surface where needed. Chemical bonding uses primers or bonding agents—read the label and use as directed. Always ensure the repair material is compatible with the substrate and your chosen bonding method.
How do I inspect a repaired area after it cures, and how long will it last in winter?
Check for cracks, pops, or hollow sounds when gently tapping the surface. Look for peeling or scaling after freeze–thaw cycles. For longevity in winter, monitor patches for stiffness loss and follow up with maintenance if cracking appears; use products appropriate for cold conditions per the label.