

Introduction
Cut-In Lines That Look Wavy means learning to make straight, clean-painted edges when painting walls, without wobbly lines. This guide covers practical brush control tips, how to sweep along edges with a steady hand, and how to clean up drips to keep walls smooth. You’ll also get quick checks to know when to stop and how to reset if the line starts to wander.
Before you cut in, prep the room by masking floors, trim, doors, and ceilings so clean edges are easier to keep. Keep a wet edge, wipe excess paint, and use steady, short strokes; for larger areas, plan your approach and clean your tools as you go. If you plan to use a sprayer, check the manufacturer instructions and local rules for safe settings, and test on scrap before applying to walls.
Key takeaways
- Prep walls and edges: clean surfaces, remove dust, patch defects, and prime.
- Mask floors, trim, doors, and ceilings to protect non-painted areas.
- Choose the right masking tape and edge protection for clean lines.
- Brush control helps eliminate wavy lines when feathering edges and consistent pressure.
- When using a sprayer, test spray patterns on scrap and maintain distance.
- Safety warning: Wear eye protection and respirator; follow equipment guidelines.
Table of Contents
- Introduction
- Key takeaways
- Why Cut-in Lines Go Wavy — Root Causes to Identify First
- Preparing Walls and Edges for Crisp Cut-Ins
- Masking Strategies That Actually Produce Straight Lines
- Tools and Materials Checklist for Sharp Cut-in Work
- Brush Control Techniques to Eliminate Wavy Lines
- Cut-in Methods for Meeting Different Colors and Finishes
- When to Use a Sprayer (and How to Get Crisp Lines with One)
- Cleanup, Maintenance, and Safety to Protect Your Edges and Tools
- Conclusion
- FAQ
Why Cut-in Lines Go Wavy — Root Causes to Identify First
Wavy cut-ins come from a mix of tool, surface, and prep issues. Start by spotting mechanical brush problems like worn bristles, improper loading, or edge feathering that leads to jagged edges. Then consider the surface texture, such as new concrete or rough trowel marks, and masking failures that let bleed through reach the line’s edge.
Brush control basics matter, including using the right type and angle, keeping loading consistent, and feathering to smooth transitions. Paint viscosity and conditioning also play a role, since coating thickness and flow affect the edge. Finally, assess masking quality, adhesion, and removal timing to prevent seepage and lift that disturb the line.
Brush and Technique-Related Causes
The waviness of your cut-in lines might be due to issues with your brush or technique. Let’s dive into these.
Brush Type: Using the wrong type of brush can lead to waves. For cut-ins, use an angled sash brush (1.5 to 2.5 inches) with synthetic bristles for better control and flow.
Loading and Grip: Overloading or underloading your brush, gripping it too tightly, or applying inconsistent pressure can cause waves. Hold the brush like a pencil, apply even pressure, and maintain consistent loading.
Stroke Speed and Wrist Movement: Varying stroke speed or moving your wrist erratically can create waves. Maintain a steady pace and keep your wrist still while painting.
Surface and Prep-Related Causes
The condition of your surface plays a significant role in the sharpness of your cut-in lines. Here’s what to look out for:
Dirty or Textured Surfaces: Dirt, dust, or textured surfaces can cause waves. Ensure your surface is clean and smooth before painting.
Uneven Edges: Uneven edges due to poor taping or surface imperfections can result in wavy lines. Inspect your edges for any irregularities before cutting in.
Priming: Priming your surface helps create a smooth, even base for painting. Skipping this step can lead to waves and other paint issues.
Masking and Environmental Contributors
Problems with your masking tape or environmental factors can also cause wavy cut-in lines. Here’s how:
Tape Choice and Adhesion: Using low-quality tape or tape that doesn’t adhere well to the surface can result in paint seepage, lift, and bleed-through, leading to waves. Use high-quality tape and press it firmly onto the surface.
Overspray: Overspray from painting other areas can cause waves if it gets under your tape. Be mindful of this when cutting in near freshly painted surfaces.
Humidity/Temperature: High humidity or extreme temperatures can affect the flow and adhesion of paint, leading to wavy lines. Paint in ideal conditions (between 65-85°F) and monitor humidity levels.
Preparing Walls and Edges for Crisp Cut-Ins
Begin with surface cleaning and deglossing to remove oil and dust, then wipe with a tack cloth for a dust-free base. Lightly sand glossy spots or texture edges to improve tape bite and edge sharpness. Re-clean the area to ensure nothing interferes with adhesion.
Inspect for imperfections like nicks or dried patches, fill and sand until smooth, then re-clean. Do a tape test along the plan line to gauge adhesion and edge quality before painting. Note any spots that may require primer or narrower tape for crisper results.
Cleaning, deglossing, and removing contaminants
Before you start painting, it’s crucial to clean your walls and ceilings. Residues like oil, dirt, or dust can interfere with paint adhesion, leading to poor cut-in lines.
Use a suitable cleaner for the surface material – TSP (trisodium phosphate) works well on most surfaces. Apply it with a sponge or cloth, then let it sit briefly before rinsing off with clean water. Follow up with a tack cloth to ensure no dust remains.
Deglossing is also important, especially if you’re painting over glossy paint or varnish. This helps the new paint bond better and prevents peeling. Use a deglosser or sand lightly with fine-grit sandpaper (220-grit) to scuff up the surface slightly.
Remember, a clean, deglossed surface gives your cut-in lines the best chance at crispness.
Filling, sanding, and smoothing edge transitions
Inspect your walls for any imperfections – nicks, dried patches, nail holes, or uneven textures. These can cause wavy cut-in lines if not addressed.
For small nicks or holes, use spackling compound to fill them in. Let it dry, then sand lightly with fine-grit sandpaper (120-grit) until smooth. Wipe away any dust with a damp cloth before moving on.
Sanding is also important for creating a uniform bite for your tape and paint. Lightly sand any glossy spots or textured edges using fine-grit sandpaper. This helps the tape stick better and creates a smoother edge.
A smooth, even surface ensures your cut-in lines are straight and crisp. Don’t skip this step – it’s worth the extra time!
Masking Strategies That Actually Produce Straight Lines
Choose masking tools based on concrete work, such as painter’s tape, specialized low-lift tapes, or masking film, and know why each helps control waviness. Align tape with the intended line using guides and a rigid edge to press down firmly and minimize bleed. Pre-mark guidelines to help position the tape accurately.
Decide whether to apply tape first or prime first, and plan for overlapping layers to avoid ridges. Keep the surface clean and dry, and factor in temperature and humidity that affect tape adhesion. Create a test strip and choose the masking width that delivers the best edge.
Choosing tape and film for different surfaces
When it comes to masking, the right tape and film can make all the difference. Here’s what you need to know:
Tape Adhesion Levels: Not all tapes are created equal. Some are designed for light-duty jobs like trim work, while others are heavy-duty for floors or ceilings. Check the label – it should tell you the adhesion level.
Edge Profiles: The edge of your tape matters too. For straight lines, use tapes with sharp edges. For rounded corners, use tapes with beveled edges. Again, check the product to know what you’re getting.
Now, let’s talk surfaces:
Floors: You’ll need heavy-duty tape here. It should stick well but also peel off cleanly when dry. Use a film that’s thick enough to protect against paint spills and splatters.
Trim & Ceilings: Here, you can use lighter-duty tapes. They’re easier to remove and less likely to damage surfaces. For ceilings, consider using a film with a matte finish to avoid glare.
Masking floors, trim, doors, and windows
Before you start pouring that concrete, you gotta protect what’s already there. Here’s how to do it right:
Floors: Lay down your floor paper or plastic sheeting. Overlap the edges by at least a foot. Tape it down with painter’s tape, not duct tape – that stuff leaves residue. Check the label for recommended overlap and tape use.
Trim, doors, and windows: For baseboards and trim, use painter’s tape to create a clean edge. Press down firmly to seal out concrete dust. Check base compaction first; if it’s soft, you might need to reinforce with a second layer of tape or even some cardboard.
For doors, pop them closed and tape around the edges. Use a putty knife to press the tape into any gaps. For windows, use plastic sheeting taped over the entire opening. Check for any drafts before you start pouring – you don’t want concrete dust getting in.
Masking ceilings and walling-off partial areas
When it comes to masking your ceiling and partial areas, you want straight lines and minimal mess. Here’s how:
Taping a straight ceiling line: Use a self-leveling tape for best results. Apply it along the edge where the wall meets the ceiling. Press firmly with a smoothing tool to ensure no gaps.
Hanging plastic without sag: Start at one corner, unroll the plastic sheet, and staple it to the ceiling. Keep tension on the roll as you move across, stapling every 6-8 inches. Use a plumb line to ensure it’s straight.
Sectioning off spaces: For partial areas, use zip walls or poly sheeting taped together. Seal gaps with tape to control dust and overspray. Always check manufacturer instructions for the best results.
Tools and Materials Checklist for Sharp Cut-in Work
Core kit essentials include angled sash or edger brushes, a small synthetic roller for blending, low-tack masking tape, masking film or corner guards, and a sprayer option with basic nozzles. Edge-control tools like shields and corner brushes help create crisper lines, with a simple test setup on scrap to verify accuracy. Prepare by cleaning the surface and applying primer if needed.
Consider spray options for base coats versus edges, noting nozzle sizes and basic settings. Include optional upgrades like reusable edger wheels and protective lips, plus rags and solvents for quick cleanup. Use a prep checklist to decide which items are essential for the job size and line quality.
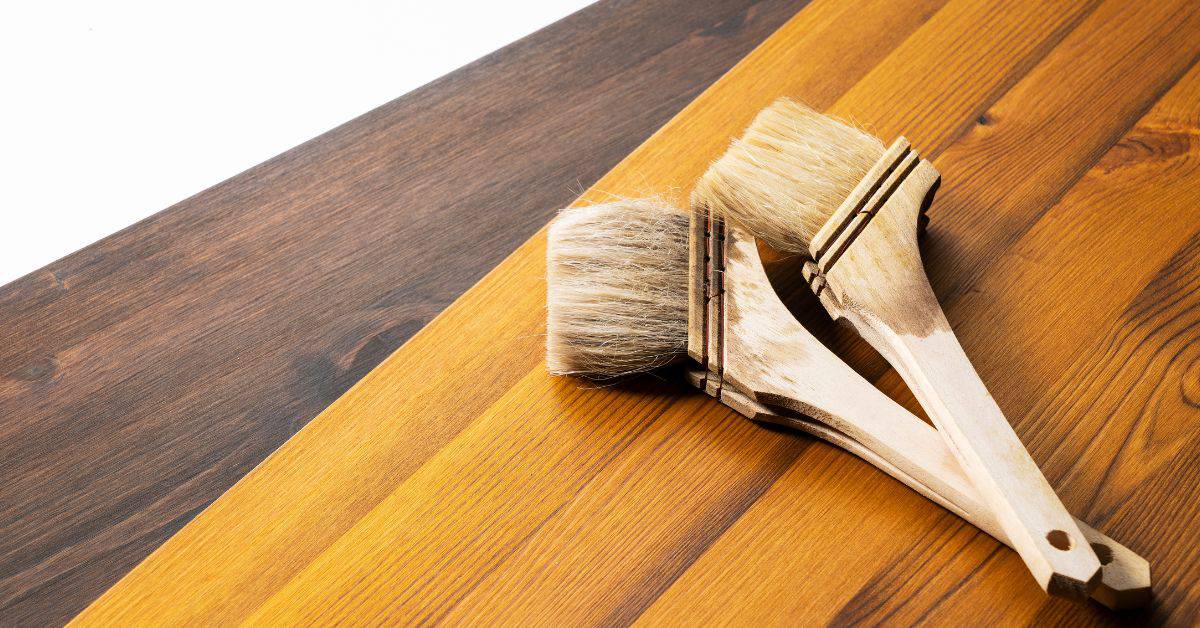
Brushes, edgers, and blade tools
Before you start cutting in, make sure you’ve got the right brushes and edgers for sharp lines. Here’s a quick checklist:
- Angled sash brush (1.5-2.5 inches): Ideal for walls and tight corners. Its angle helps control the paint bead.
- 1-2 inch edger: For crisp lines along baseboards, trim, and other edges.
- Corner brush: Designed to hug corners, leaving clean lines with no overlap.
- Blade tool (optional): For cutting in along straight edges like walls or baseboards. Helps maintain a consistent line.
- Bristles: synthetic: They hold their shape better and release paint more evenly than natural bristles.
- Avoid: long-handled brushes: They’re harder to control, leading to wavy lines.
Quick rule: The right tool makes all the difference. Don’t skimp on quality here.
Tapes, papers, and protective materials
Protecting areas you don’t want to paint is crucial for sharp cut-ins. Here’s what you need:
- Low-tack painter’s tape (0.94-1.87 inches): Sticks well but peels off easily without lifting paint.
- Edge-friendly tape (optional): For baseboards and trim, it has a built-in lip to protect edges from overspray.
- Flooring paper: Protects floors from drips and spills. Use 36-inch rolls for wider coverage.
- Plastic sheeting: Covers large areas like walls or furniture. Thicker plastic holds up better to paint splatter.
- Avoid: masking tape: It’s too aggressive, often lifting paint when removed.
Quick rule: Use the right tape for the job. Low-tack is your friend here.
Brush Control Techniques to Eliminate Wavy Lines
Use a proper grip, stable stance, and controlled wrist motion to minimize tremor along edges. Manage paint loading and consistency by wiping excess and keeping a uniform bead to prevent drips. Maintain straight, long strokes with steady speed and even pressure.
Apply feathering and edge-management techniques to blend the line without softening the edge. Adapt angle and brush face on uneven surfaces and in corners to follow irregularities. Pause to reload when needed and resume smoothly, then check for waviness and adjust as required.
Proper Grip, Angle, and Stroke Mechanics
Start by holding your brush like a pencil, not a paint can. Rest your hand on the wall for stability. Keep your wrist firm but flexible.
Angle your brush 45 degrees to the surface. This helps maintain a straight edge. Keep this angle consistent throughout each stroke.
Use long, steady strokes. Start at the top and work down. Maintain a consistent speed and pressure. Don’t turn or twist the brush; keep it moving in one direction.
Loading the Brush and Feathering the Paint
Dip your brush about two-thirds into the paint. Wipe excess on the lip of the can to control loading.
Before cutting in, ‘feather’ the paint by lightly touching the bristles to the wall in short, quick strokes. This helps distribute the paint evenly and prevents ridges.
As you cut in, maintain a steady pressure. Don’t press too hard or the paint will seep under the tape. Don’t press too lightly or it won’t cover well.
Practice Drills and Visual Checkpoints
Before tackling your walls, practice on a mock-up. This helps you get the feel of cutting in without wasting paint or making mistakes.
- Check your grip: Is it comfortable? Can you maintain it for long periods?
- Observe your angle: Is it consistent? Does it change when you’re tired?
- Evaluate stroke length: Are they even and steady?
- Inspect paint distribution: Is the paint evenly spread on the brush?
- Check your speed: Is it consistent throughout each stroke?
- Examine your edges: Are they crisp and straight?
- Look for ridges: Do any exist where you’ve paused or changed direction?
- Assess your comfort: Are you comfortable with the process? If not, adjust your technique.
Quick rule: If something feels off, stop and reassess. It’s easier to correct on a mock-up than on your walls.
Cut-in Methods for Meeting Different Colors and Finishes
Outline the cut-in sequence for two-color or contrasting finishes, noting where priming and masking fit in and when to apply base coats. Use wet-edge techniques to maintain a damp edge and prevent color migration. Describe how to transition from one color to another without edge lift.
Discuss the tools and tricks for crisp lines on concrete, including brush types and edge guards, and how to pair tools with sheen levels to avoid halos. Identify critical transition points like trim-to-wall and radiused joints, with masking strategies to reduce ridges. Finish with troubleshooting steps to detect bleed and outline a fast cleanup routine to preserve edge sharpness during coatings.
Sequencing and wet-edge control
Start with the lighter color or the one you want to show off. Prime both surfaces first, then mask off the area you’re not painting.
Keep a wet edge as you work by maintaining a damp line of paint along your cut-in. This helps prevent lap marks and ensures a smooth transition between colors.
Back-brush or blend at corners and edges to avoid harsh lines. Work in small sections, keeping your brush loaded and the edge damp until you’ve finished the entire area.
Corners, miters, and two-color joins
For corners, use a corner guide or paint a ‘V’ shape with your brush to create a crisp line. Overlap the second color slightly onto the first to ensure full coverage.
At miters, start at the point where the two surfaces meet. Paint one side, then back-brush into the other side, feathering the paint to avoid a harsh line.
For two-color joins, mask off the area you’re not painting. Start with the first color, keeping a wet edge as you work. When you reach the join, overlap the second color slightly onto the first, then back-brush or blend to create a smooth transition.
When to Use a Sprayer (and How to Get Crisp Lines with One)
Explain when a sprayer makes sense for interior walls, such as large flat areas or color transitions, and when manual brushing or rolling is better to limit overspray. Compare HVLP and airless sprayers and describe which scenarios yield crisper cut-ins in typical spaces. Cover masking and surface prep steps tailored to sprayer use to protect edges while maintaining speed.
Detail gun settings and technique, including nozzle choices, distance, and overlap to achieve uniform coats. Discuss edge management and how to pattern the spray to terminate cleanly at corners and trim without heavy masking. Weigh the pros and cons for common rooms to guide your choice.
Sprayer types and suitability for cut-in avoidance
Choosing the right sprayer can help minimize cut-in work. Here are common mistakes to avoid:
- HVLP vs Airless: HVLP (High Volume, Low Pressure) sprayers provide better control and less overspray for interior jobs. Airless sprayers may cause overspray and require more touch-ups.
- Using the wrong sprayer for small areas: Airless sprayers are better suited for large, flat surfaces like walls or ceilings. For tight spaces or trim work, use an HVLP sprayer.
- Not considering project size: For small projects, manual brushing/rolling may be quicker and cleaner than setting up a sprayer.
- Ignoring paint type: Some paints (like high-gloss or textured) are better applied with brushes or rollers. Spraying these can lead to uneven results.
In summary, for interior jobs, HVLP sprayers offer the best balance between control and coverage. Consider project size and paint type before choosing a sprayer.
Sprayer masking and edge-sparing tactics
Proper masking is key to achieving sharp lines with a sprayer. Here’s how:
Edge protection: Use painter’s tape to seal edges where you don’t want paint. Press down firmly to prevent bleeding.
Drop cloths and floor protection: Lay drop cloths on the floor to protect it from overspray. Tape them in place if needed.
Masking efficiency: Focus on masking edges, not entire surfaces. This minimizes cut-in work while preserving sharp lines. Use a sprayer with adjustable nozzle size for better control near edges.
Cleanup, Maintenance, and Safety to Protect Your Edges and Tools
Cover how to remove and store brushes and sprayer components without losing edge memory and shape, plus recommended cleaners and ventilation steps. List a step-by-step order of operations for pre-cleaning, rinsing, reshaping bristles, and storing tools. Include safety protocols for solvents and disposal per local rules.
Check tools and materials like remaining paint, appropriate cleaners, PPE, and waste containers, ensuring access to water for rinsing. Outline the quick tarp removal, pre-rinse, focused brush cleaning, and dried storage steps to protect tips and threads. Add a short safety and maintenance plan to prevent edge drift on future projects.
Cleaning brushes, rollers, and sprayers correctly
After each use, clean your tools to maintain their shape and performance. Here’s how:
Brushes: Rinse under running water, then use a brush comb or rake to reshape bristles. For solvent-based paints, use the appropriate cleaner to remove residue.
Rollers: Rinse thoroughly and let them dry before storing. For solvent-based paints, clean with the recommended solvent.
Sprayers: Flush the sprayer with water or the recommended cleaner, then clean the nozzle/jet filter to prevent clogging.
Safety, ventilation, and proper disposal
Handling solvents and paint waste requires care. Follow these safety steps:
Solvents: Use in a well-ventilated area, wear gloves, goggles, and a respirator. Keep containers sealed when not in use.
Disposal: Label and dispose of used solvents per local codes. For paint waste, check local regulations for disposal or recycling options. If using battery sprayers, follow the manufacturer’s guidelines for battery disposal.
Waste Containers: Keep them sealed when not in use to prevent solvent fumes from escaping and causing health issues.
Conclusion
Keeping cut-in lines crisp matters for both looks and durability. Stay focused on protection, steady brush control, and clean edges so your work holds up over time and under cleaning.
Follow this practical check as you wrap up: assess the wall surface and edge readiness, confirm masking is snug and straight, choose the right method for the color and finish, test a small area first, then proceed in logical passes before final cleanup. If you’re using a sprayer, practice on scrap or a hidden spot and aim for crisp lines with a shield, a steady hand, and consistent distance, then apply your final coats with care.
Common mistakes to avoid are rushing the masking, skipping a test spot, and overloading either the brush or the sprayer. Keep safety simple: protect floors and outlets, wear eye and skin protection, and unplug tools when changing heads or addressing clogs. If the job involves delicate edges, multiple finishes, or large areas, don’t hesitate to call a professional—steady hands and the right setup save money and prevent irreversible damage. Stay practical, stay patient, and your edges will stay sharp and your finish will read as professional.
FAQ
What should I do to prepare walls before painting to avoid rough edges?
Sand peeling or rough patches smooth, wipe dust off, and fill gaps where needed. Prime damaged or glossy surfaces so paint sticks evenly. Check the label for any recommended primers and drying times.
Which masking techniques work best for floors, trim, doors, and ceilings when using a sprayer?
Use drop cloths on floors and tape off trim and edges cleanly. Use painter’s tape that peels off easily without pulling finish. Protect ceilings with a wide mask or edge shield and remove or tape overnight if you’ll spray later.
How do I choose the right paint sprayer for a home project?
Look for a sprayer that fits the project size and material type you’ll use. Read the manufacturer instructions for setup, flow control, and cleanup. If in doubt, ask the store or check the label for compatible coatings and cleaning requirements.
What’s the best painting process when spraying to keep lines crisp and minimize cleanup?
Dress your edges first with masking and test spray on cardboard or a scrap area. Start spraying off the surface and sweep steadily to avoid heavy buildup. After you finish, run through the cleanup steps recommended by the sprayer maker to protect seals and gaskets.