
Introduction
Cracks along baseboards in plaster walls are gaps that form where the wall shifts with seasons. These gaps are common where plaster settles or expands and contracts with humidity. Addressing them requires understanding movement and choosing a breathable sealant.
Causes include seasonal movement of the plaster, framing, and humidity changes. For sealing, choose caulk types appropriate for plaster and trim and follow manufacturer instructions for cure time and paint compatibility. Apply with care, wiping excess and selecting flexible, paintable options for gaps along baseboards.
Key takeaways
- Identify crack patterns to separate seasonal movement from structural issues.
- Choose flexible caulk capable of longer movement without cracking in plaster.
- Use painter’s caulk for gaps along baseboards and backer boards if needed.
- Apply caulk with a steady bead and smooth with a damp tool.
- Prepare surfaces by cleaning dust, repairing loose plaster, and drying fully.
- Seal after painting to prevent moisture ingress and future baseboard movement.
Table of Contents
- Introduction
- Key takeaways
- Quick Overview: What This Problem Is and When It Occurs
- Common Causes and Diagnostic Checklist
- Tools and Materials Checklist for Repairs
- Preparing the Wall and Baseboard Before Repair
- Caulking and Patching Techniques for Seasonal Movement
- Choosing the Right Caulk for Climate and Materials
- Finishing Touches: Sanding, Priming, and Paint Touch-up
- Preventive Measures and Routine Maintenance
- Conclusion
- FAQ
Quick Overview: What This Problem Is and When It Occurs
Baseboard cracks in plaster walls often stem from seasonal movement between the wall, framing, and trim. They are typically located at baseboard seams, corners, or along the length of trim and differ from other wall cracks in pattern and timing.
Look for signs that widen with seasonal changes, such as gaps that open in winter or after temperature shifts. Root causes include moisture and temperature swings, plaster shrinkage, wood framing movement, and humidity shifts from HVAC use.
Seasonal movement explained
Plaster walls, studs, and trim materials expand and contract with changes in humidity and temperature. This is known as seasonal movement.
Humidity: When the air is moist, these materials absorb water and swell. Conversely, they shrink when the air is dry.
Temperature: Materials also expand when heated and contract when cooled. These changes can cause cracks along baseboards as different parts of your walls move at different rates.
Distinguishing cosmetic vs. structural cracks
Not all cracks are signs of serious structural damage. Here’s how to tell the difference:
Cosmetic cracks: These are usually narrow, hairline cracks that don’t widen over time and aren’t accompanied by other signs of damage. They typically appear at corners or along lengths of trim.
Structural cracks: These are wider, often jagged cracks that may widen over time. They can be accompanied by other signs of damage such as peeling paint, nail pops, or gaps at electrical outlets or door frames. If you notice any of these signs, consider a professional inspection.
Common Causes and Diagnostic Checklist
The main causes to consider are framing settling, plaster shrinkage, humidity and temperature swings, and trim fastened too loosely. These factors guide what you might expect to see at the baseboard joints.
Use a practical diagnostic checklist: observe crack patterns over seasons, measure approximate width changes, photograph sections, gently press on baseboards to test movement, and check for moisture sources such as leaks or condensation.
Materials and installation causes
The choice of materials significantly impacts the durability and appearance of your plastering job. Understanding these materials helps you make informed decisions at the store.
- Plaster Type: Traditional vs Modern
- Traditional plasters (e.g., lime-based) offer a unique aesthetic but require more skill and time to apply.
- Modern plasters (e.g., gypsum-based) are easier to use, set faster, and provide better fire resistance. Look for Type C or Type X for fire-resistant properties.
- Lath: Metal vs Wood
- Metal lath provides superior strength and durability but can be more expensive. It’s ideal for heavy plaster applications.
- Wood lath is cheaper but less durable. It’s suitable for lighter plasters and new constructions where framing is sound.
- Nail Spacing
- Nails should be spaced evenly, typically 4″ to 6″ apart, depending on lath width. Check manufacturer instructions for specific recommendations.
- Incorrect spacing can cause baseboards to warp or crack. Ensure nails are aligned with lath width for optimal support.
- Baseboard Installation
- Properly installed baseboards provide a finished look and support the plaster. They should be securely fastened, typically using finish nails spaced every 6″ to 8″.
- Loose or improperly spaced fasteners can lead to recurring gaps. Gently press baseboards to check for movement.
- Mortar: Type N vs Type S
- Type N mortar is more flexible and suitable for interior walls with normal movement. It’s cheaper but may stain if not properly sealed.
- Type S mortar is stronger, less flexible, and ideal for exterior or high-traffic areas. It’s more expensive but provides better durability.
Pro tip: When buying plasters, check the bag for storage instructions. Some plasters must be stored in a cool, dry place to maintain their setting properties. Always mix small batches first to ensure consistency and avoid waste.
Environmental and Seasonal Contributors
Use this checklist when investigating interior joint issues to understand how external factors contribute to the problem.
- Check outdoor temperature: Extreme heat or cold can cause expansion and contraction of exterior walls, affecting interior joints. Confirm with local weather records for recent months.
- Inspect HVAC cycles: Frequent on/off cycling of heating and cooling systems can lead to joint stress. Observe system operation over a few days.
- Measure indoor humidity: High humidity levels can cause expansion and warping, while low humidity can lead to shrinkage and cracking. Use a hygrometer for accurate readings.
- Examine exterior climate: Harsh weather conditions like heavy rain, snow, or wind can impact interior joints through the building envelope. Check recent weather patterns in your area.
- Gently press baseboards: Movement indicates potential settling or shrinkage due to seasonal changes in moisture and temperature. Press gently along the length of the baseboard.
- Inspect crack patterns: Cracks aligning with corners or joints, and showing seasonal widening, suggest movement due to environmental factors. Check for these patterns throughout the affected area.
- Check diagonal cracks: Diagonal cracks along baseboards may indicate more extensive issues like damaged plaster or framing movement. Inspect carefully for signs of structural problems.
- Review seasonal history: Past environmental conditions can contribute to current joint issues. Consult local weather records and historical home maintenance notes.
Quick rule: If cracks align with corners or joints and show seasonal widening, reattach or resecure trim to address movement. If diagonal cracks appear along baseboards with no clear alignment, consider more extensive remedies like replacing damaged plaster or addressing framing movement.
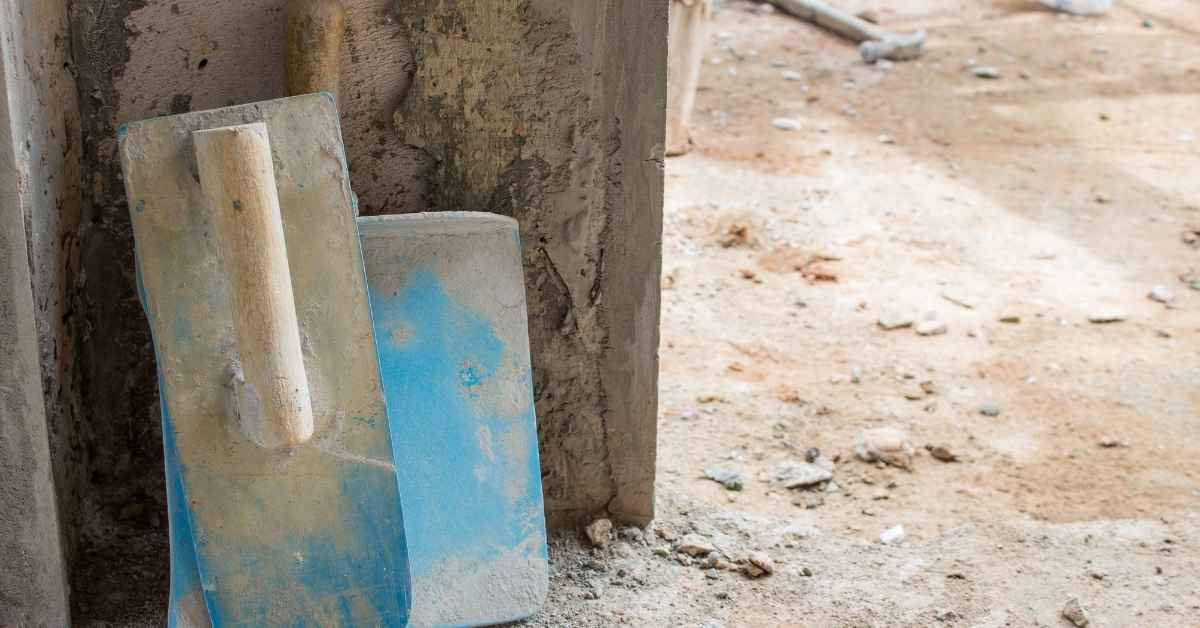
Tools and Materials Checklist for Repairs
Essential prep tools include putty knives, scrapers, a sanding block, utility knife, caulk gun, painter’s tape, a damp sponge, and a dust brush. Have these ready before starting work.
For patching and sealing, select patching compounds compatible with plaster, tapes for larger cracks, and a paintable caulk that matches nearby surfaces. Keep primer and a finishing sander on hand for a smooth finish.
Caulk and Sealant Types to Consider
Selecting the right caulk or sealant is crucial for a durable and long-lasting repair.
- Acrylic-Latex: Suitable for porous surfaces like plaster. It’s paintable, flexible, and affordable. Check if it’s compatible with your baseboard material.
- Silicone: Ideal for non-porous surfaces like metal or glass. It’s waterproof, durable, but not paintable. Verify it’s suitable for your application area.
- Siliconized Latex: Combines benefits of acrylic-latex and silicone. It’s flexible, paintable, and water-resistant. Confirm compatibility with both plaster and baseboard materials.
- Polyurethane: Offers excellent adhesion and flexibility. It’s suitable for gaps around trim but not walls due to its strong odor. Avoid using it in areas with high moisture or extreme temperatures.
Quick rule: Always choose a caulk that matches your surface type and application area to prevent failures.
Other Materials and Consumables
Using the right materials ensures a smooth repair process with lasting results.
- Painters’ Tape: Protects adjacent surfaces. Use it to mask off areas, check for proper adhesion and removal without residue.
- Primer: Prepares surface for painting. For plaster, use a stain-blocking primer to seal porous surfaces. Avoid using it on non-porous surfaces like metal or glass.
- Patching Compounds: Fills cracks and holes. For plaster walls, use a gypsum-based joint compound. Verify it’s suitable for your surface type.
- Cleanup Supplies: Includes sponges, brushes, and rags. Use them to clean up excess material and ensure proper disposal according to local regulations.
- Backing Materials: Like fiberglass mesh tape or paper tape, they reinforce large cracks. For wide cracks (<1/4 inch), use fiberglass mesh tape. Avoid using it on narrow cracks as it may cause uneven surfaces.
- Bonding Agent: Improves adhesion of patching compounds to porous surfaces. For better adhesion, apply a bonding agent or primer/sealer before patching. Avoid using it on non-porous surfaces.
Preparing the Wall and Baseboard Before Repair
Set clear goals to create a clean, stable substrate and a defined joint for patching or caulking. This reduces the chance of future movement-caused cracks.
Clean and remove loose material, inspect for seasonal gaps, and decide whether to remove or loosen the baseboard to access the joint. Lightly abrade the joint edge to improve adhesion.
Safe removal of loose material and dust control
The success of your repair depends on the careful removal of loose plaster and proper dust management. Using the right tools and techniques ensures a clean, stable substrate for patching or caulking.
- Flexible scraper: Use a flexible, non-abrasive scraper to gently remove loose plaster and flaking paint. This tool helps prevent damage to underlying materials and reduces dust dispersion. Look for one with a comfortable grip and a blade that’s not too stiff.
- Vacuum with soft brush: Vacuum the area with a soft brush attachment to minimize dust dispersion. This helps contain dust and protects your working environment, as well as existing finishes.
- Damp cloth for stubborn dust: If dust is excessive or stubbornly adheres to surfaces, wipe the area with a damp cloth. Allow it to dry completely before proceeding to ensure optimal adhesion of patching materials or caulk.
- Avoid harsh tools: Steer clear of harsh tools like wire brushes or metal scrapers that could damage underlying materials or create more dust, leading to a poor working environment and potential finish issues.
- Protective gear: Wear a face mask and safety glasses to protect yourself from dust and debris during the removal process. This helps ensure your safety and comfort while working.
Protecting trim, floors, and adjacent finishes
Properly protecting surrounding areas during the repair process helps prevent damage to baseboards, flooring, and other adjacent finishes. This ensures a clean, undamaged workspace and reduces the risk of additional repair costs.
Start by laying drop cloths on the floor to catch falling debris and protect surfaces from dust. This simple step helps maintain a clean working environment and prevents damage to your floors.
Next, apply painter’s tape along baseboards, walls, and floors to create a barrier that protects these areas from paint chips or caulk splatter during the repair process. Regularly check and replace tape as needed to maintain protection throughout the repair process.
If your baseboards are delicate or have intricate details, use a low-tack, delicate surface tape to avoid pulling off paint when removing the tape. Gently press down on the tape to ensure proper adhesion and protect the surfaces below.
Caulking and Patching Techniques for Seasonal Movement
Choose flexible caulk for moving joints when gaps open or close with temperature changes, and consider patching fillers for severely cracked sections. This helps accommodate seasonal movement around baseboards.
Follow general prep steps: clean, damp-dry, remove old filler, prime porous faces, and place backer rods or tape as needed. Apply with care to form a durable, flexible seal.
Choose Appropriate Backing Material and Joint Size for Caulking
A suitable backing material and correct joint size ensure a durable, flexible seal that accommodates seasonal movement.
- Foam backer rod: Use when the joint width exceeds 1/4 inch (6 mm). It sets proper joint width and depth, preventing over-application of caulk. Opt for rods with a smooth surface to avoid adhesion issues. Install before applying sealant.
- No backing material: Suitable for joints narrower than 1/8 inch (3 mm). It promotes better adhesion and reduces cracking risk due to expansion/contraction. Ensure the joint is clean and dry before caulking.
- Incorrect backing material: Using foam backer rod in narrow joints may result in weak adhesion, while not using any backing in wide joints could lead to excessive caulk usage and potential cracking under stress.
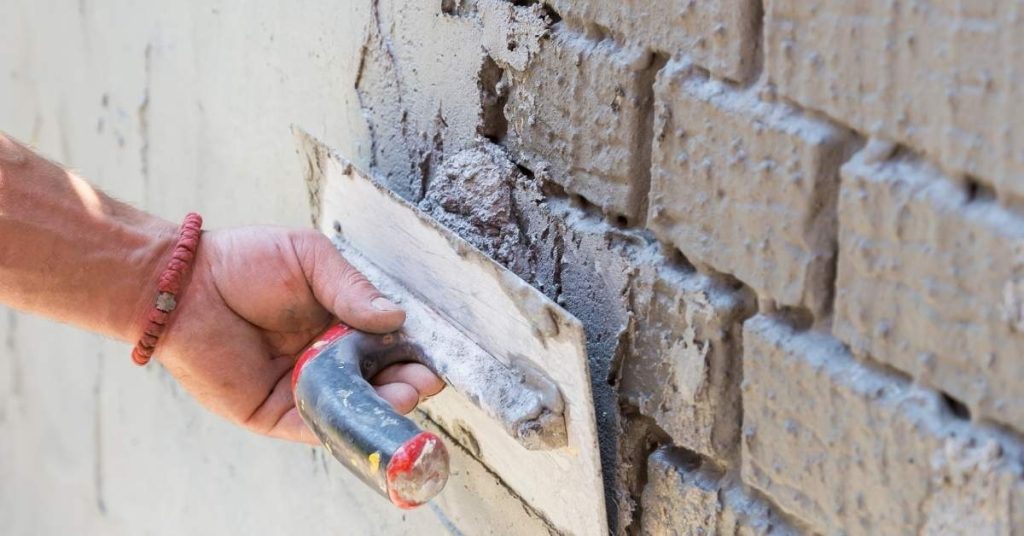
Applying Caulk for a Clean Finish
Maintain a consistent angle with the caulk gun, approximately 45 degrees, to apply even pressure and create a neat bead.
Immediately tool the bead using a damp finger or tool to smooth out any unevenness. This helps prevent cracking and ensures a clean finish. Ensure the bead’s width is slightly wider than the joint to accommodate expansion and contraction.
Allow the caulk to dry according to the manufacturer’s instructions, typically within 24-48 hours for full cure. Maintain proper ventilation during this time to prevent moisture buildup and potential mold growth.
Choosing the Right Caulk for Climate and Materials
Choose a caulk with higher elasticity to match seasonal movement of plaster walls and baseboards. Compare caulk families by flexibility, paintability, and adhesion to plaster versus wood, focusing on practical trade-offs for DIY fixes. Avoid product specs and rely on guidance that matches climate and surface conditions.
Surface preparation matters: clean, dry surfaces, remove dust, and prime as needed to maximize adhesion on plaster and painted wood. In regions with movement, select a more flexible formulation; if repainting is anticipated, consider paintable acrylic latex. Before caulking, rub the surface with a damp cloth to check readiness.
Cold, Hot, and Humid Climate Considerations
Extreme seasonal conditions can cause caulk to fail prematurely. Prioritize these properties when choosing a caulk:
Temperature Resistance: For extreme cold or heat, opt for formulations with low/high temperature resistance.
Humidity Tolerance: In high humidity areas, choose mold/mildew resistant options to prevent growth and degradation. Allow for seasonal re-sealing as needed.
Before purchasing, inspect caulk’s suitability for your specific climate zone (cold, hot, humid) by verifying its flexibility range, temperature resistance, and humidity tolerance on the label or datasheet.
Caulk Paintability and Compatibility
The ability to repaint over caulk affects maintenance of baseboards’ finish quality.
Paintable Caulk: If you plan to repaint within 1-2 years, choose paintable caulk. Before application, confirm compatibility with your intended paints and primers.
Non-Paintable Options: If no immediate repainting is planned, consider non-paintable options for better longevity and lower cost. Ensure they are compatible with your current paint finish.
To prevent common issues, always test caulk compatibility with your intended paints and primers before application. If incompatibility occurs, remove the failed caulk, prime, and reapply a suitable paintable formulation.
Finishing Touches: Sanding, Priming, and Paint Touch-up
Determine when sanding is appropriate after filling and plaster repair, outlining a sensible grit progression and dust control. This prepares the surface for finishing steps.
Select primers suitable for plaster and caulk seals, and decide when to use shellac versus latex primers. Plan how to blend repairs with surrounding walls for a seamless look.
Visual checkpoints for a professional look
Before declaring your repair job complete, perform these quick visual inspections to ensure a high-quality, seamless finish.
- Check for missed spots: Inspect the area with a magnifying glass to catch any overlooked imperfections or hairline cracks.
- Examine sheen consistency: Compare the repaired section with the surrounding wall under different lighting angles and distances. Inconsistent sheen may indicate uneven application or improper primer use.
- Inspect texture uniformity: Ensure the repaired area blends smoothly with the rest of the wall, with no visible gaps or rough patches.
- Check for bubbles or ridges: These can form if paint was applied too thickly or if the surface wasn’t properly prepared.
- Verify caulk bead: Ensure the caulk line is smooth and even, with no gaps or cracks. If visible, re-caulk as necessary.
- Check for stains or discoloration: These may indicate that a stain-blocking primer was not used or that it wasn’t allowed to dry properly before painting.
- Inspect paint edges: Ensure they are well-feathered and blend seamlessly with the surrounding wall. Sharp lines can indicate overworking the joint.
- Check for any signs of moisture: This could indicate a more serious underlying issue that needs to be addressed.
Quick rule: Address any identified issues promptly to prevent further complications or the need for rework.
Timing Paint Application Over Caulk and Patch Materials
The drying and curing times of your chosen caulk and patch materials significantly impact the final paint job. Time your painting accordingly:
- Caulk: Check product label for ‘dry-to-touch’ or ‘cure’ times to ensure safe priming and painting without risking cracking or peeling. Gently touch with a clean finger to assess tackiness.
- Spackling compound: Allow complete drying before sanding, priming, and painting. Check product label for specific drying times (24 hours to several days depending on conditions).
- Joint compound: Similar to spackling compound, allow complete drying before proceeding. Refer to product label for exact drying times.
- Plaster patching materials: Typically require longer curing times. Follow manufacturer’s instructions for best results.
Tip: Always verify manufacturer’s recommendations for drying, curing, or setting times of both caulk and patch materials before priming and painting to ensure adhesion and flexibility.
Preventive Measures and Routine Maintenance
Seasonal movement affects baseboard cracks in plaster walls, influenced by humidity and temperature swings. Establish practical humidity targets and monitor conditions regularly.
Implement a routine that includes inspecting gaps, tightening trim as needed, and sealing small cracks before they widen. Consider a simple plan for biannual checks and when to involve a professional for structural concerns.
Simple Homeowner Maintenance Schedule
Regular upkeep is key to preventing minor issues from becoming major problems. Here’s a simple maintenance schedule for your plaster walls and baseboards:
Monthly: Conduct a quick visual check for new cracks or widening gaps at baseboards, corners, and where trim meets drywall/plaster.
Biannually (before and after heating season): Perform a thorough inspection. Check for any new cracks or widening patterns across seasons. Address any issues promptly to prevent recurrence.
Upgrades to Reduce Future Cracking
Long-term fixes can minimize seasonal movement impacts on your plaster walls and baseboards. Here are some upgrades to consider:
Regularly check for any new cracks or widening gaps. Inspect trim fasteners, framing, and joints for signs of wear or movement.
If you detect brittle trim fasteners, loose studs, or framing shifts, replace or secure them as needed. Consider adding flexible backer or transition strips to absorb minor movements and prevent future cracking.
Conclusion
Consistently addressing seasonal movement along baseboards keeps plaster walls looking neat and reduces the risk of further cracking. By following careful prep, the right caulk choice, and a patient finishing process, you protect both durability and appearance while maintaining a safe work environment.
Proceed with a simple, practical checklist in sequence: start with a quick assessment of movement and any moisture or framing issues, then prepare the wall and baseboard surface, select the appropriate caulk for the climate and materials, apply and smooth the patch to accommodate movement, allow proper curing, and complete with light sanding, priming, and paint touch‑ups, followed by ongoing preventive checks. Move through each step methodically, testing a small area first and working in clean, dry conditions to avoid rework.
Common mistakes to avoid include skipping surface preparation, using the wrong type of caulk for the material or climate, and rushing the cure or cleanup. Always read product labels and follow manufacturer guidance, test in a discreet area, and keep ventilation and personal protection in mind. If you encounter cracks that reappear after patching, signs of active moisture, or structural looseness, consider bringing in a professional rather than forcing a repair, and remember that careful, steady work now saves effort and cost later. With these steps, you can achieve durable, good-looking results and plan for trouble-free maintenance ahead.
FAQ
What causes cracks along baseboards in plaster walls?
Cracks often occur from seasonal movement as the house expands and contracts with temperature and humidity changes. Settlement, framing stiffness, and plaster shrinkage can also contribute. Check if cracks follow joints or run along corners to help identify the underlying cause.
What techniques help repair seasonal wall movement around baseboards?
Address movement by allowing for small, flexible gaps with appropriate caulk. Use backer rod if gaps are deep and apply a flexible sealant that can accommodate movement. Refinish with primer and paint after the sealant cures as directed by the manufacturer.
What types of caulk are suitable for filling gaps along baseboards and plaster?
Look for highly flexible, paintable caulks labeled for interior use on plaster or wood. Silicone-based caulks stay flexible but may require painting with compatible paints, while polyurethane or acrylic latex caulks with silicone may offer good durability. Avoid rigid caulks that do not accommodate movement.
How should I apply caulk for the best long-term performance?
Clean the gap and use a steady, even bead to fill it. Tool the seam with a wet finger or caulk tool to create a smooth finish that adheres well. Allow curing as per the product instructions before priming or painting.