
Introduction
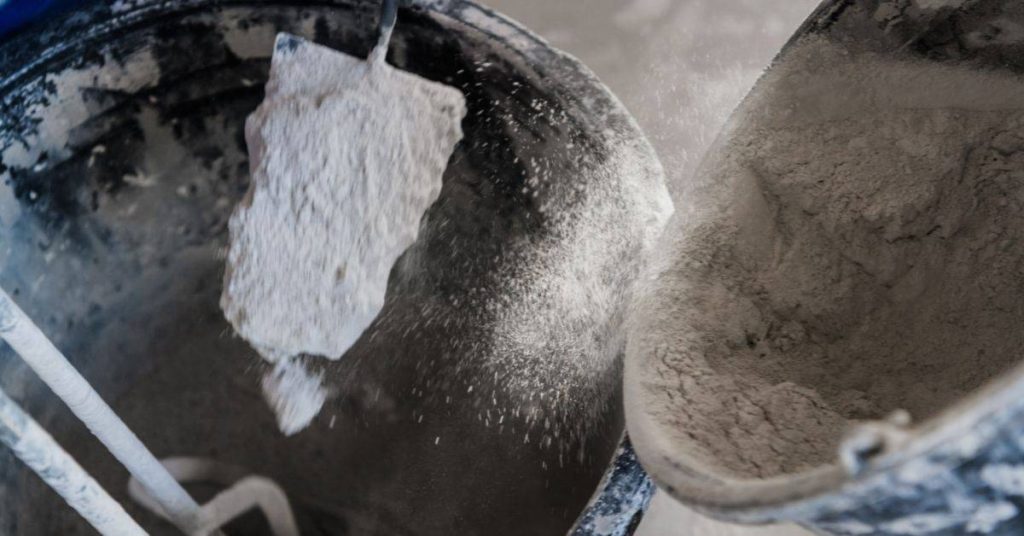
Workability without extra water means making concrete easier to work with using techniques that don’t add more liquid. You’ll want a cohesive, workable texture that stays in place as you place and finish. Start by checking the mix for uniform consistency and using the right blend of aggregates and cement in your batch.
If you’re curious about how professionals verify the consistency, you can look at concrete cylinder testing methods and the equipment used to sample fresh concrete. Casting and curing cylinders is a common way to study how a mix behaves over time, and you’ll want to follow safe, manufacturer-approved steps for both sampling and handling. Practical stays on the job: plan for how you’ll transport and manage fresh concrete and its cylinders to avoid segregation or damage during the process.
Key takeaways
- Avoid adding water on-site; stick to approved admixtures and manufacturer guidelines.
- Prepare sampling plan for fresh concrete and practice proper cylinder sampling procedures.
- Document casting, curing, and labeling cylinders to track workability over time.
- Mechanical methods and correct placement practices maintain workability without extra water.
- Safeguard safety: wear PPE, follow materials handling rules, and avoid slip hazards.
- Quality control: verify cylinder results align with contractor specs and local codes.
Table of Contents
- Introduction
- Key takeaways
- Why You Should Avoid Adding Extra Water on-Site
- Chemical Admixtures: the Primary Safe Option to Loosen Mixes
- Aggregate and Material Adjustments That Improve Workability
- Mixing, Placement, and Mechanical Methods to Loosen a Mix
- Placement, Protection, and Finishing to Preserve Workability Without Extra Water
- Quality Control, Common on-Site Mistakes, and Troubleshooting
- Cost, Safety, and Long-Term Implications of Workability Choices
- Conclusion
- FAQ
Why You Should Avoid Adding Extra Water on-Site
Adding water after batching softens the surface but does not fix the underlying mix. The slump increases and segregation can occur, wasting strength and bond. Always check the label or manufacturer instructions before any adjustments.
Long-term durability suffers as the water-cement ratio rises, creating a weaker matrix and more porosity. Cracking, shrinkage, and freeze-thaw damage become more likely if water is used as a shortcut. Plan safer on-site options and keep records of any deviations for review.
What ‘workability’ means in practice
Workability is how easily you can place, consolidate, and finish your concrete. It’s all about handling the mix without it being too stiff or too soupy.
On-site, we measure workability with a slump test. We drop a cone of concrete, and if it slumps down nicely, that’s good workability. Too much water makes it slump too far; not enough, and it won’t slump at all.
Think of it like cookie dough – you want it soft enough to roll out, but not so soft it sticks everywhere.
How extra water changes strength and durability
Adding extra water on-site might make your concrete easier to work with now, but it’s a bad idea in the long run.
Water makes up pores in the concrete as it dries. Too many pores mean less strong stuff holding everything together. It’s like having too many holes in a brick wall – not good for keeping out the cold or rain.
Too much water also raises the risk of cracking. When the concrete shrinks as it dries, those cracks can open up wider than they would with less water. And if you’re in a place where it freezes, all that extra water turns to ice and makes things even worse.
So, while adding water might make your life easier right now, it’s making your concrete weaker and more likely to fail over time.
Chemical Admixtures: the Primary Safe Option to Loosen Mixes
Polycarboxylate-based superplasticizers, HRWRs, and mid-range reducers can restore workability without extra water. They are selected to maintain strength and compatibility with common cement blends. Always obtain the product data sheets and compatibility notes before adjusting the mix.
Request supplier guidance when current slump targets are not met, and when ambient conditions affect placement duration. Use admixtures at the final mixing stage and avoid repeated dosing or premature addition. Document results for future reference and code compliance.
How superplasticizers work and dosing considerations
Superplasticizers, also known as polycarboxylate-based admixtures, are your best bet for loosening concrete mixes without adding extra water. They work by dispersing cement particles and reducing interparticle friction, making the mix flow better.
Dosing is crucial. Too little won’t do much, too much can cause problems. Always follow the manufacturer’s guidelines. A typical dose range is 0.5-2% of cement weight, but it varies based on cement type and other materials in your mix.
Don’t guess the amount. Do batch tests to find the right dosage for your specific mix. This ensures you get the workability boost without compromising strength or durability.
Compatibility and sequence: admixtures, set retarders, and accelerators
Admixtures play well with some things, not so much with others. They’re compatible with most cement types, fly ash, slag, and silica fume blends. But always check first.
Set retarders can extend your working time when you need it. But use them after adding the superplasticizer. Adding admixtures before set retarders can reduce their effectiveness.
Accelerators speed up setting time. They’re usually added last, after both admixtures and set retarders. Always check with your supplier for specific sequence and compatibility advice. Trial mixes or supplier guidance can help avoid issues.
Aggregate and Material Adjustments That Improve Workability
Aggregate grading, shape, and fines content influence cohesiveness and flow without extra water. Use practical thresholds from your mix design and follow signposts on particle shape and packing. These changes affect how the mix compacts and finishes.
SCMs like fly ash and slag can help reduce water demand and improve cohesiveness when compatible with your cement. Describe dosage considerations and verify with the supplier if you plan to adjust materials. Keep notes on observed workability changes.
Optimizing aggregate gradation and maximum size
Better-graded aggregates fill voids more efficiently. This reduces the need for extra water to achieve desired workability.
For typical mixes, aim for a grading band between 40% fine (passing #8 sieve) and 65% coarse (retained on #30 sieve).
Appropriate maximum size depends on your mix design. Generally, it’s around 1/2 to 3/4 the width of your formwork.
Role of supplementary cementitious materials (SCMs)
SCMs like fly ash and slag can increase paste lubricity or improve cohesion, reducing water demand. They’re added to the mix during batching.
- Fly Ash: Class F (silica-based) is common. Use 15-30% replacement of cement. Avoid overdosage to prevent delayed set.
- Slag: Ground Granulated Blast-furnace Slag (GGBFS). Use 25-70% replacement. Check compatibility with your cement type.
- Silica Fume: Highly reactive. Use 5-15%. Avoid overdosage to prevent excessive strength gain and cracking.
Mixing, Placement, and Mechanical Methods to Loosen a Mix
Document targeted mixing time per batch and choose between portable or stationary drum mixers. Record rotation speed, load size, and clean-out practices to maintain consistency. Avoid shortcuts that lead to uneven placement.
Re-mixing and controlled agitation can reintroduce workability without adding water. Limit agitation to prevent segregation. Use vibration and pumping techniques to assist flow without overworking the mix.
Proper mixing sequence and re-mixing safely
Start by adding clean water to the mixer. Then, introduce cement and supplementary cementitious materials (SCMs) like fly ash or slag.
Next, add coarse aggregates, followed by fine aggregates. This order helps maintain a consistent mix and prevents overworking, which could lead to segregation or increased water demand.
If you need to re-mix partially set material, do so gently and briefly. Overworking can cause aggregate separation and reduce workability. Avoid adding water during remixing; instead, use the existing moisture in the mix.
Vibration, internal consolidation, and pumping practices
Use internal vibrators during placement to remove air pockets and improve flow. Insert the vibrator into the concrete at regular intervals, ensuring it reaches all parts of the mix.
For large pours or when using a pump, employ external vibrators or needle vibrators at the end of the discharge hose to prevent blockages and ensure complete consolidation.
When pumping, maintain a steady rate of discharge. Too fast can cause segregation; too slow may lead to stiffening. Keep the pump height as low as possible to minimize pressure buildup and potential voids. Regularly clean and inspect the pump to prevent clogging.
Placement, Protection, and Finishing to Preserve Workability Without Extra Water
Plan placement sequencing and staging to minimize segregation and keep plastic properties stable. Batching order and carry distance matter for a smooth pour. Maintain continuous work where possible to avoid delays.
Prepare forms and substrates in advance so finishing does not tempt water addition. Use curing methods that maintain moisture without diluting the surface, and protect the concrete from wind and sun during early curing.
Timing and staging for continuous pours
Planning your concrete pour is key to maintaining workability. Here’s how:
Batch in order. Have your mixer ready with the first batch before starting the pour. This keeps materials fresh and reduces segregation.
Minimize carry distance. The shorter the path from mixer to form, the less workability is lost due to settling.
Plan for a continuous pour. Once started, keep that concrete coming. Delays cause materials to set up and lose workability.
Protecting fresh concrete from evaporation and temperature effects
Fresh concrete is sensitive to its environment. Here’s how to protect it:
Use curing blankets or wet burlap to cover the pour immediately after finishing. This retains moisture and maintains workability.
Set up wind breaks. A simple barrier can shield your pour from drying winds, preventing premature crusting.
Monitor temperature. Concrete sets faster in hot weather. Adjust your finishing schedule accordingly to preserve workability.
Quality Control, Common on-Site Mistakes, and Troubleshooting
Set up on-site quality control for workability without adding water: target slump, consistent mixing time, and proper aggregate moisture checks. Align activities with the approved mix design and admixture dosing. Document deviations as they occur.
Common mistakes include over-trucking, late admixture addition, and poor moisture control. Follow a step-by-step troubleshooting flow: measure slump, check batch tickets, assess aggregate moisture, and test a small trial batch before proceeding.
Field checks and visual checkpoints to assess workability
Use this checklist regularly during mixing and placement to monitor your concrete’s workability.
- Slump test: Check slump every 15 minutes. If it drops below target, troubleshoot.
- Flow test: Use a flow table for more accurate results. Aim for 20-30% flow.
- Segregation check: Inspect concrete surface for signs of segregation (e.g., excess water on top, dry aggregates).
- Temperature check: Keep an eye on temperature. Ideal range is 68-77°F (20-25°C).
- Setting time: Monitor initial and final set times to ensure proper curing.
- Color consistency: Check for uniform color, indicating consistent mix.
- Aggregate exposure: Look for exposed aggregates. If present, adjust water or admixtures.
- Bleeding check: Observe bleeding rate. Excessive bleeding indicates too much water.
Quick rule: Don’t wait until workability drops drastically before acting.
Typical corrective actions and when to stop and re-batch
First, identify the cause of poor workability. Then, take appropriate corrective actions.
Too dry: Add approved water-reducing agents or superplasticizers. Never add plain water!
If aggregates are too wet, stop and re-batch. Excess moisture causes strength loss and segregation.
If slump drops rapidly despite corrective actions, stop and re-batch. Continuing may lead to weak concrete. Document all changes and outcomes for future reference.
Cost, Safety, and Long-Term Implications of Workability Choices
Compare the direct costs of admixtures and alternative materials with the costs of rework and downtime. Consider labor and safety implications when selecting a path that avoids extra water. Seek guidance from the project specs when in doubt.
Think about long-term performance: strength development, durability, and resistance to cracking or permeability. Use a quick decision framework to balance risk, cost, and safety, and maintain documentation to support field choices.
Cost trade-offs: admixtures vs delays and rework
Adding chemical admixtures to improve workability can seem pricey, but it’s often cheaper in the long run. Here’s why:
Admixtures: They’re typically 2-5% of concrete cost. They reduce water demand, so you use less cement and aggregates.
Delays and rework are expensive. Every hour of downtime costs labor, equipment, and potential fines for late completion. Re-batching adds material costs and waste disposal fees.
Check supplier pricing. Savings from fewer defects can offset admixture cost. For instance, reducing water-cement ratio by 1% can save $350 per cubic yard in cement alone.
Safety and handling best practices during transport and placement
Concrete is heavy and hazardous. Here’s how to keep your crew safe:
Transport: Secure loads properly. Use safety chains, tarps, and secure loads at 45° angles or less.
Lifting: Use proper lifting techniques. Avoid twisting or turning while lifting. Wear gloves and use tools like shovels or rakes to move concrete.
PPE: Wear personal protective equipment. This includes hard hats, safety glasses, steel-toed boots, and high-visibility vests.
Vibration: Limit exposure to vibration from power tools and equipment. Use anti-vibration gloves and take breaks when needed.
Real-world consequence: case examples and lessons learned
Here are two scenarios illustrating the impact of workability choices:
Case 1 – Improper water addition: A crew added extra water to speed up pouring. Result? Low strength, excessive cracking, and a $20k repair bill.
Lesson: Stick to mix design. Extra water weakens concrete. Always check slump before placing.
Case 2 – Using admixtures: A project used a water-reducing admixture. Pouring was faster, with no delays or rework. Final product had high strength and low permeability.
Lesson: Admixtures can save time and money. But choose the right one for your mix design and follow manufacturer guidelines.
Conclusion
Keep the workability gains you need without risking durability or finish by sticking to approved methods and testing before you commit. A little planning now saves costly fixes later and keeps the surface looking right and performing reliably.
Start with a simple, practical check: test a small batch or test panel, choose a safe option such as a recommended chemical admixture or a known aggregate adjustment, mix in small increments, and confirm the mix remains workable for the full placement window before proceeding with the main batch. Follow the manufacturer’s instructions and your project specs, document the results, and adjust in measured steps rather than guessing.
Common mistakes to avoid are obvious but costly: adding extra water on-site, over-dosing a chemical admixture, or rushing the placement and finishing. Safety rules are simple—wear proper PPE, test on a small area first, and never alter a mix beyond tested recommendations. If a mix won’t behave after a couple of targeted adjustments, pause, reassess, and plan the next try with data rather than impulse.
If the project demands are beyond what you can safely handle, or you repeatedly fight with mix behavior despite careful testing, it’s time to call in a professional. A quick consult can prevent expensive rework and protect long-term performance. Stay methodical, stay safe, and you’ll finish strong with a solid, durable result you can be proud of.
FAQ
How are concrete cylinders tested for strength in the lab, and what should I expect if I want to check it myself?
Concrete cylinder testing measures compressive strength after curing. Expect a lab to cast, cure, and test cylinders at set ages; DIY home testing isn’t a substitute for proper lab procedures. Ask the supplier or local lab for their exact test method and curing protocol, and follow their instructions if you’re doing any sampling at all.
What equipment is used to sample fresh concrete for cylinder tests, and how can a DIYer do this safely?
Common tools include a scoop or sampler, a molding box, and a tamping rod. For DIY, use clean, labeled molds and fill them evenly, then compact per instructions. If you’re unsure, check the manufacturer’s instructions or local rules and never improvise with unapproved tools.
How should cylinders be cast and cured, and what should I verify before moving the samples to a lab or storage?
Cast cylinders in a clean mold, fill in layers, and tamp each layer to remove air. For curing, keep cylinders in a controlled environment as directed by the mix producer or lab; avoid extreme heat or direct sun. Verify the curing time, moisture/temperature requirements, and label each sample clearly with date, mix, and location.
What’s involved in transporting and handling cylinders to preserve strength results, and what should I do if I can’t deliver them to a lab?
Transport upright, avoid jostling, and keep cylinders at the proper curing conditions until testing. If you can’t deliver to a lab, document the setup and discuss options with a local testing facility or the mix supplier; don’t rely on home-made tests to replace standard strength testing.