
Introduction
Peeling is when a previously applied stain sealer lifts, flakes, or dulls away from the concrete surface. This usually happens when the sealer didn’t bond well, or when the surface wasn’t prepared or conditioned properly. In DIY terms, you’ll often see peeling after weathering, moisture, or mismatched coatings.
To recoat correctly, start with a thorough prep: remove loose material, clean the surface, and ensure it’s dry before applying a new sealer. Check the product label and manufacturer instructions for surface prep, compatible sealers (penetrating, acrylic, or epoxy), and application guidelines, including compatibility with Cryli-Tek 5505 or similar products. If you’re planning a project, start here by choosing a sealer that matches your needs and by following a simple planning checklist.
Key takeaways
- Cryli-Tek 5505 offers durable coating options; compare with two leading competitors.
- Planning a Project? Start Here helps define scope, surfaces, and timelines before purchase.
- Types of concrete sealers: penetrating, acrylic, epoxy—choose based on use and maintenance.
- Diagnosing peeling requires tests and visual checkpoints during inspection and documenting findings.
- Safe prep and removal: follow manufacturer instructions; wear PPE and ventilate well.
- Recoat correctly: system selection, proper adhesion checks, and even tool control.
Table of Contents
- Introduction
- Key takeaways
- Why Concrete Stain Sealers Peel
- Types of Concrete Sealers and How They Behave
- Planning a Project? Start Here
- Diagnosing Peeling—Tests and Visual Checkpoints
- Removing Old Sealers and Preparing Concrete
- How to Recoat Correctly—System Selection and Application
- Tools, Materials and Safety Checklist
- Cryli-Tek 5505
- Conclusion
- FAQ
Why Concrete Stain Sealers Peel
Stain sealers peel mainly because moisture, poor adhesion, contaminants, UV/weathering, or heavy wear break down the film over time. You’ll see peeling at edges, blistering, powdery residue, white halos, and flaking near joints as these failures progress.
Know the clues and check them on site: test for moisture, compare beading vs. absorption, perform a tape pull to gauge adhesion, and do a small test patch after cleaning to see if a reseal holds. This matters because it guides you to the right prep, moisture mitigation, and sealer choice, and it helps you plan proper curing and venting to prevent recurrence. Quick, practical steps—verify moisture, confirm compatibility with existing film, and fix surface issues before recoat.
Moisture and Vapor Drive
Subsurface moisture, rising damp, or trapped water can push on your sealer, causing it to peel. This is called delamination.
Sources of moisture:
- Leaks from above (roofs, windows)
- Groundwater (high water tables)
- Condensation (poor ventilation)
Surface Contamination and Poor Adhesion
Contaminants like oils, curing compounds, laitance, dust, or salt can stop your sealer from bonding properly. This leads to peeling.
Signs of contamination:
- Powdery residue on surface
- Splotchy staining after application
- Flaking near joints
Product Incompatibility and Wrong Sealer Choice
Using a non-breathable sealer over damp concrete or layering incompatible sealers can cause failure. Your sealer needs to ‘breathe’ to let moisture escape.
Checking compatibility:
- Read product labels and safety data sheets
- Consult with a professional if unsure
- Test on a small, hidden area first
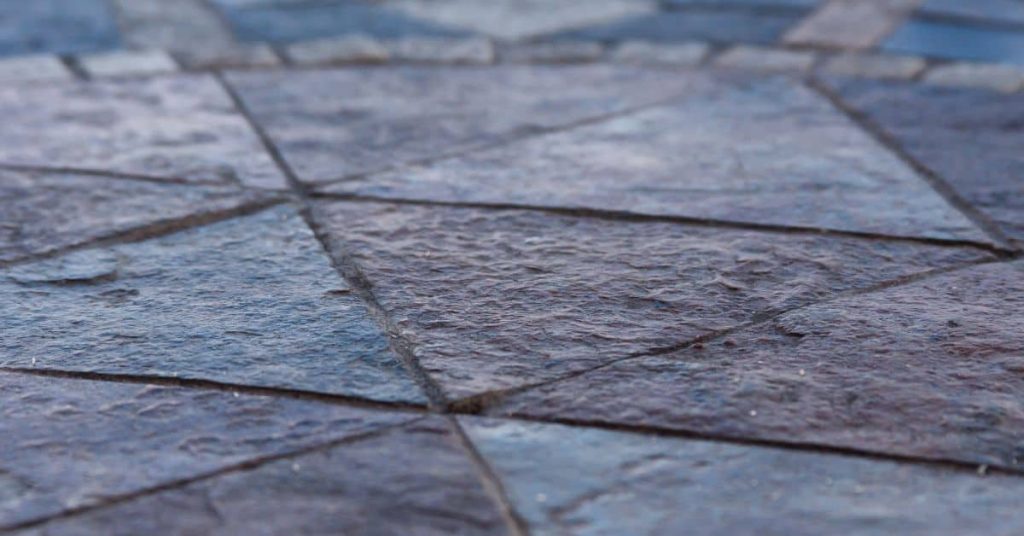
Types of Concrete Sealers and How They Behave
There are three broad sealer families you’ll actually see on concrete: penetrating sealers, acrylic film-formers, and epoxy or urethane coatings, and they differ a lot in appearance, breathability, and the way peeling tends to show up on a real slab. Penetrating sealers soak in and barely change color or gloss, so the look stays close to the bare surface and moisture can still escape if the concrete allows vapor transmission. Acrylic film-formers lay down a visible layer that can boost color a bit and add some gloss, but they can peel or craze if the surface isn’t properly prepped or if moisture is trapped beneath the film.
Epoxy and urethane coatings build a hard, glossy, fairly impermeable surface that can completely mask the substrate and may peel from bond failures, moisture entrapment, UV damage, or incompatibility with previous coatings. Breathability matters: choosing options that suit how your slab dries and what’s already on it helps reduce peeling risk, since moisture trapped under any coating is a common troublemaker. Before you recoat, do quick checks for roof or interior moisture, curing time in the concrete, and compatibility with existing coatings, and always verify prep steps and timing on the product label or datasheet before you move ahead.
Penetrating sealers (silane, siloxane, silicates, siliconates)
These sealers work by bonding with concrete below the surface. They don’t form a film on top like other sealers.
Breathable, they allow moisture to escape naturally. This reduces peeling risk caused by trapped moisture.
They’re great for water repellency and freeze-thaw protection. Use them when you want to protect concrete without changing its appearance.
Acrylic and other film-forming sealers
Film-formers like acrylics sit on top of the concrete, enhancing color and gloss. They give a wet-look finish.
Vulnerable to delamination, they can peel if substrate conditions aren’t right. Poor prep, moisture, or incompatible previous coatings can cause problems.
Use them for decorative effects, but ensure the surface is clean, dry, and compatible with the sealer.
Epoxy, urethane and high-build coatings
These offer high abrasion and chemical resistance, making them ideal for heavy-duty areas. They have strong adhesion strengths.
Typically used indoors, they need special prep to avoid peeling. The surface must be clean, dry, and free of contaminants.
They require proper ventilation during application and curing. Always follow the manufacturer’s guidelines for best results.
Planning a Project? Start Here
Start by mapping out the project scope: list every concrete surface you plan to seal, note what finish or stain exists, and mark any spots that need repairs or moisture work. Decide early on what sealer type you’ll use—penetrating or film-forming—and whether you want solvent or water-based options, then check how they’ll interact with any stains or dyes already on the surface. Don’t skip a realistic budget that accounts for primers, patches, cleaners, tools, and a cushion for surface prep or unexpected repairs, and decide up front if you’ll tackle it yourself or hire a pro based on your skill and timeline.
This planning sets the pace and keeps you out of mid-project scrambles: you’ll run moisture tests, clean and degum as needed, repair cracks or joints, and determine if etching or profiling is required before sealing, all while watching ventilation and the weather window. Knowing the sequence helps you sequence tasks, estimate how long each step will take, and avoid backtracking because of missed prep or incompatible products. In short, a clear plan helps you choose the right materials, budget wisely, and decide when DIY is feasible or when a professional touch saves time and protects the investment.
Project scope and substrate assessment
Before you start, document your project’s scope. This means identifying all concrete surfaces to seal – floors, driveways, patios, or walls.
Assess existing stains or finishes. If there are any, make sure the sealer you choose is compatible with them. Check for visible damage like cracks, chips, or spalls. These need repairs before sealing.
Note down areas that might require moisture mitigation. Concrete’s porous nature can lead to issues if not addressed properly.
Desired finish – Document this too. It’ll help you choose the right sealer type and gloss level.
Budget, timeline and permits
Your budget should cover materials, primers or patches, cleaning supplies, tools, and any rental equipment. Don’t forget a contingency for surface prep or repairs.
Timeline – Map out a realistic schedule. Consider curing/recoat times, weather constraints, and any required surface conditioning steps before and after sealing.
Permits might be needed depending on your location and the scale of your project. Check local VOC or disposal rules too. It’s better to know these upfront than face penalties later.
Tool rental vs hire – Decide based on your needs and budget. Some tools like grinders, vacuums, or shot blasters might be worth renting if you don’t plan to use them often.
Diagnosing Peeling—Tests and Visual Checkpoints
Peeling has telltale patterns and cues you can map step by step to find the root cause and decide what comes next. Look for edges, patches, blotchy areas, cloudiness, whitening, blistering, or delamination, and pair those visuals with a quick set of field checks. The goal is to choose recoating, spot repair, or full removal based on surface condition and how well the coating adheres to the substrate.
Visual inspection plus simple field tests guide your plan and prevent guessing. Document failures with photos and notes on temperature, humidity, surface profile, and porosity to back up your recommendations. This approach helps you pick the right prep, confirm substrate readiness, and tailor the repair strategy so you don’t waste time or create new problems.
Visual mapping and failure patterns
Before you start repairs, map out the peeling to understand what’s gone wrong. This helps prioritize repair areas.
- Edge lift: Peeling starts from edges? Check for insufficient sealing or improper application there.
- Uniform chalking: Whole surface looks chalky? Might be a sign of poor sealer choice or inadequate curing.
- Flaking islands: Patches of flaking? Could indicate moisture trapped beneath the sealant.
- Blotchy peeling: Irregular patches? Suggests inconsistent application or surface contamination.
- Cloudiness: Hazy appearance? Points to improper curing or incompatible sealer.
- Whitening: White spots or patches? Likely due to moisture or alkali issues.
- Blistering: Bubbles under the sealant? Indicates trapped moisture or poor adhesion.
- Delamination: Sealant peels off in large sheets? Suggests serious adhesion failure, possibly requiring full removal.
Quick rule: Mapping failures helps pinpoint causes and plan repairs. Don’t skip this step; it saves time and materials in the long run.
Moisture and simple field tests
Before recoating, check for moisture. It’s a common cause of peeling sealers.
- Plastic sheet test: Place a plastic sheet on the surface, leave it for 24-72 hours. If it’s damp or wet, there’s excess moisture.
- Moisture meter: Use one to measure moisture content. Compare results with sealer manufacturer’s allowable limits.
- Water absorption test: Pour water on the surface. If it doesn’t absorb quickly, there might be a moisture issue.
Quick rule: Always check for moisture before recoating. Ignoring this can lead to recurring peeling problems.
Adhesion and contamination checks
Before deciding on repairs, check adhesion and cleanliness of the surface.
- Edge pull test: Try to lift a corner of the peeling sealer. If it lifts easily, adhesion is poor.
- Tape test: Apply painter’s tape, let it sit for 24 hours, then pull it off. If the sealer comes with it, adhesion is weak.
- Solvent wipe: Wipe a small area with solvent (like acetone). If the sealer dissolves easily, it might be contaminated or incompatible.
Quick rule: Don’t skip these checks. They help decide between light prep and full removal, saving you time and effort.

Removing Old Sealers and Preparing Concrete
Identifying the existing sealer and its condition is the first move, so you know whether to reach for mechanical tools, chemical strippers, or a hybrid approach, and you should document film color, haze, peeling, and perform a simple adhesion check to guide the method without risking the concrete. You’ll also plan safety, containment, and ventilation from the start, using PPE, plastic containment, and proper runoff controls, and you must verify local rules for chemical strippers and disposal before you begin. The plan should cover surface profiling goals, porosity checks after removal, and a clear path to cleaning and neutralizing so the surface is ready for the next coating.
This matters for a DIY homeowner because proper prep saves you time, money, and headaches by preventing failed coatings, trapped residues, or weak adhesion down the line, and it gives you a realistic view of what the slab will accept. Use this as a practical checklist: match the removal method to the sealer condition, profile the surface to the recommended SPI/SSPC level, test porosity, and ensure the surface is dry and clean before you move on to resealing. Always check product labels, manufacturer instructions, and local guidance if you’re unsure about a step, and note repairs or imperfections you’ll address before the next coat.
Mechanical removal and profiling (grinding, shot blasting)
Use mechanical methods when the old sealer is deeply embedded or failing. These methods expose sound concrete and create the required profile for adhesion.
Shot Blasting is ideal for large areas with tough, stubborn sealers. It works by propelling abrasive materials at high speeds to remove coatings. However, it can be messy and requires proper containment.
Grinding is suitable for smaller areas or detailed work. It uses rotating discs to remove sealer. It’s slower but more controlled than shot blasting.
Both methods create a rough profile (SPI-10/SSPC-SP 10) that promotes good adhesion of new sealers. Always wear appropriate PPE and follow safety guidelines when operating these tools.
Chemical strippers and pressure washing
Chemical strippers are useful for layered or delicate surfaces where mechanical methods might cause damage. They work by softening the sealer, making it easier to remove.
Choose between solvent-based (e.g., methylene chloride) or citrus-based strippers depending on the sealer type and local regulations. Solvent-based strippers are usually more aggressive but have strong fumes, while citrus-based strippers are eco-friendlier but may take longer to work.
After applying the stripper, use a pressure washer to remove the softened sealer. Start with a low-pressure setting to avoid damaging the concrete. Always wear a respirator when using chemical strippers and contain runoff for proper disposal.
Pressure washing alone can also remove some sealers, especially if they’re already peeling or delaminating. However, it’s less effective on well-adhered sealers and may not create the required profile for new sealer adhesion.
Repairs, patching and surface checks
Before recoating, repair any cracks, spalls, or other defects in the concrete. Use a suitable patching material and follow manufacturer’s instructions for best results.
Remove any laitance (the weak, fuzzy layer on fresh concrete) to ensure good adhesion of the new sealer. This can be done mechanically with grinding or chemically using acid etching.
Perform visual and tactile checks to confirm a sound substrate before recoating. Look for signs of delamination, efflorescence, or other defects. Tap the surface with a hammer; a dull thud indicates sound concrete, while a hollow sound suggests delamination or voids.
Test porosity using a simple water drop test: place a few drops of water on the surface. If they bead up and don’t absorb, the surface is too dense to accept sealer. If they soak in quickly, the surface may be too porous and require additional treatment before sealing.
How to Recoat Correctly—System Selection and Application
Select a sealer system that matches the existing concrete, any previous coatings, and the stain sealer in use, so you don’t end up peeling or peeling later on. Know when primers or adhesion boosters are needed, and how they affect surface prep and bond, because skipping them or using the wrong product will cost you in the long run. Follow the manufacturer’s recoat windows and apply using the recommended method to build a uniform film that adheres well, with attention to stirring, thinning if allowed, and curing times between coats.
Understanding the why helps you avoid costly rework: poor timing or improper prep can trap moisture, create solvent traps, or leave uneven film that shows through after recoating. The practical steps—cleaning, profiling or etching if required, patching damaged areas, and performing adhesion or pull-off tests—confirm the substrate is ready and the new coat will bond properly. By planning the workflow and testing readiness before you commit to another coat, you reduce the risk of edge lifts, blotching, or severe adhesion failures that ruin the finish and require grinding or replacement of damaged areas later. Always check the product label or datasheet for specific guidance and local rules for disposal and cleanup.
Step-by-Step Process
Follow this clear, numbered sequence to recoat your concrete surface correctly.
- Preparation and safety checks: Ensure the area is clean, dry, and free from contaminants. Put on appropriate PPE (personal protective equipment).
- Select compatible system: Choose a sealer that matches your existing concrete, previous coatings, and stain sealer. Check product datasheets for compatibility.
- Primers or bonding aids: If required, apply primers or adhesion boosters to enhance bond strength and surface prep.
- Main application: Apply the sealer using the correct method (sprayer, roller, brush) following manufacturer’s guidelines on film thickness and recoat windows.
- Cure and final checks: Allow the sealer to cure as per manufacturer’s instructions. Perform a final inspection for any missed spots or defects.
Choosing compatible products and primers (example: Cryli-Tek 5505)
When selecting a sealer, consider the existing concrete surface and previous coatings. For example, Cryli-Tek 5505 is a solvent-based wet-look product suitable for many surfaces.
Check the product datasheet for compatibility with your current setup and follow their recoat guidance to ensure a strong bond.
If required, use primers or bonding aids to enhance adhesion. These are typically applied before the sealer coat, creating a better surface for the new coating to adhere to.
Application methods and recoat windows
Proper application techniques ensure an even, continuous film. Use sprayers, rollers, or brushes as recommended by the manufacturer.
Control film thickness to achieve the desired coverage and appearance. Follow the manufacturer’s guidelines on thinning (if allowed) and stirring before application.
Cure times between coats are crucial for a strong bond. Always adhere to the manufacturer’s recommended recoat window or full cure before service to prevent peeling.
Curing, final inspection and initial maintenance
After application, perform these checks and maintenance tasks to ensure a long-lasting, well-adhered sealer.
- Check for missed spots: Inspect the entire surface for any areas that may have been missed during application.
- Inspect edges: Ensure edges are properly sealed and there’s no lifting or peeling at corners.
- Test adhesion: Perform a simple pull-off test to confirm the sealer is well-adhered. If it lifts easily, allow more cure time.
- Monitor for defects: Keep an eye out for any cracks, bubbles, or other defects that may have formed during application.
- Allow full cure: Before exposing the surface to heavy traffic or harsh conditions, ensure the sealer has fully cured as per manufacturer’s instructions.
- Clean up spills promptly: During initial maintenance, clean up any spills or stains promptly to prevent damage to the sealer.
- Avoid high heat and direct sunlight: Keep the surface away from high heat sources and direct sunlight during the first few weeks of cure to avoid warping or lifting.
Quick rule: Regular, gentle cleaning and prompt attention to any issues will help maintain your concrete sealer’s appearance and longevity.
Tools, Materials and Safety Checklist
Key tools, consumables, and PPE are your first line for removing old sealers and getting the surface ready for a fresh coat. Have a scraper, stiff-bristle brush, grinder or sander with appropriate pads, a vacuum, and drop cloths or plastic sheeting. PPE should include a breathable respirator, chemical‑resistant gloves, and eye protection, plus a plan for disposing of used sealers and rags responsibly.
Clear surface prep and a safe work zone matter because they prevent dust, fumes, and moisture from sabotaging the reseal. Check the surface for compatibility, clean thoroughly, and watch for drying times, weather, and ventilation needs. After removal, verify the surface is sound and ready for recoating with a quick moisture check and a simple porosity test, and have a disposal plan for hazardous waste per local rules.
Essential tools and consumables
Before you start, ensure you have the right tools for your project. Here’s a checklist to help you.
- Grinder or planer: For mechanical removal of old sealers. Choose one that matches your project size.
- Pressure washer: To clean the surface thoroughly after sealer removal.
- Stripping tools (if using chemical strippers): Brushes, rollers, or sprayers for applying and working in stripper.
- Scraper: For removing loose sealers and residue.
- Stiff-bristle brush: To scrub the surface clean after stripping.
- Vacuum: To collect dust and residue, preventing it from spreading or causing damage.
- Patch materials: For repairing any cracks or holes before recoating.
- Cleaners (degreaser, etcher): To prepare the surface for new sealer application.
- Rollers/sprayer: For applying new sealer. Choose a size that suits your project.
Quick rule: Always select tools based on your project’s scope to ensure efficiency and safety.
PPE and environmental precautions
Protect yourself and the environment with these essential precautions before, during, and after sealer removal and recoating.
- Breathable respirator: Protect your lungs from dust and fumes. Use a P100 filter for chemical strippers.
- Chemical-resistant gloves: To protect your hands from stripper chemicals and sealers.
- Eye protection: Safety glasses or goggles to shield your eyes from debris and splashes.
- Drop cloths: To contain dust, residue, and spills. Use plastic sheeting for chemical strippers.
- Ventilation (for solvent systems): Ensure proper ventilation to prevent the buildup of harmful fumes.
- Disposal considerations: Follow local regulations for disposing of used sealers, rags, and wash water. Never pour chemicals down drains.
- Spill response kit: Have one on hand to quickly address any spills or leaks.
Quick rule: Always prioritize safety first by using the right PPE and following environmental guidelines.
Cryli-Tek 5505
Cryli-Tek 5505 is a solvent-based acrylic penetrating sealer, and it can suffer peeling after the first coat or if you recoat too soon. It helps to identify existing sealer types, verify adhesion with a scrub or peel test, and check moisture content and soil or alkalinity before you touch it again. You also need to confirm that the new coat will bond to what’s already there and that the substrate is prepared for a fresh film without trapping issues.
This matters because proper surface assessment and careful prep prevent failed coatings, wasted time, and stubborn reworks for a DIYer. By understanding compatibility, cure timing, and a tight recoat window under your local climate, you’ll set yourself up for a durable, even finish that resists peeling and blotching. Follow the plan: remove failed sealer and contaminants, scrub or abrade as needed, clean thoroughly, address efflorescence, and ensure the surface is dry and pH-balanced before applying a new coat, then apply evenly with controlled film thickness and observe the recommended curing/touch-dry timeline before traffic.
Surface prep for Cryli-Tek 5505
Before applying Cryli-Tek 5505, ensure your concrete surface is clean and ready to bond. Start by removing any old sealers or contaminants using methods mentioned earlier.
Moisture testing is crucial. Use a moisture meter to check for excess moisture. If it’s above 4%, address the issue before proceeding.
Cure the surface under ideal conditions (70-90°F, 50% humidity) for at least 24 hours. Etch or profile the surface if necessary to create a better bond.
Application technique and workflow
Use a roller for small areas or a sprayer for larger ones. Apply Cryli-Tek 5505 in thin, even coats (about 1-2 mils wet film thickness). Coverage is typically around 400 sq ft per gallon.
Work in manageable sections, maintaining a wet edge to avoid lap marks. Apply at temperatures between 50-90°F and humidity below 85%. Allow each coat to cure for the recommended time (usually 24 hours) before applying the next.
After the final coat, let it cure for at least 72 hours before exposing it to foot or vehicle traffic. This ensures proper adhesion and prevents damage to the sealer.
Conclusion
Peeling happens when the seal and the concrete don’t cooperate. The fix is simple but needs care: test, prep, and apply with the right system to protect color and structure for years to come.
Start by confirming the surface is sound, selecting a compatible system, and then follow a steady, repeatable process: test a small area, remove incompatible old coatings, rinse and dry thoroughly, choose the correct sealer type for your concrete, apply in the recommended conditions, and cure with patience. If any step feels off, pause and reevaluate before moving forward; test first, then coat.
A few mistakes to avoid are applying sealer over damp or dirty concrete, skipping surface prep, and rushing the recoat. Keep safety in mind: wear eye and skin protection, ventilate the area, and follow the product’s safety checklist. If the job involves uncertain moisture, unknown substrate conditions, or you’re unsure about the right Cryli-Tek 5505 approach, don’t push through—call a professional rather than risk a costly failure. With careful steps and right materials, you’ll get a durable finish that looks good and lasts. You’ve got this; start the prep and take the next logical step with confidence.
FAQ
What are the main types of concrete sealers and how do they differ?
Penetrating sealers soak in and block pores; they don’t form a film on the surface. Acrylic sealers form a moisture- and UV-resistant film that can wear off in heavy traffic. Epoxy sealers create a hard, thick film but can be prone to peeling if moisture or bond issues exist.
How do sealer type and current condition affect recoat timing and method?
Check the label for compatibility with the new coating and any surface prep needed. If the old coat is still glossy or peeling, remove or abrade it and follow the manufacturer’s recoat instructions. If it’s penetrating, you may need a compatible topcoat or a specific primer step.
What application methods work best for penetrating versus film-forming sealers?
Penetrating sealers go on thinly with a brush, roller, or spray and must be allowed to dry fully. Film-forming sealers require a smooth, clean surface and are typically rolled or brushed in even coats; avoid puddling and follow the product’s wet edge guidance.
What are common problems after sealing and how can I prevent or fix them?
Peeling, yellowing, or streaks happen from improper prep or incompatible products. Prevent by cleaning well, repairing cracks, and using compatible products in the right order. If problems show up, consult the label for remedies and consider testing a small area first.