

Introduction
Shot blasting is a surface preparation method that uses high-velocity abrasive to clean and roughen a surface. For DIY projects, you can rent equipment and compare how it fits your time, budget, and safety plan. Always check the operator’s manual and local rules for ventilation and containment before you start.
There are walk-behind, self-propelled, and ride-on machines that vary in footprint and power. Dust control is a major factor; look for built-in enclosures, dust collectors, or water suppression and plan containment. Rentals work best for small to medium jobs when you can schedule setup, use, and cleanup without committing to a long-term tool.
Key takeaways
- Assess project material, surface condition, and access to decide if shot blasting is warranted.
- Walk-behind, self-propelled, and ride-on blasters suit different scales and spaces.
- Shot blasting uses propelled media to abrade surfaces, exposing fresh, uniform profiles.
- Choose media by material type and desired texture; avoid embedding into substrate.
- Rent with a contained dust-control plan and mobility for your workspace.
- Always use PPE, seal off area, and verify local rules before blasting.
Table of Contents
- Introduction
- Key takeaways
- Is Shot Blasting Right for Your DIY Project?
- Types of Shot Blasters and How They Differ
- How Shot Blasting Works (Mechanics and Surface Effects)
- Choosing the Right Shot Media
- Dust Control and Containment Strategies
- Rental Options: What to Look for and a Pre-Rental Checklist
- Renting Vs. Buying: Decision Factors for Diyers
- Safety, Maintenance, Common Mistakes, and Environmental Considerations
- Conclusion
- FAQ
Is Shot Blasting Right for Your DIY Project?
Shot blasting suits projects where you need a clean, prepared surface, a defined profile, or coatings to key well for adhesion. Think old coatings removal, surface cleaning, or profile creation for coatings on concrete floors, patios, or countertops. The key outcomes to watch are a clean surface, proper profiling, and coating readiness.
Consider the match to your goals: mechanical cleaning, surface profiling, and improved adhesion. Look at what you need to remove, the desired roughness, and how much time and labor the project will require. Also review safety and dust control, including PPE, ventilation, containment options, and any local rules. A quick decision checklist can help you compare shot blasting to grinding and other methods to judge if it’s worth it for your scenario.
When shot blasting is worth it
Shot blasting shines when you need to remove old coatings, rust, or contaminants quickly and efficiently. It’s your best bet for creating a consistent surface profile for coating application.
Time-saving: Shot blasting can cover large areas faster than grinders or hand methods. It’s ideal for big projects like warehouse floors or long driveways.
Superior profile: Unlike grinders, shot blasting doesn’t generate heat that could damage the substrate. It creates a uniform surface profile, improving adhesion of new coatings.
When to choose alternatives
While shot blasting is powerful, it’s not always the best tool for the job. Here are some scenarios where other methods might be preferable:
Small areas: For tiny jobs like removing paint from a small patio or countertop, hand scraping or grinding might be more practical and less messy.
Delicate surfaces: Water-based blasting or chemical removal could be gentler on sensitive substrates. They’re great for historic concrete that you don’t want to damage.
Environmental concerns: If dust control is a major issue, consider water-based blasting or enclosure methods. For toxic contaminants, chemical removal might be safer.
Types of Shot Blasters and How They Differ
The main categories are walk-behind, self-propelled, and ride-on machines, each with its own footprint and power needs. Walk-behind units are usually lighter and easier to maneuver in tight spaces. Self-propelled and ride-on options cover larger areas with different speed and reach.
Scale and maneuverability drive what works for your space. Small patios or interior slabs often suit a walk-behind unit, while bigger garage floors may justify a larger machine. Operator skill and training influence how you set feed rate, blast pressure, and nozzle selection, with safety and supervision as ongoing requirements.
Walk-behind models — best fit for small DIY jobs
For smaller spaces like garages, patios, or interior slabs, walk-behind shot blasters are your best bet. They’re compact and easy to maneuver.
These units typically have widths ranging from 12″ to 48″, making them perfect for narrow or tight areas. They’re also lighter, usually weighing between 50 to 300 lbs, so you can control them with ease.
Operator skill is crucial here. You’ll need to master the feed rate, blast pressure, and nozzle choice to get the desired profile. Safety gear like goggles, gloves, and ear protection are a must.
Self-propelled and ride-on for larger areas
When you’ve got bigger spaces to cover, like large garage floors or commercial warehouses, self-propelled or ride-on shot blasters are the way to go. They offer greater capacity and speed.
These machines usually have widths ranging from 48″ to 72″, and they’re heavier, weighing between 1000 to 3000 lbs. They require more space for turning and often need a dedicated power source (gas or electric).
Operator skill is still key, but these machines also introduce access and transport requirements. You’ll need to ensure there’s enough room to maneuver, and you might need help moving the machine around.
Safety is paramount here too. These machines can kick up a lot of dust, so proper ventilation, containment, and PPE are essential.
How Shot Blasting Works (Mechanics and Surface Effects)
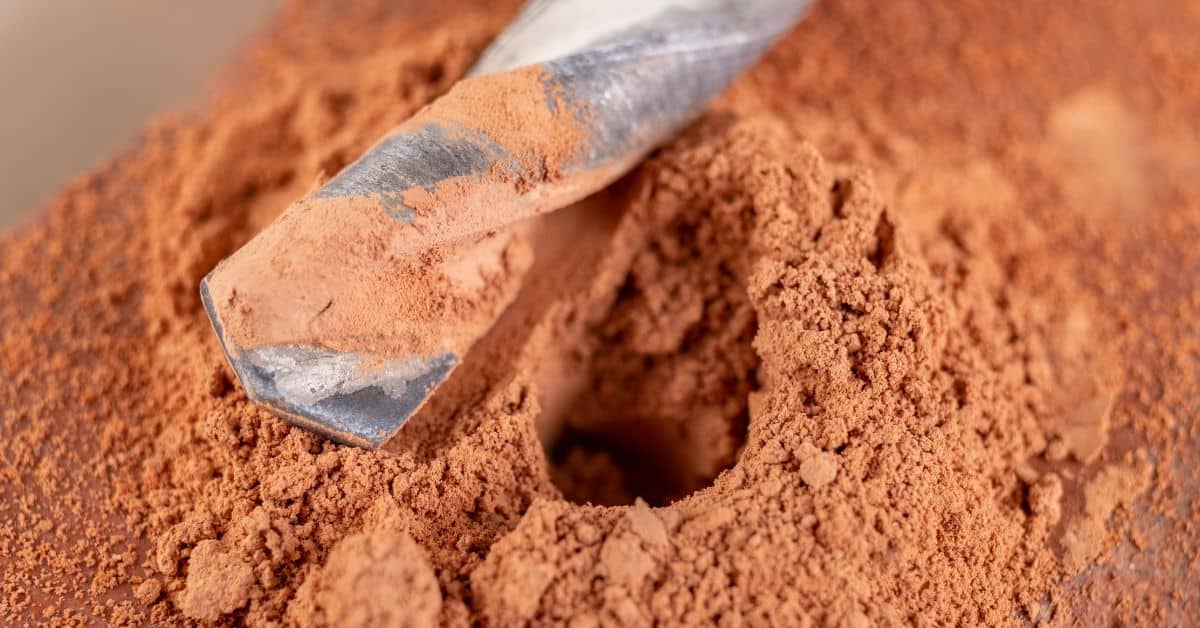
At the core, a turbine drives media at high velocity to strike the surface, causing micro-abrasion and cleaning that exposes aggregate and removes coatings. This mechanical action creates a roughened surface ready for coatings. The results depend on the media and settings you choose.
Media size and hardness, along with nozzle distance and travel speed, shape the profile and cleanliness you’ll see. Concrete behaves differently from overlays, so expect visible differences in texture and uniformity as you adjust the setup. Safety and setup checks, including PPE, ventilation, and securing the area, keep the job controlled and clean.
Turbines, shot velocity, and surface profiling
The heart of a shot blaster is its turbine. This spins at high speeds to accelerate media (shot or grit) out of the nozzle.
Imagine it like a tiny sandblaster. The faster the turbine spins, the harder the media hits your surface. That’s impact energy – what creates micro-abrasion and cleans your concrete.
The right velocity exposes aggregate, removes coatings, and prepares your surface for new finishes. Too slow, you won’t get clean results. Too fast, you might damage the substrate.
Visual checkpoints for acceptable results
Before moving on to your next step – like sealing or overlaying – use this checklist to ensure your surface is ready. Do this after blasting and before any cleanup.
- Uniform texture: Your surface should look consistent, with no smooth spots or missed areas.
- Exposed aggregate: You should see small stones or gravel on the surface. This indicates good adhesion for new coatings.
- Coating removal: Old paint, stains, or sealers should be completely gone.
- No shiny spots: These indicate missed areas where the old coating is still present.
- Rebar exposure: Check for any exposed rebar. If found, grind it smooth and apply a protective coating before proceeding.
- Surface damage: Look for cracks or other defects that need repair before overlaying.
- Dust-free: Your surface should be dry and free of loose dust. A quick wipe with a damp cloth can help check this.
- Consistent profile: The entire surface should have the same level of roughness, ready for your next step.
Quick rule: If something doesn’t look right, recheck your work. It’s better to spot issues now than after applying new materials.
Choosing the Right Shot Media
Media types include steel shot, steel grit, ceramic beads, and glass beads, each with distinct aggressiveness and finishing texture. The material’s composition, shape, and size drive how it cuts and how the surface feels after blasting. These choices influence the final profile and cleanliness on concrete substrates.
Think about substrate compatibility and coating needs when selecting media. Some media are gentler on hardened floors or coatings, while others offer stronger surface removal. A quick compatibility check with your substrate and coating data will guide a practical choice for your project.
Reuse, separation, and disposal considerations
The shot media can be reused multiple times in a closed system. But once it’s spent – too worn or contaminated – it needs to go.
Spent steel shot/grit should be separated from other debris. It’s magnetic, so use a magnet to help. Then, recycle it at a metal recycling center.
Ceramic and glass beads can’t be recycled like steel media. Once spent, they’re usually disposed of as hazardous waste due to their silica content. Check local regulations for safe disposal.
Media vs. coating compatibility
Different shot media can embed or contaminate surfaces, affecting coatings. Here’s what to check:
Steel shot/grit can leave micro-scratches that might affect adhesion of thin coatings like urethanes or epoxies. It’s safe for terrazzo and decorative overlays.
Ceramic and glass beads are gentler, making them safer for thin coatings. But they can embed in softer substrates, so avoid on new concrete or surfaces with exposed aggregates.
Always test a small area first to ensure compatibility. And remember, the better you prep your surface, the better your coating will perform.
Dust Control and Containment Strategies
Dust sources include fines, silica dust, and media fragments, with health and indoor air quality implications for DIYers. Plan containment and ventilation to keep the work zone safe and compliant. Enclosures, barriers, and controlled airflow are your first line of defense.
Containment strategies include temporary enclosures, plastic sheeting, airlocks, and negative-pressure setups. Dust collection can be supported by portable units with appropriate filters to capture dust at the nozzle. Coupled with housekeeping, these steps reduce cleanup burdens and exposure in occupied spaces.
Dust collectors and filtration basics
A dust collector is your first line of defense against shot blasting dust. When renting, ensure the provider includes one that’s compatible with your blaster.
Check for these signs to confirm your dust collector is working properly:
- Suction: It should create a strong pull at the nozzle.
- Filter change: If filters need frequent replacement, it might be undersized or clogged.
Containment, negative pressure, and cleanup steps
Contain the dust to keep your workspace clean and protect indoor air quality. Use temporary walls or plastic sheeting to seal off areas.
Create a negative-pressure setup by ensuring airflow is directed outwards. This prevents dust from migrating into sealed spaces.
After blasting, use a vacuum with a HEPA filter to clean up remaining dust. This will help minimize cross-contamination and simplify post-job cleanup.
Rental Options: What to Look for and a Pre-Rental Checklist
When evaluating rental providers, consider the fleet’s age, maintenance history, and availability of DIY-friendly shot blasting equipment. Look for equipment that matches your room size and surface type. A simple check of operational readiness helps prevent on-site delays.
Logistics matter too: plan delivery and pickup, access needs, staging space, and return procedures. Ask about operator support, safety briefings, and whether an on-call expert can help during the rental. A clear pre-use checklist helps you verify condition before accepting equipment.
Inspection checklist on pickup/delivery
Before you sign off on accepting the shot blasting equipment, follow this checklist to ensure everything is in good working order.
- Visual damage: Check for any visible dents, cracks, or other signs of damage. If found, document and inform the rental provider.
- Dust collector connection: Ensure the dust collector hose is securely attached to the machine and in good condition. A loose or damaged hose can lead to inadequate dust control.
- Controls: Test all controls (throttle, steering, etc.) to ensure they function properly. Sticky or unresponsive controls can hinder operation.
- Hoses: Inspect air and fuel hoses for leaks, cracks, or other damage. A compromised hose can cause equipment failure or safety hazards.
- Tires: Check tire pressure and tread depth. Low pressure or worn tires can affect machine stability and performance.
- Safety features: Verify that all safety features (emergency stop, safety guards, etc.) are functioning and in place.
- Shot blasting nozzle: Check the condition of the nozzle. A clogged or damaged nozzle can reduce shot blasting effectiveness.
- Wheels/blades: Inspect wheels or blades for wear, cracks, or other damage that could affect machine performance or cause safety issues.
Quick rule: Always inspect equipment before signing off. It’s your responsibility to ensure everything is in working order.
Accessories and consumables to request
To ensure a smooth shot blasting job, make sure you have all the necessary accessories and consumables before starting your project.
- Shot media: Request the appropriate amount of shot media (e.g., steel shot, stainless steel shot) for your project’s size. Running out mid-job can disrupt progress.
- Replacement wear parts: Ask about availability and cost of replacement parts like nozzles, blades, or wheels in case of damage during use.
- Spare filters: Request extra dust collector filters to ensure continuous operation. A clogged filter can reduce dust collection efficiency.
- Personal Protective Equipment (PPE): Ensure you have the necessary PPE, including safety glasses, gloves, and ear protection, for safe operation.
- Safety signs: Request safety signs to warn others about the work area and potential hazards.
- Fuel or power source: Confirm availability of the required fuel (gasoline, diesel) or power source (electricity, generator) for your machine’s operation.
Quick rule: Always request accessories and consumables upfront to avoid delays during your project.
Renting Vs. Buying: Decision Factors for Diyers
Use rental when project frequency is low or you only need the tool for a short time. For frequent or ongoing work, buying may offer better long-term value and availability. Assess your typical workload and space to store equipment safely.
Storage, transport, and workspace impact are practical considerations. Compare total ownership costs, maintenance duties, and resale value alongside your skill level and safety responsibilities. Gather local rental rates and resale data to inform the choice with real-world context.
Hidden costs and practical trade-offs
The upfront cost of renting might seem lower, but don’t forget about the hidden expenses. Transport fees can add up if you’re not local to the rental store. Insurance is usually required, adding another cost. You’ll also need to factor in training if you’re new to shot blasting and wear parts replacement.
Dust control is a must. Rental units often come with dust collectors, but you might need to buy or rent additional containment equipment. Don’t forget about disposal costs for used shot media.
Total Cost of Ownership (TCO) is what you should focus on. TCO includes all these hidden costs and helps you make a more informed decision.
When buying makes sense for a DIYer
If you’re planning to use shot blasting frequently, buying might be your best bet. Ongoing projects or commercial work can justify the initial investment. Plus, you’ll avoid repeated rental fees and hidden costs.
However, buying isn’t just about cost. You need space for storage when not in use. Consider your workspace needs and equipment footprint. Also, maintenance will be your responsibility, so factor in time and skill level.
If you’re planning to resell later, research the market first. Used units can retain significant value if well-maintained. Check local listings and consult with suppliers about warranty terms and support.
Safety, Maintenance, Common Mistakes, and Environmental Considerations
Safety basics start with proper PPE, including eye protection, respirators or PAPRs, hearing protection, gloves, and clothing. Set up clear access controls and keep exclusion zones for bystanders. Plan ahead to keep the site organized and safe.
Pre-use checks should cover media, nozzle wear, hose integrity, and dust-collection connections. Have training or credential needs met and follow lockout/tagout where applicable. Common DIY mistakes include poor ventilation, weak containment, blasting too close to edges, and skipping PPE.
PPE, ventilation, and regulatory checks
Before you start shot blasting, safety is your top priority. Here’s what you need to know:
Personal Protective Equipment (PPE): Wear a full-face shield or helmet with face protection, a respirator or Powered Air Purifying Respirator (PAPR), hearing protection, gloves, and a hard hat.
Ventilation: Ensure the area is well-ventilated. Use dust extraction equipment to control airborne particles. Check local air quality regulations before starting.
Regulatory Checks: Contact your local authorities to verify if you need any permits for this work. Ask about waste disposal rules and noise restrictions. Always follow Safety Data Sheets (SDS) when handling blasting media.
Routine maintenance and troubleshooting
Regular upkeep keeps your shot blaster running smoothly. Here’s what to do:
Inspect wear parts: Check the blast nozzle, impeller, and hoses for signs of wear before each use. Replace if necessary.
Filter checks: Inspect dust collector filters regularly. Clean or replace them as needed to maintain efficient operation.
Media handling: Store blasting media properly to prevent contamination. Check the media quality and size before each use.
Troubleshooting: If your machine isn’t working right, check for clogged nozzles, damaged hoses, or loose connections first. Always refer to the operator’s manual for specific troubleshooting steps.
Common DIY mistakes and how to avoid them
Even with the best intentions, DIYers can make mistakes. Here are some common ones and how to prevent them:
- Inadequate containment: Not containing the blast area properly leads to dust escaping. Use plastic sheeting or other barriers to contain debris.
- Wrong media choice: Using the wrong blasting media can damage surfaces or create unwanted results. Always choose the right media for your job.
- Uneven passes: Inconsistent blasting technique leaves visible lines and uneven surface preparation. Take your time, maintain a consistent distance, and overlap passes slightly.
- Insufficient dust collection: Not collecting enough dust can lead to health risks and environmental issues. Ensure you have adequate dust extraction equipment.
By being aware of these common mistakes and taking steps to avoid them, you’ll achieve better results and a safer work environment.
Conclusion
Shot blasting can deliver a durable, clean surface with a good look, but safety and control must come first to avoid costly mistakes or hidden damage. When you do it right, you get predictable results and a surface that holds paint or coatings better over time.
First, decide if shot blasting fits your project by matching the blast intensity, media type, and containment needs to the surface and area you’re working on. Check the rental options and a solid pre-rental plan, confirm you have the right media for the job, set up dust containment and ventilation, test a small area, and then inspect the test patch before moving ahead. Plan for clean-up, re-seal guidance after blasting, and a simple maintenance routine for the equipment you use; keep a conservative approach and document what works for future projects.
Common mistakes to avoid include skipping proper PPE and containment, using the wrong media or pressure for the surface, and rushing the process which can gouge or roughen areas you meant to preserve. Always guard against dust leakage, verify the surface is suitable for blasting, and keep blast time and pressure in check—if something looks uncertain, slow down and re-evaluate rather than push on. Use small test areas first to confirm results before committing to the full job.
If the project involves structural steel, critical coatings, large areas, or tight tolerances, or if you’re unsure about safety or containment, it’s wise to call a professional. Stay practical, follow the plan, and stay focused on safety—concrete results come from careful steps, not bravado. You’ve got this when you keep it controlled and deliberate.
FAQ
How does shot blasting actually work on a job site?
Shot blasting uses tiny steel or ceramic beads propelled at the surface to clean, profile, or prepare it. The blows micro-abrade the surface and leave a roughened texture for coatings to grip. You’ll want to keep the machine fed, wear protection, and follow the manufacturer’s guidance for settings and surfaces.
What are the main types of shot blasters I’ll see in rental shops?
Walk-behind units are portable and usually push-operated. Self-propelled models need some steering but move on their own. Ride-on machines cover larger areas but require a bigger space and more operator control. Check the weight, horsepower, and access in your workspace.
How can I control dust when shot blasting?
Use dust containment like enclosures or skirts and keep a good vacuum system on the machine if possible. Localized dampening with water is sometimes an option, but follow the equipment guidelines. Always wear proper respiratory protection and seal off the area as much as you safely can.
When should I rent versus buy, and what should I look for in the rental?
Rent when the job is a one-off or you don’t want the upkeep. Look for the right size for your surface, available media, and a rental that includes basic maintenance or quick support. Always read the operator instructions and check for any site limitations or safety requirements.