

Introduction
Concrete spalling at reentrant corners is surface and edge breakdown where the inside corner of a slab or wall flakes, chips, or crumbles, and relief joints are cuts you make to interrupt stress paths so the same spot doesn’t fail again. In plain terms: you cut a controlled weak line near the corner to shift cracking away from the edge and give repairs a fighting chance. This is a hands-on job that will need a grinder or saw, a steady hand, and the right joint spacing for your situation—check product labels, manufacturer instructions, or local rules for exact depths and spacing.
This guide walks you through pragmatic steps a DIYer can handle: where to mark, how to cut, and how to protect the corner while you repair. It won’t replace professional judgment when structures are seriously damaged, so if you see deep corrosion, large delaminations, or structural movement, consult a structural pro before proceeding.
Key takeaways
- Inspect reentrant corners for spalling signs before planning relief joints.
- Cut relief joints only after confirming substrate integrity and local code.
- Use appropriate saws, dust control, and safety gear to minimize debris.
- Plan joint depth and pattern to align with existing reinforcement and cracks.
- After cutting, seal joints per manufacturer guidance to slow moisture ingress.
- Monitor for new cracking and maintain joints to prevent repeat damage.
Table of Contents
- Introduction
- Key takeaways
- Understanding Spalling at Reentrant Corners
- Why Relief Joints Reduce Repeat Damage
- Assessing Damage and Deciding Whether to Cut a Relief Joint
- Tools, Equipment and Materials Checklist
- Step-by-Step Method to Cut Relief Joints at Reentrant Corners
- Material Specs and Standards Explained (What to Check)
- Post-Cut Repair, Finishing, and Quality Checkpoints
- Monitoring, Maintenance, and Alternatives to Cutting Relief Joints
- Conclusion
- FAQ
Understanding Spalling at Reentrant Corners
A reentrant corner is where two concrete surfaces meet at an internal angle, creating a tight inside corner rather than an exposed edge. The geometry concentrates tensile stresses and channels water, accelerating freeze–thaw action, corrosion, and bond loss in that local area.
These combined factors make the corner a common origin for spalling and progressive delamination that travels inward from the corner. Verify any material-specific causes by checking the component’s labels or the manufacturer’s product data sheet for compatibility and exposure guidance.
What is a reentrant corner and why it matters
A reentrant corner is where two surfaces meet at an angle less than 180 degrees, like the inside corners of a room or a wall’s edge. These spots focus loads and moisture compared to flat surfaces.
Corners bear extra stress due to their geometry. Loads from above concentrate here, causing higher pressure. This can lead to cracking if not properly reinforced.
Moisture also gets trapped in these areas. It can’t drain or evaporate as easily as on flat surfaces. This leads to prolonged exposure, promoting spalling and other damage.
Common causes of spalling in these locations
Spalling at reentrant corners is often due to thermal movement. Concrete expands when hot, contracts when cold. This movement can cause cracks to form and grow.
Shrinkage during curing also plays a role. As concrete dries, it shrinks. If not properly controlled, this shrinkage can lead to cracking at corners.
Freeze-thaw cycling is another culprit. Water trapped in pores freezes and expands, pushing against the concrete’s surface. This can cause pieces to flake off over time.
Corroding reinforcement can also cause spalling. As steel bars rust, they expand. This increased pressure can push concrete off from the inside out.
How spalling progresses and typical failure patterns
Spalling starts with hairline cracks at corners. These may not be visible at first, but they allow moisture and other contaminants to enter.
Over time, these cracks grow wider. Moisture intrusion increases, leading to delamination – where the concrete surface separates from the underlying layers.
If left untreated, pieces of concrete can fall out entirely, leaving gaps in the structure. This not only looks unsightly but also weakens the overall integrity of the concrete.
In severe cases, spalling can lead to structural failure. It’s crucial to address spalling early before it progresses this far.
Why Relief Joints Reduce Repeat Damage
Relief joints introduce a planned weak plane that interrupts continuous tensile-stress paths and gives concrete a controlled location to move or crack. That controlled discontinuity reduces uncontrolled cracking at vulnerable features like reentrant corners by opening and closing where intended.
Think of the joint as a sacrificial break point that keeps movement out of the repaired zone; confirm recommended joint geometry and filler types with the manufacturer instructions or product technical data.
Stress relief versus structural weakening
Relief joints don’t weaken your concrete. They’re designed to redirect stress, not reduce it.
Properly placed, they interrupt stress paths, preventing them from building up and causing damage at reentrant corners.
Think of it like a bend in a pipe. Without relief, the pressure builds and causes leaks. With a joint, that pressure’s released safely.
Situations where relief joints are an appropriate solution
Relief joints work best when you’ve got reentrant corners, like in right-angled walls or corners of foundations.
They’re also great for areas with high stress, like near heavy equipment, or where concrete’s subject to frequent temperature changes.
But they’re not a fix-all. If you’ve got structural issues, like poor reinforcement, you’ll need to address those too. Relief joints just give your concrete room to move without cracking.
Assessing Damage and Deciding Whether to Cut a Relief Joint
Start by documenting the spall size, depth, reinforcement exposure, and nearby cracking, then identify ongoing causes such as drainage issues or deicing exposure. If the damage is isolated to the corner and caused by concentrated movement or moisture, a relief joint can be considered as part of the repair plan.
Use a logical workflow: inspect, diagnose root cause, test adhesion or delamination if needed, and only then decide on joint cutting; when in doubt, check manufacturer instructions or consult local practice standards.
Visual checkpoints and pre-cut documentation
Before you start cutting relief joints, document the damage. This helps track progress and ensures you’ve covered all affected areas.
- Photograph: Crack patterns and extent of loss from multiple angles.
- Measure: The length and width of cracks, and the depth of spalling.
- Sketch: Reentrant corner geometry to plan joint placement.
- Note: Any visible signs of corrosion or delamination.
- Avoid: Skipping this step. It’s crucial for tracking progress and ensuring you’ve covered all damaged areas.
Quick rule: If you can’t document it, you might miss something important.
Simple diagnostics: sounding, moisture, and rebar checks
Before cutting, perform non-destructive checks to understand the damage better. Start with a hammer sounding test.
How to: Gently tap the concrete surface with a hammer. Listen for dull or hollow sounds, indicating delamination or voids.
Next, check moisture levels using a moisture meter probe.
Why it’s important: High moisture can indicate poor drainage or waterproofing, which could exacerbate spalling. If sounding tests suggest rebar exposure, expose and inspect the reinforcement to assess its condition.
When to consult a structural or materials engineer
While relief joints can help, some situations require professional input. Material choices and structural integrity are key factors here.
- Extensive cracking: If cracks are widespread or interconnected, an engineer can assess if the structure’s integrity is compromised.
- Exposed corroded reinforcement: If rebar is exposed and shows signs of corrosion, consult an engineer to discuss repair options.
- Load-bearing concerns: If the spalling is near load-bearing walls or supports, an engineer can assess if additional support is needed during repairs.
Wrong material choice: Using the wrong materials for your relief joints can lead to cracking, staining, and weak bond. Always follow engineering recommendations for materials and specifications.
Tools, Equipment and Materials Checklist
Gather cutting gear (walk-behind saw, hand grinder or concrete saw), appropriate diamond blades for wet cutting if possible, and backer materials plus a compatible joint sealant and filler. Include PPE—respirator, hearing protection, eye protection, gloves—and dust-control items like wet-cutting water supply or a HEPA vacuum.
Also prepare repair mortars, corrosion treatment for exposed steel, and temporary protection for adjacent surfaces; confirm blade and material compatibility on product labels or technical sheets.
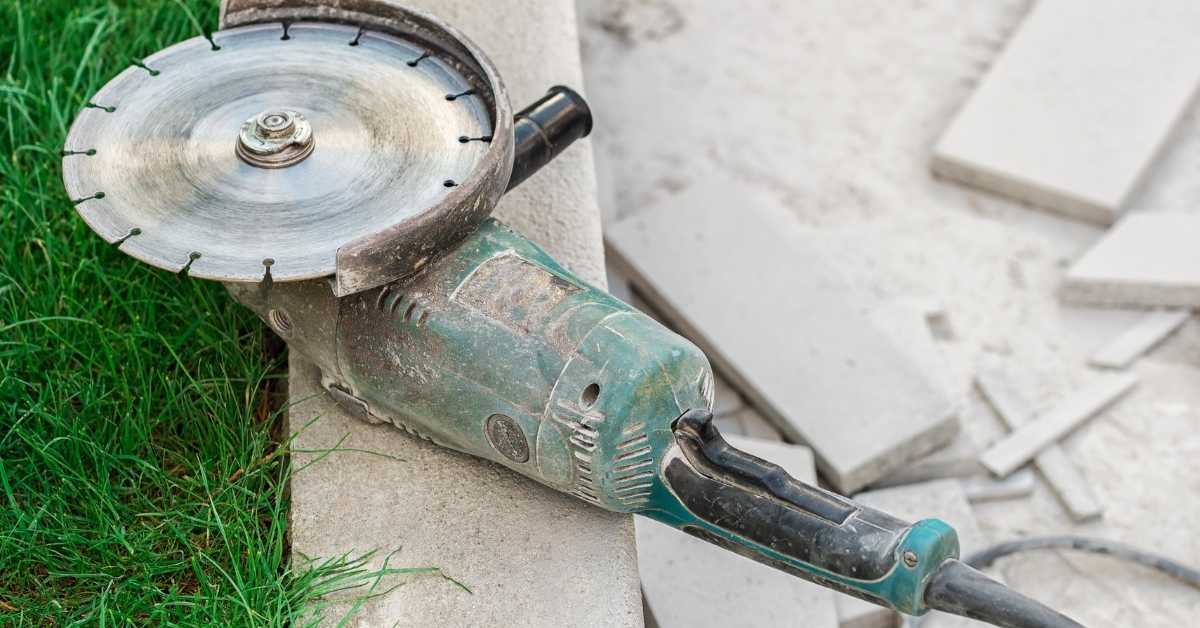
Cutting tools and blade selection
Before you start, make sure you have the right tools for the job. Here’s a checklist to help you.
- Hand saws: For thin slabs (up to 4 inches). Use a fine-toothed blade for cleaner cuts.
- Circular saws: For medium-thick slabs (up to 8 inches). Choose a diamond blade for best results.
- Angle grinders: For thick slabs (over 8 inches). Use a cup wheel with diamond segments.
- Blade size: Match the blade diameter to your tool’s capacity. Too small, it won’t cut; too large, it’s unsafe.
- Tooth count: More teeth mean smoother cuts but slower progress. Balance speed and finish.
- Segment type: Diamond segments are best for concrete. Avoid silicon carbide or aluminum oxide blades.
- Blade thickness: Thinner blades (1/32 inch) give cleaner cuts, but they’re more fragile. Choose wisely.
- Water supply: For diamond blades, use a water supply to keep the blade cool and reduce dust.
Quick rule: Always match your blade specs to your slab thickness for safe, efficient cuts.
Safety and dust-control equipment
Your safety is paramount. Here’s what you need before you start cutting.
- Respirator: Use a NIOSH-certified respirator to protect against silica dust.
- Safety glasses: Protect your eyes from debris with ANSI-approved safety glasses.
- Ear protection: Wear earplugs or earmuffs to protect your hearing from tool noise.
- Gloves: Use gloves to protect your hands from cuts and vibrations.
- Wet cutting: Use water to suppress dust when cutting with diamond blades.
- Local exhaust: Connect a dust extractor to your tool for better dust control.
- Containment: If possible, contain the work area to prevent silica dust spread.
- Clothing: Wear long sleeves and long pants to protect your skin from debris.
Quick rule: Always prioritize safety. Silica dust is harmful; control it at the source.
Backer, fillers, and repair material options
After cutting your relief joints, you’ll need to seal them. Here’s what you need.
- Backer rod: Choose a closed-cell foam rod for waterproofing. Check its compatibility with your joint filler.
- Joint sealant: Use a polyurethane or silicone-based sealant for durability and flexibility.
- Repair mortar: For filling deep cracks, use a polymer-modified concrete repair mortar.
- Primer: Apply a primer before using some joint fillers to improve adhesion.
- Tape: Use a reinforcing tape for wide joints (over 1/4 inch) to prevent cracking.
- Grout: For filling large voids, use a cement-based grout. Check its compatibility with your joint filler.
- Manufacturer instructions: Always follow the manufacturer’s guidelines for mixing and application.
Quick rule: Check compatibility between all materials to ensure a long-lasting repair.
Step-by-Step Method to Cut Relief Joints at Reentrant Corners
Lay out the joint line from the corner, mark depths, and set exclusion zones before cutting; control dust and follow safe cutting practices when operating power tools. Cut to the prescribed profile, remove debris, treat any exposed reinforcement, install joint backing, and place the chosen filler or sealant to the recommended depth.
At each stage check alignment and depth with measuring tools and re-check manufacturer instructions for clean-up and cure requirements before finishing. Prioritize safety, steady cutting speed, and clear communication with anyone on site.
Step-by-Step Process
This section guides you through the practical steps to cut relief joints at reentrant corners, ensuring safety and accuracy.
- Preparation: Check for any hidden reinforcement. Wear appropriate PPE (personal protective equipment).
- Marking: Use a straight edge and pencil to mark joint lines relative to corners and other features.
- Cutting: Start with shallow cuts, gradually deepening until the desired depth is reached. Be cautious not to cut into reinforcement.
- Cleaning: Remove debris from the joint using compressed air or a brush.
- Backing & Sealing: Apply backer material according to manufacturer’s instructions. Allow it to cure before applying sealant.
Layout, marking, and setting offsets
Proper layout is crucial for controlling crack migration and maintaining aesthetics. Start by identifying the reentrant corners.
Use a straight edge to mark joint lines. Offset them from corners to prevent stress concentration at the corner itself. The offset should be about 1/4 to 1/3 of the joint width.
Do not align joint lines with other cracks or joints in the concrete, as this can encourage crack propagation.
Proper cutting technique and depth control
Safety is paramount when cutting. Wear safety glasses and a dust mask. Use a wet saw to minimize dust.
Make multiple, shallow passes with the blade to achieve the desired depth. This helps prevent the blade from binding or breaking. Aim for a depth of about 1/4 to 1/3 of the concrete’s thickness, but never cut into reinforcement unless planned.
Never force the saw. If it binds or bogs down, you’re cutting too deep or fast. Back off and start again with lighter pressure.
Cleaning the joint and installing backer/sealant
Thorough cleaning ensures good adhesion of backer and sealant. Use compressed air or a brush to remove all dust and debris from the joint.
Apply backer material according to the manufacturer’s instructions. Typically, this involves troweling it into the joint, allowing it to cure for the recommended time before applying sealant.
When installing sealant, follow the manufacturer’s guidelines for application temperature and surface preparation. Use a caulking gun or similar tool to apply the sealant in a smooth, continuous bead along the joint. Tool the sealant with a damp sponge to achieve a smooth finish.
Material Specs and Standards Explained (What to Check)
When selecting joint dimensions, fillers, and sealants, consult product technical data sheets, relevant industry standards, and exposure classifications to ensure compatibility with the environment and traffic loads. Look for recommended joint width-to-depth ratios, substrate preparation methods, and acceptable temperature or moisture ranges on the product data.
If you cannot find a specific requirement, ask the manufacturer for installation guidance and check local codes or best-practice documents for applicable recommendations. Avoid assuming values—always verify with the source documents.
Joint width and depth: guidance and safe ranges
Before you start cutting, check these guidelines for joint widths and depths to prevent future damage.
- Width: Typically 1/4 to 1/2 inch (6-12 mm) for most slabs. Too narrow can cause cracking; too wide weakens the slab.
- Depth: Usually 1/3 to 1/2 of the slab thickness. Shallow cuts don’t relieve stress; deep cuts weaken the structure.
- Spacing: Generally 24 to 36 inches (600-900 mm) apart for interior slabs, more frequent for exterior or heavy loads.
- Corners: At reentrant corners, make joints 1/8 inch (3 mm) wider and deeper than usual to account for extra stress.
Quick rule: Always verify with manufacturer data and local codes for your specific application.
Selecting sealants, fillers, and backer materials
Choose the right materials to ensure a strong, durable repair.
- Adhesion: Check that the material adheres well to your existing concrete. Poor adhesion leads to delamination.
- Elasticity: Ensure the material can flex with temperature changes. Insufficient elasticity causes cracking.
- UV Resistance: For exterior joints, choose a UV-resistant sealant to prevent degradation from sunlight.
- Chemical Resistance: If your slab is exposed to chemicals (e.g., de-icing salts), ensure the material can withstand them.
- Compatibility: Make sure the materials are compatible with any repair mortars you’ll use. Incompatibility causes poor bonding and weak repairs.
Quick rule: Always test materials on a small, hidden area first to ensure compatibility and performance.
Environmental and durability factors to consider
Consider these environmental factors when selecting joint materials to extend their service life.
- Freeze-Thaw Exposure: In freeze-thaw regions, use air-entrained concrete and sealants designed for these conditions. Without protection, joints can spall and crack.
- De-Icing Salts: If using de-icing salts, choose materials resistant to their corrosive effects. Otherwise, expect reduced service life.
- UV Exposure: For exterior joints, consider UV exposure. Choose materials with good UV resistance for longer-lasting repairs.
- Chemical Exposure: If your slab is exposed to chemicals (e.g., industrial settings), choose materials resistant to those chemicals.
Quick rule: Regularly inspect and maintain joints in harsh environments to extend their service life.
Post-Cut Repair, Finishing, and Quality Checkpoints
After cutting and cleaning, apply corrosion treatment to exposed rebar, place repair mortar to match original profile, and finish the surface consistent with the surrounding concrete. Install the joint filler and strike or tool the edges to ensure a clean seal and uniform appearance.
Inspect visually and by touch for voids, adhesion, and correct filler depth; document finishes and photograph the work. Use objective checks—bond tests or simple tapping—to confirm the repair will resist repeat spalling, and refer to product cure guidance for final acceptance criteria.
Preparing cut faces and bonding surfaces
Before applying repair materials, ensure the cut faces are clean and ready for bonding.
- Remove loose concrete: Chip off any loose material using a cold chisel and hammer. Skipping this step leaves weak spots that can compromise the repair.
- Clean surfaces: Use a wire brush to remove dust and debris. A clean surface promotes better bonding.
- Wet the surfaces: Moisten the concrete with water before applying primer. This helps prevent rapid drying of the primer, which can weaken its bond.
- Apply primer: Use a paintbrush or roller to apply a thin coat of primer. Primer improves bonding and seals the surface.
- Roughen surfaces (if needed): For smooth surfaces like those made with stamped concrete, use a diamond blade to roughen up the area. This increases surface area for better bonding.
- Allow primer to dry: Follow manufacturer’s instructions for drying time. Applying repair materials too soon can cause poor bonding and delamination.
- Inspect surfaces: Check for any missed spots or contaminants before proceeding with repairs.
- Tape off edges (if needed): Use painter’s tape to protect adjacent areas from repair material spills. This ensures a clean, neat repair.
Quick rule: A well-prepared surface is half the battle won in any concrete repair job.
Repair mortar placement and finishing tips
Properly placing and finishing your repair mortar ensures a strong, durable, and visually appealing result.
- Select the right mix: Choose a repair mortar that matches the original concrete’s strength and appearance. Using the wrong mix can lead to premature failure or an unsightly patch.
- Control water-cement ratio: Maintain the correct water-cement ratio as specified by the manufacturer. Too much water weakens the mortar, while too little makes it difficult to place.
- Add shrinkage-compensating admixtures (if needed): These additives help prevent cracking due to drying shrinkage. Skipping this can cause your repair to crack over time.
- Pre-wet the joint: Before placing mortar, wet the joint with a fine mist of water. This helps control suction and prevents rapid drying of the mortar.
- Place mortar in layers: Apply mortar in thin layers, tamping each layer as you go. This helps remove air pockets and ensures good compaction.
- Match texture and color: For visible repairs, match the texture and color of the surrounding concrete using integral color pigments or surface-applied stains.
- Avoid overworking mortar: Overworking mortar can cause it to lose its plasticity and become weak. Keep tamping to a minimum.
- Finish surfaces promptly: Finish the repair surface as soon as possible after placing mortar. Delaying finishing can lead to poor surface quality or damage from weathering.
Quick rule: The key to successful concrete repair lies in the details of placement and finishing.
Final inspection and acceptance criteria
Before declaring your repair complete, perform a thorough visual and physical inspection to ensure it meets quality standards.
- Check sealant adhesion: Inspect the bond between the repair material and the existing concrete. Poor adhesion can lead to delamination and failure of the repair.
- Inspect joint movement accommodation: Check that the repair can accommodate normal joint movement without cracking or breaking apart. Inadequate flexibility can cause premature failure.
- Look for voids or honeycombing: Tap the repair with a hammer and listen for any hollow sounds, which indicate voids or poorly compacted mortar. These defects can weaken the repair.
- Inspect surface finish: Ensure the finished surface is smooth, even, and free of defects like cracks, holes, or excessive roughness.
- Check for proper curing: Verify that the repair has been properly cured. Inadequate curing can cause premature failure due to drying too quickly.
- Inspect edges and corners: Pay special attention to edges and corners, as these areas are prone to cracking or delamination if not properly reinforced or finished.
- Check for proper reinforcement (if applicable): Ensure that any added reinforcement is securely embedded in the repair material and aligned correctly.
- Perform a final wash: Clean off any dirt, debris, or residue from the repair surface. This ensures a clean, finished look.
Quick rule: A thorough inspection is crucial to ensure your repair will stand up to the test of time and use.
Monitoring, Maintenance, and Alternatives to Cutting Relief Joints
Set a schedule of periodic inspections focusing on sealant condition, water intrusion signs, and any new cracking near the treated corner, and perform routine resealing or cleanup as required. Watch for recurring distress patterns that suggest the underlying cause was not addressed, such as continued drainage or load issues.
If ongoing problems persist, consider complementary measures—improved drainage, protective flashing, or load redistribution—and check product labels or manufacturer recommendations before changing materials. Regular documentation of condition and maintenance actions will help decide if more invasive interventions are needed.
Routine inspection schedule and trigger signs for rework
Regularly inspect your concrete structure to catch any issues early. Use this checklist to guide you.
- Cracking: Hairline cracks are normal, but wider ones need attention.
- Spalling: Flaking or peeling of concrete indicates deterioration.
- Discoloration: Changes in color may signal water damage or contamination.
- Efflorescence: A white, powdery substance on the surface can indicate moisture issues.
- Joint deterioration: Check for crumbling or missing sealant. Reapply every 2-5 years.
- Water stains: Persistent stains may signal recurring leaks.
- Sinking or settling: Uneven surfaces can lead to structural issues over time.
- Corrosion of reinforcement: Rust stains or bulging concrete indicate rebar corrosion.
Quick rule: Inspect annually, and address any issues promptly to prevent further damage.
Complementary measures: drainage, flashing, and coating
Improving drainage can significantly reduce water-related issues. Ensure your structure has proper slope to direct water away.
Flashing: Installing flashing around corners and joints helps prevent water intrusion. It’s a simple, cost-effective measure that can extend the life of your concrete.
Protective coatings can also help. They seal the surface, preventing moisture from entering and causing damage. Choose a coating suitable for your climate and exposure conditions.
When to consider more extensive repairs or redesign
If you notice progressive structural damage, it’s time to consider more than just relief cuts. Extensive cracking, leaning, or significant settling may indicate a need for strengthening or reconfiguration.
Recurring corrosion: If your structure keeps corroding despite repeated repairs, it might be more economical and safer to replace the affected area entirely.
Consult with a structural engineer if you’re unsure. They can assess the damage and recommend appropriate action based on your specific situation.
Conclusion
Cutting relief joints at reentrant corners can stop repeat spalling, but it only works if you prioritize safety, follow the method, and verify the results through finishing and monitoring. Stay deliberate so you prevent costly mistakes and keep the concrete looking solid for the long haul.
As you move from assessment to cutting, follow this practical check in plain language: inspect the damaged area, confirm the joint layout and material specs, assemble your tools and PPE, mark the cut lines, perform a careful, gradual cut with control, clean and seal the joint, complete post-cut repair and finishing, then verify a solid cure and set a simple monitoring plan.
Common mistakes to avoid include rushing the cut, over- or under-cutting depth, skipping material specs or proper curing, and neglecting edge protection or surface finishing. Safety first means using eye and ear protection, keeping bystanders away, and testing a small patch on noncritical area first to confirm behavior before full-scale work. Do not skip drying and inspection steps, and don’t push ahead with damaged tools or improper bits.
If the damage is extensive, the corner is structurally critical, or you encounter unexpected hard substrate or drainage issues, call in a professional rather than pushing on alone. With clear planning and disciplined steps, you can deliver a durable repair and a clean finish that resists repeat damage, and you’ll finish with confidence and a solid sense of accomplishment.
FAQ
Is cutting a relief joint at a reentrant corner always the right fix for spalling?
No. It depends on the extent of damage and the concrete layout. Check the damage pattern and follow manufacturer instructions or local guidelines before cutting anything.
What should I look for in the product labels or manufacturer instructions before cutting?
Read the guidance on expansion or relief joints, curing, and sealing. If the label isn’t clear, call the supplier or manufacturer for a straight answer.
How do I decide the best location for relief joints near a reentrant corner?
Choose locations that align with the existing joint system and avoid cutting through reinforcement. If you’re unsure, compare options with the project plans or ask for a technician’s input.
What safety steps should I take during the cutting process?
Wear eye and hearing protection, and keep the work area clean. Verify the concrete is stable and that you’re not cutting near utilities or embedded items without checking first.