
Introduction
Curling is when a concrete slab lifts in the middle as it cures. Causes include moisture differences, improper edge drying, and uneven shrinkage during curing. On small pours, wind and heat shifts can worsen the effect.
To measure curling, check for a ridge or gap at the edges by placing a straightedge across the surface. Prevention hinges on moisture control, steady curing, and proper control joints, plus protecting the slab from drafts and temperature swings. Always follow the product label, recommended curing guidelines, and local rules for your area.
Key takeaways
- Small pours curl unpredictably; measure edges and centers for pattern changes.
- Moisture balance and formwork stiffness strongly influence curling during cure.
- Control moisture with consistent curing and avoid rapid evaporation from wind.
- Environmental factors like temperature and wind speed affect cure rate and curl.
- Document measurements daily during pours to catch curling early and adjust forms.
- During design, specify proper slab thickness, joints, and subgrade to minimize curl.
- Safety: wear PPE, secure formwork, and halt work if edge heaving worsens.
Table of Contents
- Introduction
- Key takeaways
- What Slab Curling Is and Why Small Pours Are Different
- Primary Causes of Slab Curling
- Environmental and Site Factors That Increase Risk
- How to Measure Slab Curling — Tools, Procedures, and Documentation
- Prevention Strategies During Planning and Mix Design
- Best Practices for Pouring, Finishing, and Curing to Minimize Curling
- Vapor Barriers, Below-Slab Considerations, and Modern Best Practices
- Mitigation Products, Cost Considerations, Common Mistakes, and Safety
- Conclusion
- FAQ
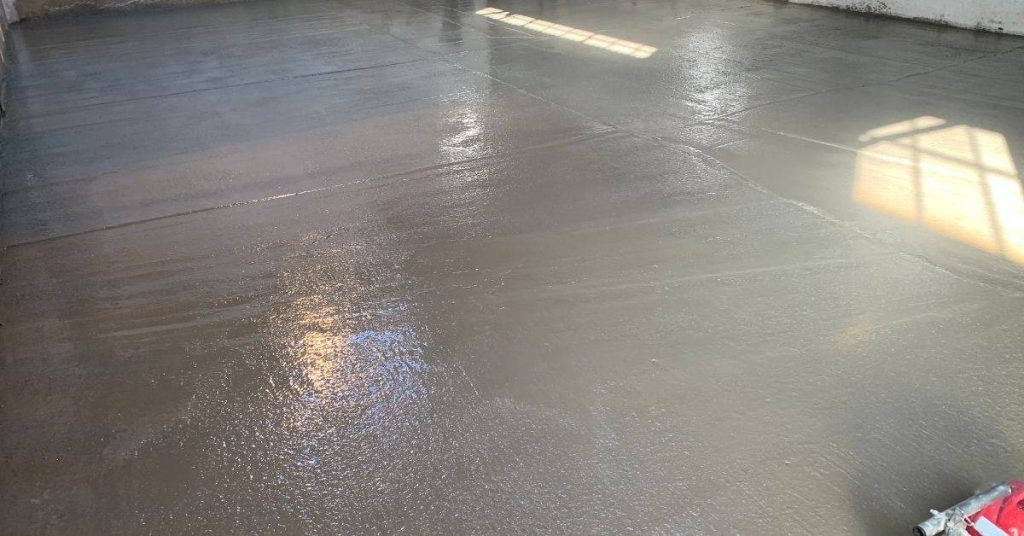
What Slab Curling Is and Why Small Pours Are Different
Curling and warping are not the same thing, even though both involve bending the slab. Curling happens when edges lift away from the formwork while the center stays lower, often forming a concave or convex edge relative to the middle. This behavior is driven by uneven shrinkage and restraint in a small, isolated pour.
Small pours intensify curling because the edge-to-area ratio is higher and drying occurs faster near the edges. Local conditions like substrate moisture, temperature gradients, and wind exposure have a stronger say in how the slab cures. Practically, edge lift can ruin finish quality, create trip hazards, and complicate later work such as overlays or subsequent pours.
Curling vs. cracking vs. warping
Concrete issues can manifest differently, but they’re not always distinct. Let’s clear up the confusion.
Cracking is a break in the concrete’s surface or structure due to excessive stress, often from drying shrinkage or loading.
Warping, on the other hand, refers to a general distortion of the slab, usually caused by uneven support or differential settlement. It can lead to cracking but isn’t the same as curling.
Curling is when edges lift off the substrate, creating concave (down) or convex (up) shapes relative to the center. This happens due to restraint at the edges and differential shrinkage across the slab’s thickness.
Why small pours amplify the issue
Small, isolated pours have unique challenges that make curling more likely. Here’s why:
The edge-to-area ratio is higher in small pours. This concentrates stress near formwork, making edges more prone to lift.
Smaller slabs also dry and shrink faster relative to their size. Quick drying leads to quicker strength gain but also quicker shrinkage-induced stresses.
Small pours are more sensitive to local conditions like substrate moisture, temperature gradients, and wind exposure. These can create uneven curing rates and further exacerbate curling.
Primary Causes of Slab Curling
Curling is driven by gradients in moisture, temperature, and how the mix behaves as it cures. In residential, small pours are especially sensitive to these factors and can start bending early in the cure.
Moisture gradients come from sources like soil moisture, curing water, evaporation, and under-slab barriers. Temperature gradients arise from heat differences between the edges, center, and nearby structures. Material and mix factors—cement content, water demand, aggregate size, air entrainment, slump, and curing compounds—also shape curl tendency.
Moisture-driven curling (drying gradients)
Slab curling often starts with moisture. Here’s how it works:
Top of your slab dries faster than the bottom. This creates tensile stresses that lift edges, causing curl.
Watch for these moisture sources:
– Soil moisture wicking up through slab.
– Curing water evaporating too quickly from top surface.
– Under-slab vapor barriers not doing their job.
Temperature-driven curling (thermal gradients)
Temperature changes also drive curl. Here’s why:
Surface heating or cold spots during finishing and early curing can cause uneven expansion/contraction.
This leads to curl, especially when thermal effects dominate over other factors.
Keep an eye on these temperature hotspots/coldspots:
– Slab edges exposed to direct sunlight or wind.
– Adjacent structures with different temperatures (like a heated garage).
Mix design and placement factors
The concrete mix itself can influence curl. Here’s how:
– High water-cement ratio makes slab more prone to curl.
– Large or poorly graded aggregates increase warping risk.
– Admixtures like accelerators can speed up drying, causing curl.
– Finishing too early (before bleed water is gone) leaves voids that weaken slab.
Environmental and Site Factors That Increase Risk
Wind, sun, and humidity actively drive moisture loss during curing and affect small pours more than larger slabs. Exposure patterns determine how quickly the surface dries relative to the interior.
Subgrade moisture, soil type, capillary rise, drainage, and proximity to groundwater all influence surface drying and shrinkage. Site layout, shade, reflective surfaces, and nearby structures modify heat and moisture exchange at the slab edge.
Weather and microclimate effects
Wind, sun, and low humidity can speed up concrete drying, increasing the risk of short-term curling on small pours.
Wind: Blows away surface moisture faster. More wind means quicker drying and higher curl risk.
Sun: Direct sunlight heats the slab’s surface, driving evaporation. Slabs in full sun dry faster than those in shade.
Low humidity: Drier air pulls moisture out of the concrete quicker. Low humidity means faster drying and more curl.
Subgrade, drainage, and nearby moisture sources
Moisture from below can cause long-term warping. Here’s what to watch for:
Wet subgrade: Too much moisture under the slab leads to excessive underside drying and curling.
Pooling water: Standing water near or under the slab increases moisture drive, leading to warping over time.
High vapor drive from soil: Some soils release more moisture than others. This can cause long-term warping if not managed properly.
How to Measure Slab Curling — Tools, Procedures, and Documentation
Curl means the slab edges are higher or lower than the center in a way that can compromise function and finish. Precise measurement helps verify performance against project expectations and tolerances. Start by defining what counts as acceptable curling for your job specs.
Use a tiered approach: quick visual checks, semi-quantitative surface profiling, and instrumented surveys with defined accuracy targets. Measure after curing is consistent and after form removal to avoid reading drift. Document baseline readings for future comparisons and control tests on the next pour.
Step-by-Step Process
Follow these practical steps to measure slab curling, ensuring you capture accurate data for performance and aesthetic evaluation.
- Preparation: Ensure the slab is fully cured (at least 28 days) and forms are removed. Check safety conditions before starting.
- Visual Inspection: Walk the slab, looking for visible signs of curl such as lifted edges or warped surfaces.
- Straightedge Checks: Place a straightedge across joints/edges to identify gaps or high spots. Mark these locations.
- Documentation: Record measurements using consistent units (e.g., inches or millimeters). Note down environmental conditions and time of measurement.
- Final Checks: Revisit marked locations after a few hours to ensure readings are stable. If not, re-measure until they are.
Simple Field Checks
Use these straightforward methods to perform quick, initial checks on slab curling:
Straightedge: Place a straightedge across joints/edges. Look for gaps or high spots indicating curl.
Feeler Gauges: Use feeler gauges to record gap sizes at marked locations. This helps quantify the severity of curl.
Gap Mapping: Systematically map out locations with significant gaps on a plan. This helps visualize curling patterns and identify trends.
Quantitative Instruments
For more precise measurements, use these tools and techniques:
Dial Indicators: Place the indicator on a flat surface. Measure lift or tilt at marked locations every 1-2 feet along joints/edges.
Digital Levels/Inclinometer: Check slope and camber at regular intervals, ensuring readings are consistent with project specs.
Laser Levels: Use for long-range measurements. Ensure accuracy by checking multiple points around the slab’s perimeter.
Record Keeping & Interpretation
Proper record keeping helps track trends and compare measurements to tolerances:
Photograph: Take photos of marked locations with reference points (e.g., a ruler or tape measure). Document environmental conditions.
Chart Trends: Plot measurements over time. Look for patterns or changes that may indicate issues requiring attention.
Compare to Tolerances: Refer to project specs or industry standards to determine if curling is out of spec. If so, consult a specialist immediately.
Prevention Strategies During Planning and Mix Design
Plan pour size and joint layout to minimize differential shrinkage in small pours. Think about how joints, insulation, and edge details influence curling risk from the start. Align these decisions with the forecasted curing conditions.
Work out a tailored mix design for small pours, including target slump and appropriate cement content and aggregate size. Consider shrinkage-reducing admixtures and proper water management. Decide on reinforcement and jointing approaches to interrupt potential curling paths, plus a clear curing and protection plan for the first days after placement.
Optimizing the concrete mix
The key to preventing curling lies in creating a well-balanced, low-shrinkage mix. Here’s how:
Water control: Too much water can lead to excessive shrinkage and curling. Use appropriate water-reducing admixtures to maintain a target slump while keeping water content low.
Low-shrinkage cements or admixtures: Specify Type III (low heat) or Type IV (moderate heat, low shrinkage) cement for smaller pours. Add shrinkage-reducing admixtures like calcium chloride or lithium-based compounds to further minimize drying shrinkage.
Aggregate selection and fiber reinforcements: Use well-graded, dense aggregates to reduce void space and potential shrinkage. Incorporate fibers (steel, synthetic, or natural) to control cracking and distribute stresses evenly across the slab.
Jointing, reinforcement, and pour geometry
Proper joint placement, reinforcement, and pour geometry are crucial for controlling curling in small pours:
Joint placement and saw-cut timing: Plan joints at intervals that match the slab’s length-to-width ratio. Saw-cut joints within 24-48 hours after pouring to control cracking and curling.
Reinforcement options: Use wire mesh or fibers for smaller pours, focusing on controlling shrinkage-induced cracks rather than providing structural reinforcement. Dowels can be used at expansion joints to align adjacent slabs and prevent curling due to differential movement.
Pour geometry: Taper edges where possible to reduce stress concentrations and potential curling. For small pours, consider using tapered edge forms or shoring to create these transitions.
Best Practices for Pouring, Finishing, and Curing to Minimize Curling
Coordinate placement timing with seasonal conditions and avoid pouring during extreme heat or cold. Plan sequencing to prevent cold joints and unnecessary delays. Manage truck arrival times to minimize early set before placement.
Finish with techniques that reduce surface water and avoid over-brushing. Control bleed water and use appropriate curing methods to retain moisture consistently. Plan for perimeter insulation or edge forms if needed to stabilize the slab during cure.
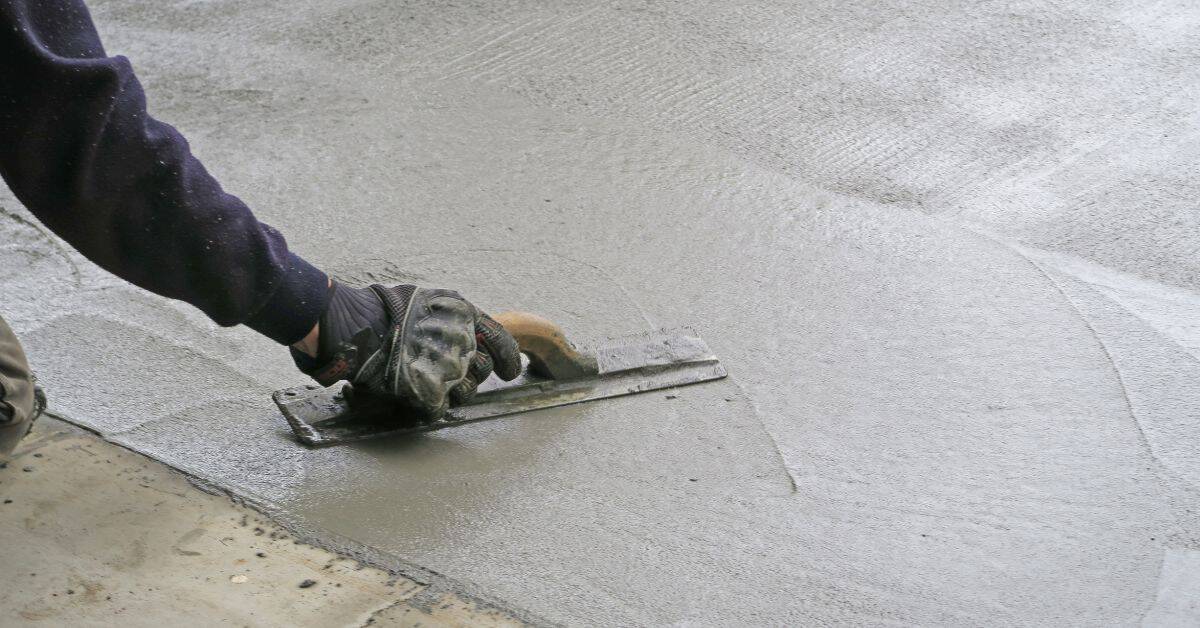
Timing and finishing techniques
Timing is crucial when it comes to concrete slab pouring. Avoid extreme temperatures – pour during mild weather, ideally between 50-90°F (10-32°C). Coordinate with your supplier for proper batching and delivery times to minimize cooling before placement.
Proper finishing technique helps prevent curling. Screed immediately after placing the concrete to ensure a level surface. Trowel within 15-30 minutes of screeding, but avoid overworking or premature finishing as it increases shrinkage. Control bleed water and use burlap or curing blankets to limit rapid evaporation and surface drying.
Remember: Over-brushing can cause excess water to rise to the surface, leading to increased curling risk.
Curing and moisture-control methods
Curing is vital for minimizing curl. Wet curing is effective but requires constant water application. Curing compounds and liquid membrane-forming products can be used as alternatives, providing a protective barrier against rapid drying.
Temporary covers like burlap or plastic sheets can also help maintain moisture. Use them immediately after finishing to prevent early surface drying. Monitor slab temperature to reduce differential drying – keep it uniform across the entire slab.
Note: Different methods suit different conditions, so choose wisely based on your specific job site and weather conditions.
Vapor Barriers, Below-Slab Considerations, and Modern Best Practices
Clarify when a vapor barrier is necessary versus optional, and consider modern vapor retarders and their permeability. Understand how barrier choices influence long-term warping and short-term curling for small pours. Refer to product labels and manufacturer guidance for specifics.
Evaluate subgrade moisture, drainage, and desiccation potential to inform barrier placement. Ensure overlaps, seals, and penetrations are done correctly and integrate insulation and drainage layers to minimize moisture movement. Use project criteria to decide on installation details and sequencing.
When vapor barriers help and when they hurt
A vapor barrier can be your best friend or worst enemy, depending on the situation. Here’s when to expect each:
Help: In high moisture subgrades (clay soils, wet conditions), a perm-rated vapor retarder (<1 perm) reduces long-term warping by preventing moisture from entering the slab and creating differential drying. It also helps maintain consistent slab temperature during curing.
Hurt: On small pours with quick drying mixes, an airtight barrier can trap moisture under the slab, leading to early curling as the slab tries to dry from above while moisture is trapped below. This is more common in hot, dry climates or when using fast-track curing methods.
Installation and protection of modern vapor retarders
Proper installation is key to getting the most out of your vapor barrier. Here’s how:
First, lap joints at least 6 inches and seal with tape or mastic. This prevents moisture from wicking around edges. Next, protect the barrier during placement by keeping it clean and free of punctures. Use boards to walk on instead of stepping directly onto the barrier.
Coordinating with subgrade prep is crucial. Ensure proper drainage and moisture testing before laying the barrier. Integrate it with insulation and drainage layers to minimize moisture movement. After placement, protect it from sunlight and extreme temperatures until ready for pouring.
Mitigation Products, Cost Considerations, Common Mistakes, and Safety
Identify curing compounds, blankets, vapor barriers, surface sealers, shrinkage-reducing admixtures, and optional reinforcement suitable for small DIY pours. Use each product according to its label and project needs. Decide when a given product is appropriate based on your specific pour size and conditions.
Compare practical costs and expected effects on curling prevention, ease of use, and curing time. List common mistakes such as skipping moisture tests, poor surface prep, or neglecting early curing, and offer quick fixes. Prioritize safety with PPE, ventilation for curing agents, and safe handling of materials during pour and cure.
Products and tools (liquid membranes, admixtures, gap fillers)
Choose the right products to minimize curling in small DIY pours. Here are some options:
- Liquid Membranes: Seal cracks and prevent moisture loss. Apply thin coats before pouring.
- Shrinkage-Reducing Admixtures: Mixed into concrete, they reduce curling by controlling shrinkage. Costs around $5-$10 per 80 lbs.
- Gap Fillers: Seal voids and prevent air pockets. Use before pouring to ensure a solid base.
- Curing Compounds: Applied after finishing, they retain moisture and speed curing. Costs vary but expect around $0.50-$1 per sq ft.
- Optional Tools: Rentable tools like concrete mixers ($40-$60/day) or power trowels ($30-$50/hr) can help with small pours.
Cost trade-offs and choosing a strategy for small/DIY pours
Preventing curling in small pours involves weighing costs. Here’s how:
Material Costs: Liquid membranes, admixtures, and curing compounds vary but expect $0.50-$10 per sq ft.
Labor/Installation Time: DIY saves labor costs but takes time. Consider your skills and available hours.
Long-Term Repair Costs: Preventing curling now avoids costly repairs later. Consult a contractor or engineer if unsure.
Common mistakes and safety considerations
Avoid these common errors and prioritize safety for successful small pours:
- Skipping Moisture Tests: Wet surfaces cause curling. Test before pouring.
- Improper Surface Prep: Clean, dry, and prime surfaces to ensure adhesion.
- Neglecting Early Curing: Keep concrete moist and cool for the first 7 days.
- Using Incompatible Products: Check product labels to ensure compatibility with your mix.
- Underestimating Temperature/Cure-Time Constraints: Follow manufacturer’s guidelines for application temperatures and cure times.
Always use appropriate PPE, ventilate areas when using chemicals, follow lifting rules for heavy materials, and maintain safe curing/temperature practices to avoid premature cracking.
Conclusion
Staying proactive, careful planning, and disciplined execution will protect your slab from curling and save you from costly repairs later. The most important thing is to build in sound practices from the start and test ideas on a small scale before committing full pours.
Verify the plan and conditions before you pour: check site drainage and slope, confirm vapor barrier and below-slab details, review mix design and curing plan, and measure any potential curl tendencies on test patches. Then proceed in a steady sequence: prepare, place and screed with consistent thickness, finish with control joints and proper curing, and document every step so you know what worked and what didn’t.
Common mistakes to avoid include skipping small-area tests, rushing pours in adverse weather, and ignoring moisture or temperature changes that affect cure. Always follow safety protocols, wear proper PPE, and never mix or apply products beyond their recommended use. If any part of the plan falls outside your comfort zone, or you see unexpected slope or cracking during curing, pause and reassess before continuing.
If the project drifts into uncertain territory—complex subgrade, unusual environmental conditions, or signs of excessive curl early in the process—call in a professional rather than forcing a DIY fix. A careful, informed approach now protects your structure, your time, and your budget, and gives you confidence to tackle the next step with solid results.
FAQ
What are the main causes of slab curling beyond a simple pour mistake?
C Styling factors like uneven moisture and uneven drying across the slab drive curling. Subgrade moisture, temperature gradients, and shrinkage from the mix all push the slab to warp as it cures. Poor joint planning and reinforcement placement can make curling worse.
How does moisture in the mix and in the surrounding environment affect curling, and how do I manage it?
Moisture differences between areas of the slab pull it up or down as it cures. Control moisture by following the mix instructions and using appropriate curing methods. Check the product label and manufacturer guidance for moisture handling and curing times.
How do wind and temperature during curing influence curling, and what can I do about it?
Strong air flow or temperature swings can dry the surface too fast and create tension that curls the edges. Protect the pour with windbreaks, shade, or curing blankets as needed, and follow site-specific recommendations from the material supplier. If in doubt, ask for local best practices and any time windows you should observe.
What kinds of products or methods help reduce cracking and curling in small pours?
Use products and practices that limit shrinkage and improve moisture control, and follow the manufacturer’s instructions. Look for guidance on shrinkage reduction, proper curing, vapor barriers, and joint placement; check labels and datasheets for specifics. Long-term curling can stem from a high initial curl, so prioritize consistent curing and planned jointing to reduce future cracks.