
Introduction
Thin concrete warps when uneven moisture and temperature pull the slab in different directions. Moisture gradients and the way the mix dries out interact with the slab’s thin profile to cause bowing. Reinforcement and curing setup can worsen or help the effect depending on how evenly things stay throughout the cure.
To keep things flat, plan for even moisture, steady temps, and a curing setup that minimizes rapid changes. Check the placement and type of reinforcement, and ensure protection from sudden drying or wetting so moisture moves more evenly. When in doubt, read the product label and manufacturer instructions, and follow local rules for curing and humidity.
Key takeaways
- Moisture gradients drive warping; ensure uniform moisture by planned curing and placement.
- Reinforcement affects moisture-induced stress; place proper rebar or mesh to distribute loads.
- Curing setups matter most; use consistent environment and avoid rapid drying or soaking.
- Temperature and humidity interact; supervise pour timing and ventilation to minimize gradients.
- Detrimental warping risks rise with inadequate detailing; inspect edges, joints, and slab thickness.
- Safety note: keep forms secure and PPE on site during curing and monitoring.
Table of Contents
- Introduction
- Key takeaways
- What Is Warping in Thin Concrete and Why It Matters
- How Moisture Gradients Form Through Slab Thickness
- Interaction of Temperature and Moisture: Compound Effects
- Role of Reinforcement and Slab Detailing in Reducing Warping
- Curing Strategies That Prevent or Reduce Warping
- Construction Best Practices and Common Mistakes to Avoid
- Case Studies, Costs, and Lessons Learned
- Inspection, Monitoring, Mitigation, and Safety Considerations
- Conclusion
- FAQ
What Is Warping in Thin Concrete and Why It Matters
Warping, or curling, happens when a thin concrete slab bends or twists rather than laying flat. It often stems from moisture gradients, uneven drying, and restrained reinforcement that fight each other as the mix cures. The result can show up as edge lift, surface cracks, or misaligned joints that complicate next steps on the project.
In this section, you’ll learn the primary and secondary causes of warping and how to recognize them on site. We’ll cover practical consequences for durability and safety, plus how to set expectations for measurements and inspections. Look ahead to see how curing setups, reinforcement layout, and moisture control can change the likelihood of warp in your specific job.
Definition and physical mechanisms
Warping in thin concrete slabs is a distortion where the slab bends or twists out of its intended flat shape. This happens due to differential strains caused by moisture and temperature gradients, along with restraint effects from reinforcement.
Moisture migration within the slab creates varying degrees of shrinkage as it dries. When one part of the slab shrinks more than another, it causes a strain difference, leading to bending or displacement. Temperature shifts can also cause expansion and contraction at different rates across the slab’s surface, further exacerbating warping.
Reinforcement plays a significant role in warping. If the reinforcement is restrained (e.g., anchored at both ends), it prevents the concrete from shrinking freely, causing additional stress and warping. This is known as ‘restrained shrinkage’.
Why thin slabs are more vulnerable
Thin concrete slabs are more susceptible to warping due to their lower thickness and low stiffness. The thinner the slab, the less material there is to resist bending forces caused by differential drying and shrinkage.
Surface drying is a significant factor in thin slabs. As the top layer dries faster than the bottom, it shrinks more, causing the slab to curl upwards at the edges (edge lifting). This effect is amplified in thinner slabs because there’s less concrete below to counteract this force.
Low stiffness means that thin slabs are less rigid and more flexible. While this can be beneficial for some applications (like reducing cracking from minor movements), it also makes them more prone to warping under the influence of restrained shrinkage and moisture gradients.
How Moisture Gradients Form Through Slab Thickness
Moisture gradients form when the surface dries faster than the interior or when underlying moisture moves into the concrete. Capillary action and self-desiccation during hydration also shape the humidity profile across the thickness. The result is a differential that can drive shrinkage and movement in the slab.
Gradients evolve as the slab ages, with surface drying typically most rapid early on and interior changes continuing later. These shifts influence thermal responses, microcracking risk, and potential warping tendencies. Practical indicators and simple field checks help you track progress and plan interventions if needed.
Surface drying, capillary suction, and internal self-desiccation
Moisture gradients in concrete start forming right after placement. Here’s what happens:
Surface drying: The top layer dries out first due to evaporation. This is the dominant process early on.
Capillary suction: Moisture from below rises up through tiny pores, meeting the drying surface. This becomes significant as the slab ages.
Internal self-desiccation: As concrete hydrates, it loses moisture internally too. This process continues throughout the slab’s life but is slower than surface drying initially.
Diffusion and transient moisture profiles
Moisture doesn’t just sit still in concrete. It moves, creating changing moisture profiles over time:
Moisture diffuses from wetter to drier areas. This happens gradually, taking days or even weeks.
These transient profiles create varying warping stresses. Early on, the surface dries fast, pulling inwards. Later, as inner moisture moves out, it pushes outwards.
Understanding these transient changes helps predict when and how warping might occur.
Measuring and modeling humidity gradients
To manage moisture gradients, you need to monitor them. Here’s how:
Use relative-humidity sensors or moisture probes at different depths. Simple field checks like mass change can also help.
Compare your readings with established diffusion models or standards. This helps predict moisture movement and warping risks.
Regular monitoring lets you adjust curing regimes if needed, keeping gradients under control.
Interaction of Temperature and Moisture: Compound Effects
Temperature differences across a thin slab change how moisture moves, so drying on one face can pull the slab into a warp as the two sides respond differently. This coupling makes climate and sun exposure a key part of the warp risk equation. You need to watch for persistent gradients under real-world conditions.
Reinforcement and curing timing interact with these gradients to set up initial stress patterns. By considering placement, restraint, and early moisture levels, you can anticipate how temperature and moisture will combine to shape the final slab bend. Simple checks and practical mitigation steps help keep warp in check.
Curling from combined temperature and moisture gradients
Temperature changes cause concrete to expand and contract. Moisture loss makes it shrink. In thin slabs, these effects happen at different rates across the depth.
Imagine a slab with one side exposed to sun, the other shaded. Daytime heat makes the surface expand. Meanwhile, moisture evaporates faster up top, causing that layer to shrink more than the cooler bottom.
At night, temperatures drop. The slab contracts evenly but the drier top shrinks more. This sets up a curling effect – the slab bends upwards at the edges like a piece of paper left in the sun.
Site and seasonal factors to consider
Sun exposure is key. South-facing sides in northern climates, or north-facing in southern, get more direct sunlight. This causes greater temperature swings and faster drying.
Wind also plays a role. It speeds up evaporation, creating steeper moisture gradients. Humidity swings matter too – drier air promotes faster moisture loss.
Seasonal changes bring different challenges. Summer heat drives faster drying and bigger temperature swings. Winter cold slows down curing but can cause freezing-thawing damage if not properly protected.
Role of Reinforcement and Slab Detailing in Reducing Warping
Reinforcement type and layout alter how stiff and restrained the slab is, which directly impacts differential movement. Edge treatments and internal grids influence how bending moments develop and where a warp might start. The goal is to distribute restraint evenly without inviting cracking.
Spacing, cover, and dispersion of reinforcement affect shrinkage restraint across the slab. By choosing appropriate patterns and coordinating with formwork and curing, you can reduce the likelihood of differential movement. Practical workflow tips help keep restraint effective from placement through early curing stages.
Reinforcement types and their effectiveness
Choosing the right reinforcement is crucial to minimize warping. Each type has its strengths:
Rebar: Provides high tension capacity, but layout can be labor-intensive.
Welded Wire Mesh: Offers good crack control and ease of installation, but may not provide the same level of tension resistance as rebar.
Synthetic Fibers: Distributes micro-cracks, reducing warping. They’re easy to use but have lower tension capacity than steel.
Joints, edges, and support conditions
Proper detailing of joints and edges helps control warping:
Joint Spacing: Wider joints allow more slab movement. Narrower joints restrict movement but may cause cracking.
Edge Support: Well-supported edges reduce edge curling. Unsupported edges can warp upwards.
Subgrade/ Base Contact: Good contact prevents warping due to differential settlement, but too much friction can cause restraint and increased warping.
Material specs and standards explained
Material choices impact warping. Here’s what matters:
- Cement Type: Type I or II cement is standard for most slabs. Type III accelerates setting but may increase shrinkage.
- Admixtures: Air-entraining admixtures reduce drying shrinkage, helping to minimize warping.
- Aggregate: Coarse aggregates with low absorption and high modulus help control warping.
- Modulus of Elasticity (E): Higher E means stiffer concrete, reducing warping. Look for E ≥ 3000 ksi in specs.
- Avoid Low-Strength Concrete: Lower strength increases the risk of cracking and warping. Specify a minimum compressive strength of 3000 psi.
Curing Strategies That Prevent or Reduce Warping
Moisture control during curing drives the early development of warping risk. Indicators like surface drying rate and edge behavior help you decide when to intervene. The right curing plan keeps moisture more uniform from edge to center in a thin section.
Choose curing methods based on weather and the intended use of the slab, and apply them consistently across the entire area. A stepwise approach to protection, moisture retention, and gradual transition to long-term curing supports a flatter final profile and fewer movement issues.
Step-by-step curing protocol
The following sequence ensures your thin slab stays protected and evenly cured during the critical first week.
- Within 1-4 hours after finishing, cover the slab with plastic sheeting or a curing membrane to retain moisture. Check: Ensure the entire surface is covered without gaps.
- Maintain consistent surface moisture for 24-48 hours using periodic misting or water sprays. Check: The surface should be consistently damp but not overly wet.
- After 24-48 hours, gradually reduce the frequency of misting to allow slow drying. Check: The slab should feel slightly damp to the touch.
- Continue long-term curing by keeping the surface moist for at least a week, adjusting based on weather conditions. Check: Monitor edges and center for signs of differential drying or curling.
- If edges show early curling or center remains overly damp after 7 days, re-evaluate protection and adjust as needed. Call a pro if: Curling persists despite proper curing.
Curing materials, setups, and tools checklist
Use this checklist to gather the right supplies for your thin slab’s curing needs.
- Plastic sheeting: Essential for immediate post-finish protection. Check: It’s large enough to cover the entire slab without gaps.
- Curing membrane: Optional, but helps maintain even moisture distribution. Check: It’s compatible with your slab type and size.
- Misting equipment: For maintaining consistent surface moisture. Check: It has a suitable spray pattern and coverage area.
- Water source: Nearby hydrant or hose for misting. Check: Water pressure is adequate for misting.
- Timers: To automate misting intervals. Check: They’re reliable and weatherproof.
- Thermometer/hygrometer: For monitoring temperature and humidity. Check: It’s accurate and easy to read.
- Edge formwork: To prevent edge lift during curing. Check: It’s sturdy and fits your slab edges.
- Tape measure: For checking slab thickness and coverage. Check: It’s accurate and long enough for your slab size.
Quick rule: Always have backup supplies on hand in case of equipment failure or unexpected weather changes.
Construction Best Practices and Common Mistakes to Avoid
On-site sequences and timing have a strong influence on warping risk. Early substrate conditions and formwork accuracy set the stage for how the slab cures. Align pours with the forecast and establish a clear window for placement and consolidation.
Substrate prep, moisture control, and finishing practices must be coordinated to minimize differential movement. Typical mistakes—like improper curing environments, uneven thickness, or rushed early finishing—can amplify warp. Use practical checks and standardized curing plans to stay on track.
Placement, finishing and timing pitfalls
Certain techniques during concrete placement, finishing, and curing can exacerbate surface drying and warping. Here are some common mistakes to avoid:
- Overworking the surface: Excessive troweling or over-finishing can lead to a dry surface layer that shrinks more than the underlying concrete, causing warp.
- Late curing initiation: Delaying the application of cure compounds allows the surface to lose too much moisture too quickly, leading to warping.
- Poor consolidation: Inadequate vibration or compaction can result in weak spots that dry and shrink differently than the rest of the slab, causing warp.
- Early-age finishing: Finishing concrete before it has gained sufficient strength can lead to warping as the slab settles under its own weight.
- Inadequate joint treatment: Neglecting to properly treat joints allows moisture to escape unevenly, contributing to warp.
To minimize these risks, follow a standardized finishing and curing regime, avoid overworking the surface, initiate curing promptly, ensure proper consolidation, finish only when the concrete has gained sufficient strength, and treat joints appropriately.
Subgrade preparation and sequencing
The condition of the subgrade and the sequence in which you prepare it can significantly impact warping risk. Here’s what to consider:
Uneven support: A poorly prepared or uneven subgrade provides inadequate support, leading to differential deformation as loads are applied.
Trapped moisture: Moisture beneath the slab can cause differential drying and warping. Ensure the subgrade is dry before placing concrete.
Premature load application: Applying loads too early can cause the slab to deform differentially as it tries to accommodate the weight. Allow the concrete sufficient time to gain strength before applying heavy loads.
Case Studies, Costs, and Lessons Learned
Real-world scenarios show how moisture gradients, reinforcement layouts, and curing setups contribute to warp. Each case highlights what went wrong and how a different approach could have changed the result. These examples help you weigh prevention against repair implications.
For each scenario, you’ll see the problem, the chosen fix or prevention, and the time and cost considerations. The lessons translate into quick decisions and simple checklists you can apply to new projects and small jobs.
Example Scenarios and Outcomes
Let’s look at two real-world cases to understand how moisture gradients, reinforcement layout, and curing setups can cause warping.
Case 1: A DIYer poured a 4″ thick exterior patio slab in a hot, dry climate. After curing, the slab curled up at the edges due to rapid evaporation causing high moisture gradients. The fix? They had to grind down the edges and apply a moisture barrier before resealing.
Case 2: A small contractor laid a 6″ thick pavement overlay on an existing road with insufficient reinforcement. Moisture from below caused warping over time. They ended up having to mill off the overlay and redo it with added reinforcement, costing double initially planned.
Cost and Lifecycle Implications
Preventing warping through better design and curing is cheaper in the long run than recurring repairs.
For instance, investing in proper reinforcement ($2-$5 per sq. ft.) and a good curing setup ($1-$3 per sq. ft.) can prevent costly repairs later on. A warped slab may need to be replaced entirely, costing $10-$20 per sq. ft. or more.
Factor lifecycle costs into your specifications. For a 1,000 sq. ft. slab, prevention could cost $3,000 – $8,000 upfront but save you from $10,000 – $20,000 in repairs over the structure’s life.
Inspection, Monitoring, Mitigation, and Safety Considerations
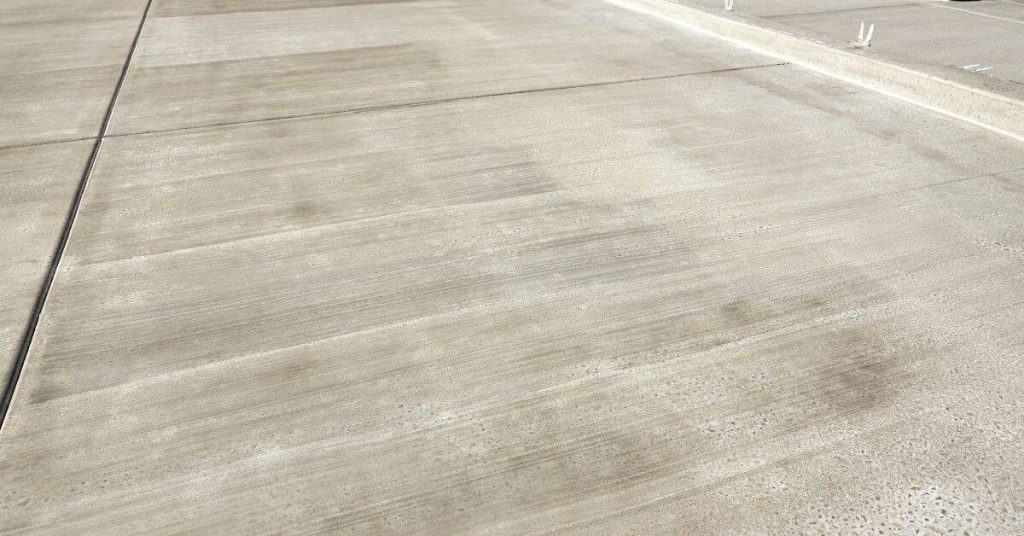
Early warping signs include surface deformations, edge lift, and nonuniform slopes, with additional clues from hairline cracks and moisture staining. Documenting timing relative to curing stages and weather helps prioritize actions. These observations guide when to escalate to a professional review.
A practical monitoring plan tracks moisture, temperature, and slab deflection over time. Use simple sensors and regular checks, with clear action thresholds that trigger mitigation or expert assessment if needed.
Visual checkpoints and when to act
Use this checklist during the first few weeks of curing to spot early signs of warping. Timely action can prevent costly repairs.
- Cupping or edge lift: Check for upward curving edges or corners. Confirm by placing a straightedge along the slab’s surface.
- Nonuniform slope: Inspect for dips or humps in the slab. Use a level to confirm.
- Hairline cracks: Look for fine, spiderweb-like cracks. These can widen over time.
- Moisture staining: Check for discoloration around joints and edges. This could indicate excessive moisture.
- Joint movement: Inspect joints for excessive gaps or closures. Use a ruler to measure.
- Reinforcement exposure: Ensure reinforcing bars are well-covered with concrete. Exposed bars can lead to corrosion.
- Crack width increase: Monitor crack widths. If they widen, immediate action may be needed.
- Timing relative to curing stages: Note when warping signs appear. Early detection helps prioritize follow-up inspections.
Quick rule: If you spot any of these issues, document them and consult with a professional immediately.
Retrofit options, repairs, and safety precautions
When warping is detected, use these measures to mitigate further damage and ensure safety until permanent repair.
- Edge sealing: Seal slab edges with a suitable sealer to prevent moisture ingress.
- Saw cuts (control joints): If necessary, cut control joints to relieve stress and prevent random cracking.
- Overlays: Apply a new layer of concrete to level the slab temporarily.
- Added reinforcement: Install additional reinforcing bars if warping is severe. This may require professional help.
- Exclusion zones: Barricade off affected areas to prevent falls or unplanned loads.
- Signage and barriers: Use clear signage and barriers to warn of hazards.
- PPE for workers: Enforce the use of personal protective equipment near warped slabs.
- Lockout procedures: Implement lockout/tagout procedures for equipment near the slab.
- Work halt plan: Establish a plan to stop work if movement increases or cracks widen significantly.
Quick rule: While these measures provide temporary relief, they are not permanent solutions. Always consult with a licensed professional for long-term fixes.
Conclusion
Controlling moisture gradients, using decent curing, and placing proper reinforcement are the practical levers that keep thin concrete from warping. Done right, you get a safer, straighter slab that looks good and lasts.
First, check the slab plan: confirm thickness and exposure to moisture as you lay out the form and source, then verify the curing setup and temperature, then confirm reinforcement placement and slab detailing, then perform a quick field check for moisture movement and surface finish, and finally schedule periodic inspection and monitoring as the slab cures and dries. Follow the steps in that order and keep notes so you can spot changes early.
Two or three common mistakes to avoid are skipping moisture control before they set, rushing curing or ignoring temperature guidance, and skimping on proper reinforcement or detailing that stops warping. Keep safety first, don’t weaken joints, and never exceed recommended curing times or temps. If you’re unsure about the slab’s behavior after basic checks, slow down and re-check, or bring in a pro—your call is about long-term safety and cost. If you handle small areas first and verify results, you’ll build confidence and avoid costly fixes. Stay steady, stay cautious, and concrete projects will reward you with solid results.
FAQ
How do moisture gradients lead to warping in thin concrete slabs?
Moisture moves unevenly through the slab, causing some areas to swell or shrink at different rates. That mismatch creates internal stresses and a tendency for the slab to warp as it dries out or dries in. Keep coverage even and avoid rapid drying to minimize this.
What role does reinforcement play in moisture-induced warping?
Reinforcement helps hold the slab together as it experiences moisture changes, slowing down how quickly edges or sections can move. It doesn’t stop moisture from moving, but it can reduce differential movement and crack patterns if placed correctly. Check with the manufacturer for proper bar spacing and placement guidance.
Why are curing setups so important for preventing warping?
A proper curing setup keeps the surface and edges from drying too fast and unevenly. Bad curing lets the exterior dry while the interior stays wet, increasing gradients and warping risk. Follow the product instructions and local recommendations for curing methods and timeframes.
How do humidity and temperature influence concrete behavior in thin slabs?
High humidity slows evaporation, while low humidity speeds it up, both changing how the slab dries over time. Temperature swings can amplify moisture movement and stress. Use site conditions to plan for consistent drying, and verify any special requirements on product labels or datasheets.