
Introduction
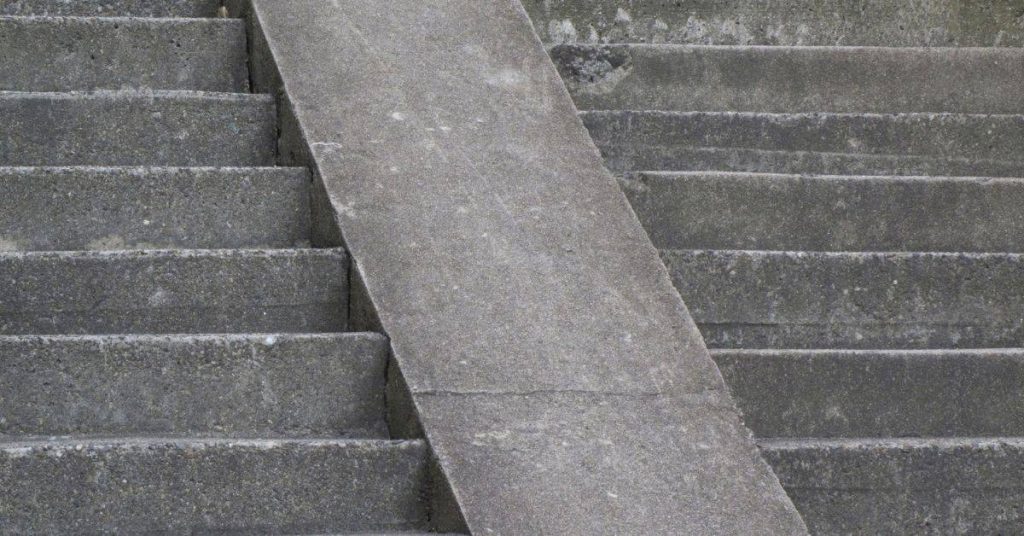
Concrete scaling in winter is when the top layer peels or flakes off because cold weather, moisture, and repeated freezing push water in and out. Cold temperatures slow curing and make water move through the surface, so you see scaling more on sidewalks, driveways, and slabs that get wet. Watch for slick, rough patches that look chalky or hollow when you scratch them with a putty knife.
Deicing agents can worsen the problem by pulling moisture and attacking the surface, especially on aged concrete. Identify winter damage signs like flaked edges, spalling near joints, and brighter, dusty areas where the surface has worn away. If you see it, note where it happens and what the weather was doing, then check product labels and local rules for repair options.
Key takeaways
- Cold weather weakens concrete; water freezes inside pores, causing surface scaling.
- Identify frost-damaged surfaces: flaking, powdery dust, hollow spots, and spalling edges.
- Immediate action: keep people off damaged areas, isolate with barriers and signage.
- Use clean, damp surface before repairs; remove loose material but avoid overdrying.
- Choose repair method aligned with damage: patching, resurfacing, or epoxy injections per instructions.
- Preventive steps: seal cracks before winter, schedule maintenance, and limit deicer exposure.
Table of Contents
- Introduction
- Key takeaways
- What Is Concrete Scaling?
- Why Concrete Flakes in Winter — Principal Causes
- Identifying Types and Extent of Winter Damage
- Immediate Actions When You Find Scaling
- Repair Techniques for Scaling and Related Damage
- Preventive Measures and Seasonal Preparation
- Smart Winter Maintenance Practices
- Costs, Common DIY Mistakes, and Long-Term Planning
- Conclusion
- FAQ
What Is Concrete Scaling?
Concrete scaling is a surface flaking issue that occurs when freeze–thaw moisture cycles lift and detach the top cement paste layer. It is different from spalling, which typically shows bigger chunks and deeper failure, and from dusting, which is a fine, powdery surface without real flaking. Look for thin, flaky areas that peel or powder under touch, a chalky feel, and signs of micro-delamination that worsen after cold spells or salt exposure.
In winter, methods that keep moisture near the surface often trigger scaling. Typical causes include excessive moisture in the slab, repeated freeze–thaw cycles, poor finishing or curing, inadequate sealing, and deicers that speed salt penetration. Practical checks include a visual survey, a gentle tap test to feel for hollow spots, checking for persistent dampness, inspecting drainage, and considering a moisture or humidity test if available. Prevention centers on breathable sealers, proper resealing before winter, and targeted repairs for severely scaled areas while emphasizing proper curing and finishing to minimize weak surface paste.
Scaling vs spalling vs delamination
Concrete surface failures often get mixed up. Let’s clear the confusion.
Scaling: Top cement paste layer flakes off in thin sheets, usually due to freeze-thaw cycles. It’s a surface issue, not structural.
Spalling: Bigger chunks detach, exposing aggregate. It’s deeper and more severe than scaling, often caused by internal pressure or poor concrete quality.
Delamination: Layers separate due to improper curing, finishing, or moisture issues. It can lead to scaling but is not the same thing.
Visual checkpoints for severity
Before you start repairs, assess the damage. Use this checklist when you first notice scaling.
- Flake size: Measure flakes. Small (1/8″-1/4″) is minor; large (>1/2″) is severe.
- Depth of delamination: Gently tap with a hammer. Deep hollow sounds mean serious damage.
- Area affected: Check if scaling is isolated or widespread. Widespread needs urgent attention.
- Moisture presence: Look for persistent dampness, even in winter. Moisture accelerates scaling.
- Salt exposure: Check if deicers are used nearby. Salt speeds up scaling.
- Cracking: Inspect for hairline cracks. They can worsen scaling.
- Drainage: Ensure water drains away from concrete. Standing water causes scaling.
- Structural concerns: Check if scaling affects structural elements like beams or columns. If yes, call a pro immediately.
Quick rule: The more severe the signs, the faster you need to act.
Why Concrete Flakes in Winter — Principal Causes
The core drivers are freeze–thaw damage, moisture movement to the surface, and the interaction with deicing salts that favors flaking over deeper spalling. Material factors include how well the air-void system performs, surface saturation and pore structure, curing temperature history, laitance, and the role of air-entraining admixtures in resisting scaling. These elements shape how the surface responds to cold cycles.
Environmentally, repeated wetting, freezing, and drying create a repeating surface oscillation that initiates micro-delamination at the paste interface. Moisture, salts, and abrasion combine to detach the weak outer shell rather than fracture the bulk concrete, which is why coatings or sealers may fail if porosity and moisture pathways aren’t addressed. For planning, assess surface depth, run moisture and porosity tests, review deicer exposure history, verify cure age, and note any prior repairs to tailor recommendations.
The Freeze-Thaw Cycle and Pore Water Physics
Water in concrete’s pores plays a significant role in winter scaling. When temperatures drop below freezing, this water expands by about 9% as it turns into ice.
This expansion generates immense pressure within the concrete, pushing outwards towards the surface. Over time, these repeated cycles of freezing and thawing cause micro-cracks to form at the surface, leading to flaking.
The severity of this process depends on how well the concrete’s air-void system is designed to accommodate this expansion. A well-designed system allows the ice to expand into these voids rather than pushing against the surface.
Deicing Chemicals, Salts, and Chemical Attack
Deicers like sodium chloride (road salt) lower the freezing point of water, making them effective at melting ice. However, they also accelerate concrete scaling.
When deicers are applied to concrete, they penetrate into the surface. As temperatures fluctuate, these salts crystallize and expand, further exacerbating the damage caused by the freeze-thaw cycle. The salt crystals can also disrupt the cement paste, weakening it and making it more susceptible to scaling.
The chemical attack from deicers is particularly severe on concrete with high water-cement ratios or weak surface layers. To minimize this effect, consider using air-entraining admixtures in your mix design, which create tiny bubbles that help resist both physical and chemical attacks.
Construction and Material-Related Contributors
The way concrete is constructed and the materials used can significantly impact its resistance to winter scaling. Poor construction practices or subpar materials can predispose your concrete to flaking.
- Inadequate Curing: Concrete needs time to gain strength and develop a durable surface. Insufficient curing allows the surface to dry out too quickly, leading to weak, porous concrete that scales easily.
- Improper Finishing: A rough or poorly finished surface has more exposed pores where water can collect and freeze, accelerating scaling.
- Low Air Entrainment: Concrete with insufficient air voids lacks the necessary space for water to expand into during freezing. This leads to increased pressure on the surface, causing flaking.
- High Water-Cement Ratio: A high water-cement ratio results in a weak, porous concrete that is more susceptible to scaling. Be sure to use the correct water-cement ratio for your mix design.
- Thin Cover: Concrete with thin cover over reinforcement or insulation is more prone to scaling due to increased heat loss and temperature fluctuations at the surface.
Identifying Types and Extent of Winter Damage
Use a diagnostic framework that clearly separates surface scaling from deeper structural issues like spalling or exposed rebar, with quick decision steps you can use in the field. Start by listing signs that point to surface scaling, and note any deeper concerns for escalation. Create a simple flow that guides whether you can DIY or need a pro after initial checks.
Practical signs include texture changes, color variation, hollow or hollow-sounding areas behind thin flakes, cracks that widen vertically, efflorescence, moisture staining, and any rust on exposed steel. Tools include a flashlight, mirror for tight spots, a tapping or sounding test, and a moisture meter on exterior concrete. You may perform non-destructive checks like delamination tests where safe, and document findings with photos and measurements to support decisions.
Surface-level indicators to document
When inspecting winter-damaged concrete, start by documenting surface-level signs. These will help you understand the extent of damage and plan repairs.
Look for:
- Flaky layers: Small pieces of concrete that peel off easily.
- Map-cracking: Intersecting cracks forming a pattern on the surface.
- Powdering: A fine, dust-like material coming off when you brush your hand over the surface.
Document these signs by taking photos and noting their location and approximate depth. This will help you and any professionals you consult to plan repairs effectively.
Structural concerns that require urgent attention
While some winter damage is purely cosmetic, other signs point to serious structural issues. If you notice any of these red flags, address them immediately.
Watch out for:
- Wide or deep cracks: Cracks wider than 1/8 inch (3 mm) or deeper than 1/4 inch (6 mm).
- Exposed reinforcement: Bare rebar or other steel elements, which can lead to rusting and further damage.
- Settlement: Uneven surfaces or sunken areas, indicating the concrete may have lost support.
- Water infiltration: Puddles, dampness, or water stains, which can indicate cracks or holes allowing water in.
If you notice any of these signs, consult a professional immediately. They can assess the damage and recommend appropriate repairs or replacements to prevent further deterioration.
Immediate Actions When You Find Scaling
First, identify hazards such as loose chunks, sharp edges, or exposed rebar, cordon off the area, and protect occupants from dust and trip hazards. Note current weather conditions and moisture sources feeding the scaling to plan steps. Keep the scene safe while you plan the next moves.
For immediate damage control, stop water intrusion, divert runoff away from the slab, and set up temporary coverings to reduce freeze–thaw cycling. Avoid heavy loading or removing concrete in cold conditions. Use quick, low-cost fixes like resealing visible cracks with exterior sealant and applying a breathable primer if recommended, then cover with plastic or tarps to limit moisture ingress until permanent repairs.
Temporary fixes and safety precautions
First things first, clear away any loose chunks of concrete to prevent accidents. Use a broom or shovel, but be careful not to create more dust.
Cordon off the affected area with barriers or tape to keep people safe from trip hazards and exposed rebar. If there’s a risk of falling debris, use a temporary covering like plastic sheeting or tarps.
During winter work, avoid using salt or deicing chemicals near the damaged area until you’ve made repairs. They can cause more damage and make the situation worse.
Lastly, follow safe winter work practices. Wear appropriate clothing, use non-slip footwear, and keep the work area well-lit to prevent accidents.
When to call a professional
While there are DIY fixes you can do immediately, know your limits. If the damage is extensive or you’re unsure about the structural integrity of the concrete, it’s time to call in a pro.
Here are some signs that indicate you need professional help:
- Large sections of concrete are flaking off.
- The exposed rebar is rusting or damaged.
- There are visible cracks wider than 1/8 inch (3mm).
- The slab is sloping or uneven, indicating possible structural issues.
Don’t wait until spring to make repairs. Winter damage can worsen over time and lead to more costly repairs. Get a professional assessment as soon as possible.

Repair Techniques for Scaling and Related Damage
Start with a quick diagnostic framework to distinguish scaling from other damage and decide repair urgency. DIY is suitable for minor surface issues if you can manage moisture and surface prep; otherwise, plan professional help for deeper or structurally questionable cases. Document the decision path so you can revisit it if conditions change.
DIY patching options include surface patches with cementitious repair mortars or epoxy/urethane injections for specific scenarios, chosen based on severity and traffic. A typical workflow involves cleaning and etching, removing loose material, priming, applying patch material, shaping flush with the slab, and proper curing. When selecting materials, compare cementitious patches, polymer-modified mortars, epoxy/urethane systems, and sealers, and consider longevity and maintenance needs. Address moisture intrusion, seal joints, and ensure products suit the underlying substrate and freeze–thaw cycles for best results.
Surface restoration: patching, overlays, and resurfacing
The first step in restoring your concrete’s surface is to remove any loose material. Use a chisel or grinder to chip away at the damaged area until you reach solid substrate.
Next, prepare the substrate by cleaning it thoroughly with a wire brush or pressure washer. For better bonding, consider etching the surface using muriatic acid diluted with water (follow safety guidelines).
Now, apply your chosen patch material. For small cracks and minor damage, cementitious repair mortars are suitable. For more severe cases, polymer-modified mortars or thin overlays can provide a stronger bond and better finish.
Tip: Always follow the manufacturer’s instructions for mixing and application. Work in manageable sections to ensure proper curing.
Crack repair and structural remediation
For hairline cracks, routing-and-sealing is an effective method. First, route out the crack using a diamond blade to create a wider, deeper channel. Then, apply a flexible sealant that can expand and contract with temperature changes.
For larger cracks or structural damage, epoxy injection may be necessary. Drill small holes along the crack at regular intervals, then inject epoxy resin into these holes to fill the void.
In severe cases where the slab has failed, full-depth repair or even replacement might be required. Consult a professional engineer to determine the best course of action for your specific situation.
Remember: Always address structural issues promptly to prevent further damage and maintain the integrity of your concrete.
Tools, materials, and standards to choose
Before starting any repair work, ensure you have the right tools. While some may be expensive to purchase outright, many are available for rent at home improvement stores.
- Chisel and grinder: For removing loose material. Rentable; around $20-$50 per day.
- Pressure washer: For cleaning the surface. Rentable; around $40-$70 per day.
- Muriatic acid: For etching the surface to improve bonding. Available at hardware stores; around $10-$20 per gallon.
- Repair mortars and overlays: Choose frost-resistant, polymer-modified options for durability. Check manufacturer specs for setting times and working temperatures.
- Epoxy resins: For crack injection. Available in various strengths; expect to pay around $50-$150 per kit.
- Flexible sealants: For routing-and-sealing cracks. Choose urethanes or polysulfides for freeze-thaw resistance.
- Bond agents: To improve adhesion between old and new concrete. Check manufacturer specs for compatibility with your chosen repair material.
- Air-entrained mixes: For new concrete pours, these mixes incorporate tiny air bubbles to resist freeze-thaw damage.
Preventive Measures and Seasonal Preparation
Think of a seasonal risk timeline and checkpoints that align with weather changes. Plan pre-winter prep, monitor during freezing conditions, and review after thaw events to minimize surface stress and scaling potential. Tie actions to available temperature windows and forecasts rather than fixed dates.
Focus on surface prep and curing, including when to apply sealers or coatings and how to handle edge repairs before winter. Choose breathable sealers, anti-scaling treatments, or repair mortars and follow substrate prep, coverage rates, curing windows, and re-coat intervals. Improve drainage, reduce surface saturation, and protect vulnerable edges with temporary measures during extreme cold, while maintaining a practical maintenance cadence for inspections and re-sealing when conditions permit.
Proper Curing, Sealing, and Timing Before Freeze
Curing concrete properly is crucial to prevent scaling. It allows the concrete to gain strength gradually as moisture evaporates slowly from within.
Apply a breathable sealer several weeks before the first freeze. This lets the concrete breathe, preventing moisture buildup that could lead to scaling. Use a sealer designed for your climate and concrete type.
The ideal time to seal is when the concrete has reached 70-80% of its final strength, usually around 28 days after placement. However, check the product label for specific recommendations as timing can vary.
Mix Design and Placement Best Practices
Using the right mix design reduces scaling risk. Air entrainment is key – it introduces tiny air bubbles into the concrete, allowing ice to expand without causing damage.
The water-cement ratio should be low (around 0.45 or less) for stronger, more durable concrete. Use high-quality aggregates and ensure adequate cover over reinforcement to protect against freeze-thaw cycles.
Proper finishing methods also matter. Do not overwork the surface, as this can lead to a weak top layer prone to scaling. Allow the concrete to bleed naturally, then finish it smooth and level.
Smart Winter Maintenance Practices
Set up a proactive winter inspection protocol to catch early signs of scaling, microcracks, moisture intrusion, and spalling before they worsen. Prioritize cleaning and preparation to avoid adding damage, ensuring a sound substrate for any sealers or patches. Keep notes of what you find for future seasons.
Manage moisture and freeze–thaw risk by improving drainage, addressing standing water quickly, and planning breathable protective coatings that let moisture escape. Choose winter-ready sealers and coatings designed for freeze–thaw resistance and salt exposure, applying them within suitable temperature ranges. Plan timely repairs with methods like epoxy or polyurethane injections or compatible mortars, and establish a simple mid-winter maintenance routine to slow progression of scaling. Keep a log of inspections, products used, weather conditions, and repairs to guide future seasons.
Deicer selection and application guidance
Choosing the right deicer is crucial to protect your concrete. Common options include calcium chloride, sodium chloride (rock salt), potassium chloride, and magnesium chloride.
Calcium chloride is less harmful to concrete but more expensive. Sodium chloride is cheaper but can cause damage at low temperatures. Potassium chloride and magnesium chloride are safer alternatives, though pricier.
Apply deicers sparingly. Too much can lead to scaling. Follow package instructions, usually 1-2 pounds per square yard. Spread evenly for best results.
Snow and ice management techniques
Remove snow promptly to prevent it from turning into ice. Use a shovel with plastic edges to avoid scratching the surface. For large areas, consider using a snowblower.
Prevent water from pooling by keeping drains clear. If water collects, use hot water or a deicer to melt it quickly.
For traction, use sand instead of salt on steps and walkways. It’s less damaging and provides better grip. Avoid using ashes or cinders as they can stain concrete.
Never use metal shovels or tools that can damage the surface. Be gentle when removing snow to avoid chipping or cracking.
Costs, Common DIY Mistakes, and Long-Term Planning
Develop a practical cost framework that considers materials, tools, labor, weather-related delays, and the journey from patching to long-term durability. Compare possible DIY versus professional costs and present quick references for planning. Use a simple approach so you can estimate without committing to a price list.
Compare repair options and value, from patching to resurfacing, grinding/overlay, or full replacement, noting suitability for winter-damaged surfaces and typical lifespans in plain terms. Common DIY mistakes to prevent include insufficient surface prep, incorrect mix ratios, poor curing, using the wrong product for winter exposure, incorrect thickness, and ignoring moisture beneath the surface. Plan timing and execution around suitable temperatures, drying times, safe winter handling, tool readiness, and steps to minimize further freeze–thaw damage. Develop a long-term maintenance plan that covers sealing, re-coats, crack management, documentation, and knowing when to escalate to professional service or warranty considerations.
Cost considerations and budgeting guidance
The cost of winter concrete scaling repair varies greatly depending on the extent of damage, labor required, materials needed, and accessibility. Here’s a breakdown to help you budget:
Materials: Repair mortars, patch kits, sealants, and tools make up about 40-60% of your cost. Expect to spend $20-$50 per square foot for materials alone.
Labor: Labor can range from 30-50% of the total cost, depending on the repair method chosen and local labor rates. Get quotes from local contractors to compare DIY costs.
Weather delays: Winter repairs may take longer due to weather conditions. Allocate extra time and budget for potential delays.
Common DIY mistakes to avoid
While tackling concrete scaling yourself can save money, it’s crucial to avoid these common pitfalls:
- Improper surface prep: Skipping proper cleaning and profiling leads to poor bond between old and new concrete.
- Incorrect mix ratios: Using the wrong water-cement ratio weakens repairs, making them susceptible to further damage.
- Inadequate curing conditions: Not providing enough moisture during curing causes premature drying and cracking.
- Using wrong patch/sealant: Applying a sealant not suited for winter exposure leaves your repair vulnerable to freeze-thaw cycles.
- Improper thickness: Applying repairs too thin or thick can lead to rapid deterioration or delamination.
- Ignoring moisture beneath: Failing to address underlying moisture issues sets the stage for recurring scaling problems.
Taking these precautions ensures your repair lasts and protects your investment.
Long-term maintenance and inspection schedule
Regular inspections and timely maintenance keep your concrete in top shape, preventing future scaling. Use this checklist:
- Annual Inspection (Spring): Check for cracks, signs of scaling, or other damage after winter’s harsh conditions.
- Sealing (Every 2-3 years): Reapply sealant to protect your concrete from moisture and deicing chemicals.
- Crack Management: Monitor and repair any cracks promptly to prevent water intrusion and further damage.
- Professional Assessment (Every 5-10 years): Have a professional evaluate your concrete’s condition, especially in high-traffic or critical areas.
- Document Repairs: Keep records of all repairs to track trends and plan future maintenance.
Quick rule: Inspect annually, seal every 2-3 years, repair cracks promptly, and get professional assessments every 5-10 years for optimal concrete health.
Conclusion
Winter scaling on concrete is a real durability issue that can threaten safety, appearance, and long-term performance if you don’t act smartly and methodically.
First, inspect a small test area, identify the type of scaling, check moisture and temperature conditions, and decide the repair method before you touch the rest. Then clean loose material, select the appropriate repair technique, apply it in a controlled way, and cure it with proper protection while you monitor weather and freeze-thaw cycles. Finally, seal and protect the surface, schedule seasonal maintenance, and keep simple records so you know when to recheck.
Common mistakes to avoid include trying to fix widespread damage with a single quick patch, using the wrong materials or mix ratios, and skipping safety steps or testing in a small area first. Always wear protective gear, work only in safe temperatures, and never rush repairs that involve structural concerns or uncertain substrate conditions.
When you’re dealing with large areas, deep scaling, or signs of underlying issues, call a professional instead of pushing on alone. With careful planning and disciplined execution, you can protect durability and keep your surfaces looking solid all winter—and beyond. Stay disciplined, stay safe, and keep moving forward.
FAQ
How does cold weather actually hurt concrete, even when it looks fine?
Cold slows down set time and makes water inside the mix stiffen. If you pour or finish in cold air, you’ll get a weaker surface and more dusting or flaking after it dries. Check the product label and local guidance for suitable temps and curing practices.
What signs tell me winter damage is starting beyond visible flakes?
Look for tight hairline cracks, a spongy feel under pressure, or a surface that flakes off in thin sheets. Missing patches or a rough, uneven finish also signal deeper freeze-thaw damage. Note these and check with the manufacturer instructions before any repair.
What is the freeze-thaw cycle doing to my concrete, and how can I see it?
Water expands when it freezes. If it soaks in, the surface will scale, spall, or delaminate as temps swing. Visible scaling is common, but you may feel rough patches underfoot. Use this as a warning to inspect seals and joint work.
Are deicing chemicals making this worse, and how should I handle them?
Many deicers pull moisture from the concrete and can corrode surface minerals over time. They speed up salt staining and scaling if left on too long. Follow the product label, limit salt use near damaged areas, and rinse residue after application.