
Introduction
Concrete core sampling is the process of extracting a small cylindrical sample from a hardened slab or wall to inspect its strength, composition, and condition.
This is a hands-on task that you may tackle in simple projects, but you should plan for proper safety, access, and documentation, and verify local rules and requirements before you drill. Know when you need a core sample and what you plan to learn from it, and check manufacturer instructions or local codes for any specific guidance.
A core sample can reveal variations in mix, curing, or the presence of voids, and it helps guide patching or repair decisions. When patching, consider cleaning, material compatibility, and curing, and keep in mind that professional qualifications and documentation may be required for some jobs. Lab results tell you about strength, contaminants, or moisture, but you should verify what the lab is testing for and how to interpret the results with the contractor or inspector.
Key takeaways
- Core sample basics: a drilled cylinder reveals internal conditions, strength, and features.
- Choose core sampling when defects, layering, or strength verification is needed.
- Plan campaign with access, sequencing, labeling, and documentation to satisfy inspector.
- Safety and codes: only qualified personnel should drill; follow PPE and local rules.
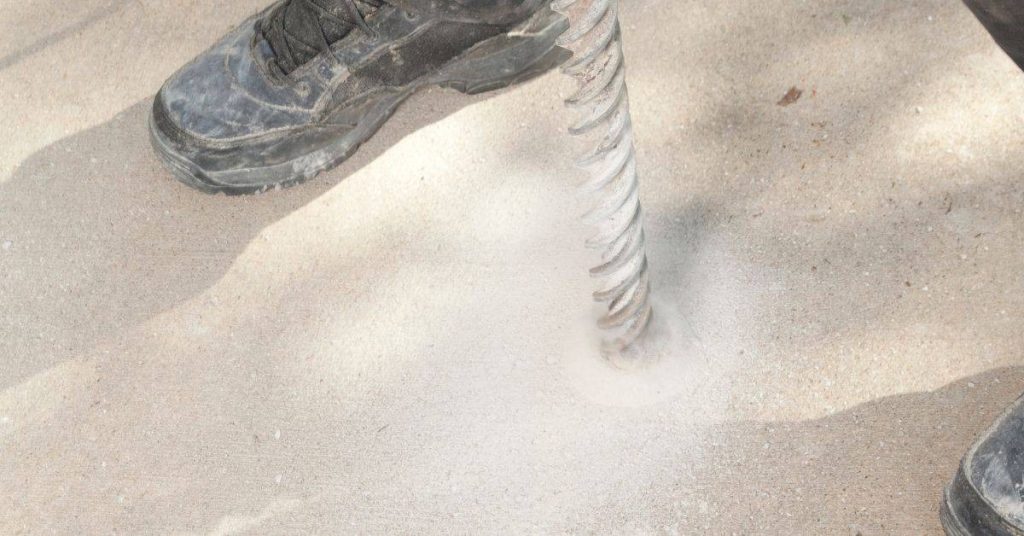
- During drilling keep dust down, maintain water control, and prevent core damage.
- Patching: clean, cure, and document patch materials and methods after coring.
Table of Contents
- Introduction
- Key takeaways
- What a Core Sample Is and Why It Matters
- When to Choose Core Sampling Vs. Non‑destructive Testing
- Planning Your Core Sampling Campaign
- Safety, Codes, and Who Should Perform Cores
- Step‑by‑step Drilling Best Practices
- Preparing, Labeling, and Transporting Cores for Lab Analysis
- What Labs Can Test and How to Interpret Results
- Patching and Restoring the Slab After Coring
- Conclusion
- FAQ
What a Core Sample Is and Why It Matters
A core sample is a cylindrical segment drilled out of the slab and kept as a direct physical specimen for laboratory analysis. It comes from inside the concrete, not just the surface. This is the most concrete evidence you can get about the slab’s condition.
Cores reveal actual material conditions such as strength, density, porosity, cracking patterns, and the presence of voids or contaminants. Non-destructive methods may miss these details. Typical information gained includes quality and uniformity, the aggregate-to-cement mix, moisture content, thickness, and where reinforcement sits.
Definition and objectives
A concrete core sample is a cylindrical section drilled from your slab. It’s like taking a tiny, round slice of cake to check if it’s baked right.
We remove cores to evaluate thickness, layering, moisture content, contaminants, and embedded elements – like rebar or post-tension cables.
The main goal? Get direct evidence from inside your slab. Non-destructive methods can’t always tell the full story.
Typical equipment and core sizes to consider
Before you start drilling, gather your tools. You’ll need a core drill – wet or dry, diamond bit, and maybe a vacuum stand for cleanup.
- Core Drill: Rotates at high speeds to cut through concrete. Rentals available.
- Diamond Bit: Hardened steel with industrial diamonds for cutting. Wear protective gear when using.
- Vacuum Stand: Keeps dust down, making drilling safer and cleaner.
- Water Supply (for wet core drilling): Cools the bit and reduces dust.
- Safety Gear: Eye protection, gloves, ear protection, and a dust mask. Safety first!
When to Choose Core Sampling Vs. Non‑destructive Testing
Core sampling is most justified when there are disputes over depth or strength, moisture or contamination concerns, unknown or layered subslabs, or to verify repair depth or plate embedment. In some cases, non-destructive testing can provide adequate guidance without cores. Use cores when accuracy matters for design or remediation decisions.
Decision criteria include cost, required accuracy, risk tolerance, and schedule impact. In the field, consider a simple flow or decision tree to guide whether to core or proceed with NDT. Also review the limits of NDT methods such as Schmidt rebound, penetration tests, half-cell potential, resistivity, and infrared imaging compared with core data.
Common use cases and triggers
Concrete core sampling isn’t always necessary, but it’s crucial when you’ve got issues that need a closer look. Here are some common triggers:
Moisture problems: If your slab’s showing signs of moisture damage, cores can help find out why.
Adhesive failures: When adhesives aren’t sticking to concrete, cores can reveal contamination or other issues at the surface.
Unknown slab composition: Cores help identify aggregate size and type, as well as any unexpected layers in your slab.
Alternatives, trade-offs, and cost drivers
Before you decide to core, consider these alternatives:
Infrared thermography (IR): IR can spot moisture and voids but won’t give you concrete strength or mix design. It’s cheaper than coring but less accurate.
Ground-penetrating radar (GPR): GPR can map out reinforcement and find voids, but it can’t measure concrete quality or detect moisture. It’s non-destructive but may not provide the full picture.
Moisture meters: These are cheap and easy to use, but they only give you a surface reading and won’t help with deeper issues.
Coring is more invasive and expensive than these alternatives, but it provides the most accurate data. Cost drivers include access (hard-to-reach slabs cost more), slab complexity (layered or reinforced slabs take longer), and number of cores (more cores mean more money).
Planning Your Core Sampling Campaign
Define objectives and the sampling plan by specifying how many cores, core diameters, depths, and planned locations are needed for representative results. Outline the drilling pattern (grid, random, or targeted) and how you will handle contingencies. This sets a clear roadmap before you drill.
Site mapping and documentation are essential. Create a simple map with drill locations, access routes, utilities, and obstacles, plus baseline photos or notes. Permissions, scheduling, and stakeholder coordination keep the project moving smoothly.
Site assessment and permissions
Before you start drilling, understand your site. Check structural drawings to know what’s under the slab – rebar, post-tensioned tendons, or other utilities.
Owner/tenant sign-off: Get permission from those who own or occupy the space. They might have rules about drilling on their property.
Permits and insurance: Check if you need a permit for core sampling. Always ensure your team has proper insurance coverage to protect everyone involved.
Choosing hole locations and sample counts
Selecting where to drill is crucial. Look for visible distress patterns – cracks, delamination, or other signs of trouble. Your engineer might have specific areas they want you to focus on.
Representative samples: Choose locations that’ll give you a fair picture of the whole structure. Don’t just pick one spot and call it a day.
Sample density: More isn’t always better. Follow your engineer’s advice, but remember – too many holes can weaken the slab. Too few might miss critical issues.
Safety, Codes, and Who Should Perform Cores
Define minimum qualifications and roles upfront: a licensed professional for load-critical assessments, and certified concrete testers for sampling. Clearly identify who supervises, authorizes cores, and reviews results. This prevents confusion on site.
Codify building and code considerations, especially for post-tensioned slabs, existing anchors, and moisture barriers. Note any permit or notification requirements that apply in your jurisdiction. Safety planning and risk controls are also essential to protect occupants and workers.
Qualifications, training, and liability
Coring concrete isn’t a job for just anyone. You need trained professionals with the right qualifications.
Licensed Engineers or Architects: For load-critical areas, hire a licensed professional engineer or architect to assess and authorize cores. They ensure slab integrity won’t be compromised.
Certified Concrete Testers/Technicians: These are the folks who’ll actually drill the holes. Make sure they’re certified and have proper insurance to cover any damages.
Always ask for documentation of their qualifications and insurance before hiring.
On-site safety protocols and PPE
Safety’s paramount when coring. Here are some must-dos:
Utility Checks: Before drilling, locate and mark all utilities to avoid accidents.
PPE: Everyone on site should wear proper personal protective equipment: hard hats, safety glasses, steel-toed boots, and high-visibility vests.
Dust/Wet Controls: Use water or dust-suppression systems to keep concrete dust down. It’s a health hazard and can cause slippery surfaces.
Traffic Control: Set up barriers and signs to control traffic around the work area, keeping everyone safe.
Live Systems/Fall Hazards: If working near live systems or fall hazards, have specific procedures in place to manage these risks.

Step‑by‑step Drilling Best Practices
Outline the full sequence from markings and measurements to pilot holes, ensuring alignment with the core location and avoiding stressed areas. Plan for access, permits, and safety. Communicate this plan to all on-site participants.
Detail drilling strategy, including core bit size, guiding pilot holes, and spacing/depth based on thickness and reinforcement. Wet coring can help with dust suppression and sample quality. Maintain steady, controlled drilling to preserve the sample integrity.
Setup, drilling technique, and sample extraction
First things first, check your machine’s safety features. Ensure the clutch is engaged, emergency stop button is accessible, and guards are in place.
Secure your drill to a sturdy surface or use a stand. The base should be level and stable. Check base compaction, it should be at least 100mm thick and well-compacted. Use a spirit level to ensure the base is flat.
Now, let’s talk technique. Start with a low drill speed and feed rate. Gradually increase as you go deeper. Keep the drill bit perpendicular to the surface for a clean hole. Here are some safe ranges:
– Drill speed: 50-150 RPM (check your bit’s max speed)
– Feed rate: 20-40mm per minute
– Drilling depth: No more than 3 times the drill bit diameter at a time
When extracting, be gentle. Use a steady, slow motion to avoid cracking or damaging the core. If you’re using a core barrel, unscrew it counter-clockwise while applying even pressure.
Preventing damage to structure and embedded items
Before you start drilling, you need to protect your structure and avoid damaging any hidden items like rebar or tendons. Here’s how:
First, check for any visible signs of reinforcement. Look for those telltale rust stains or bulges in the concrete. If you see any, mark them out clearly.
Next, use a concrete scanner to detect any hidden obstructions. These are cheap to rent and can save you a world of trouble. Follow the manufacturer’s instructions for best results.
If you don’t have access to a scanner, you can do a shallow test cut. Use a small drill bit to make a series of shallow holes along your planned drilling line. This way, you’ll feel any obstructions before they become a major problem.
Preparing, Labeling, and Transporting Cores for Lab Analysis
Document exact drill location, depth, orientation, and concrete generation. Use a simple sketch or photo logs to pair with measurements. This supports traceability from slab to lab.
Establish a labeling protocol with unique sample IDs and visible project data. Protect moisture-sensitive cores with proper containment and rapid sealing. Chain-of-custody practices prevent mix-ups during transport.
Field documentation and labeling standards
When you’re out there drilling, it’s crucial to keep detailed records. This helps the lab understand where each core came from and ensures your results are accurate.
Record these details for each core:
- Site: Where exactly on the property is this?
- Grid Reference: If you’ve gridded your site, note which grid this is in.
- Depth: How deep was the core taken from?
- Orientation: Which way was the core facing? (north, south, etc.)
- Date/Time: When was the core taken?
- Sampler: Who took this sample?
Label each core with a unique ID. Include project name, date, location, depth, and core diameter. Take a photo of the label for extra traceability.
Common mistakes that compromise lab results
Some simple slip-ups can ruin your samples and make test results unreliable. Here are some to avoid:
- Improper Storage: Temperature and moisture exposure can alter your cores before they reach the lab.
- Contamination: Dirty tools or handling can contaminate your samples.
- Poor Labeling: Incomplete, illegible, or mixed-up labels make it hard for the lab to track your samples.
- Delayed Submission: The longer cores sit around, the more they can change and invalidate tests.
Keep your cores cool, dry, clean, well-labeled, and moving quickly to the lab. That’s how you get reliable results.
What Labs Can Test and How to Interpret Results
Typical lab analyses include compressive strength, petrographic analysis, moisture content, pH, chlorides, carbonates, and contamination screening. Each test has a purpose and limitations for diagnosing slab condition and repair options. Understand what each result means for your project.
Interpret results with a practical lens: strength ranges, petrographic indicators of design or construction issues, and how moisture, pH, and chlorides influence corrosion risk and patching strategy. Use a clear decision framework to select tests based on goals and environment.
Key tests and their practical implications
The lab can perform several tests on your concrete cores. Each test tells a different story about your slab’s condition.
Compressive strength tells you how strong the concrete is. If it’s below 2000 psi, you might have issues with ongoing use or repairs.
Petrographic analysis shows what’s inside your concrete – aggregates, voids, cracks. It can spot design flaws or poor workmanship. High void content could mean weak spots.
Moisture content, pH, and chloride levels affect corrosion risk. High moisture and chlorides speed up rusting of reinforcing steel, leading to cracks and delamination.
Reading reports and next steps
Once you get the lab report, read it carefully. It’s like a roadmap for your repair plan.
Ask questions if something’s unclear. The lab should explain their findings in plain language, not just jargon.
Use the results to work with engineers or contractors. If strength is low, you might need to reinforce before repairs. High moisture could mean you need to address sources before patching.
Document everything – reports, photos, notes. You’ll need this for permits, warranties, and future maintenance. If something doesn’t add up between the lab findings and what you see in the field, consult a pro.
Patching and Restoring the Slab After Coring
Distinguish between temporary repairs for quick access and permanent patches that restore long-term performance. Choose methods and products that align with the engineer’s guidance and the flooring requirements. Plan the repair to minimize downtime and risk to users.
Focus on material compatibility, surface preparation, and curing. Ensure the patch bonds with surrounding concrete and any underlayment or coatings. Monitor cure conditions and protect the surface until full strength is reached.
Patch materials and application techniques
The right patch material ensures a strong, long-lasting repair. Here are common types and selection criteria:
- Epoxy Patches: Use for structural repairs and high traffic areas. Look for high compressive strength (4000+ psi) and low shrinkage. Avoid applying in cold temperatures or high humidity.
- Polymer-Modified Mortars: Good for non-structural repairs and moderate traffic. Seek flexural strength (600+ psi) and low shrinkage. Not suitable for freeze-thaw conditions.
- Rapid-Set Mortars: Ideal for quick repairs to allow immediate foot traffic. Check setting time (1-4 hours) and ensure it’s compatible with your slab’s moisture content. Avoid using in extreme temperatures.
- Portland Cement-Based Mixes: Basic, low-cost option for non-structural repairs. Look for ASTM C887 or C926 standards. Not recommended for high traffic areas due to potential cracking.
- Polyurethane Grouts: Used for filling voids and cracks before applying new flooring. Check compatibility with your flooring material. Avoid using in extreme temperatures or high humidity.
Curing, verification, and visual checkpoints
After patching, follow this checklist to ensure a successful repair:
- Cure time: Follow manufacturer’s guidelines (1-7 days). Keep the patch moist and protected from traffic.
- Load sequencing: Avoid heavy loads until fully cured. Gradually increase weight to prevent damage.
- Bond test: Perform a pull-off or push-out test after cure time to confirm bond strength. Weak bond indicates poor preparation or incompatible materials.
- Visual inspection: Check for cracks, delamination, or other signs of failure.
- Flatness/level check: Ensure the patch is level with surrounding concrete using a straight edge and feeler gauges. Irregularities can cause tripping hazards or flooring issues.
- Rebound/deflection test: Check for excessive flexibility by bouncing on the patch. Excessive movement indicates weak repair.
- Moisture check: Test for excess moisture before installing new flooring to prevent delamination or other issues.
- Post-patch inspection: Inspect the patch after cure time and before reinstalling floors or applying coatings.
Quick rule: Always follow manufacturer’s guidelines for best results.
Conclusion
Core sampling matters for safety, durability, and appearance, so keep the focus on doing it right and patching cleanly. When you do it carefully, you know what the slab holds and you protect the rest of the project.
First, confirm the project scope and any codes or permits, then plan your drill locations, mark the spots, verify your PPE and tools, drill a controlled sample, label and transport it correctly, and interpret the lab notes to guide patching and next steps.
Avoid these mistakes: drilling without a plan or utility check, skipping labeling or proper sealing, and ignoring safety rules or weather conditions. Always de‑energize and lockout where needed, use dust control, and keep patching on schedule so you don’t invite cracks or settlement later.
If the area is large, involves unknown materials, or code requires a licensed pro, call in a professional. When you stay methodical, you protect people, the slab, and your budget, and you finish confident that you did the work right.
FAQ
What is a core sample?
A core sample is a small cylinder cut out of concrete to inspect the inside. It shows the thickness, strength indicators, and any changes in mix or curing that aren’t visible on the surface. You’ll see the rebar layout and paste color, too, if you open the core up.
When is core sampling used?
Core sampling is used when you need to verify slab thickness, determine aggregate size, or check concrete quality before repairs or overlays. It’s common when renovations hinge on hitting specific structural or substrate conditions. If you’re unsure about the slab’s condition, a test core can save you guesswork.
What can core samples reveal?
Core samples can reveal slab thickness, location of joints or reinforcement, and changes in mix over time. They can also show curing conditions, moisture, and presence of contaminants. Use the lab results to plan patching, grind lines, or additional treatment.
Is core sampling destructive?
Yes, it creates a hole. You patch properly after, but plan for a small repair area. Make sure you know where utilities or pipes run in the area you’re sampling to avoid damage. Document the hole and patch so it’s clear what was removed.