
Introduction
Infrared thermography is a non-contact inspection method that shows temperature differences on concrete walls to reveal moisture and delamination.
It helps you spot problem areas without invasive probing, so you can plan remediation. Use it as a hands-on tool to guide where to open the wall and what to seal.
In practice, expect to see cooler spots where moisture is present and irregular heat flow where layers have separated. Before you start, check the tool’s settings, the manufacturer’s guidance, and local building rules, and verify what the images mean with a physical check. Consider how joint sealing, movement, and different sealants affect what you see, and compare methods before choosing a plan.
Key takeaways
- Document moisture hotspots with IR imaging before sealing to target balcony spalling zones.
- Check joint sealing integrity; failed seals accelerate water ingress and deterioration.
- Seasonal scheduling: winter remediation requires warm, dry conditions and proper cure.
- Always wear PPE during inspection and keep electrical hazards clear.
- Address balconies’ BBQ-related spalling by targeted sealing and durable waterproofing.
- Integrate IoT sensor data with IR findings for proactive maintenance.
Table of Contents
- Introduction
- Key takeaways
- Why Infrared Thermography Is Effective for Concrete Wall Diagnostics
- Recognising Signs of Moisture, Spalling and Concrete Degradation
- Step-by-Step Infrared Inspection Workflow for Concrete Walls
- Visual Signs and Examples to Look for
- Integrating Thermography with Other Diagnostic Methods
- Joint Sealing, Waterproofing and Repair Choices Informed by IR
- Preventative Maintenance, Risk Assessment and Cost Considerations
- Seasonal, Climate and Usage Factors That Influence Inspections
- Conclusion
- FAQ
Why Infrared Thermography Is Effective for Concrete Wall Diagnostics
Concrete is a layered, porous medium that stores and conducts heat in distinctive ways. Moisture and aggregates disrupt heat flow, changing surface temperatures in ways that infrared cameras detect. Emissivity basics and heat transfer modes help explain why damp areas often look cooler or behave differently under controlled heating and cooling.
Delamination, voids, and trapped moisture interrupt heat paths and create delayed responses, along with anisotropic warming or cooling. You’ll see halos, bands, or patchwork patterns on thermograms that precede visible cracking or spalling. A practical workflow—from surface prep to post-processing—helps separate moisture signals from shading or solar gain, reducing false positives.
Basic thermography principles for building fabric
Thermography works by detecting heat, which is how we see things with our eyes. But instead of visible light, it picks up infrared radiation – the heat that objects emit.
Emissivity is a measure of how well an object emits this heat. Concrete has good emissivity, meaning it shows up clearly on thermal images. But it’s not perfect, so we need to consider other factors like surface coatings and roughness.
Thermal gradients are temperature differences between parts of the same material. In concrete walls, these can occur due to varying thickness, moisture content, or subsurface defects. Heat flows from hot to cold, so understanding this principle helps us interpret thermograms.
How moisture and delamination show up thermally
Moisture in concrete feels cooler than dry concrete because it evaporates, taking heat with it. This creates cold spots on thermograms. Trapped moisture shows as persistent cold areas that don’t change much over time.
Delaminations – layers separating from each other – disrupt heat flow. They show up as delayed thermal responses: areas that warm or cool slower than surrounding concrete. Voids, like air pockets, also slow down heat transfer and appear as cooler spots.
Thermal signatures can vary based on moisture content and defect type. For instance, rising damp shows a wicking pattern, while freeze-thaw damage might display characteristic halos or bands. Regular monitoring helps track changes over time.
Recognising Signs of Moisture, Spalling and Concrete Degradation
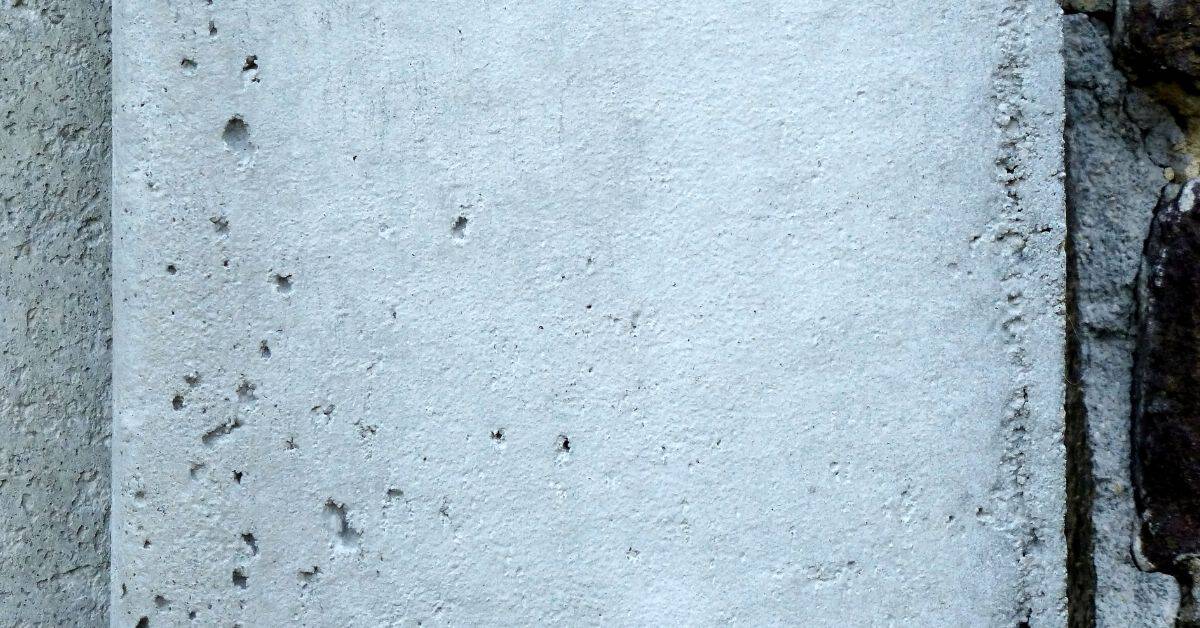
Use visual clues like moisture staining, efflorescence, salt deposits, and rust marks in tandem with IR data. Cracking patterns and spalling rims often align with where water travels along walls or corners. These signs guide where to focus infrared interpretation without guessing.
Thermal clues include persistent cold spots over damp zones and heat anomalies at active leaks. Look for edge effects near joints and seasonal changes that reveal moisture movement or evaporation differences. Practical steps include documenting with photos and IR frames, then pursuing non-destructive tests or professional assessment as needed.
Visual checkpoints to correlate with IR findings
Before you start scanning, give your walls a good visual once-over. This helps tie thermal anomalies to physical signs of trouble.
- Moisture staining: Dark spots or streaks on concrete may indicate water ingress.
- Efflorescence: White, powdery deposits form when water evaporates, leaving salts behind. It’s a sign of moisture movement.
- Salt deposits: Crusty, often yellow or brown, salt accumulations signal dampness and potential corrosion.
- Mold growth: Visible mold indicates moisture levels above 15%.
- Cracking patterns: Check for cracks that may allow water intrusion. Hairline cracks can hide bigger issues.
- Spalling rims: Flaking or peeling concrete around reinforcement bars could mean corrosion damage.
- Rust stains: Reddish-brown stains suggest active rusting, likely due to moisture and reinforcement exposure.
- Water tracking: Look for paths where water seems to follow walls or corners.
Quick rule: Don’t rely solely on visuals. Use them to confirm IR findings and guide further investigation.
Progression and consequences of untreated moisture
Moisture hidden behind your walls isn’t just an inconvenience. It’s a ticking time bomb that can cause serious damage over time.
Stage 1: Moisture finds its way to reinforcement bars, starting the corrosion process. This weakens the steel and reduces its lifespan.
Stage 2: As corrosion progresses, it causes delamination – the concrete starts to peel away from the reinforcement like wallpaper coming off a wall. This leaves your structure vulnerable to further damage.
Stage 3: If left untreated, moisture can cause spalling (concrete flaking or breaking off), exposing more reinforcement and making repairs increasingly complex and costly. It may even lead to structural failure if ignored long enough.
Step-by-Step Infrared Inspection Workflow for Concrete Walls
Start with clear objectives: is the goal moisture detection or delamination assessment? Identify stakeholders and define who will use the brief. Check permits and access considerations early.
Choose appropriate equipment and environmental controls, including emissivity settings for concrete and calibration targets. Plan surface preparation and ideal timing to reduce moisture movement and dew effects. Follow a consistent survey pattern with multi-angle passes and timestamped imagery.
Step-by-Step Process
Before you start, make sure you’ve got the right equipment and everyone’s on board. Here’s your step-by-step guide to a thorough infrared inspection.
- Preparation: Check safety gear, ensure access permissions, and brief stakeholders.
- Camera Setup: Calibrate the IR camera, set emissivity for concrete, and prepare surface if needed.
- Baseline Scans: Start with exterior scans from multiple angles to establish a baseline.
- Interior Scans: Move inside, maintaining consistent grid or reference plan. Scan walls systematically.
- Multi-Angle Passes: Capture hot/cold spots by scanning at different angles and distances.
- Documentation: Timestamp imagery, note anomalies, and correlate with visual checkpoints.
- Review and Report: Compare scans, interpret data, and draft a report for stakeholders.
- Cleanup: Restore site to original condition, store equipment properly.
Quick rule: Always follow up with corroborating tests if anomalies are found.
Preparation: Timing, Environmental Controls and Safety
Before you start scanning, ensure conditions are right and everyone’s safe. Here’s what to do.
- Timing: Scan early morning or late evening for best thermal contrast.
- Weather Check: Avoid scanning in rain, snow, or high humidity.
- Safety Briefing: Ensure all involved know safety protocols and emergency procedures.
- Fall Protection: Set up fall protection where needed, especially on multi-story buildings.
- Edge Safety: Secure edges with barriers or warning tape to prevent falls.
- Electrical Risk: Be cautious near damp walls; turn off power if possible.
- Confined Spaces: If applicable, follow confined-space entry procedures.
- PPE: Ensure everyone has appropriate personal protective equipment (PPE).
Quick rule: Never compromise safety for speed or convenience.
Scanning Technique, Overlap and Documentation
Now that you’re ready, here’s how to scan effectively and document your findings.
- Camera Distance: Maintain consistent distance from the wall for accurate readings.
- Angle of View: Use multiple angles to capture all anomalies. Start vertical, then horizontal.
- Overlap Scans: Overlap each scan by at least 30% to avoid missing areas.
- Reference Points: Include reference points in each scan for later comparison.
- Photographic Images: Capture corresponding visible light images for correlation.
- Thermal Images: Record thermal images, noting hot/cold spots and anomalies.
- Timestamping: Ensure all imagery is timestamped for easy reference.
Quick rule: Always double-check your equipment settings before scanning.
Post-processing and Actionable Reporting
After scanning, it’s time to analyze the data and present your findings. Here’s how:
- Image Correction: Adjust images for emissivity, reflection, and atmospheric effects.
- Annotation: Mark up thermal images with notes on anomalies and their locations.
- Metadata: Include relevant metadata (date, time, location, equipment used) in reports.
- Site Maps: Use site maps to show scan areas and anomaly locations.
- Anomaly Logs: Create a log of all anomalies found, with severity ratings.
- Remediation Sequencing: Suggest remediation sequencing based on severity and accessibility.
- Handoff Checklist: Prepare a concise checklist for the next phase (e.g., repair work).
Quick rule: Always present findings clearly and concisely to aid decision-making.
Visual Signs and Examples to Look for
Pair infrared findings with visual observations: note moisture staining, mold, and cracking patterns. Be mindful of delamination signatures such as patchy layers or spalling rims. Annotate suspected areas directly on-site for later correlation.
Understand how sun, temperature swings, humidity, and HVAC cycles can create confounding signals. Develop a practical protocol: standardized capture angles, reference markers, and cross-checks with non-destructive tests. Use annotated examples to train readers on accurate interpretation.
Reflections, surface emissivity and transient effects
Shiny surfaces can reflect heat back at your camera, creating false hot spots. Varying emissivity means some areas might not show temperature accurately. Recent sun exposure can leave temporary heat signatures.
To control for these:
- Angle your camera to minimize reflections.
- Use a tripod and consistent distance to maintain steady emissivity settings.
- Scan early morning or late evening when temperatures are stable.
Calibration, temperature references and verification
Regularly check your IR camera’s calibration. Use a known-temperature target for quick checks.
For moisture, use a handheld probe or surface moisture meter to cross-verify IR findings. Here’s how:
- Scan the area with IR.
- Mark suspected moist spots.
- Use probes/meters on marked spots for confirmation.
Integrating Thermography with Other Diagnostic Methods
IR thermography provides a map of where to look, but it has limits. Use it to guide targeted follow-up testing rather than standalone conclusions. Thermal patterns help prioritize inspections and sampling locations.
Incorporate moisture meters, borescopes, half-cell tests, and lab analyses as needed. Each method confirms or clarifies IR findings, and together they form a more reliable diagnosis. Document the integrated results clearly for stakeholders.
Complementary Handheld and Invasive Tests
Infrared thermography (IR) is a powerful tool for detecting moisture and delamination, but it’s not foolproof. Follow up IR anomalies with these targeted tests:
Pin/Non-pin Moisture Meters: Use non-invasive meters first to avoid damaging finishes. If readings are high, follow up with pin-type meters to confirm.
Delamination Hammers: Tap suspected areas to listen for a dull thud, indicating delamination. Combine with IR to pinpoint problem spots.
Targeted Openings: For severe cases or when non-destructive tests are inconclusive, open up small areas to visually inspect and test for moisture.
IoT Sensors and Continuous Monitoring for At-Risk Walls
IR gives you a snapshot in time. For ongoing protection, use IoT sensors to validate IR findings and provide early warning:
Data Loggers: Install these devices to record temperature and moisture levels over time. Compare logged data with initial IR scans.
Moisture/Temperature Sensors: Place these in strategic locations to monitor at-risk areas continuously. Set up alerts for abnormal readings, indicating potential deterioration.
Regularly review sensor data alongside your IR findings to ensure walls remain structurally sound and moisture-free.
Joint Sealing, Waterproofing and Repair Choices Informed by IR
Early IR detections shape priorities: seal joints with movement first, then address moisture sources before choosing repair systems. Flexible vs rigid options depend on crack width, substrate condition, and anticipated movement. Use temperatures to differentiate active leaks from historical moisture signals.
Translate findings into practical sealing strategies: decide between hydrophobic or hydrophilic sealants and note when dynamic joints are needed. Choose membranes or coatings based on how thermally driven movement affects joint geometry. Plan sequencing to minimize downtime and warranty risks.
Why proper joint sealing matters for longevity
Joints are the weakest points in concrete walls. When they fail, moisture finds its way in, leading to delamination and structural damage over time.
Properly sealed joints act as barriers, preventing water ingress while allowing movement of the structure. The key is matching your sealing strategy with the specific needs of your wall – its movement patterns and breathability requirements.
Improper sealing can trap moisture, causing further damage. It’s crucial to understand that there’s no one-size-fits-all solution. Each job site has unique conditions that dictate the best sealing approach.
Comparing repair and sealing options at a glance
When it comes to repairing and sealing, you’ve got options. But each has its pros and cons.
Flexible membranes, for instance, can accommodate movement but may not adhere as well to rough surfaces. Rigid coatings, on the other hand, provide excellent adhesion but lack flexibility, making them prone to cracking under stress.
Before you decide, check product datasheets and warranties. They’ll tell you about performance in different conditions, expected lifespan, and what kind of movement they can handle. Don’t forget to consider compatibility with your existing substrate and any coatings.
Remember, the best repair or seal isn’t always the most expensive or high-tech. It’s the one that suits your specific needs and lasts the longest under those conditions.
Preventative Maintenance, Risk Assessment and Cost Considerations
Create a risk-based maintenance framework that uses infrared indicators to drive priorities. Define inspection intervals and translate findings into targeted actions. A simple triage helps allocate resources efficiently.
Balance upfront costs of preventive surveys against potential reactive repairs. Consider downtime, occupancy impact, and long-term value. Develop repeatable maintenance strategies and a schedule for re-surveys to verify effectiveness.
How to prioritise interventions by risk and exposure
The first step in preventative maintenance is knowing what needs fixing first. Here’s how to rank defects based on risk:
Location: Prioritize areas that are structurally critical, or where moisture could spread easily. Basements, foundations, and load-bearing walls should top your list.
Structural Role: Consider the wall’s role in supporting the structure. A compromised support wall is more urgent than a non-load bearing one with similar defects.
Moisture Severity: Act fast on severe moisture signals, as they can lead to rapid deterioration and hidden damage. Regularly monitor areas with active moisture issues.
What to check when comparing inspection and repair costs
Before you start comparing quotes, ensure you’ve got a clear scope of work. This checklist helps:
- Diagnostics: Ensure the quote includes infrared thermography or other necessary diagnostics.
- Access: Check if access equipment (scaffolding, lifts) is included in the quote.
- Remediation Scope: Make sure the scope covers all identified issues and proposed solutions.
- Materials: Ask about material quality and warranties. Cheaper isn’t always better.
- Labor: Check if labor costs are itemized, and if they’re competitive.
- Permits: Ensure the contractor includes any necessary permits in their quote.
- Warranty: Ask about warranties on workmanship and materials.
- Timeline: Check if the timeline for completion is realistic and suits your needs.
- Contingency: Ensure there’s a contingency plan (and cost) for unexpected issues.
Quick rule: Always compare apples to apples. Make sure each quote covers the same scope of work before making a decision.
Seasonal, Climate and Usage Factors That Influence Inspections
Seasonal patterns affect moisture migration and surface temperature gradients, which changes how you read IR data. Temperature swings and solar exposure can alter signatures, so baselines matter. Be cautious of readings during rain or dew conditions.
Coastal climates, humidity, and salt exposure accelerate degradation processes and influence IR interpretation. Occupant use, HVAC cycles, and nearby water sources also shape thermal patterns. Pair scans with weather data and maintain a seasonal inspection calendar for trend analysis.
Why cold months and temperature swings increase risk
Inspect concrete walls in colder months for freeze-thaw impacts and thermal contraction stresses.
- Check for cracks: Freeze-thaw cycles can widen existing cracks or create new ones. Confirm with a visual inspection.
- Look for delamination: Cooler temperatures make it easier to spot delaminating areas as they may show different surface temperatures.
- Inspect joints: Temperature swings can cause joint movement, leading to water intrusion. Check joint integrity.
- Evaluate rebar exposure: Cracking due to temperature changes might expose reinforcing steel, setting the stage for corrosion.
- Assess spalling: Cold weather can exacerbate spalling issues, making them more visible. Check for flaking or chipping concrete.
- Check moisture content: Use a moisture meter to confirm if there’s excess water behind the surface, which could freeze and cause further damage.
- Inspect coatings: Temperature swings can degrade coatings, allowing water intrusion. Check for signs of coating failure.
- Evaluate drainage: Ensure proper drainage to prevent water buildup that could freeze and cause damage.
Quick rule: Don’t skip inspections in colder months; temperature swings can exacerbate defects.
Climate change, coastal exposure and accelerated spalling
Inspect concrete walls in exposed environments for increased moisture cycles and salt intrusion.
- Check for efflorescence: White deposits indicate excess moisture and potential salt intrusion. Confirm with a visual inspection.
- Look for rust stains: Salt exposure can accelerate corrosion, leading to rust staining around joints or cracks.
- Inspect for spalling: Increased moisture cycles and salt exposure can cause accelerated spalling. Check for flaking or chipping concrete.
- Evaluate joint sealants: Salt spray can degrade joint sealants, allowing water intrusion. Inspect their condition.
- Check rebar corrosion: Salt exposure can accelerate rebar corrosion, leading to delamination and spalling. Use a half-cell potential test if necessary.
- Assess coating condition: High humidity and salt spray can degrade coatings, allowing water intrusion. Check for signs of coating failure.
- Evaluate drainage systems: Ensure proper drainage to prevent water buildup that could exacerbate problems in exposed environments.
- Check for mold or mildew: High humidity can lead to mold growth, which can further degrade concrete. Inspect for signs of fungal activity.
Quick rule: Prioritize inspections in exposed environments; climate factors accelerate deterioration.
Conclusion
Inspecting concrete walls with infrared thermography gives you real evidence, not guesswork, so you can protect safety, prevent hidden damage, and keep the finish looking right.
Begin with a simple, practical check: start on a clean, dry surface, note the room conditions, take baseline infrared images, then move to suspect spots, compare them with visible signs, and plan targeted follow-up tests or sealing decisions. Keep every step deliberate and small-scale first, especially when moisture or delamination is suspected, and document what you find so you can track changes over time. Safety first and test a small area before full-scale work.
Common mistakes to avoid are clear. Do not rely on infrared results alone or push ahead without confirming cause and extent. Do not ignore seasonal or usage factors that can skew readings, and do not seal or repair before you’re sure you’re addressing the right problem. Always keep power and water hazards in mind, work from dry areas when possible, and use proper PPE.
If you face large or complex moisture intrusion, unknown sources, structural concerns, or potential electrical hazards, call a professional rather than guessing. When in doubt, pause, assess, and plan with care. Stay disciplined, fix only what you can safely handle, and you’ll protect the wall’s integrity and your investment.
FAQ
How do joints affect moisture in concrete walls and what should I check to prevent leaks?
Joints are the main paths for water. Look for gaps, gaps at the joint, voids behind the seal, and cracked or softened sealant. Check that movement joints can actually flex with temperature and load without tearing or pulling away from the edge.
What are the common mechanisms of water getting into concrete, and how can I spot them with infrared?
Water can seep through cracks, around edges, and behind failed seals. Use IR to spot cooler wet areas near joints, penetrations, and where insulation is compromised. Look for patterns that align with joints, deck edges, or roof line transitions.
How should I compare sealing methods for DIY repairs and monitor performance over time?
Compare material compatibility with concrete, ease of application, and expected movement tolerance. After sealing, monitor areas with periodic IR checks and physical checks for new cracks or peeling edge seal. If you see recurring wet patches, revisit the seal design and installation details.
When upgrading or repairing seals, what practical steps should I take and what should I verify?
Clean and remove old material thoroughly, choose a sealant compatible with the joint substrate, and follow the manufacturer’s cure and application guidelines. Verify joint preparation, backing material, and compatible primers or primers if required; check local rules or labels for any restrictions.