
Introduction
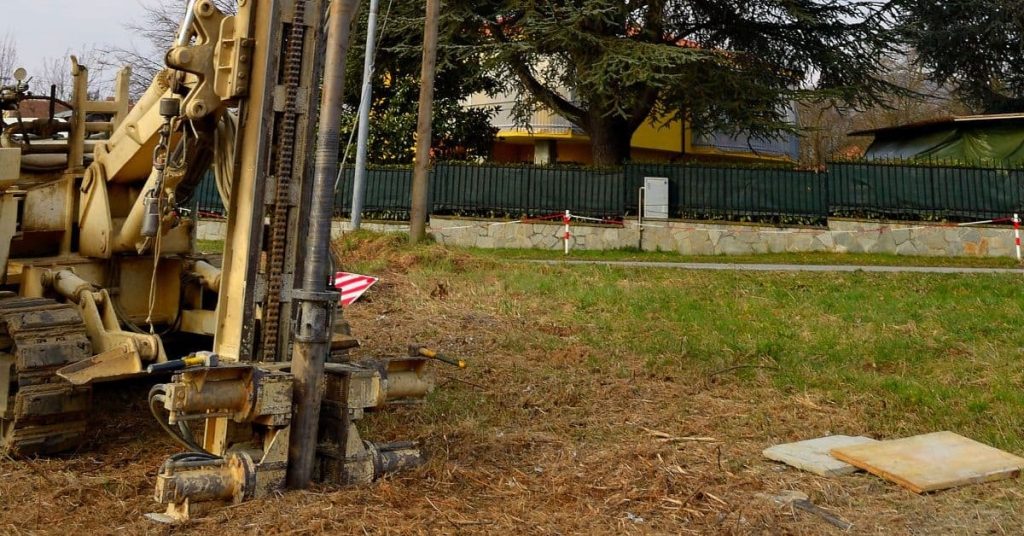
Half-cell potential testing is a quick field check that estimates the likelihood of corrosion on embedded steel by measuring electrical potential at the surface. It’s a screening tool, not a crystal ball, and results should be used with other observations. Always follow the device instructions and local rules when you perform it.
To perform the test, you place a reference electrode on the concrete surface and connect it to the reinforcement according to the device’s guidelines, keeping the surface clean and dry. Prepare to interpret the readings by comparing them to standard guidance and noting coating or moisture conditions; if in doubt, verify with the manufacturer directions or local codes. Take multiple readings across the area to spot patterns, and treat anything suggesting higher risk as a cue to investigate further rather than making a definitive judgment.
Key takeaways
- Understand half-cell potential testing as a field indicator of corrosion risk in reinforced concrete.
- Gather tools: reference electrode, moisture barrier, corrosion coupon or grid, measuring leads, and notebook.
- Prepare surface properly; remove laitance, clean rust, and maintain clean contact for readings.
- Follow step-by-step field procedure: set up reference, measure potentials, document locations, and label.
- Interpret results with local codes and manufacturer guidance; avoid overgeneralizing to cures.
- Include safety: wear PPE, check electrical grounding, and avoid wet conditions during testing.
Table of Contents
- Introduction
- Key takeaways
- What Is Half-Cell Potential Testing?
- Tools and Materials Checklist
- Step-by-Step Field Procedure
- Interpreting Test Results
- Common Misreads and Field Pitfalls (with Real Examples)
- Safety and Quality-Control Protocols for Field Operators
- How Half-Cell Testing Compares and Complements Other Methods
- Planning Inspections, Frequency, and Budgeting
- Conclusion
- FAQ
What Is Half-Cell Potential Testing?
Half-cell potential testing is a way to gauge corrosion risk on buried or embedded metal by comparing a test electrode to a reference electrode in the surrounding environment. It relies on a simple electrochemical idea: potentials are measured relative to a standard reference, mapped across the area of interest. The test is conducted in soil or concrete where the metal sits, with the goal of signaling where corrosion may be more likely.
The primary purpose is to provide a quick field screening tool, not a precise corrosion-rate measurement. It helps flag areas that warrant closer inspection or more definitive testing. Typical setups use a properly placed reference electrode and consider soil moisture and surface prep as part of the measurement context, with common configurations differing between soil and concrete embedment.
Basic principle and how it works
The half-cell potential test is an electrochemical method used to assess corrosion risk on buried or embedded metals. Here’s how it works:
A reference electrode (like a copper-copper sulfate electrode) is placed in the soil near the metal surface. This acts as our standard for comparison.
We then measure the potential difference between this reference and the test metal surface, which is in contact with the electrolyte (moist soil or concrete).
Negative readings (more negative than -250mV vs. Cu/CuSO4) indicate a higher probability of active corrosion.
Typical applications and limitations
Half-cell potential testing is widely used in various industries to screen for corrosion risk:
- Reinforced concrete structures (bridges, buildings) – check rebars.
- Buried pipelines – inspect for leaks or damage.
- Tanks and storage vessels – monitor internal corrosion.
It’s great for quick field checks but has limitations:
- Not suitable for dry soils or coatings with high resistance.
- Results are relative, not absolute corrosion rates.
- Further testing (like linear polarization) may be needed for definitive diagnosis.
Tools and Materials Checklist
Compile a core tools list that includes a half-cell potential meter, reference electrodes, an auxiliary counter electrode, and a field-ready case with cables and clips. A field notebook or digital log helps keep readings organized. Include backup meters or spare parts to handle field contingencies.
Discuss electrode types and compatibility, including when to use single-rod versus multiple-rod configurations and any project-specific electrode material concerns. Verify meter features such as auto-calibration and data logging, and check battery life and recent calibration records. Ensure calibration certificates and local codes align with project requirements, not just standard references.
Required equipment and specs to check
Before you start testing, ensure your gear is in order. Here’s a quick checklist.
- Reference electrode: Check condition, no cracks or leaks. Copper/copper-sulfate electrodes need fresh solution.
- Voltmeter (half-cell potential meter): Confirm input impedance meets project requirements (usually >10 kΩ).
- Leads and cables: Inspect for damage, ensure proper length for your site.
- Alligator clips: Test connections, replace if worn or corroded.
- Temporary ground/connection tools: Verify functionality, have spares ready.
- Portable tester case: Ensure it’s weatherproof and secure for site conditions.
- Field notebook/digital log: Check battery life, data storage capacity.
- Probe compatibility: Confirm probes fit your meter and reference electrode type.
Quick rule: Skipping checks might lead to inaccurate readings or equipment failure mid-test.
Consumables, site prep and visual checkpoints
Preparing your site and gathering consumables ensures accurate testing. Here’s what to do before you start.
- Cleaning pads: Check for abrasives, ensure they’re suitable for your surface type.
- Saline solution (if using Cu/CuSO4 electrode): Verify concentration (usually 3% NaCl), replace if old or contaminated.
- Clamps: Inspect condition, ensure they can secure probes safely.
- Site prep: Remove any debris, ensure surface is dry and clean for probe contact.
- Coating damage: Note any visible cracks or delamination before testing.
- Moisture zones: Identify areas with standing water or high humidity.
- Temperature: Record ambient temperature, as it affects readings.
- Lighting: Ensure adequate light for safe work and accurate observations.
Quick rule: Overlooking site prep can lead to inaccurate results or missed corrosion signs.
Step-by-Step Field Procedure
Set up the field workflow with defined roles, a safety briefing, and required PPE. Establish a temporary workspace and a clear documentation plan, using a notebook or tablet with timestamped photos. Prepare the surface and contacts to be clean and dry before measurements begin.
Map electrode locations on a grid or live map and secure all leads to prevent movement. Record reference electrode placement and context such as soil or concrete resistivity. Follow a repeatable sequence for baseline potentials and capture temperature, moisture, and any anomalies observed.
Step-by-Step Process
Follow this clear, numbered sequence to perform a reliable half-cell potential test from start to finish. It covers preparation, main work, and cleanup.
- Ensure safety: Brief your team, wear PPE (gloves, safety glasses), and keep a first aid kit ready.
- Set up temporary workspace: Choose a dry, flat area near the test site for equipment and notes.
- Prepare surface and contacts: Clean exposed concrete and rebar ties. Remove debris. Verify moisture conditions. Ensure clean, tight contact clamps or probes with proper grounding.
- Perform readings: Establish baseline potentials, take readings in a consistent order, record temperatures and moisture, note corrosion indicators or anomalies; include duplicates for confirmation.
- Clean up and demobilize: Restore the site to its original condition, secure equipment, back up field data, and summarize findings for the client.
Setup, Reference Electrode Placement, and Bonding
Position your electrode correctly to get a stable reference. Make a low-resistance bond to the metal under test for accurate readings.
Place the reference electrode in a moist, conductive area near the test point but not directly on it. Ensure it’s secure and won’t move during testing.
Bonding is crucial. Scrape any paint or rust from the rebar tie. Apply a thin layer of conductive gel. Tighten the clamp firmly, ensuring good contact. Check for proper bonding by measuring resistance – it should be less than 10 ohms.
Taking Measurements and Mapping Methodology
Record point measurements systematically to generate a clear potential map. This helps identify corrosion risks accurately.
Use a grid or traverse pattern for your measurement points. Start at one corner, move in a straight line, then step back and continue horizontally. Repeat vertically to cover the entire area.
Take readings every 6-12 inches along each line, depending on the size of the structure and suspected corrosion areas. More frequent measurements may be needed where corrosion is likely or visible.
Recordkeeping, Photos, and Post-Test Checks
Keep detailed records to ensure data integrity. Take photos of test points for future reference. Perform quick checks to spot any bad data before leaving the site.
Log time, location, electrode serial number/calibration date for each reading. Assign unique point IDs for easy tracking. Take timestamped photos of each test point from multiple angles.
Post-test checks: Review your readings on-site. Look for any outliers or inconsistencies that could indicate instrument drift or a misread. If you find any, retake the reading immediately if possible.
Interpreting Test Results
Translate potential readings into practical risk tiers, keeping in mind that there is no single universal threshold. Assess how absolute values relate to project criteria and classify risk as low, moderate, or high when aligned with the map of readings. Treat readings as screening data rather than definitive diagnostics.
Integrate spatial patterns with the absolute measurements, looking for clusters or trends and understanding how measurement error could influence the map. Check project acceptance criteria and know when to escalate to more advanced tests or a corrosion specialist. Document assumptions and plan for re-testing if readings seem inconsistent.
Risk categories and what they mean
Half-cell potential readings don’t stand alone. They’re part of a bigger picture that helps us understand corrosion risk.
The first step is to categorize your results into low, medium, or high risk based on the absolute values you’ve measured. Remember, there’s no single threshold. Your project-specific acceptance criteria will guide you here.
Low risk: Readings above -350 mV are typically considered low risk. These areas might still corrode over time but at a slow rate.
Medium risk: Readings between -350 and -700 mV fall into this category. Keep an eye on these spots, they could start corroding soon.
High risk: Readings below -700 mV indicate high corrosion activity. These areas need immediate attention.
Mapping, trend analysis and decision rules
Now let’s look at how your readings spread across the structure. This tells us where to focus our efforts.
Clustering: If you see groups of high-risk readings in one area, that’s a cluster. These spots need immediate repair or further testing.
Linear trends: If readings get more negative as you move along the structure, there might be a continuous source of corrosion (like a leak). Trace it and fix it at the source.
Isolated anomalies: Single high-risk readings can be measurement errors. Re-check them before making decisions. But if they’re confirmed, they still need attention.

Common Misreads and Field Pitfalls (with Real Examples)
Inadequate surface preparation or contamination can create contact resistance and shield the metal, leading to false negatives. Quick prep steps include removing debris and ensuring good contact before measurement. A short field checklist helps verify clean contact every time.
Poor auxiliary electrode placement and grounding can drift readings, sometimes showing misleading positives. Field scenarios with loose clamps illustrate how readings can skew results. Temperature, moisture, and environmental shifts also affect readings and should be normalized by waiting or stabilizing conditions before re-testing.
Poor contact, high contact resistance, and connector errors
Dirty, loose contacts, and damaged leads can skew your half-cell potential readings. Here’s how to avoid these common mistakes.
- Dust or rust: Clean the area thoroughly before testing. Use a wire brush or sandpaper if necessary.
- Loose clamp: Ensure the reference electrode is securely clamped onto the rebar. Tighten as needed.
- Damaged lead: Inspect leads for breaks, frays, or corrosion before each use. Replace if damaged.
- Insufficient clamping force: Apply steady pressure on the clamp to ensure good contact with the rebar.
Regularly inspect your equipment and test area to prevent these errors from happening.
Environmental and stray-current influences
Moisture, nearby DC currents, and seasonal changes can affect your readings. Here’s how to identify their signatures:
Moisture: Rain or high humidity can cause sudden swings in potential. Normalize measurements by waiting for soil moisture to stabilize or by comparing readings taken under similar conditions.
Stray currents: Active electrical systems nearby can skew your results. Shield your leads and alternate locations to reduce drift. If possible, test when these systems are off.
Seasonal changes: Temperature shifts can alter electrode response. Account for this by taking readings at similar temperatures or normalizing your data based on temperature.
Case examples of common misreads and consequences
A loose clamp once yielded a misleading positive indication, leading to unnecessary excavation. Always verify contact integrity before taking readings.
In another case, stray current from a nearby utility line masked active corrosion. Shielding the leads and retesting confirmed the presence of corrosion, preventing further damage.
Regularly repeating measurements at the same spot and using multiple locations around suspected areas can help confirm true corrosion risks versus single anomalous readings.
Safety and Quality-Control Protocols for Field Operators
Prioritize personal protective equipment and site-specific safety rules, and train crews to handle equipment safely to prevent shocks or injuries. Establish clear electrical-hazard controls and use insulated tools with proper grounding. Keep the work area organized to minimize trips and contact with exposed conductors.
Maintain instrument calibration and verification through pre-test checks, battery health, and data logger settings. Use a pre-test safety and quality checklist that covers risk assessment, weather, isolation of test areas, and an emergency communication plan. Ensure data integrity with standardized notes and secure storage of results.
Personal protective equipment and site safety
Safety is paramount when conducting half-cell potential testing. Here’s what you need to wear and consider:
- Hard Hat: Protects against falling objects. Ensure it’s clean, undamaged, and fits well.
- Safety Glasses: Shields eyes from debris and hazards. Choose impact-resistant ones for added protection.
- Steel-toed Boots: Safeguards feet from heavy equipment and falling objects. Ensure they’re in good condition and fit properly.
- High-Visibility Vest: Increases visibility, especially around excavation sites and heavy machinery. Rentals available for around $5-$10 per day.
- Gloves: Protects hands from cuts, burns, and electrical hazards. Choose insulated gloves if working near live circuits.
- Ear Protection: Reduces noise levels from heavy equipment. Disposable foam earplugs are cheap and effective.
- Respirator or Dust Mask: Protects against dust and particles when drilling or chipping concrete. Rentable half-face respirators with P100 filters cost around $20-$30 per day.
Electrical safety, isolation, and interference controls
Identify and mitigate electrical hazards before starting tests:
Lockout/Tagout (LOTO): Disconnect power sources and tag them to prevent accidental energization. Always follow your local LOTO procedures.
Use insulated tools when working near live circuits or exposed conductors. Rentable insulated tools start at around $10-$20 per day.
Wear protective footwear with built-in safety features to protect against electrical hazards. Ensure your test area is properly grounded, and avoid testing near exposed or energized conductors.
Calibration, verification, and QA checks
Regularly verify your equipment’s accuracy to ensure reliable test results:
Daily Checks: Inspect probes, leads, and data loggers for damage or wear. Check battery health and timestamp synchronization.
Reference Checks: Use a known good reference electrode (e.g., a copper/copper sulfate half-cell) to verify your instrument’s accuracy before each test. Keep calibration certificates on file for traceability.
Documentation: Maintain up-to-date records of calibration status, date stamps, and any adjustments made. Use standardized note templates to ensure consistency in data collection and reporting.
How Half-Cell Testing Compares and Complements Other Methods
Place half-cell potential testing alongside visual inspection, coupon or ER/LPR measurements, and ultrasonic thickness to cover different degradation signals. Each method provides unique information about corrosion signs, remaining cover, and steel condition. Use them in combination to sharpen conclusions.
Understand the strengths and limitations of half-cell data, including how moisture and concrete resistivity influence maps and how reinforcement layout can skew results. Plan workflows that pair non-destructive screening with quantitative methods as needed, depending on objectives and available data.
Advantages and limitations versus other techniques
Half-cell potential testing is a quick and cost-effective way to screen for corrosion risk. It’s faster than visual inspection, which relies on signs of active corrosion or damage.
Advantage: Half-cell tests can detect passive corrosion, where there are no visible signs yet. It also provides data on the probability of corrosion and concrete resistivity, helping to map vulnerable zones.
Limitation: While it indicates risk, half-cell testing doesn’t directly measure corrosion rate. For that, you’d need additional methods like Linear Polarization Resistance (LPR) or Electrochemical Impedance Spectroscopy (EIS).
Complementary tests and an integrated inspection approach
After a half-cell survey, follow up with these tests to get a clearer picture of your structure’s condition. Use this checklist when you need more detailed information.
- Ultrasonic thickness measurement: Check remaining concrete cover and steel condition. Skipping this might lead to underestimating corrosion risk due to reduced cover.
- Coating evaluation: Assess the condition of protective coatings. Neglecting this could miss areas where coating failure is causing corrosion.
- Current density measurements (LPR/EIS): Estimate corrosion rate. Without this, you can’t plan repairs or predict future damage.
- Coupon tests: Get localized rate estimates in specific areas of concern. Ignoring these might result in inaccurate repair plans.
Quick rule: Combine half-cell testing with at least one other method for a comprehensive inspection, depending on your structure’s unique needs and findings from the initial survey.
Planning Inspections, Frequency, and Budgeting
Define the objective and scope of half-cell potential inspections by asset type, noting how piping, tanks, or rebar in concrete present different risk profiles. Frame the plan around corrosion risk rather than a single metric. Align the effort with project goals and maintenance practices.
Outline a practical inspection cadence that supports baseline surveys, follow-up checks, and post-diagnostic verifications. Include budgeting for field surveys, diagnostics, data analysis, and reporting, and use asset history to tailor frequencies. Provide a simple decision framework to justify schedules and document contingencies.
Recommended inspection intervals and triggers for re-testing
Use this checklist to determine how often to run half-cell surveys based on asset characteristics and history.
- Asset age: Older assets (>10 years) need more frequent testing. Every 2-5 years.
- Previous findings: If corrosion was found, re-test in 6 months to a year.
- Operating environment: Harsh conditions (marine, industrial) warrant annual tests.
- Criticality: Critical assets (bridges, water tanks) need annual testing.
- History of corrosion: If past corrosion, test every 1-2 years.
- Survey results: If trends show increasing risk, re-test sooner.
- Damage events: After damage (floods, earthquakes), test immediately.
- Regulatory requirements: Some industries have specific testing frequencies.
Quick rule: If in doubt, start with annual testing and adjust based on findings.
Cost considerations, time estimates and budgeting tips
Consider these factors when estimating the cost of half-cell potential surveys.
- Access: Difficult access increases labor and equipment costs.
- Mapping density: More test points mean more time, probes, and data analysis.
- Travel: Remote sites increase travel expenses.
- Probes: Purchase or rental costs vary. Consider reusable options.
- Moisture testing: If needed, add cost of moisture meters and time.
- Data analysis: Software licenses and analyst fees may apply.
- Reporting: Prepare for report writing and presentation costs.
- Mitigation actions: Budget for follow-up repairs or coatings.
Quick rule: Combine inspections where possible to reduce travel and labor costs.
Building a comprehensive inspection schedule
Use this framework to plan your half-cell potential testing program.
- Prioritize assets: Focus on critical, high-risk, or older assets first.
- Combine inspection types: Coordinate with other maintenance tasks (e.g., visual inspections).
- Document findings: Keep records of all test results and recommendations.
- Set follow-up actions: Plan repairs, coatings, or re-testing based on findings.
- Establish corrective timelines: Set deadlines for follow-up actions.
- Review and adjust schedule: Update the inspection plan annually or after significant changes.
- Communicate with stakeholders: Share the schedule and findings with management, operators, and maintenance teams.
Quick rule: Regularly review and update your inspection schedule to ensure it remains relevant and effective.
Conclusion
Half-cell potential testing gives you a real, practical signal for corrosion risk that matters to safety, durability, and appearance. It helps you catch trouble early before it shows up as costly repairs or hidden damage.
Start with safety checks, then move in a steady, field-friendly sequence: pick a small test area, clean the surface, verify your connections, take readings at known reference points, compare them to the guidance in your field procedures, document every value, watch for misreads, cross-check with other methods if needed, plan the next inspections, and budget for follow-up work.
Avoid common mistakes by never testing on wet or damaged coatings, never force a bad connection, and never rely on a single reading to decide. Always keep safety first, protect yourself from weather and traffic, and use proper grounding and clean surfaces to prevent false results. If the area is large, coatings are suspect, or you’re unsure about readings, call a professional rather than pushing ahead. Stay disciplined, stay curious, and keep moving with clear records and simple rules of thumb to guide every inspection.
FAQ
How does Half-Cell Potential Testing actually work?
It measures the electrical potential between a reference electrode and the embedded reinforcement. The reading helps spot areas that may be at risk for corrosion. You’ll rely on the reading trend across the area being tested, not a single number.
What equipment do I need for testing?
You need a half-cell reference electrode, a counter electrode, a soil or moisture contact path, and a portable voltmeter or loggers. Use clean attachments and follow the manufacturer’s instructions. If you’re unsure about any item, check the label or datasheet first.
What are the steps in conducting a test?
Prepare the surface and establish a good contact with the concrete. Place the reference and counter electrodes as directed and take steady readings along the test grid. Record notes on location, moisture, and any surface issues for accuracy and repeatability.
How should I interpret the results?
Look for readings that indicate higher corrosion risk based on the testing method you’re using. Don’t rely on a single point—map the area and compare with prior tests if available. If results are unclear, verify with manufacturer instructions or local guidelines and consider a repeat test.
Maintenance tips after testing
Clean and store all probes properly after use. Document the locations tested and any anomalies for future visits. Schedule follow-up testing as part of your maintenance plan and check that any repairs or coatings are compatible with future measurements. If anything looks off, verify with product labels or instructions before proceeding.